A Work in Progress (4 Viewers)

MLH13

Staff Sergeant
Joined
Mar 21, 2019
Messages
848
Hey guys,

I have a new diorama in mind and I am in the process of constructing it. I thought I would share with you my progress as I move along.

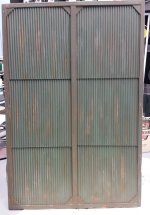
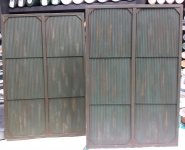
I'll give more details on the theme later on, but this aircraft hanger door was built from scratch and finished by yours truly. I will need to build six doors in total as well as the hanger itself. It will be a façade only because of the 1/30 scale size.

Mark

Door 6.jpg Door 1.jpg Finished door.jpg
 
Impressive, Mark. I can photograph with my point-and-click camera, but building dios is a whole different thing. Looks like you're off to a nice start with the hangar door. I look forwarding to seeing how it progresses.

Cool!

EDIT: trying to figure out the theme. I know that it's not Ancient Egypt.^&grin Battle of Britain perhaps?

EDIT: or perhaps Imperial Japanese? ^&confuse
 
Last edited:
Impressive, Mark. I can photograph with my point-and-click camera, but building dios is a whole different thing. Looks like you're off to a nice start with the hangar door. I look forwarding to seeing how it progresses.

Cool!

EDIT: trying to figure out the theme. I know that it's not Ancient Egypt.^&grin Battle of Britain perhaps?

EDIT: or perhaps Imperial Japanese? ^&confuse

Thank you, Rob. I appreciate your comments and you are correct. There is a BoB connection. ;)

Mark
 
The door is very realistically painted. I am also working and going to finish a small diorama (about Iwo Jima).
 
Mark

You're off to a great start with those doors. Perhaps you'd care to let us in on how you made them ? :salute::

Steve
 
Mark

You're off to a great start with those doors. Perhaps you'd care to let us in on how you made them ? :salute::

Steve

Hi Steve and thank you for your comments.

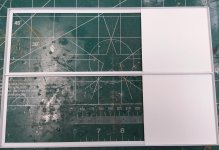
I use Evergreen plastics and when everything is cut, I use Loctite super glue gel to assemble the pieces. Some filing and sanding is required and then I prime the door with Mr. Hobby Mr. Surfacer 1000. Once dry I apply two coats of Tamiya AS-12 (Bare Metal Silver). Then I apply one coat of Tamiya AS-24 (Luftwaffe Dark Green). Once this has dried I lightly mist the door with Tamiya AS-23 (Luftwaffe Light Green). The idea here is to create a dimension between the two colors. Once this dries, I use Secret Weapon Pigments. I apply Sewage Muck using a make-up foam applicator/sponge. I then lightly coat the pigment with Hobby Master clear flat lacquer to lock in the pigments. I then use a mix of pigments with a ratio of 75% Slate Green and 25% Slate Gray and once applied, I mist the pigments with the clear flat lacquer.

Once everything has thoroughly dried, I use a Zem deerfoot stippler brush with Mr. Color Thinner 400 and thin out areas on the corrugated panels. I use the stippler and just enough thinner to expose the silver paint underneath. I then cut small pieces from a Tamiya 1000 grit sanding sponge and using lockable tweezers, I lightly sand areas on the corrugated panels and frame to expose the silver paint. I idea here is to create areas of wear.

I then use Vallejo Light Rust and apply it with a small narrow paint brush. In some areas I use a wider dry brush to smooth and blend the rust. I use the tip of a sharp blade to create small chips on the frame paint, and use 400 grit sandpaper to remove paint along the hard edges.

Finally, I use a make-up sponge to apply Secret Weapon Pigment Dark Earth on the corrugated panels and frame. This pigment color represents rust perfectly. I moderately apply this pigment because if applied too lightly, it doesn't show properly once the flat lacquer is applied. I then lock in this pigment by lightly coating it with the flat lacquer.

I hope this helps and doesn't bore you too much.

Mark
 
Last edited:
The door is very realistically painted. I am also working and going to finish a small diorama (about Iwo Jima).

Thank you, Poppo and I look forward to seeing your Iwo Jima dio.

Mark
 
Hi Steve and thank you for your comments.

I use Evergreen plastics and when everything is cut, I use Loctite super glue gel to assemble the pieces. Some filing and sanding is required and then I prime the door with Mr. Hobby Mr. Surfacer 1000. Once dry I apply two coats of Tamiya AS-12 (Bare Metal Silver). Then I apply one coat of Tamiya AS-24 (Luftwaffe Dark Green). Once this has dried I lightly mist the door with Tamiya AS-23 (Luftwaffe Light Green). The idea here is to create a dimension between the two colors. Once this dries, I use Secret Weapon Pigments. I apply Sewage Muck using a make-up foam applicator/sponge. I then lightly coat the pigment with Hobby Master clear flat lacquer to lock in the pigments. I then use a mix of pigments with a ratio of 75% Slate Green and 25% Slate Gray and once applied, I mist the pigments with the clear flat lacquer.

Once everything has thoroughly dried, I use a Zem deerfoot stippler brush with Mr. Color Thinner 400 and thin out areas on the corrugated panels. I use the stippler and just enough thinner to expose the silver paint underneath. I then cut small pieces from a Tamiya 1000 grit sanding sponge and using lockable tweezers, I lightly sand areas on the corrugated panels and frame to expose the silver paint. I idea here is to create areas of wear.

I then use Vallejo Light Rust and apply it with a small narrow paint brush. In some areas I use a wider dry brush to smooth and blend the rust. I use the tip of a sharp blade to create small chips on the frame paint, and use 400 grit sandpaper to remove paint along the hard edges.

Finally, I use a make-up sponge to apply Secret Weapon Pigment Dark Earth on the corrugated panels and frame. This pigment color represents rust perfectly. I moderately apply this pigment because if applied too lightly, it doesn't show properly once the flat lacquer is applied. I then lock in this pigment by lightly coating it with the flat lacquer.

I hope this helps and doesn't bore you too much.

Mark
Thanks Mark ! :salute::

Made for a very interesting read. I take it that you do some kit making if not now, in the past ?

Thanks again for going through the detailed steps you took. I'm sure others will have found it useful in their own projects in your revealing some of your secrets !

Steve
 
Thanks Mark ! :salute::

Made for a very interesting read. I take it that you do some kit making if not now, in the past ?

Thanks again for going through the detailed steps you took. I'm sure others will have found it useful in their own projects in your revealing some of your secrets !

Steve

Thank you, Steve. I did kit building about 20 years ago but now that I'm retired, I have more time to dabble. Scratch building always interested me and hopefully this new dio I'm creating turns out well. Information on the internet and a lot of experimentation usually produces the results I'm looking for. We'll see.

Mark
 
Hey all! Sorry for not posting my progress sooner but I am quickly realizing this project will take me some time to complete. It's more complex than I first thought but my OCD when it comes to scratch building doesn't help either.{sm4}

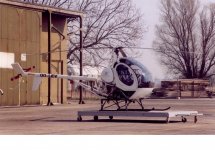
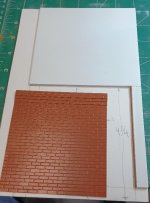
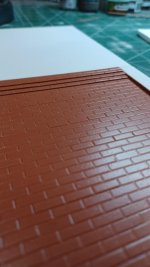
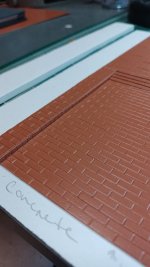
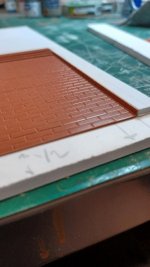
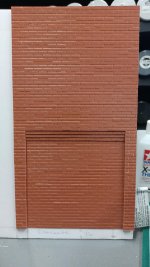
All hanger doors are now built and finished. I am working on the hanger's side walls which were originally made of red clay brick. I am working off of several photographs of the actual hanger that luckily still stands today. I attached a photo that shows a portion of this hanger and the side wall I am replicating.

Attached are a few photos of my progress....it's definitely a labor of love.

Mark

Hanger.jpg Side Wall Work.jpg Side Wall Construction 1.jpg Side Wall Construction 4.jpg
 

Attachments

  • Side Wall Construction 2.jpg
    Side Wall Construction 2.jpg
    57 KB · Views: 289
Quick update.....

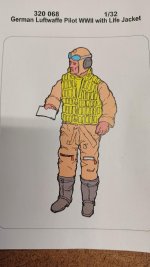
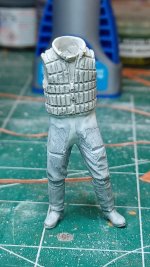
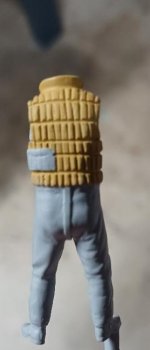
I started on the flight crew for my diorama. I quickly learned how time consuming it is to Frankenstein parts together and make them look natural. With this particular figure, I took the torso from an Aero Bonus scale figure and mounted it on the legs of a Master Box Ltd. figure. I used the head from Aero Bonus and the arms and parachute from Master Box. Lots of modifications to the parachute was needed because it was being mounted over a kapok life vest. In addition, lots of modification was needed on the legs in order to make it appear this crewman is wearing a summer flight suit. I am happy with the results and hopefully the remaining flight crew won't be as difficult.

Mark

Aero Bonus.jpg Master Box Ltd.jpg Dio.jpg Dio1.1.jpg
 
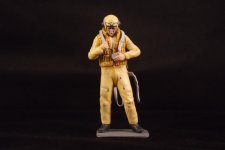
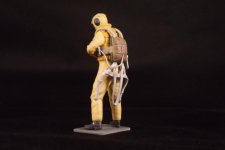
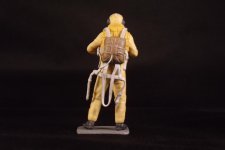
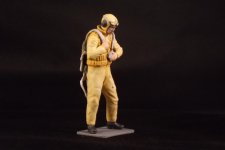
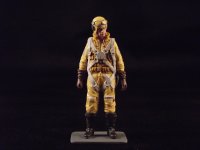
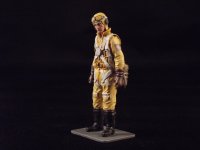
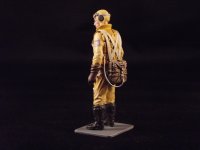
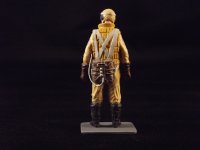
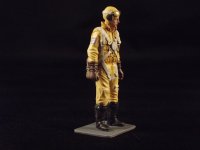
My pilot is finished! Two more crew members to go then I'll do more work on the aircraft hanger.

This figure is made by AeroBouns and one thing I found interesting is the parachute he is wearing. After doing some research, I found he is wearing a chest type chute opposed to the typical seat type chute. The chest mounted chute allowed bomber crews to remove the chute so they could more easily move around inside the aircraft and when needed, they easily connected the chute to their harness via 2 large clips. I'm unsure if this was an oversight on the creator's end or if the chest mounted version could also be used as a seat type. At any rate, I contemplated changing this chute for a typical seat version, but the work involved would have been immense. I am still pleased with how it turned out.

Pilot 1.JPG Pilot 1.1.JPG Pilot 1.2.JPG Pilot 1.3.JPG Pilot 1.5.JPG
 
Very nice !
Well done, I know what it's such a fiddly job altering figures :salute::

Steve
 

Users who are viewing this thread

Back
Top