Antony and Cleopatra (2 Viewers)

blaster

Major
Joined
Sep 10, 2008
Messages
6,012
Hi All,

I had made this piece a couple of years back but timing and circumstances prevented me from sharing the work then. So here it is, in stages, as I unload the wordy text and photos laboriously in between my work on the other numerous projects as well.

Please feel free to comment and input. Thanks.

Rgds Victor
 
Introduction

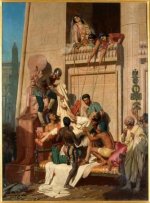
Once in a while, you come across a striking incidental scene of a group of people which just cries out to be transformed into a 3-dimensional vignette. I refer to this painting 'Antony brought dying to Cleopatra' by the French painter Eugène Ernest Hillemacher (1818-1887)[SUP]1[/SUP]. The painting was executed in 1863 and currently resides in the Musée de Grenoble (Fig 1).

From atop the monument with her maids, Charmian and Iras, Cleopatra declares that she will never leave her hiding place. Antony’s guard has brought him to Cleopatra where Antony says that he is dying and wishes to embrace her one last time. She replies that she dares not come down from her monument, lest she be captured by Caesar and paraded through the streets as a prisoner. Instead, Cleopatra asks the soldiers and servants to heave Antony up to her for one last embrace.’
(short summary of Act IV, Scene xv (Shakespeare).

Mark Antony and Cleopatra VII were the famous tragic lovers of the Roman Empire. ‘Antony and Cleopatra’ is a tragedy by William Shakespeare and first performed in 1607[SUP]2[/SUP]. The painting closely follows William Shakespeare’s plot. Antony was losing the final land battle when, upon hearing of the false news that Cleopatra was dead, fell on his own sword, mortally wounding himself. The dying Antony was then brought back to Egypt to die in the arms of Cleopatra.

‘Cleopatra: Here's sport indeed! How heavy weighs my lord!
Our strength is all gone into heaviness,
That makes the weight: had I great Juno's power,
The strong-wing'd Mercury should fetch thee up,
And set thee by Jove's side. Yet come a little,—
Wishes were ever fools,—O, come, come, come;


The words of Cleopatra above suggest that it was quite an effort to lift Antony up. The painting shows his shrouded body being carefully hoisted up by soldiers and servants with tied sheets and ropes to greet the grief-strickened Cleopatra. This painting is really about the apotheosis of Antony, the exaltation of Antony to mythical sainthood. The scene suggests a beatific transfiguration occurring as Antony is gradually lifted up, with his arms wide open to receive divine grace.

What great drama that has been perfectly captured in this genre painting! The costumes and settings are not necessarily accurate but they embody the ‘Neo-classical/orientalism’ style of painting. Elements of the painting, such as the statue of the Egyptian lion goddess Sekhmet[SUP]3[/SUP], the hieroglyphics on the monument walls, the quasi-Roman helmet, toga and the Roman standard firmly places this as a Roman tragedy playing out on Egyptian soil.

I especially liked the composition of the painting – the placement of the supporting figures at varying heights directing the viewer’s gaze downwards from the left side into the painting, and then redirecting it upwards through the upward faces and hand gestures of the two figures on the right side towards the grieving group of women on the parapet. The taut rope lines further redirects the gaze downwards towards Antony. The pristine white cloth sheets, with a single splash of blood, draped on the bed and falling to the foreground suggest life essence oozing out from the dying Antony.

Closer examination of the painting shows that there are two spears tied to each end of the settee, acting as handles to use the settee as a litter for the wounded Antony. There is another spear, a cloth bundle and more coils of rope in the foreground.
a.jpg

Fig 1. “Antony brought dying to Cleopatra” painting.
 
Planning

Due to the dynamic composition of the tableaux, this piece was conceived as a shadow box, best viewed only from the front and with minimal perspective. All the figures would be constructed to the same scale. The monument walls and parapet would form a natural backdrop to the scene. The staging would be brought as close to the front as is possible to minimize the depth and to create a compact scene.

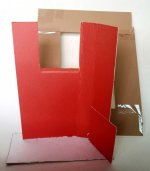
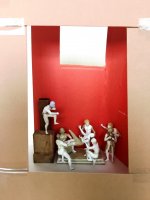
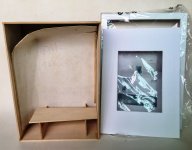
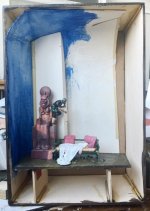
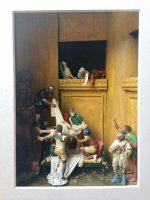
Having selected a suitable frame size for this piece, a simple cardboard cutout was used to frame the composition of the scene. Simple cutouts were also used to create the monument walls (Fig 2).

There were 11 figures and 1 statue to be constructed. A coloured A4 printout of the painting was made for visual reference and the figures came out at about 1/32 scale.

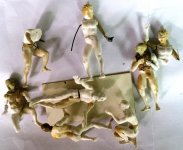
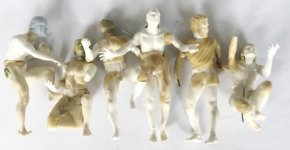
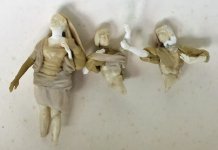
Various commercial parts (mostly Preiser figures) were used in the figure conversions to speed up the work. The commercial parts help to maintain a constant scale throughout. To further speed up the work, details were added only to the visible parts which could be viewed through the cutout frame. Wire and epoxy putty were used extensively to reshape the figures and add details (Fig 3).


ax.jpg
Fig 2. The basic cutouts to frame the scene.

ax2.jpg
Fig 3. The figures being recruited and assembled. The settee dimensions were determined at this stage.
 
Hi All,

I had made this piece a couple of years back but timing and circumstances prevented me from sharing the work then. So here it is, in stages, as I unload the wordy text and photos laboriously in between my work on the other numerous projects as well.

Please feel free to comment and input. Thanks.

Rgds Victor

Looks like another mammoth task for you to recreate this painting as a 3-D diorama ..... I'll keep keeping a lookout on this one, should be good???

John
 
Hi John,

You say tomayto, I say tomahto,
You say potayto, I say potahto...hahaha.

good or gawd

Taste is subjective. You lot are very generous with your comments and it messes up with my mind.

Mammoth was the keyword for this project. It really tested me on being able to construct architectural structures (hated it) but I hope you'll like the effort at least, if not the effect...

Rgds Victor
 
Construction

The description below has sub-headed components to create a coherent narrative but note that all the component parts were being constructed in parallel, and that there were constant refitting and readjustment of the components. Hence, the photos may not necessarily show the exact chronology of construction.

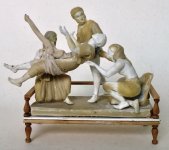
The Antony Group – This complex grouping comprised 5 figures on the settee including Mark Antony, who, being the central figure here, was made first. Once I was satisfied with Antony’s basic pose, the other figures were then constructed around this figure. The settee dimensions were also determined at this stage. Details on the settee frame and legs were added later. The positions and interactions of the figures were adjusted to fit the composition (Fig 4).

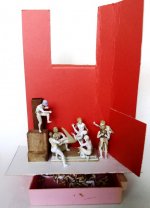
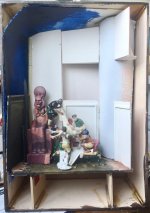
The Statue Group - This comprise the helmeted soldier on the statue and lifting the hoist. A simple wooden armature was created for the statue (Fig 5). The dimensions of the statue were critical to positioning the helmeted soldier and the scene was visualized through the simple cutout frame (Fig 6).

az.jpg

Fig 4. The Antony Group. As the details were added, there was constant adjustment of the poses so that the figures interacted well within this group.


az2.jpg

Fig 5. The stage had to be elevated to fit into the cutout frame.


az3.jpg

Fig 6. The scene being framed. As can be seen, the parapet has to be lowered and the scene has to be brought forward.
 
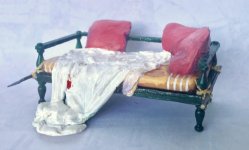
Due to the complexity of the Antony Group, this whole sub assembly was completed as a project in itself. A mattress for the settee was made from putty. This was epoxied to the settee frame to create a solid platform. The settee arms and legs were made from wooden ship railings and plastic strips (Fig 7).
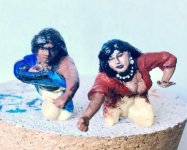
The figures have to be partially attached to each other to determine the poses. I started with Antony and the Roman soldier holding his head up. A wire was drilled and inserted into the right shoulder of Antony which mated with the left thigh of the Roman soldier. The legs of Antony were pressed down to rest on the right hand of the Egyptian servant kneeling at his feet.

Once I was satisfied with the position, a drop of superglue sealed the wire joint. Further support was created between the Roman soldier and Antony by wire inserts to the right and left hands supporting Antony. Except for this fixed pair, all the other figures were attached only temporarily to each other with wire inserts at this stage for further adjustment of poses and final detailed painting of separate figures before final assembly.

There are two hoists made from clothing in the painting - the white one being held up by a helmeted soldier and the red one being attached with ropes. Wire inserts were used as structural supports for the hoists.

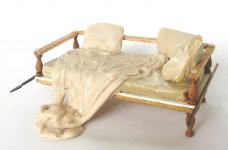
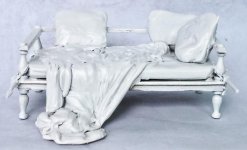
The Antony-soldier pair and the kneeling Egyptian servants were pinned to the settee to fix their positions. The legs of the Nubian slave were adjusted to straddle the bed and the ground. Then the arms were adjusted to support Antony. The pillows were made from putty. The cloth sheet of putty was draped onto the settee and then sculpted in several stages. The spears were added and tied to the settee arms. The settee was sprayed in matt undercoat. The settee was now fully painted (Fig 8).

a5.jpg
Fig 7. Legs and railings were added to the settee. The height of the settee had to be finalized to adjust the hoist positions. Figures were pinned onto the settee to fix their positions for readjustment of poses.

a6.jpga7.jpga8.jpg
Fig 8. Construction of the settee. a – details added with pillows, drapery and spear handles; b - sprayed with matt undercoat; c – fully painted.
 
Then the fully painted figures were assembled. The assembly sequence was important as all the figures were interlocked. First, the two Egyptian servants were epoxied into their positions. Then the Antony-soldier pair was epoxied. The Nubian slave was now added and epoxied. Some minor details were re-worked to ensure that the figures integrated well within this group.

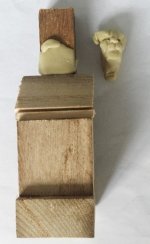
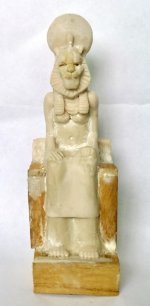
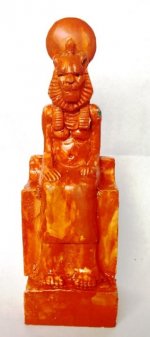
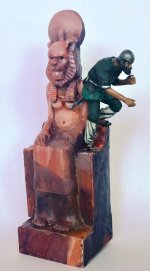
The statue of Sekhmet was sculpted from epoxy putty over the wooden armature (Fig 9). When most of the statue was sculpted, the helmeted soldier standing on it was pinned and epoxied to the statue to fix his position (Fig 10). The wire insert from the hoist was attached to the helmeted soldier. Putty was then used to create basic shapes for the hoists and the details were then sculpted later.


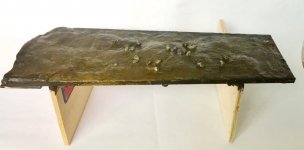
b.jpgb2.jpgb3.jpg
Fig 9. Construction of the Sekhmet statue. a –armature and head; b – finished sculpture; c – undercoated with enamels.


b4.jpg
Fig 10. The Sekhmet statue with attached helmeted soldier, fully painted.
 
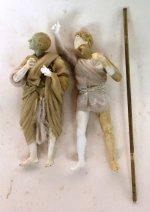
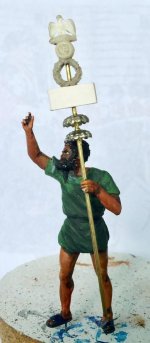
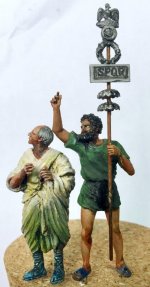
The Roman Group – This comprised a Roman senator (fully visible) and behind him, a Roman standard-bearer. A piece of brass wire was cut to serve as the Roman standard handle (Fig 11).

The Cleopatra Group - The women figures were easier to sculpt as their lower bodies were not visible below the parapet (Fig 12).

b5.jpgb6.jpgb7.jpg
Fig 11. Construction of the Roman Group. a – figures being sculpted; b – the Roman standard was made from a Historex eagle, cardboard and some brass trinkets; c - figures fully painted.


b8.jpgb9.jpg
Fig 12. Construction of the Cleopatra Group. a – figures being sculpted; b – fully painted.
 
As you can see, I'm really cooking now at this stage with this project.

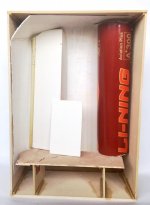
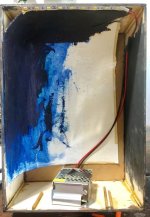
The Shadow Box Frame and Shell – A commercial IKEA Ribba frame was adapted for the shadow box. The frame has side depth which creates an overlap for strengthening the shell for this diorama. The shell was constructed from light basswood cut to fit neatly inside the IKEA frame (Fig 13). The back of the frame was attached to the sides to complete the shell. The shell was carefully sanded smooth, stained in dark red brown and varnished in gloss.

Backdrop, Stage and Walls - The backdrop was formed from thin cardboard and then covered with gesso and lightly sanded. The backdrop was glued to the inside of the shadow box shell before it was painted (Fig 14).

The elevated stage was made to slant slightly downwards towards the foreground and the front edge was hidden beneath the lip of the cutout frame. Some minor ground work with small stones and details were added to the elevated stage and it was painted (Fig 15).

Using the cutouts as templates, the monument walls were made from thick cardboard and a cardboard carton tube. The tube was trimmed to size and diameter to fit into the scene. The monument walls were glued at obtuse angles, visually adjusted for slight perspectives. The left edge of the monument was made with plastic tubing. Cardboard pieces were glued to the back of the monument wall structures to provide structural strength which were adjusted to fit snugly against the backdrop.

A basic test-fitting of the scene was carried out. The elevated stage was placed in the shadow box and held in place by wooden strip runners. The monument walls were glued onto the elevated stage (Fig 16).


b.jpg
Fig 13. Shadowbox shell constructed to fit within the IKEA frame. The backdrop and elevated stage have been constructed.

b2.jpg
Fig 14. The backdrop has been glued to inside the shadow box. The elevated stage and the monument wall structures being test-fitted within the shadow box. The position of the stage is finalized by wooden strip runners.

b3.jpg
Fig 15. The stage scattered with small stones and painted with artist oils.


b4.jpgb5.jpg
Fig 16. Construction of the scene within the diorama box. a - basic test-fitting; b - monument walls being constructed to fit into the scene.
 
The parapet walls were made from wood and plastic tubing (Fig 17).

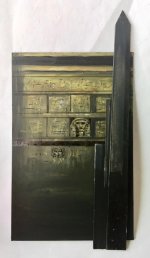
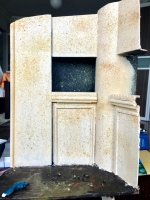
When I was satisfied with the initial trial fitting of the scene (Fig 18), I proceeded on with the final adjustments and painting. As I was dealing with an internal light source, I took every precaution to mask off any gaps to prevent any light filtering through to spoil the final scene. Cutouts were made for a backdrop side monument wall and obelisk which were painted (Fig 19). These will be fitted to the left side of the scene.
Painting

Oil paints were used because I like to mix my colours. I notice that homogenous colours give off a very dull effect when compared to heterogenous colours. Simply put, this is the “pointillism” approach where the individual colours are constantly mixed and processed in the viewer’s eyes and always appear refreshing. Oil paints are never mixed perfectly and the various colour flecks create this interesting effect.

I approached this piece as if I was doing a painting. As stated earlier, all the component parts were painted at various stages during the construction to facilitate access to awkward areas. I matched all tonal colours as close to the original painting as possible. The backdrop and stage were painted. The figures were given basic undercoats with enamel paints and finished off with artist oils. Where appropriate, I applied matt varnish or semi-gloss to the figures after the oils had dried out.
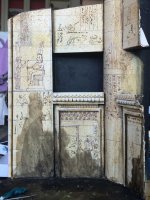
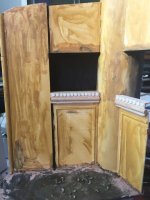
The walls were sprayed with matt white and painted. An old toothbrush was used to flick small drops of paint onto the painted walls. This creates a nice “granite look” to the walls. A fine-tipped brown-coloured pen was used to draw in the granite slabs and Egyptian hieroglyphs. Cuts and nicks were made to the walls along the granite slabs to further create a 3-dimensional look (Fig 20).

a2.jpg
Fig 17. The parapet walls being constructed.

a3.jpg
Fig 18. The first framed trial fitting of the scene.

a4.jpg
Fig 19. The side monument wall and obelisk cutouts for the backdrop.

a5.jpga6.jpg
Fig 20. Detailing the monument walls. a - spray painted; b - hieroglyphics and shadows added.
 
Hi Louis,

Thanks for your nice comments. This was a challenging project as it required various skill sets which I wasn’t fully equipped with then. So I was learning and honing my sculpting and conversion skills on the figures.

I definitely never made any architectural models before and knocking up the backdrop was truly a trying journey.

Juxtaposing the figures on the settee was very fiddly work but I persisted as I had carefully planned this project. Hope you’ll like the rest of the work and final results.

Rgds
Victor
 
Final Assembly

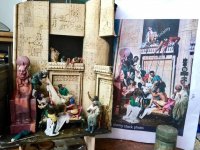
The settee, statue and figures were pinned and attached to the stage. Some minor accessories were also added to the stage (Fig 21). The ropes were then added to the scene, linking the Anthony Group to the Cleopatra Group figures. This was very fiddly work, and was carried out using tweezers.

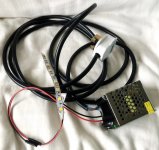
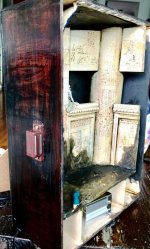
An LED light strip with a driver and wall plug was used to provide an internal light source (Fig 22). The LED light strip was installed on top and the driver was tucked underneath the stage (Fig 23).

The frame including the glass panel and cutout frame was now fitted to the front and secured with magnetic latches on both sides (Fig 24).


b.jpg
Fig 21. Further test-fitting of components, trying to ensure fidelity to the painting as much as possible.

b2.jpg
Fig 22. LED light strip with driver and 240 Amp plug.
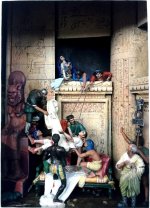
b3.jpg
Fig 23. The LED light strip and driver installed inside the shadow box. A hole was drilled at the back of the box to pass through the wall plug wire.
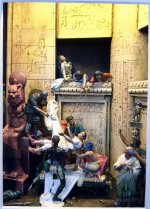
b4.jpg
Fig 24. Magnetic latches were installed to secure the frame.
 
Here is the final installment to this project.

Conclusion
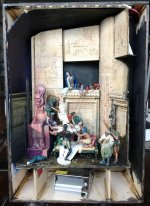
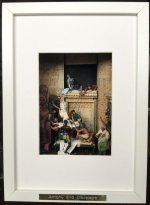
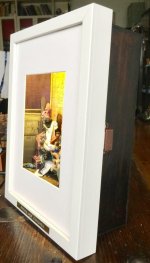
There was really only a single satisfactory viewpoint for this piece, with the monument walls blocking off any other viewpoints. Hence the shadowbox approach was selected as it confines the viewer to this singular vision. Bringing the scene to the front minimizes the depth and size of the shadow box and keeps the scene compact and visually tight (Fig 25, 26, 27 and 28). The shadow box genre remains a daunting and challenging modelling prospect but was an ultimately and satisfying project following completion. The shadow box can be displayed tilted up to rest on the display stand (Fig 29).
References

  1. https://en.wikipedia.org/wiki/Eugène_Ernest_Hillemacher
  2. http://shakespeare.mit.edu/cleopatra/index.html
  3. http://www.bluffton.edu/homepages/facstaff/sullivanm/egypt/thebes/medhabu/medhabu.html


a2.jpg
Fig 25. The completed scene fully fitted out.

a3.jpg
Fig 26. The frame was added. A brass name plate was added to the frame.

a4.jpg
Fig 27. A close-up of the framed scene.

a5.jpg
Fig 28. The framed scene fully lit up.

a6.jpg
Fig 29. The completed shadow box diorama.
 
Very nice job you made of it. Really looks professional Vic ! :salute:: {bravo}}{bravo}}{bravo}}

Steve
 
This might be my favorite of all of your shadow box dioramas, just awesome Victor!:salute::
 
Brother,

That is a whole new level of diorama. I am utterly impressed and love shadow boxes.

John from Texas
 
Victor,

yet another brilliant masterpiece, by a true artist,

well done,

John
 

Users who are viewing this thread

Back
Top