Casting metal figures-some in progress shots (1 Viewer)

theBaron

Major
Joined
Mar 27, 2008
Messages
10,327
Hi, all! This afternoon, I fired up the forge and broke out some molds, to cast some figures. I thought I would take some pictures during the process and post them here, to help illustrate what we've so often talked about.

The first picture is a shot of my melting pot:
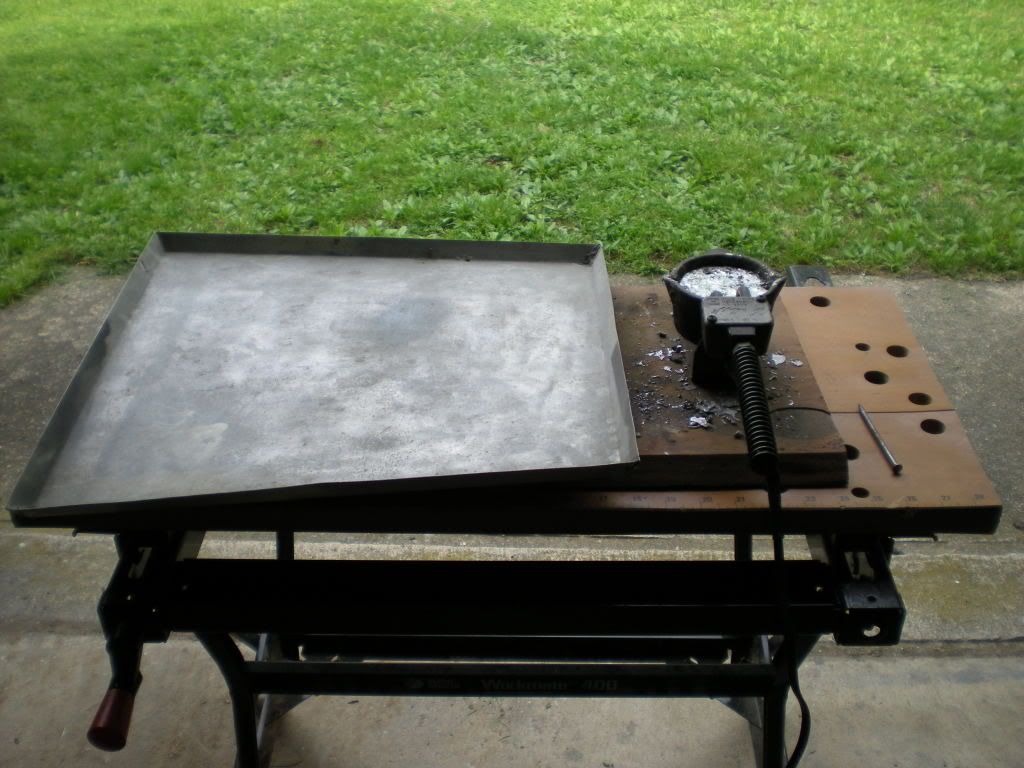
1Castingpotandplate.jpg


The pot I use is made by Hilts Molds of Nevada, and they call it "The Hot One" I bought it years ago at a sporting goods store, that sold black-powder supplies. This holds a couple of pounds of metal, and melts it via a heating coil in the bowl of the ladle. It came with a stand made of a piece of stamped sheet steel, which I bolted to a piece of plywood as a base.

The large metal square is a homemade casting plate, which is intended to protect any surface beneath it, and to contain any metal that might happen to flow where it's not supposed to.

I cast in my garage, and I have the rig set up on an old Workmate, set up in the doorway, for good ventilation.

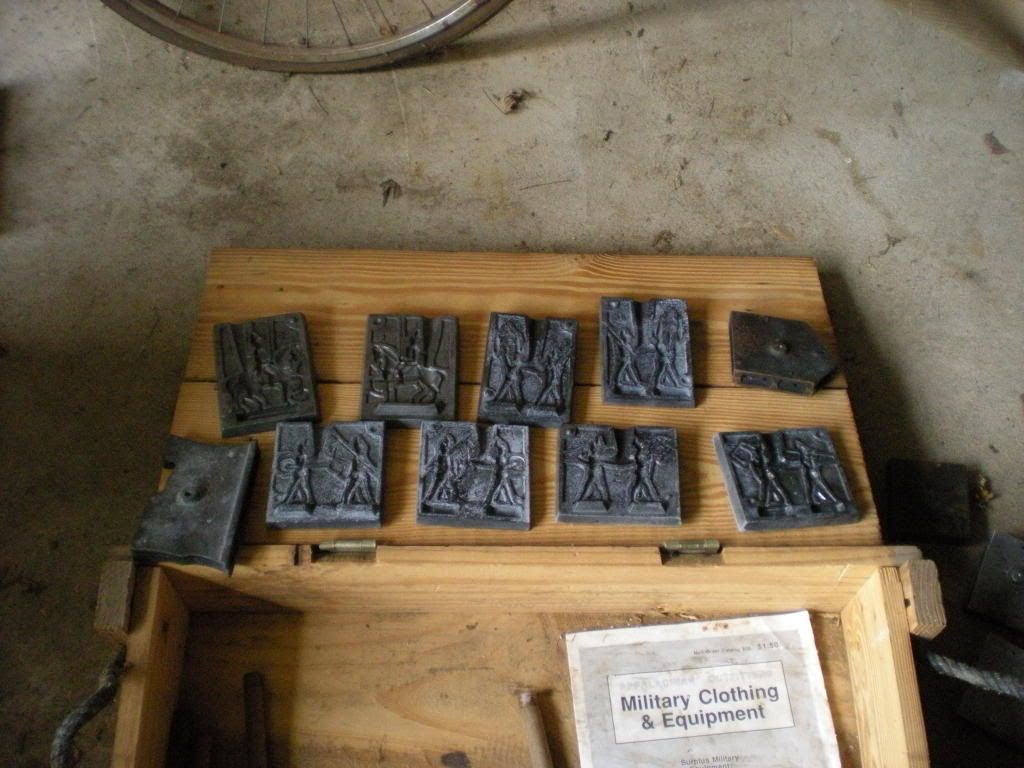
Here is a shot of some of my metal molds:
2Metalmolds1.jpg


These are modern copies of the old bronze molds from Germany, from the firm Schneider Bros. They make half-round figures. These newer molds are not as good as the original German molds. But that's not unexpected, since these American copies are actually derived from the original German castings, copied here in the 30's by the Rappaport Brothers (Junior Caster).

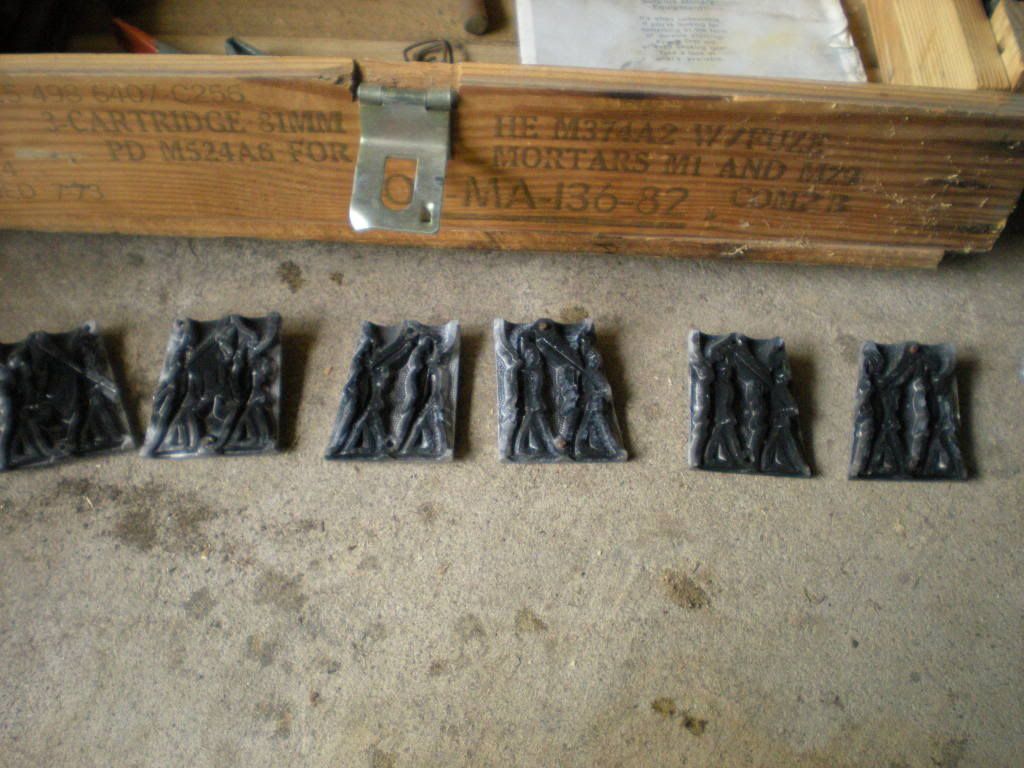
Here are some more of my metal molds:
3Moremetalmolds.jpg


These are also copies of the old Schneider molds, but they were made in Germany by a gentleman named Höhmann, who made his molds from the original Schneider masters. These are of a zinc alloy, and produce very crisp castings.

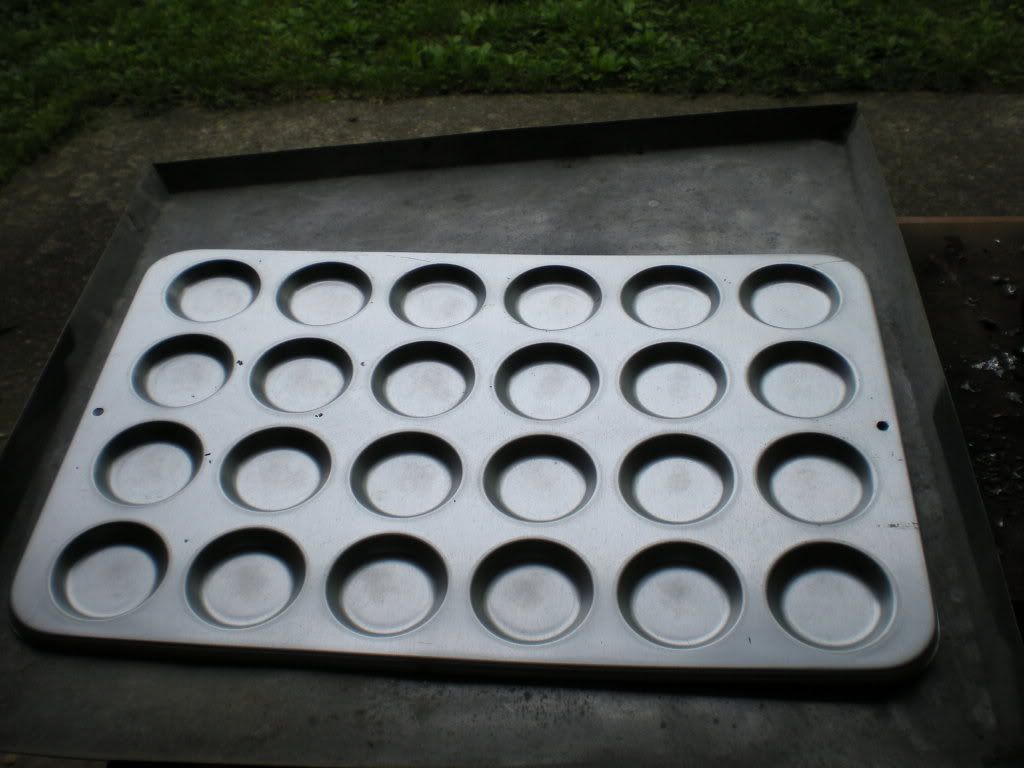
Next, this is a tool that I've mentioned in some of our threads about casting:
4Moldforcastingpigs.jpg


That is an aluminum muffin-top pan. I use it to make casting pigs out of my metal supply. The pigs are about the size of a silver dollar, and are in much more convenient form than the bars of metal that I have.

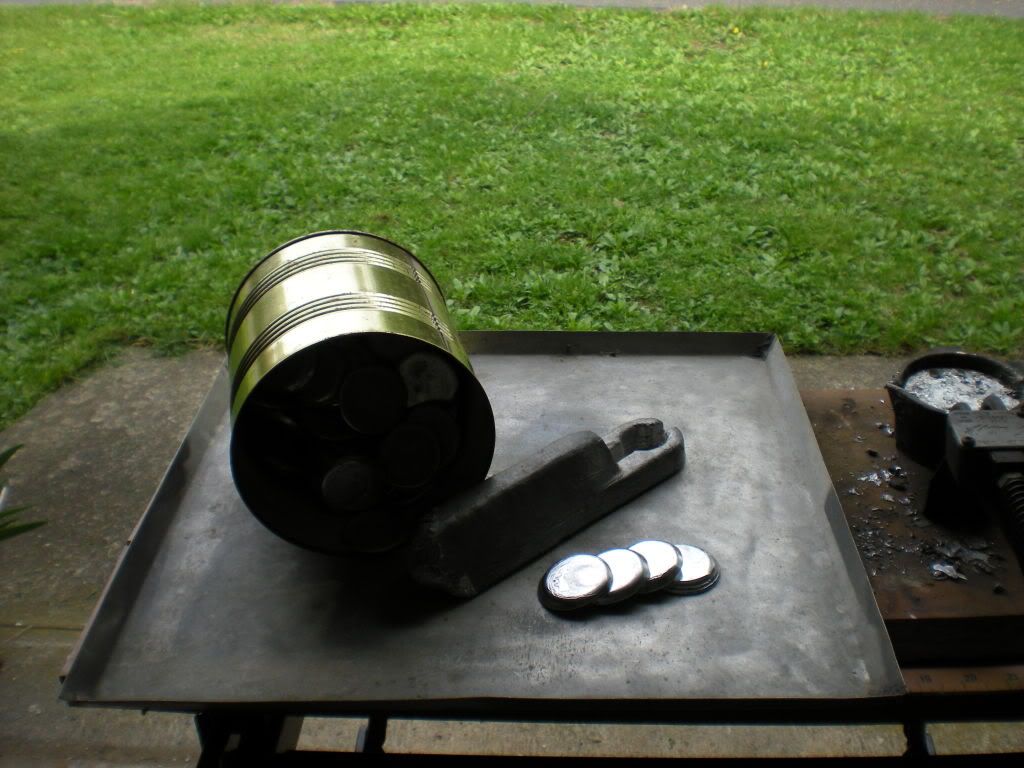
Speaking of metal, here is a shot of some of my casting metal:
5Castingmetal-tin.jpg


The bar in the center is the last remnant of a 25-lb bar of linotype metal that I bought from a fellow who cleans out old print shops. It was originally about 28 inches long (sorry, metric people, you'll have to do your own math!) and very unwieldy. That's what inspired me to process it down into casting pigs.

Some more metal, this time, a supply of lead:
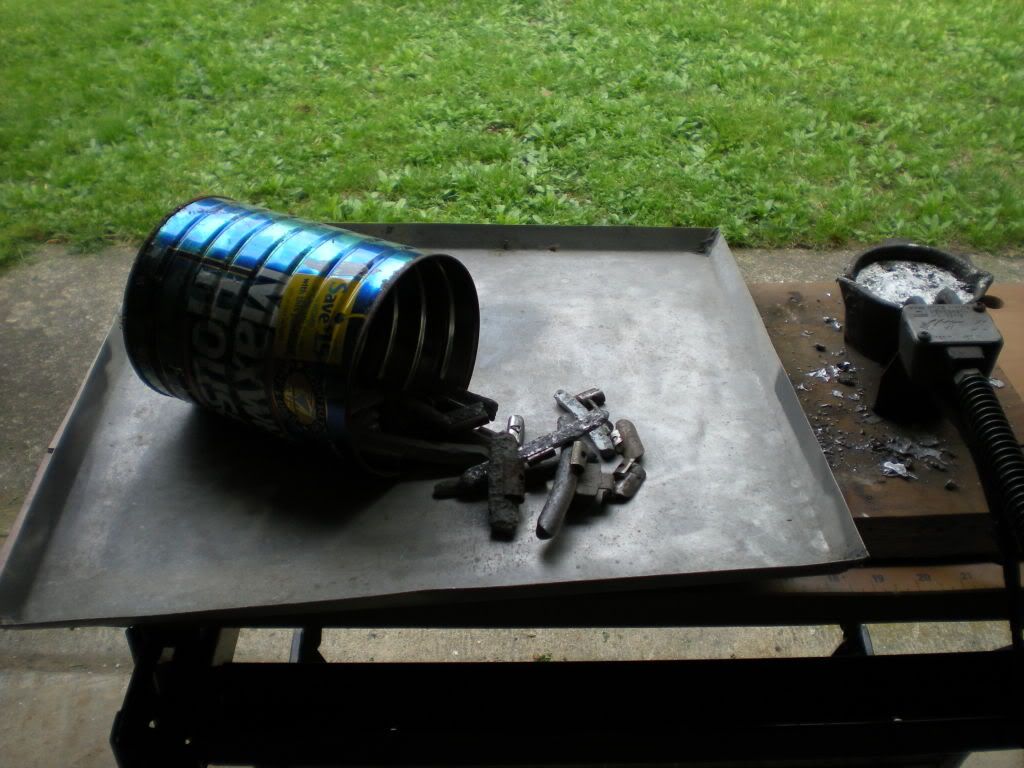
6Castingmetal-lead.jpg


Those are tire weights. I add those to the linotype alloy, depending on the mold. My metal molds like linotype, which is high in tin content, with some antimony, but that alloy is a littler hotter than an alloy with a little more lead in it, which I use for some of my rubber molds.

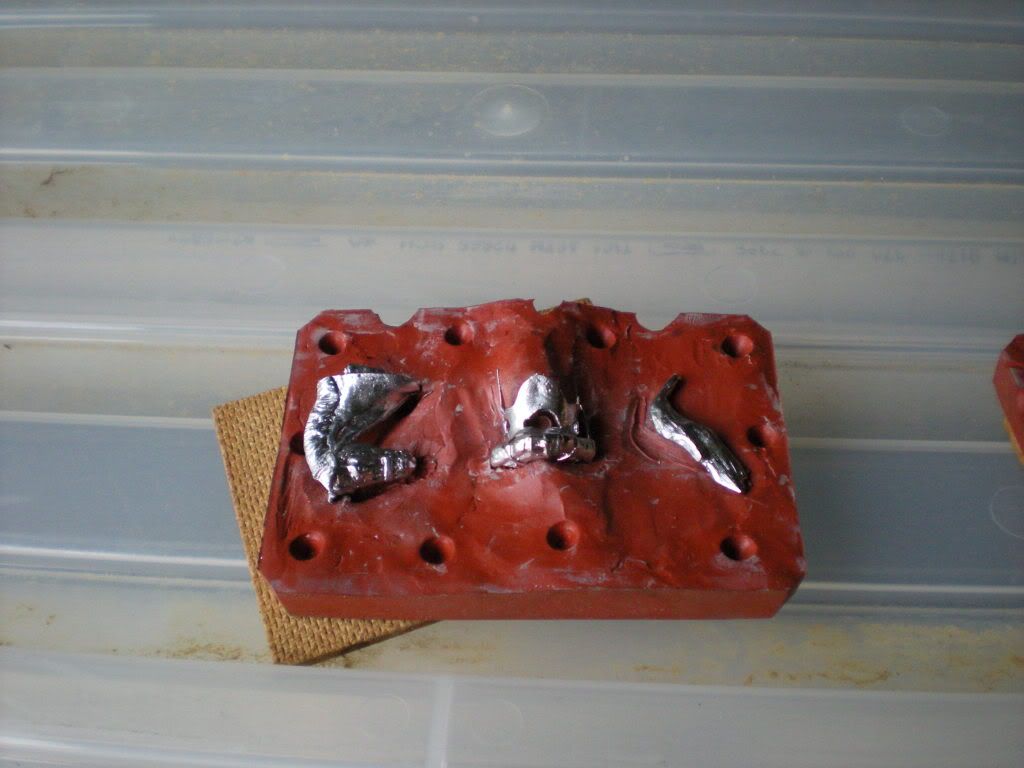
Speaking of the rubber molds, here is a typical one, a mold of a Prussian cuirasser:
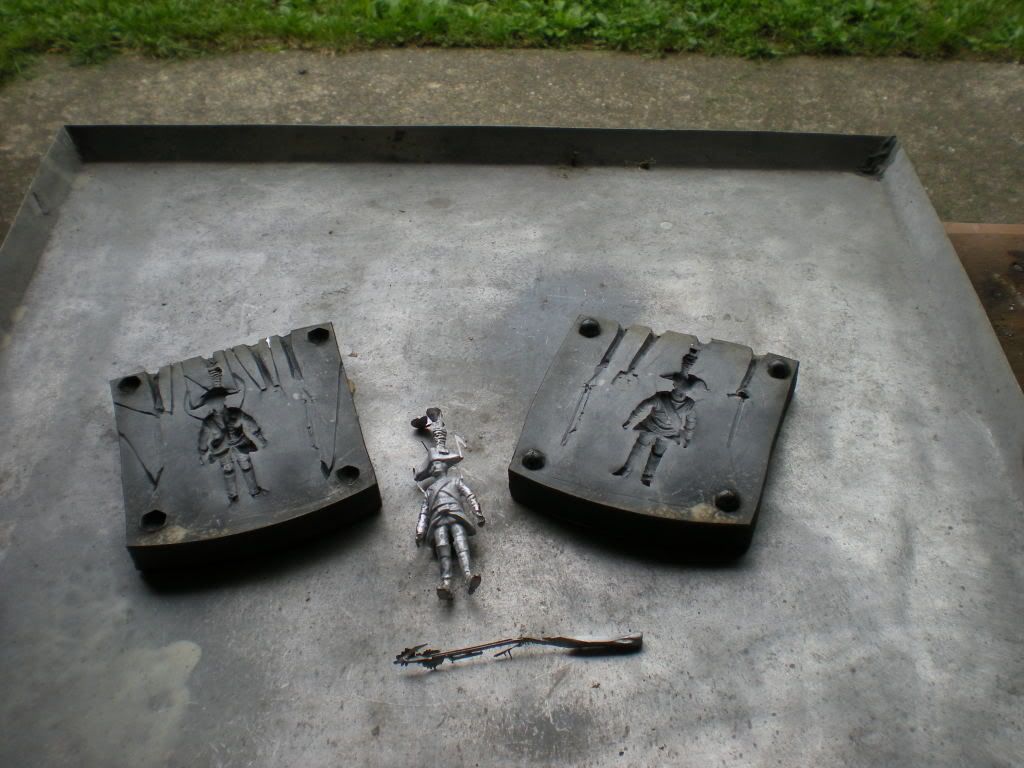
7Asiliconrubbermold.jpg


Once I fired up the pot, the first thing I did was to finish rendering the bar into the smaller pigs:
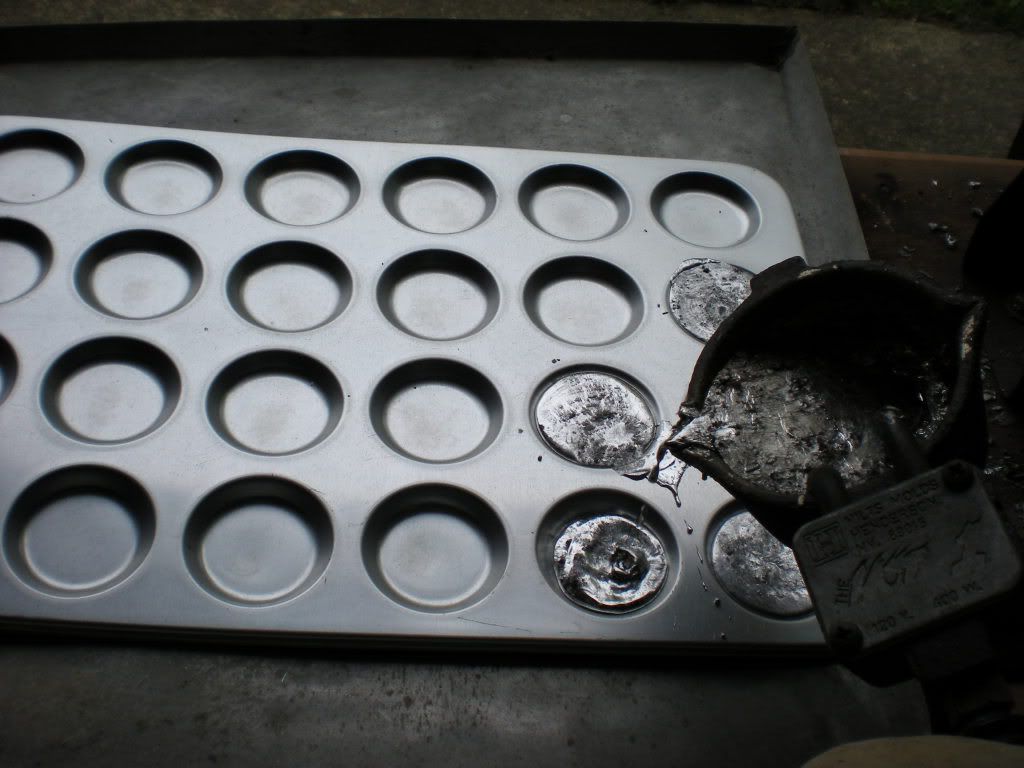
8Pouringsomecastingpigs.jpg


and here is a shot of some finished pigs:
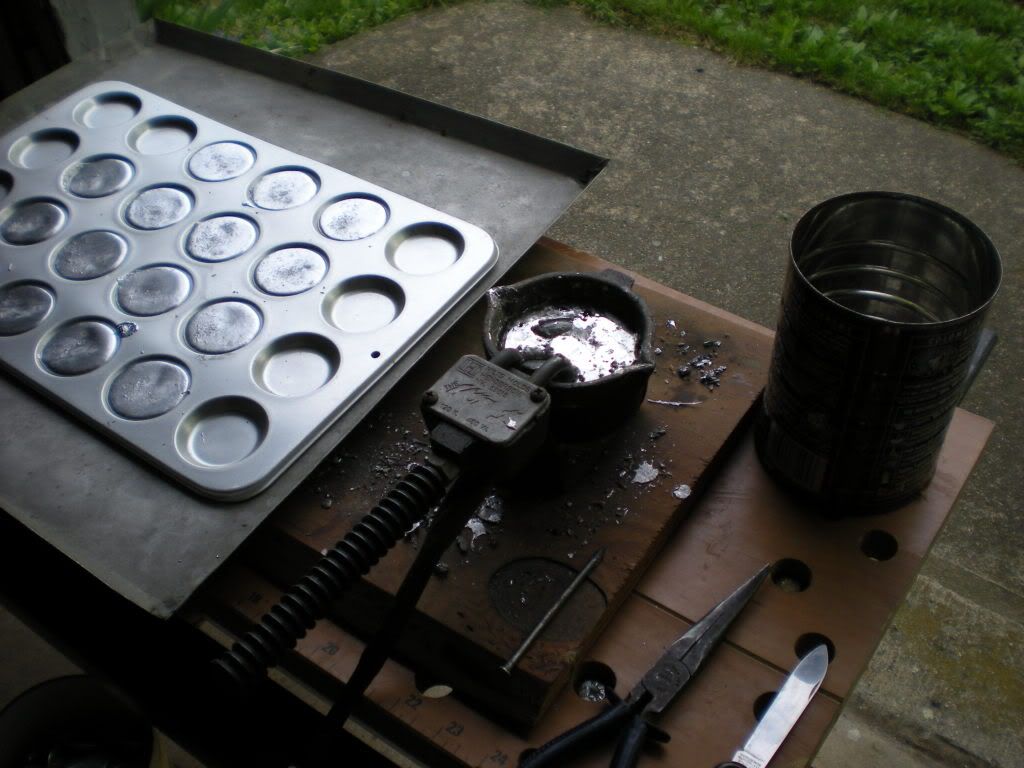
9Somecompletedpigs.jpg


Those go in the can, and we're ready to break out some molds.

Casting follows in the next post....
 
Can I have sprinkles on mine. :) This is a very interesting thread I always wondered what was all involved in the figure casting process.
 
The first batch of figures that I wanted to cast today was some German half-round figures, for a fellow member of the MFCA, Mike Tisone. Mike and I have different molds, and we swap figures. We've also had a plan to cast a bunch of figures, paint them, and put them in the exhibition, but we've been planning that for years :D

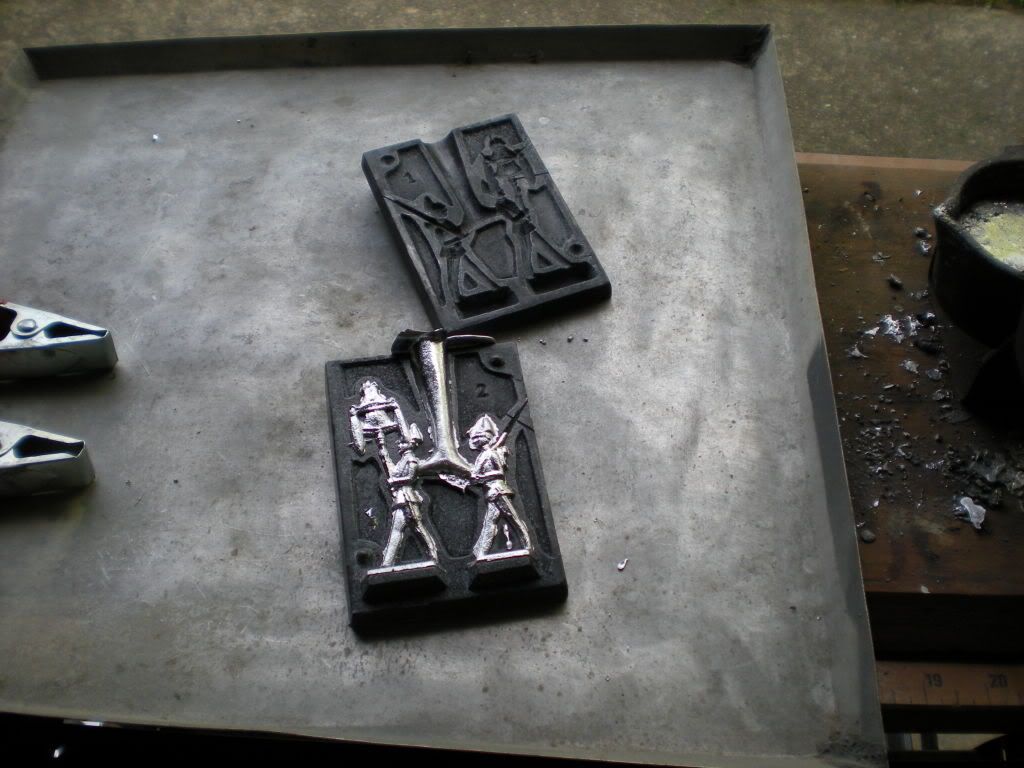
So, I've taken one of the Schneider copies, clamped it with some spring clamps, and made a first pouring:

10Firstpop.jpg


This mold is from a series to make parade figures, including a military band. This one has the Schellenbaum or "Jingling Johnny", as the Brits named it, and a soldier with his rifle at shoulder arms. I want the Schellenbaum, so the other figure will go back in the pot.

As you can see, the metal filled all the cavities of the mold, and I was pleased, until I tried to get the casting out of the mold. It wouldn't budge! Well, actually, the bases were stuck. I eventually broke the casting in getting it out of the mold, and then did what I should have done, before I ever poured any metal into this mold:

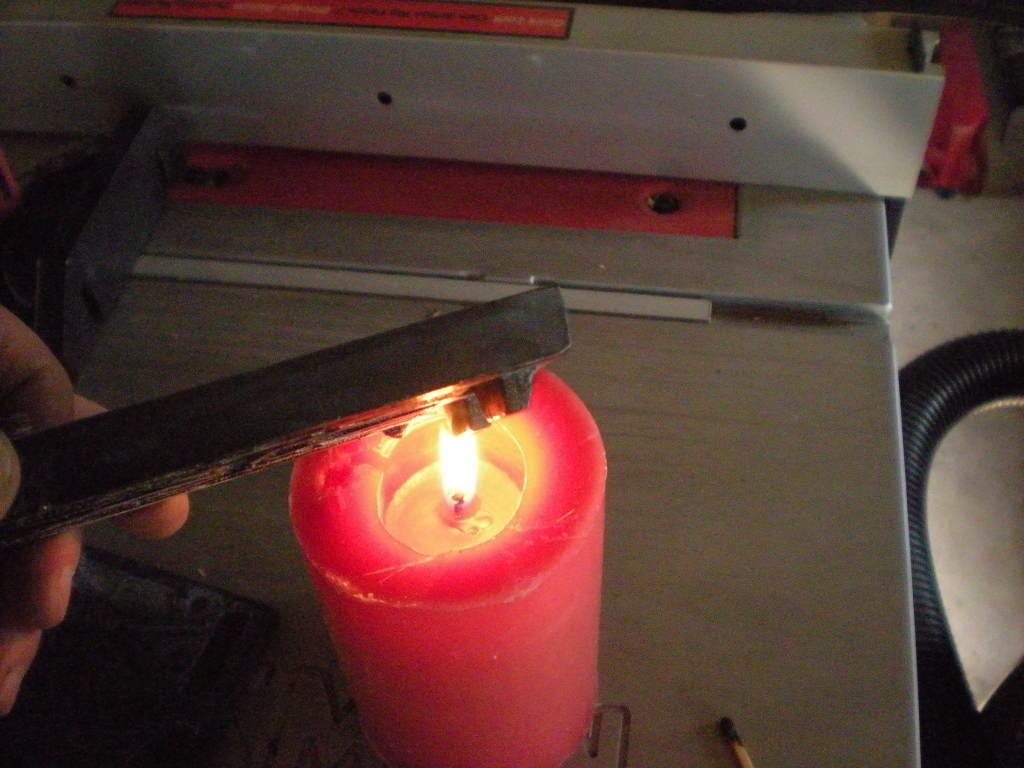
11Sootingthemold.jpg


I sooted the mold, by holding it in the flame of a candle. The soot deposited on the surface of the mold acts as a dry lubricant. It helps the metal flow, and it also helps release the casting.

I used my bare hand for the picture, but I actually put on a heavy insulated glove to do this, because the molds get hot very quickly.

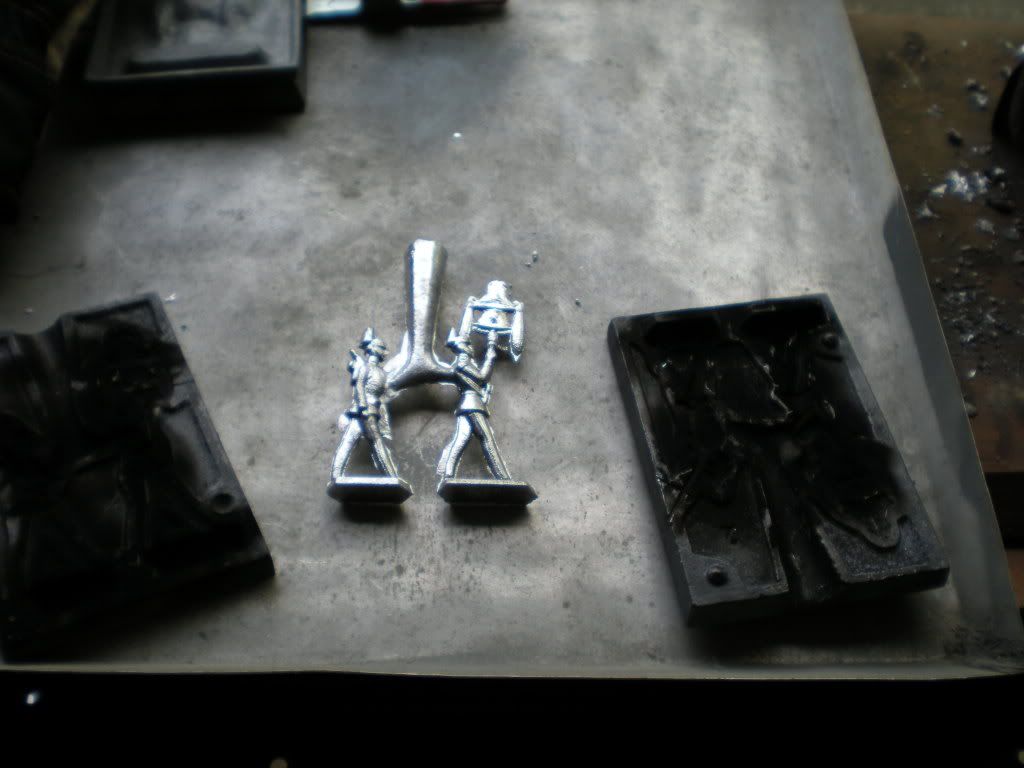
Having put a good layer of soot in the mold, I clamped it up and did a second pour, and success!

12Successfulcasting.jpg


The casting popped out of the mold very easily.

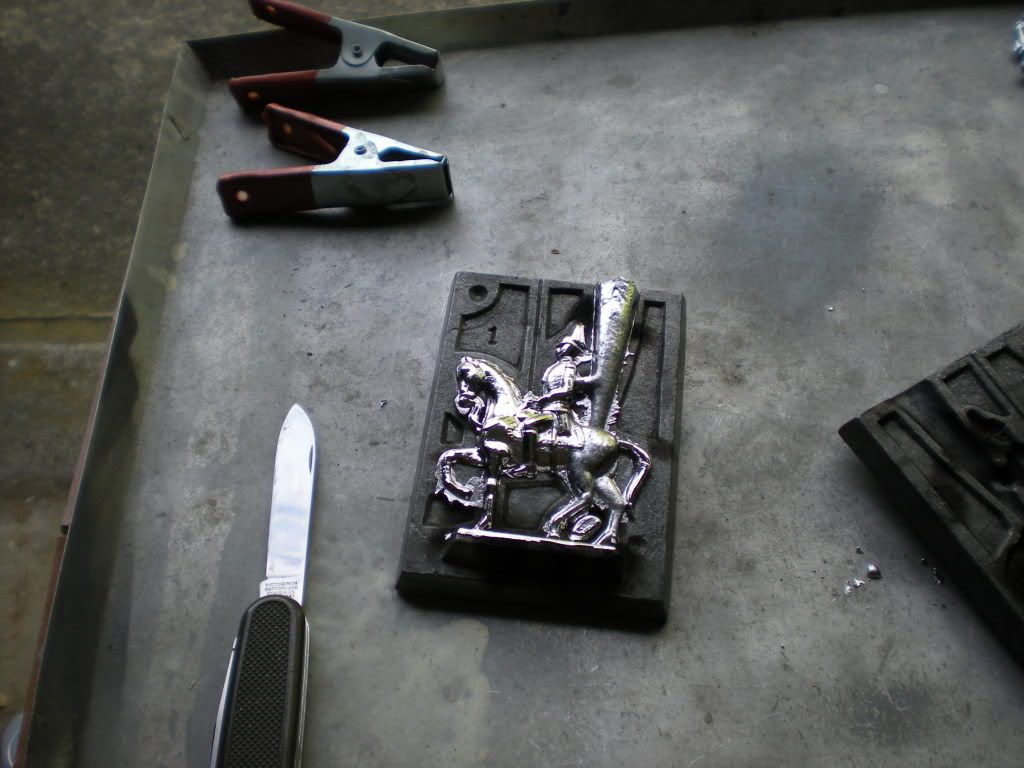
Here is another mold for this batch, a figure of a mounted officer:

13Successfulcasting.jpg


Another successful casting. This figure can also be used as an Imperial German dragoon, and that is actually how I'll paint it.

Here is the casting with the pouring gate removed:

14Castingwiththepouringgateremoved.jpg


I wanted to cast 6 of these today. I actually had to do 12 pourings, because several were short-shot, ie, the metal didn't fill all of the mold cavity, and another one cracked right across the officer's midriff, when I used a pair of nippers to cut off the pouring gate. That's how it goes, with drop casting.

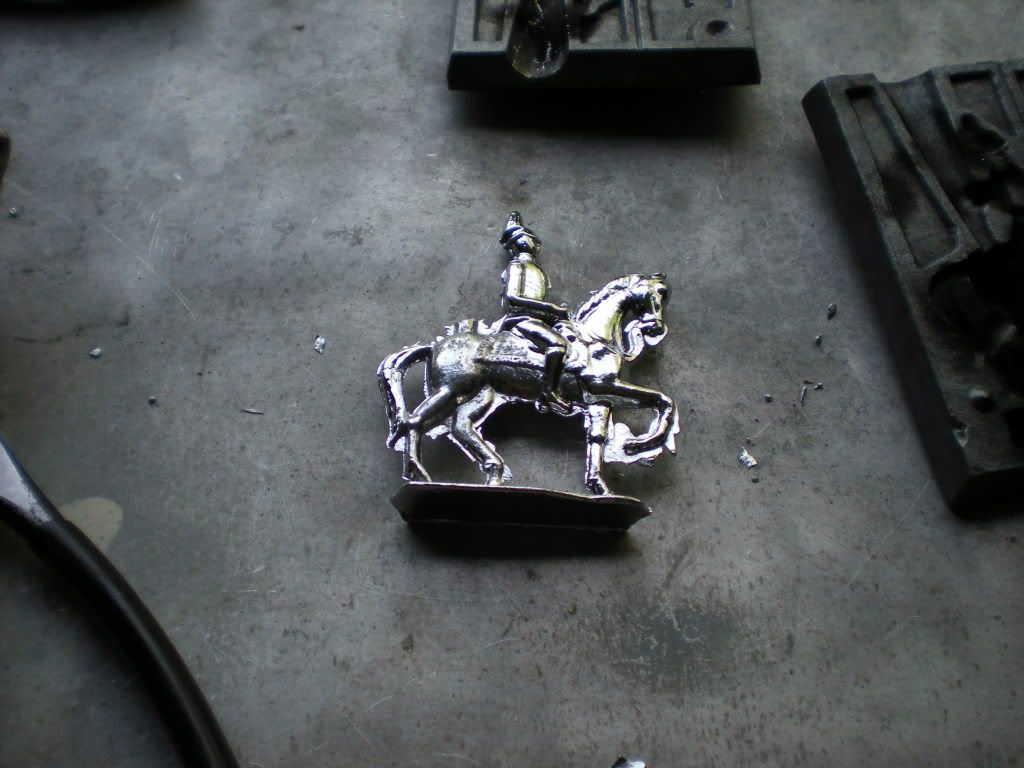
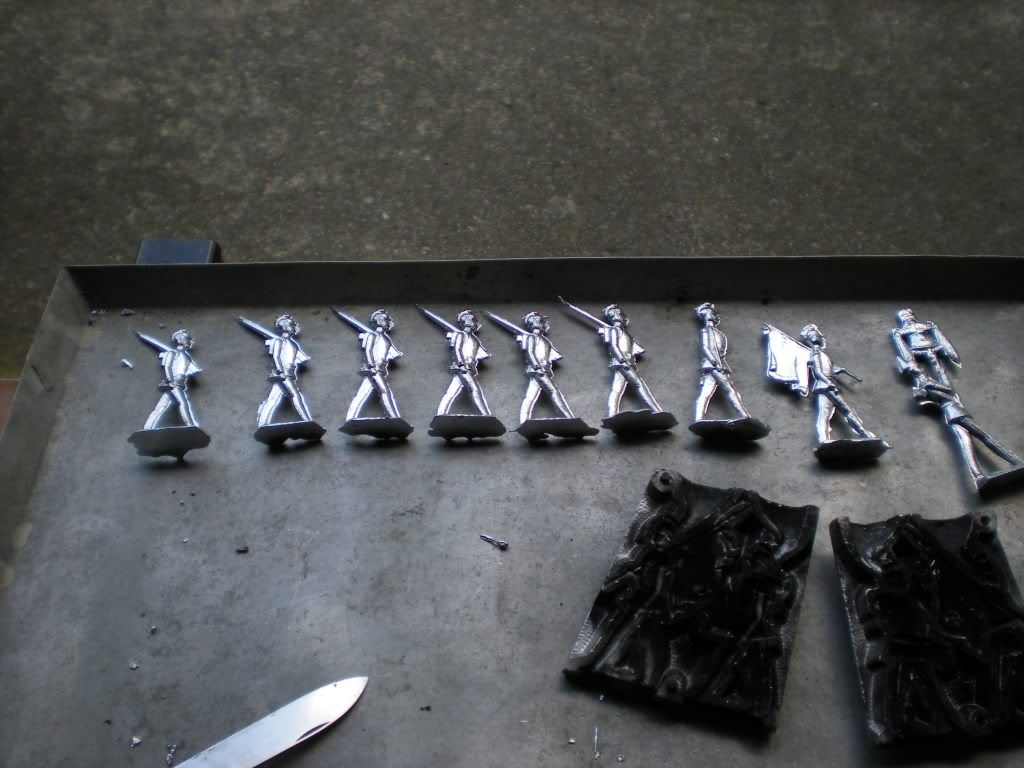
I selected another couple of molds, this time, from among the zinc molds. These were figures of the Bavarian army circa 1870, when they still wore the Raupenhelm, with its distinctive crest. Here is the result of an afternoon's work:

15Anafternoonswork.jpg


After making those castings, I switched over to some of my silicon rubber molds. I need to make castings for another fellow member and friend from the MFCA, Fred Klotz, who was a toy soldier maker in his own right (his line was called "Present Arms"), and we agreed to swap figures.

Here are some of my rubber molds:

16Somemoresiliconrubbermolds.jpg


and here are some successful castings:

17Successfulcasting.jpg


All in all, it was a productive afternoon. And I got to listen to the Phils beat the Mets at the same time, too.

Thanks for letting me share a glimpse into my workshop!

Prost!
Brad
 
Can I have sprinkles on mine. :) This is a very interesting thread I always wondered what was all involved in the figure casting process.

Hi, Alex, glad you liked it!

I'll have to add some more pictures of the other tools I use, like the nippers, pliers and clamps.
 
This is very interesting.I didn't realize that you used a lot of different metals and molds.I don't know that much about casting.I will follow this thread closely.
Mark
 
Thanks for posting these pics Brad. It's good to visualise what we've already discussed.

Cheers
Simon
 
Brad, very interesting thanks. I notice that you don't use a coffee mug like KV did! ;):D

Are you going to follow this up by a painting thread?

Jeff
 
Thanks Brad and well done: the photos are clear and the explanations are well thought out. Do you teach?

I have a Prince August mold I bought years ago. It's a French Curasseur. When I bought it I imagined casting, painting, and then having hundreds of these fellows. It's still in the box. Maybe, just maybe, this will get me going.

I have two questions. If one doesn't have access to linotype metal, where might one get some metal? Second, where might one get a melting pot?

With this casting thread, my own ongoing soldier painting projects, and
Maddadicus' gun boat thread which got me interested, I'll have to explain to my wife that there's no time for all her home improvement projects.:eek::rolleyes::D
 
With this casting thread, my own ongoing soldier painting projects, and
Maddadicus' gun boat thread which got me interested, I'll have to explain to my wife that there's no time for all her home improvement projects.:eek::rolleyes::D

Ahhh, it's all in the power of suggestion. Instead of explaining that there is no time for Home Improvement, work on explaining that shelves full of toy soldiers and gunboats is home improvement. ;)

NB: I have to add that I have been unsuccessful in this, but feel it would be interesting to see if other forum members fal by the wayside also.
 
Thanks for the kind comments, guys! And Jeff, yes, these will show up in some future painting threads, though I still have the Rose figures to finish.

I'll add some more pictures to show some things I realize I left out, like clamping the mold halves together.

Prost!
Brad
 
Wraith, I don't think I'll attempt your suggested manoveur.:D I look for guidence to the Russians against Napoleon when it comes to my wife. Passive resistence is my motto. The less said about my toy soldier shelves the better.

Now Maddadicus' gun boat -two feet long- that would be hard to hide or blend into the background. I'd have to be Houdini making an elephant disappear on stage.

I walk around the house and ask myself, if I built it, where could I put it? These friendly tussles over house supremacy are good for the soul. Don't ask me to explain that. It's a gut feeling.

Cheers
 
Brad, very interesting thanks. I notice that you don't use a coffee mug like KV did! ;):D

Are you going to follow this up by a painting thread?

Jeff

Gee some people never forget.:)

Thanks Brad and well done: the photos are clear and the explanations are well thought out. Do you teach?

I have a Prince August mold I bought years ago. It's a French Curasseur. When I bought it I imagined casting, painting, and then having hundreds of these fellows. It's still in the box. Maybe, just maybe, this will get me going.

I have two questions. If one doesn't have access to linotype metal, where might one get some metal? Second, where might one get a melting pot?

With this casting thread, my own ongoing soldier painting projects, and
Maddadicus' gun boat thread which got me interested, I'll have to explain to my wife that there's no time for all her home improvement projects.:eek::rolleyes::D

Getting metal is easy. First place could be where ever you get the mold from.
Second, Dutkins, Prince August and some of the other mold makers or just type casting metals into Google.
 
What a great thread Brad. I have always enjoyed your postings, but ever since you received your camera your posts have become even more interesting :cool: Thanks for showing us this process. I can only imagine what it must be like at a major TS company :eek::eek::eek: It certainly does look like fun !!
 
Thanks Brad and well done: the photos are clear and the explanations are well thought out. Do you teach?

I have a Prince August mold I bought years ago. It's a French Curasseur. When I bought it I imagined casting, painting, and then having hundreds of these fellows. It's still in the box. Maybe, just maybe, this will get me going.

I have two questions. If one doesn't have access to linotype metal, where might one get some metal? Second, where might one get a melting pot?

With this casting thread, my own ongoing soldier painting projects, and
Maddadicus' gun boat thread which got me interested, I'll have to explain to my wife that there's no time for all her home improvement projects.:eek::rolleyes::D

Hi, Russell, thanks, that's very kind of you to say! And yes, I did teach, back in the day, I taught German and US history at a Catholic high school over in Jersey (Holy Cross, Delran).

I have Prince August molds, too, those were the first commercial molds I bought, both from the 40mm series, and from the Seven Years War Prussian and the traditional toy soldier series in 54mm. The Napoleonics are very nice, too, and the diorama piece molds can be used for several different periods.

As to the metal, KV is right, some toy soldier dealers like Rich Dutkin of Dutkin's Collectibles (www.dutkins.com), sell casting metal, also The Dunken Co. down in Texas (www.dunken.com), Prince August does, too. Shipping can get pricey, though.

I happened to find my supplier at a flea market. Like I said, he cleaned out old print shops, and he sold the printer's trays at flea markets, as curio organizers. I've seen people hang them on the wall and put little knick-knacks in them. He also sold the odd printing block or two. The metal, he had bought, and actually didn't know what to do with it, no one he knew wanted it. So I came along at the right time.

As to geting a casting pot, you can Google it, or ask at your local sporting goods store, especially a store that sells firearms. Chances are, if they sell guns, they may have black powder supplies, or at least, supplies for guys who cast their own rounds.

I just Googled the compay that made my casting pot, Hilts Molds, and found that it is still in business, though it was bought by another company. Here is the URL of a page in their catalog that shows the same model pot that I have:

http://www.hiltsmolds.com/LeadMeltingEquipment.htm

Correction, that shows the Mk II version of the Hot One. Mine was the original version, with the heating element on the inside of the pot. The Mk. II has it on the outside, under the pot. I think I prefer the original version.

Now, as I said, mine is a small ladle, it holds a couple of pounds. There are larger casting pots that hold several pounds of lead, and that have a pouring spigot at the base. I think KV uses a model like that. That's bigger than I needed at the time.

I think casting your own is very rewarding, and if you can find a cheap supply of metal, and have some decent molds, you can make some really nice figures.

Hope that info helps you decide!

Prosit!
Brad
 
One of the things I like about my melting pot is that I do not have to pick up the whole thing. Good thing as it is fairly awkward at the best of times. Also the control of the metal flow when filling the mold is fairly easy. Down side is the spigot can get obstructed by junk in the metal. That wont happen with Brads' melter. Mine holds ten pounds of metal. I did have to alter mine to get the molds to fit under it. I think Brad has been doing this longer than me.

Another thing I would add is ventilation is extremely important if you are melting lead or lead alloy. I think there is less of a problem with Pewter. It also has a lower melting and flowing point than lead. This also means your silicon molds will last longer. Pewter runs two to three times more than lead though. If you use lead work outside if at all possible or with really good ventilation
 
Brad,

Thanks for posting this thread and for the photos.

I have always wondered exactly how the metal was worked.

I'm sure this is a simple question, but I'm stumped.

I understand how the hot metal you pour does not melt a metal mold, but how does a rubber mold survive the heat?

Why doesn't the hot melted metal destroy the soft rubber mold by melting it?

Michael

This is a very cool thread, if you want to follow with a painting thread, I would love to follow it.
 
Thanks for the post Baron. Great pics and instruction. I've been casting my own .58 & .69 minie balls since I was in high school but never have done any soldiers. Melting pots are available from "Dixie Gunworks" or "Cabella's". It's the alloy part of soldier casting that leaves me scratching my head. Looking forward to more pics and instruction on this interesting topic.
 
Nice thread about casting figures Brad. Good job explaining. I might try some casting this summer. I have mostly Prince August molds and use some silicon molds also. I still got a can full of printer's metal. I add a little to my 60/50 mix of lead and tin. They have an old metal place that I go to and buy bars of metal. You can even get rolls of silver and other types of metal bars.Thanks for the pictures. Maybe I will get inspired and do some casting. John
 
Brad,

Thanks for posting this thread and for the photos.

I have always wondered exactly how the metal was worked.

I'm sure this is a simple question, but I'm stumped.

I understand how the hot metal you pour does not melt a metal mold, but how does a rubber mold survive the heat?

Why doesn't the hot melted metal destroy the soft rubber mold by melting it?


Michael

This is a very cool thread, if you want to follow with a painting thread, I would love to follow it.

Thanks very much, Michael!

Good question about the rubber and the heat. I've seen traces of rubber on the tire weights that I use burn as they hit the molten metal (another example to illustrate doing this in a well-ventilated area). But if I'm not mistaken, the silicon added to the mold compound makes it more heat-resistant. The constant heating and cooling will eventually wear the mold out, but they have a life of a couple hundred castings, on average.

The metal molds, too, will warp over time, but they can be pounded back into shape. The trick is to get a piece of carbon paper (if that's still around), place it on a flat surface, place the mold halves face-down on it, check where the carbon is, and then use a mallet to tap them flat again. I got that tip from Ron Ruddell, London Bridge toys.

Prost!
Brad
 

Users who are viewing this thread

Back
Top