English Civil War Cornet (1 Viewer)

blaster

Major
Joined
Sep 10, 2008
Messages
6,045
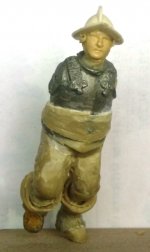
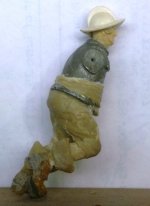
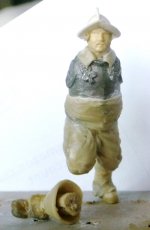
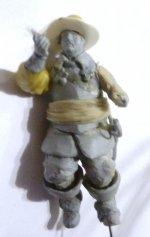
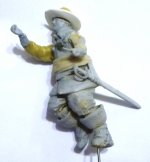
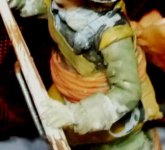
I found this sorry reject from some time back and decided to try to make something out of it. The cuirass is an original piece cast in metal. So too are the boots cast in resin. I will sculpt an overcoat for this piece. I am using Haythonthwaite's book as reference. Helmet is from the ubiquitous Airfix Pikeman. Thank goodness I trimmed my fingernails...:)

Rgds Victor
 

Attachments

  • P1060470.JPG
    P1060470.JPG
    218 KB · Views: 156
  • P1060471.JPG
    P1060471.JPG
    280.2 KB · Views: 157
  • P1060475.JPG
    P1060475.JPG
    298.2 KB · Views: 153
I found this sorry reject from some time back and decided to try to make something out of it. The cuirass is an original piece cast in metal. So too are the boots cast in resin. I will sculpt an overcoat for this piece. I am using Haythonthwaite's book as reference. Helmet is from the ubiquitous Airfix Pikeman. Thank goodness I trimmed my fingernails...:)

Rgds Victor
Looking good...an interesting period TS wise...know very little about it but was just given a book by my daughter about a tour of the Civil War sites.....amusing stories about the tour but excellent info on the various battle's and battle sites as they are today....the book....."Death,Destruction and a Packet of peanuts"..by Keith Pascoe.....the title is a sorta put you off title but I find it informative and a bit amusing in parts.....if you find it in a library, it is worth a read.....cheers TomB
 
Hello TomB,

Thanks for looking. I also use the Europa Militaria Special book on the ECW which has reference on re-enactment photos.

I was always interested in the ECW. I acquired quite a number of re-released ECW Airfix figures about 10 years back as well as E-bay stuff. Some of the parts were excellent, the arquebus, the breastplate thigh protection, the stocking feet etc. However, there were some parts within these kits which I felt needed improvement. The breastplate was too narrow, the helmet too small, the shoes were too small, the boots were all wrong etc. Sometime back, I resculpted some of these accessories and made metal and resin castings in the hope of speeding up my conversions. But some of the resin conversions turned out wonky with air bubbling (what did you expect - simple home casting without a vacuum). So I abandoned some of these figures for a while - short attention span syndrome. I had ever completed only two converted ECW figures - a musketeer and a pikeman which can be seen on my profile page.

I am redoing these old figures (incl other periods) as I feel that I can do much better now. You'll have to forgive the messy manner in which these pieces are sculpted. At different times, putty can take on different colours depending on the amount grime present on your fingers. When I am satisfied with the basic pose, I normally spray on a light grey primer to highlight imperfections. So my threads are more of a disclaimer on how not to sculpt....:)

Rgds Victor
Victor.....Your Book appears to have all you need for the ECW.....I checked out Google Image and got some good pictures there some time ago...I think the re-enactment groups do a great service....the picture's of them all kitted out look great...you can see the actual history...painting and drawing are okay but the real thing is splendid...... your sculpts look like they are coming on fine... I would like to see them when they are finished.....everything takes time........I have tried doing molds with resin without any luck ...can do flat casting with resin okay..but no good at 3D casting....I did a Roundhead horseman some time ago...those breasts plates are hard to do...cannot get them right......may have posted a pic in the how to diorama section with a plasticine castle I was doing.....cant remember......time goes so fast these days.....the putty....what type is it...the only putty I know is the stuff you use on the old fashion windows to set the glass in....keep enjoying doing your conversions....much more fun being involved with the figure's than just buying them off the shelf.......cheers TomB
 
Hello TomB,

I suspect that your successful flat resin castings were done using open single moulds, allow the air bubbles to escape? I have also used this rather successfully to cast large wall sections. Depending on the mix (and age) of the casting resin and catalyst, I have a spotty record of doing smaller castings, including boots and torsos. When the resin ages, it appears to produce more bubbling. I have found the shelf life of these products to be not more that a couple of months when opened.

i use several types of epoxy putty, self curing when mixed in equal portions. They range from rubbery types (Kneadatite) thru waxy types (Aves) to rock hard types (A+B). I don't use Milliput at all as I found it to be very difficult to knead (similar to Sculpey), and it always seems to set off in bits when aged. For my one off pieces, I use only A+B.

I agree with you that some of us get more fun out of sculpting our own figures, but I guess the buyers and producers of toy soldiers are really the drivers of this hobby...:)

Rgds Victor
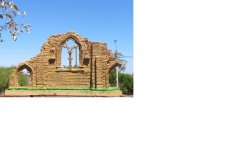
The putties are not available where I am, I am lucky to be able to obtain sculpey.....sculpey now seems to be softer...some is...some aint...I find the harder sculpey bake's stronger.....I use a frypan to bake the sculpey...had to buy a new one today...the old one gave up the ghost.......have not used a lot of resin so I dont really know much about it.....if you would like a quick way to make molds for simple things...face's...boots...legs etc....use sculpey for the mold......simply flatten out a bit of sculpey...right size and thickness...then press object into it half way...wet sculpey and object so they dont stick....bake half mold.. ..carefull when taking mold from frypan....when sculpey is hot it breaks very easily....make sure mold is cold....replace object...press another lot of sculpey over the top....carefully remove top soft mold and baked until hard ....you can actually pour resin into these mold but they leak badly because the sides dont seal too well.....You can put your putty into these molds and press mold shut....I do this with sculpey where I can to save a lot of time with pre-made bits and piece's so I do not have to remake everything again....the molds are not perfect...you still have reshaping to do but it does save time.....You may be able to do the mold bit with the putty...if you try it...you will find it is a handy way to reproduce small items....worth a try.....I have used plasticine to make resin walls and doors...flat impressions into the plasticine......Warning....those little pkts of colored plasticine are no good to use.....you need good quality pkt plasticine......I will see if I can add a resin ruin picture I did using the plat impression molds......I made all the bit from sculpey ..pressed into plasticine and poured in resin......if I wanted to make a reslin mold of the resin bits and piece's ... I would have to reverse the procedure...something like that ....once everything was done I stuck them together with super glue or fast-ly drying resin paste.....wow...what a novel....hope you can understand what I have been raving about...regards TomBResin ruin.jpg
 
Hello TomB,

Shame that you can't get the epoxy putty. They may come under different labels in Australia? One other thing that I found with sculpey and similar was that after moulding and baking, they became brittle after a couple of years and literally disintegrated. I had made Popeye, Donald Duck etc using these colourful clays but don't have any left. Maybe its our climate and humidity - things don't last in the tropics.

That is a nicely cast backdrop ruin without any visible air bubbles on the surface.

I attach some recent progress on my ECW cornet.

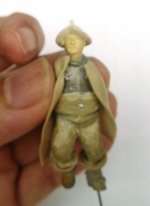
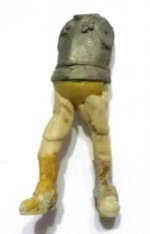
Pic 1. I remove one leg to make it easier to resculpt the boots and legs. The pic shows that the folded down boot top opening has been re-sculpted. Foolishly, I had made castings of even the folded top opening - hence it came out as a solid item. If you look closely, the boot castings made of resin has air bubble imperfections which have to be filled in with putty.

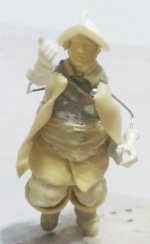
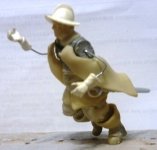
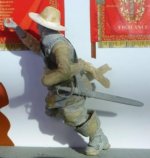
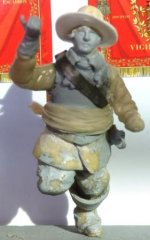
Pic 2 and 3. The trousers fully sculpted and boots reattached. A leather coat was worn underneath the breastplate. The penultimate pose has him holding the imaginary standard with two hands and advancing rapidly with his cloak billowing behind. Sword is Airfix and I will be sculpting the arms next. I probably will change the helmet for a brimmed hat with feathers.

Face looks like Peter Ustinov.

Rgds Victor

P1060479.JPGP1060484.JPGP1060485.JPG
 
Hello TomB,

Shame that you can't get the epoxy putty. They may come under different labels in Australia? One other thing that I found with sculpey and similar was that after moulding and baking, they became brittle after a couple of years and literally disintegrated. I had made Popeye, Donald Duck etc using these colourful clays but don't have any left. Maybe its our climate and humidity - things don't last in the tropics.

That is a nicely cast backdrop ruin without any visible air bubbles on the surface.

I attach some recent progress on my ECW cornet.

Pic 1. I remove one leg to make it easier to resculpt the boots and legs. The pic shows that the folded down boot top opening has been re-sculpted. Foolishly, I had made castings of even the folded top opening - hence it came out as a solid item. If you look closely, the boot castings made of resin has air bubble imperfections which have to be filled in with putty.

Pic 2 and 3. The trousers fully sculpted and boots reattached. A leather coat was worn underneath the breastplate. The penultimate pose has him holding the imaginary standard with two hands and advancing rapidly with his cloak billowing behind. Sword is Airfix and I will be sculpting the arms next. I probably will change the helmet for a brimmed hat with feathers.

Face looks like Peter Ustinov.

Rgds Victor

View attachment 131647View attachment 131648View attachment 131649
Figure is looking good.......will look good as a standard bearer,,,,steel or felt hat......Am familiar with the climate....have spent a bit of time on the Malayan mainland ...Penang,,,Sungi Seput..Ipoh...Kalua Kansar..KL....Malacca, and Borneo...and place's in between ...did two tours with the Aust Army...Malayan Emergency and Indonesian Confrontation....many yrs ago now......strange you had trouble with sculpey .....maybe not baked long enough....thin sections will break.....I always use wire in my models to stop limps falling off if dropped on a hard floor....that resin is a problem,,,I found it is a bugger to use so I dont bother with it anymore....I did read somewhere if you have a open flat mold...like my Ruin ....pass a hair drier slowly over the surface...fair distance away as the air will move the resin.....it seemed to work...I believe with sealed molds you need to shake ...every now and again as you pour...and poke a bit of wire or something inside the mold ...now and again to try and move the resin into the hard place's....I guess you know this anyway.....In the diorama..how too....above the sculpting forum (this one) I am doing a very quick Nurse and patient figures....the legs (female) and heads are made from the type of mold I was talking about... I.make the objects (heads...legs...whatever) then do a rough mold. so I do not have to spend heaps of time repeatedly remaking every single object ...save's me a lot of time....looking forward to your figure progressing.,,..... .regards TomB
 
Figure is looking good.......will look good as a standard bearer,,,,steel or felt hat......Am familiar with the climate....have spent a bit of time on the Malayan mainland ...Penang,,,Sungi Seput..Ipoh...Kalua Kansar..KL....Malacca, and Borneo...and place's in between ...did two tours with the Aust Army...Malayan Emergency and Indonesian Confrontation....many yrs ago now......strange you had trouble with sculpey .....maybe not baked long enough....thin sections will break.....I always use wire in my models to stop limps falling off if dropped on a hard floor....that resin is a problem,,,I found it is a bugger to use so I dont bother with it anymore....I did read somewhere if you have a open flat mold...like my Ruin ....pass a hair drier slowly over the surface...fair distance away as the air will move the resin.....it seemed to work...I believe with sealed molds you need to shake ...every now and again as you pour...and poke a bit of wire or something inside the mold ...now and again to try and move the resin into the hard place's....I guess you know this anyway.....In the diorama..how too....above the sculpting forum (this one) I am doing a very quick Nurse and patient figures....the legs (female) and heads are made from the type of mold I was talking about... I.make the objects (heads...legs...whatever) then do a rough mold. so I do not have to spend heaps of time repeatedly remaking every single object ...save's me a lot of time....looking forward to your figure progressing.,,..... .regards TomB

Hi TomB,

Well, then you know the tropics. Sungei Siput, Kuala Kangsar. I was just there for a few days looking around Perak. The Taiping prison, museum, The Palaces at Kuala Kangsar, The train station at Ipoh, Kellie's Castle (do you remember this?). Nice places. I was from Brunei on Borneo, and grew up during the Confrontation. Yeah, this dates you (and me....:))

Rgds Victor
I was in Kedah...I believe that name has change..... in 1955,,,Perak in 56/57....mainly at Sungi Siput and Ipoh and a short time at Taiping.... Taiping is where the Commonwealth War Cemetery is......a few of my mob are buried there.... The first tour....all the sight seeing I did was in the bars...second tour I was stationed in Malacca,,,married then,,,no touring the bars......Everything would have changed now....Sungi Siput was just a small place...a picture show and no bars...tin miine and rubber plantations and a bloody lot of steep mountains and jungle...I am 77 yrs old now so I reckoned I have moved on a bit....enjoyed my early trip to Malaya as a youngster though...always had fun on leave.....Vietnam was much the same as Malaya was when I was a youngster ..bars...bars ...bars and other things ..but I was married so there was nothing to look forward too....have you ever sculptured any figures yourself ?...you mentioned some Walt Disney figure's ....gotta go...got a couple of arms for a nurse baking in the frypan....that is the finish of a Nurse and soldier small dio...cheers TomB
 
Hello TomB,

Kedah is the state, Alor Setar is the capital of that state. It still produces rice. Both Kedah and Perak are still pretty rustic. But Malacca (now Melaka) has changed quite radically. They have transformed the old Portuguese fort into a world heritage site. I visited Saigon (Ho Chih Minh City) two years back. Very dynamic place. Lots of bars. I'm married with kids but that doesn't stop me...:) just kidding.

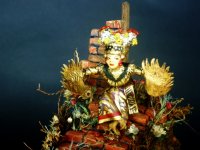
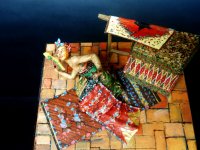
Some unique figures I have sculpted are Balinese dancers. I am into this sort of stuff as well. A Tjondong Dancer and a Kebyar Duduk Dancer.

Rgds Victor

TJ dancer.jpgTomB.jpgTomB2.jpg
 
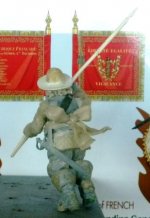
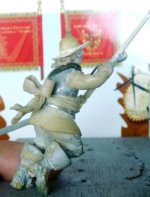
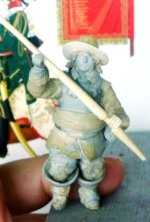
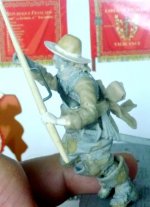
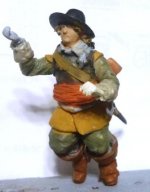
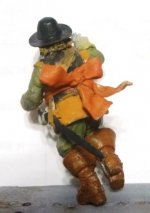
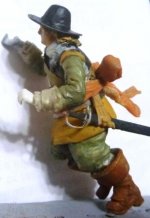
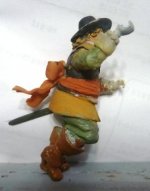
Some progress on the ECW cornet.

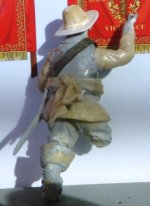
I decided not to use the overcoat as I wanted to sculpt and display a back bow on the sash, fully detailed. I changed the helmet for a hat. Sculpted the right hand. Also started on another ECW standard bearer (I found another pair of homecast resin boots and another cuirass).

Rgds Victor

P1060486.JPGP1060488.JPGP1060496.JPG
 
Some progress on the ECW cornet.

I decided not to use the overcoat as I wanted to sculpt and display a back bow on the sash, fully detailed. I changed the helmet for a hat. Sculpted the right hand. Also started on another ECW standard bearer (I found another pair of homecast resin boots and another cuirass).

Rgds Victor

View attachment 131755View attachment 131756View attachment 131757
Coming on well..are you going to put a helmet on the second figure ?......regards TomB
 
Hello TomB and all,

More progress on the guidon bearer. I changed the hat, added hair, sculpting the bow sash, the arm sleeves, finalising all details except for the hands which will be sculpted last after attaching the guidon.
Rgds Victor

P1060499.JPGP1060500.JPGP1060501.JPG
 
More in-progress shots with the guidon staff itself. Both arm sleeves are sculpted, barring touch-ups and the bow too.

Rgds Victor

P1060506.JPGP1060507.JPGP1060509.JPGP1060510.JPG
 
I started to paint in the basic colours with thin washes of enamels. Hands still awaiting final sculpting after attaching the completed guidon.
Looking very satisfactory from my perspective.
I actaully think that I can complete this piece.

Rgds Victor

P1060515.JPGP1060516.JPGP1060517.JPGP1060518.JPG
 
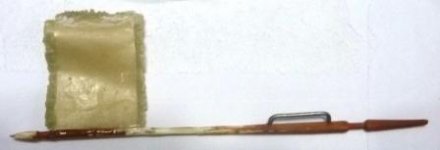
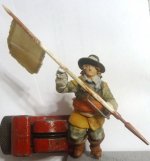
Here is the cornet fully sculpted with fringe. The staff will be attached to the figure before I sculpt the hands.

Rgds Victor

P1060525.JPG
 
Hi All,

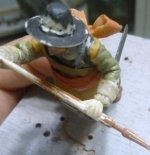
I've removed the fingers and glued the staff to the hands. Fingers will be sculpted to grip the staff properly.

Rgds Victor

P1060526.JPG
 
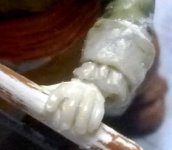
Fingers on left hand are sculpted.

Rgds Victor
 

Attachments

  • P1060530.JPG
    P1060530.JPG
    32.5 KB · Views: 68
  • P1060531.JPG
    P1060531.JPG
    52.4 KB · Views: 70
  • P1060532.JPG
    P1060532.JPG
    34.9 KB · Views: 65

Users who are viewing this thread

Back
Top