Foam Barn structure How To! (1 Viewer)

fishead19690

Command Sergeant Major
Joined
Nov 3, 2005
Messages
2,555
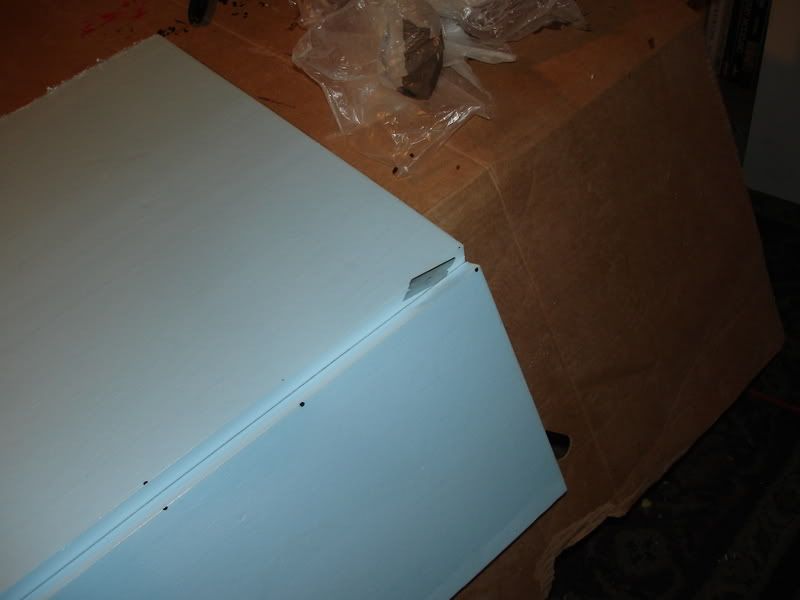
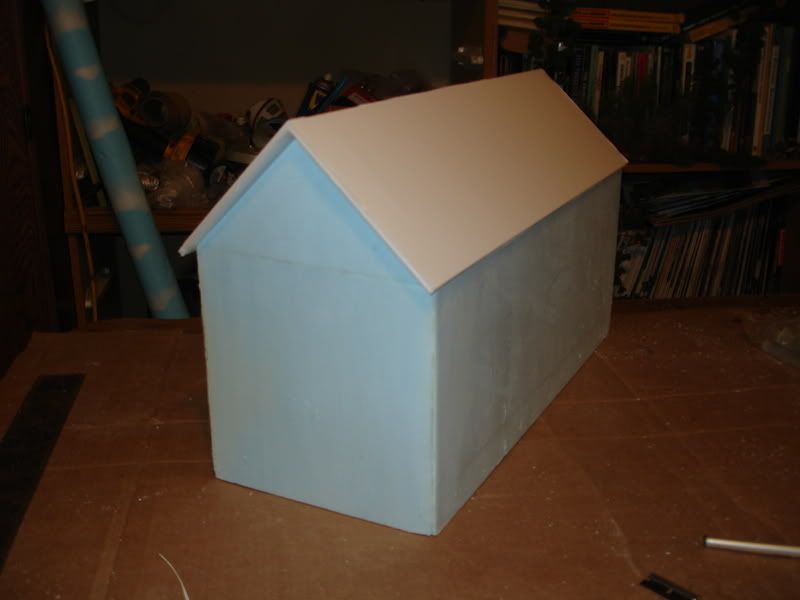
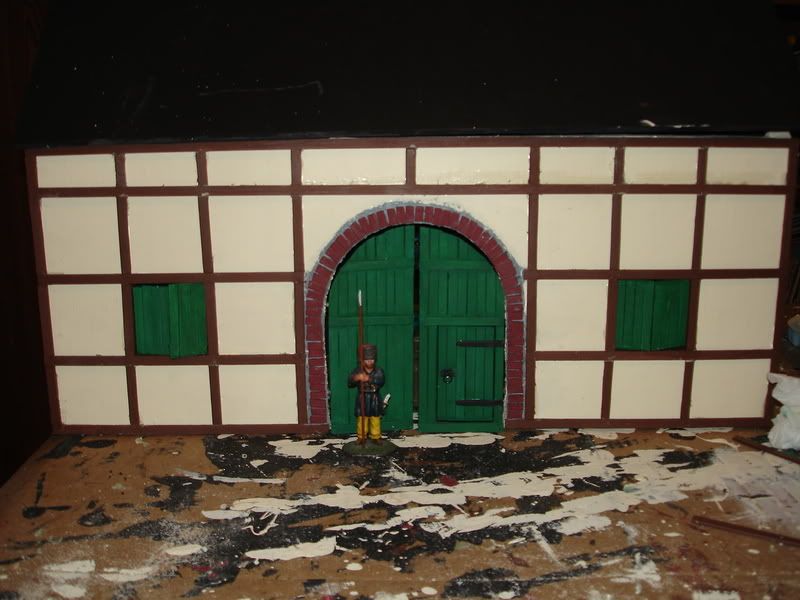
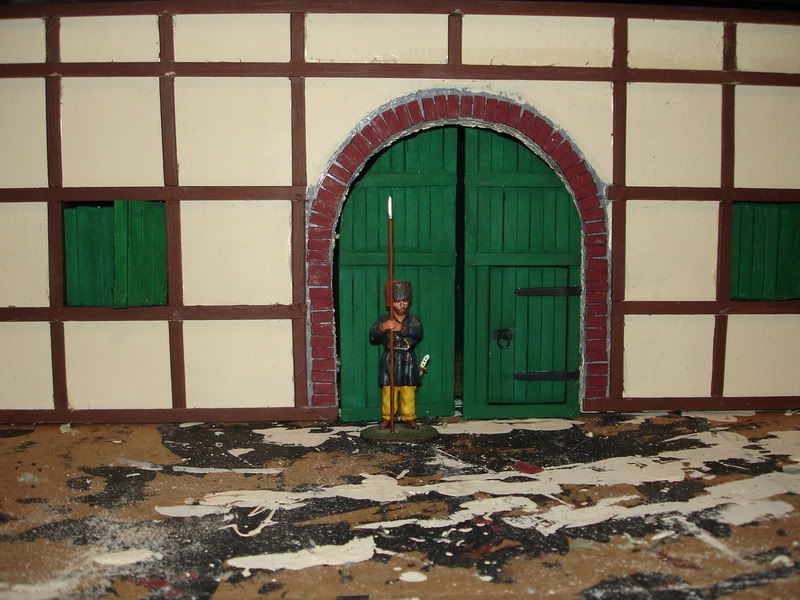
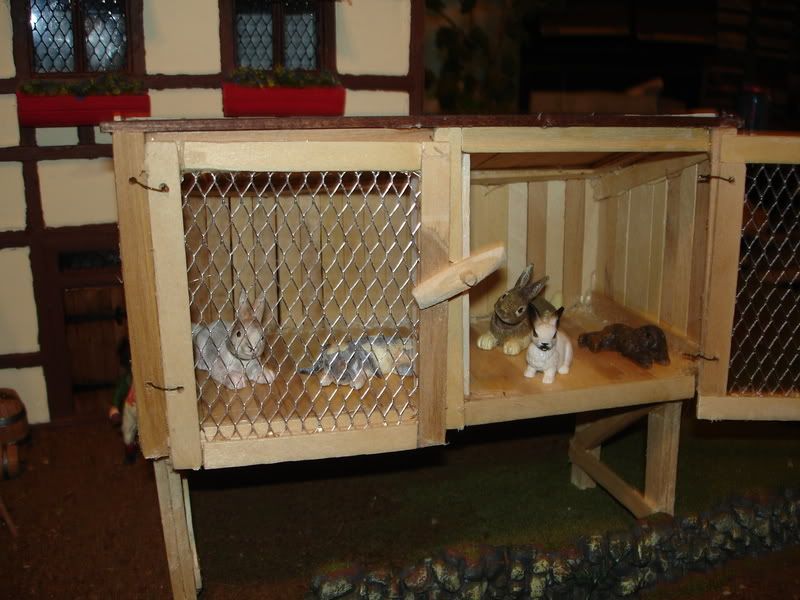
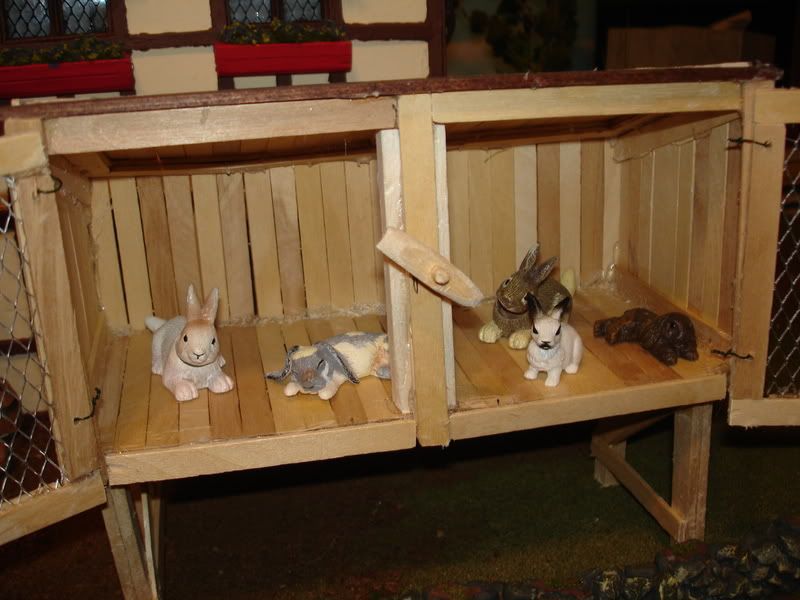
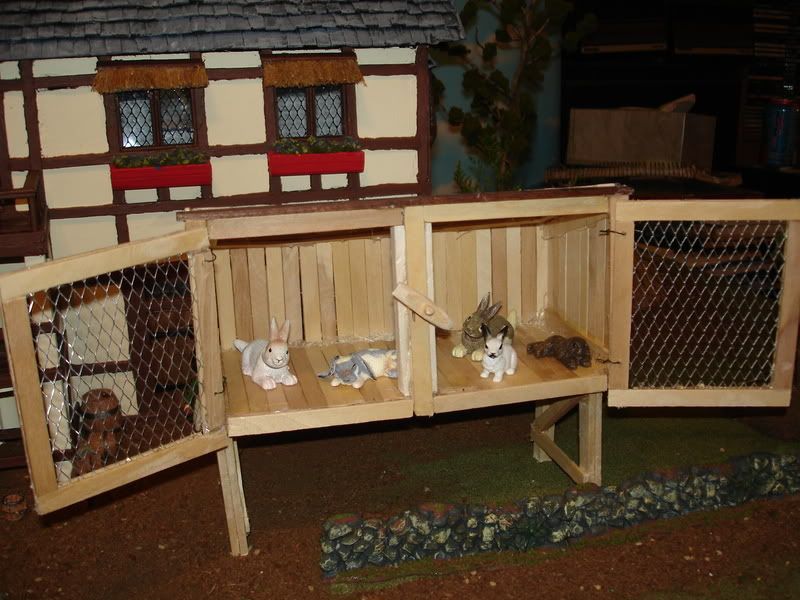
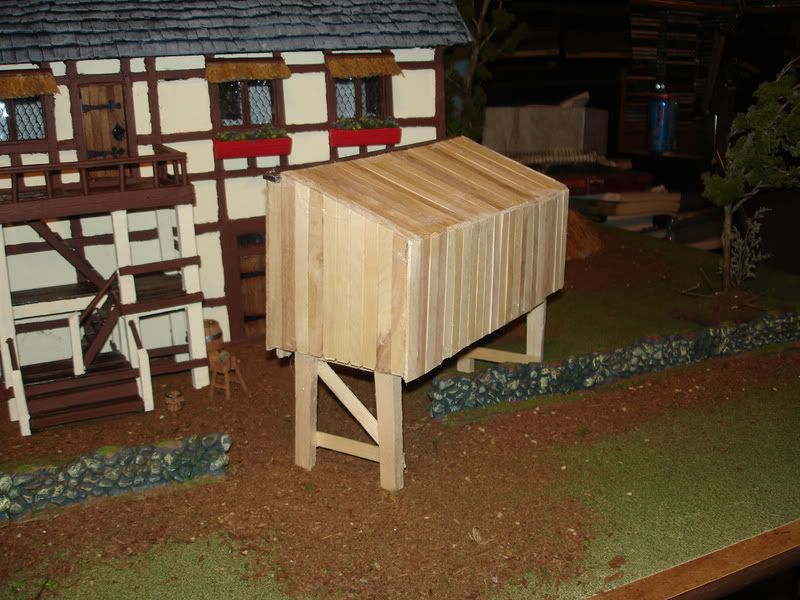
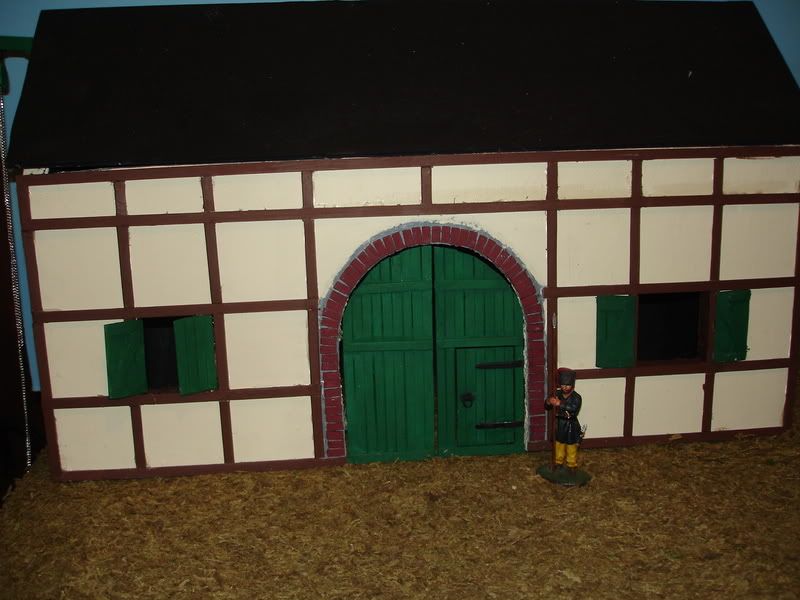
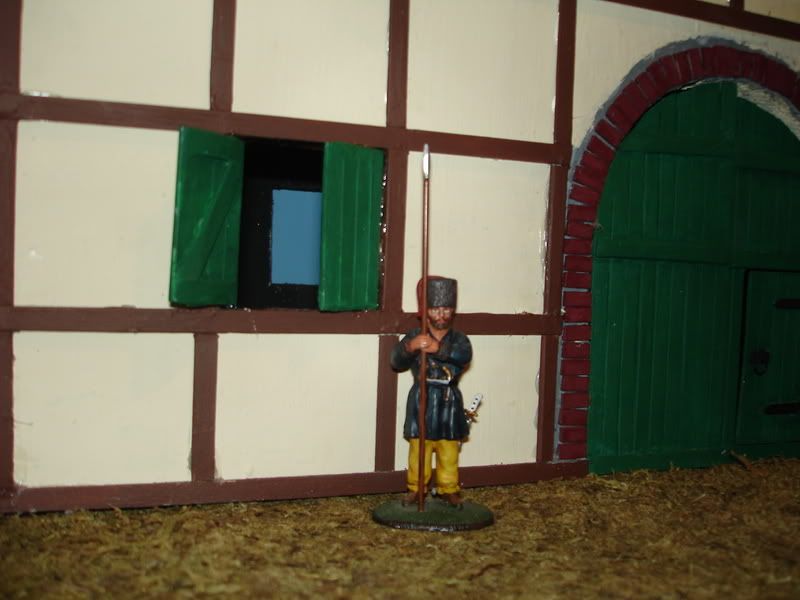
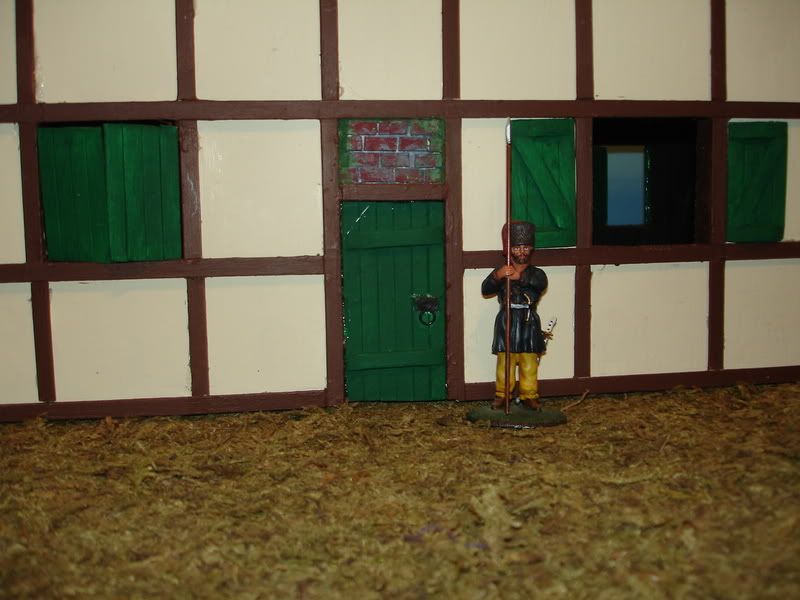
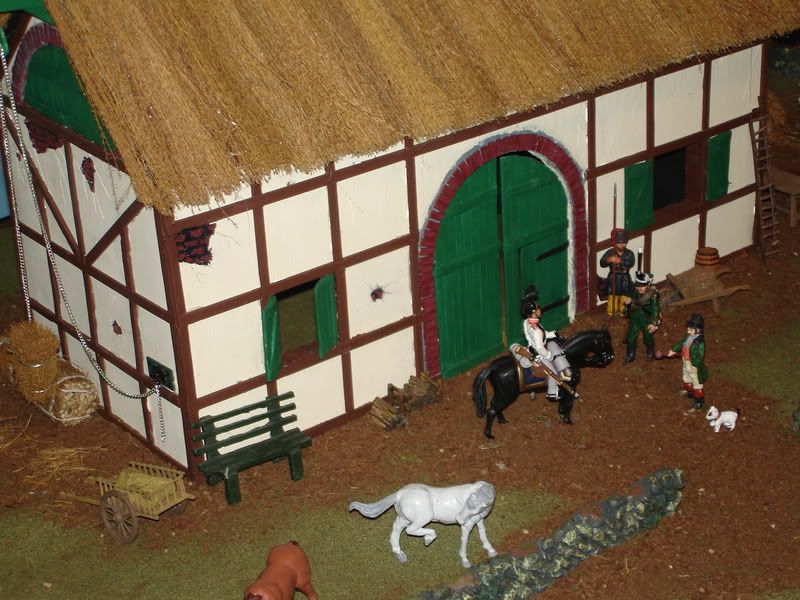
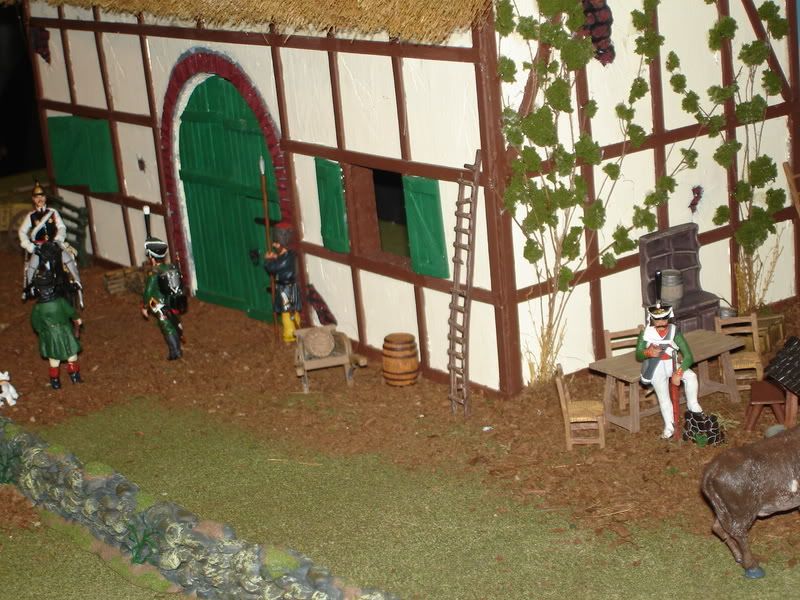
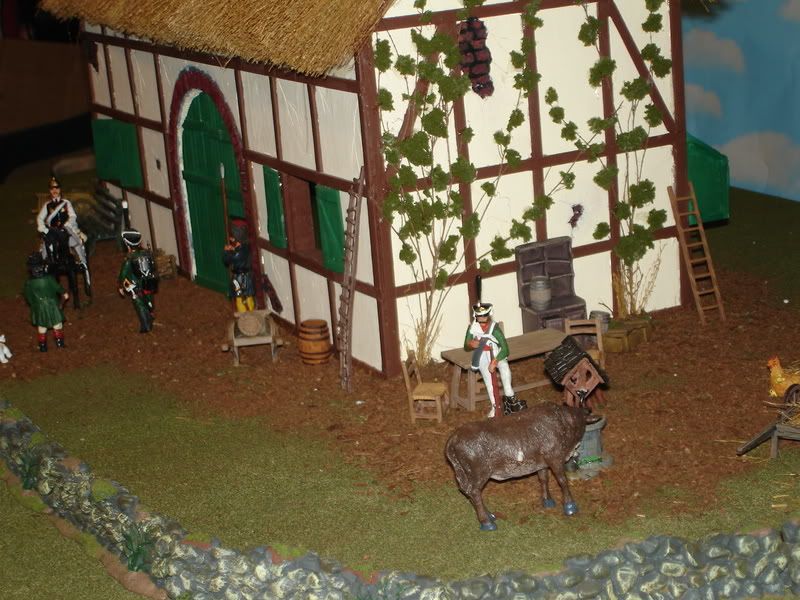
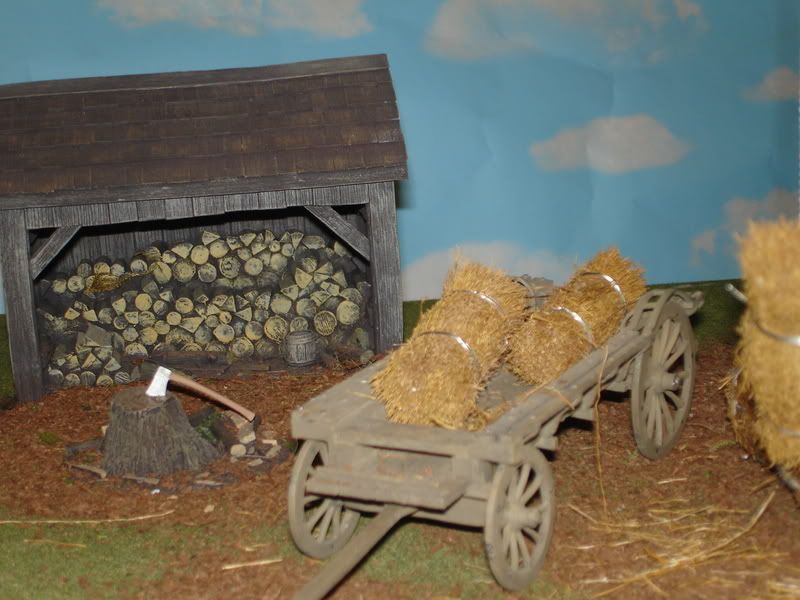
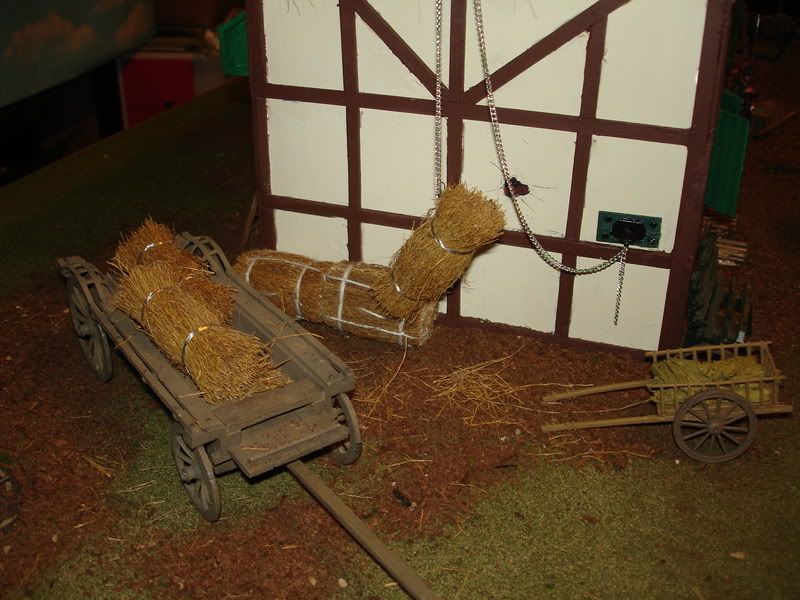
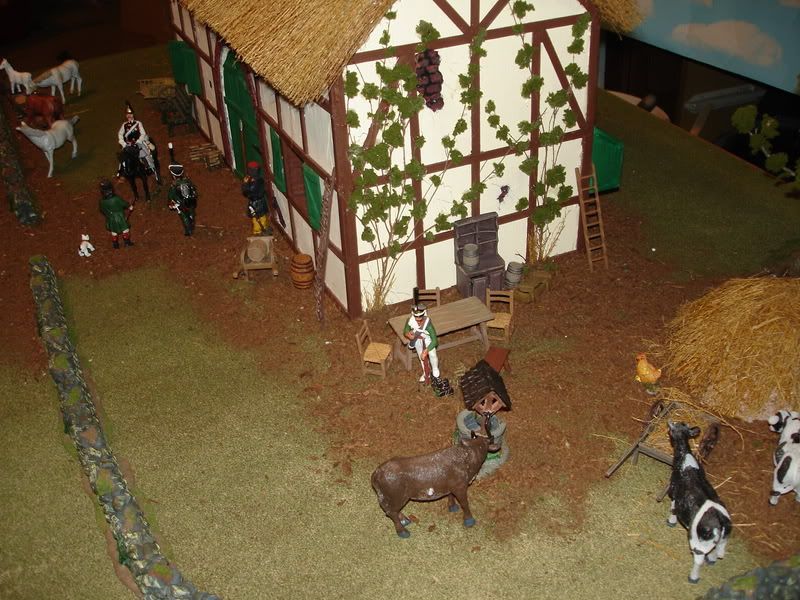
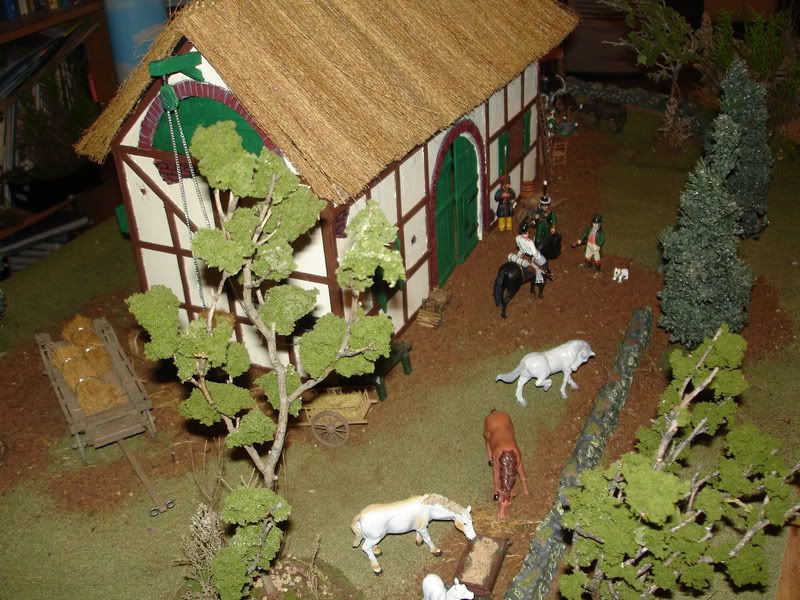
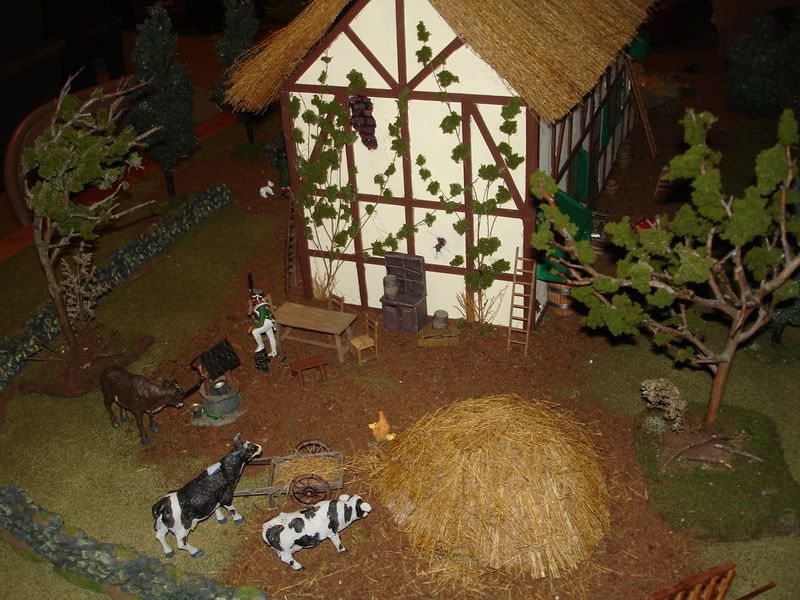
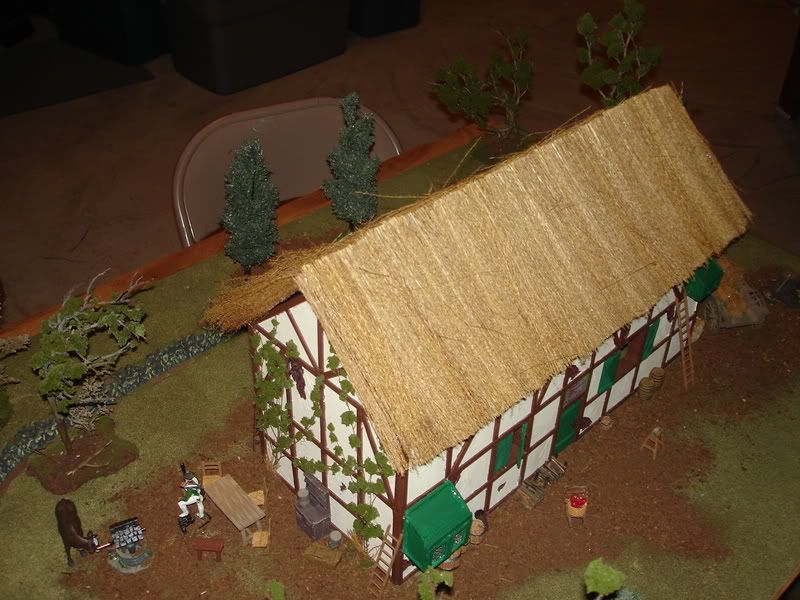
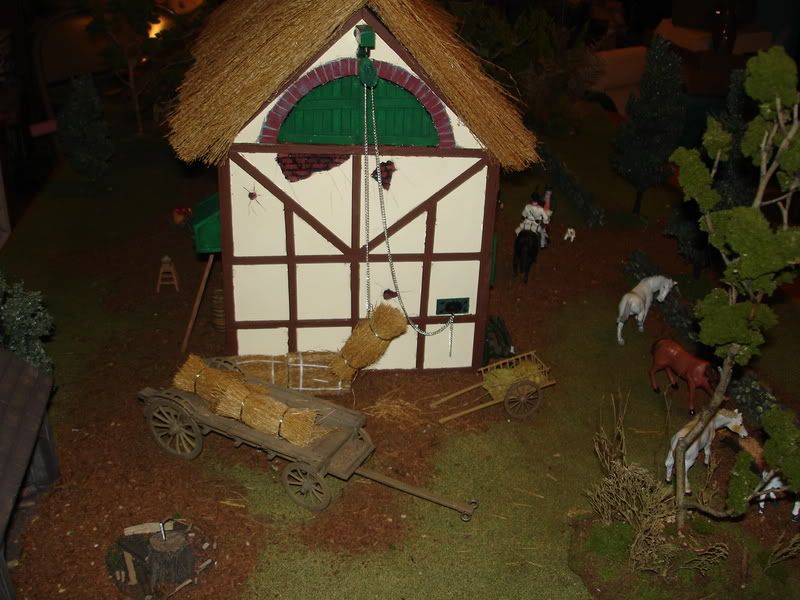
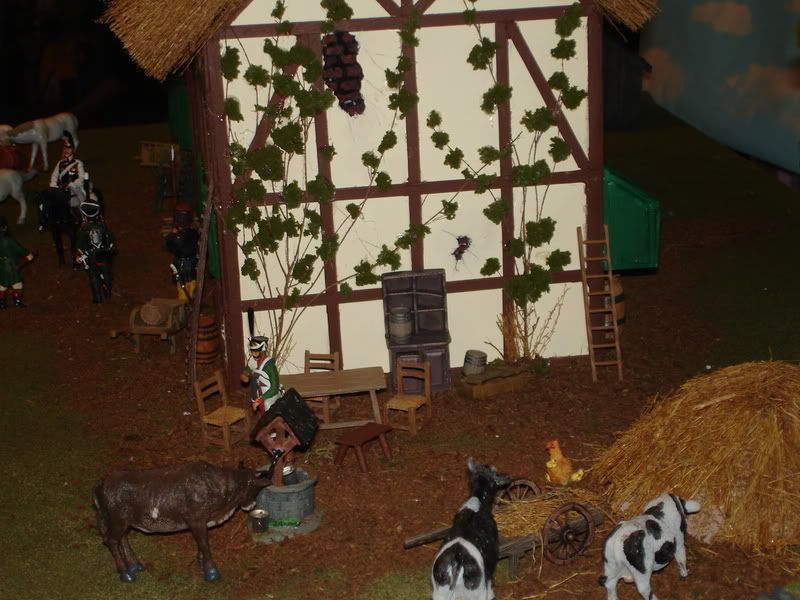
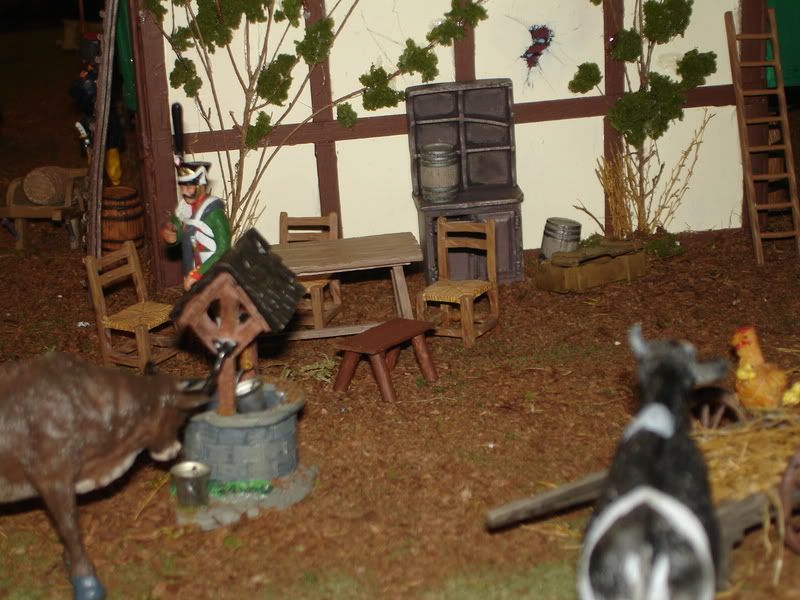
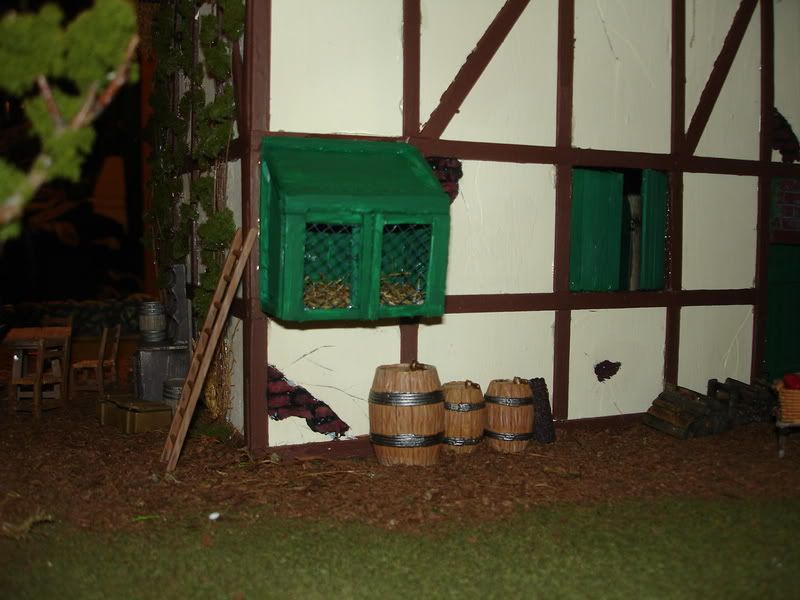
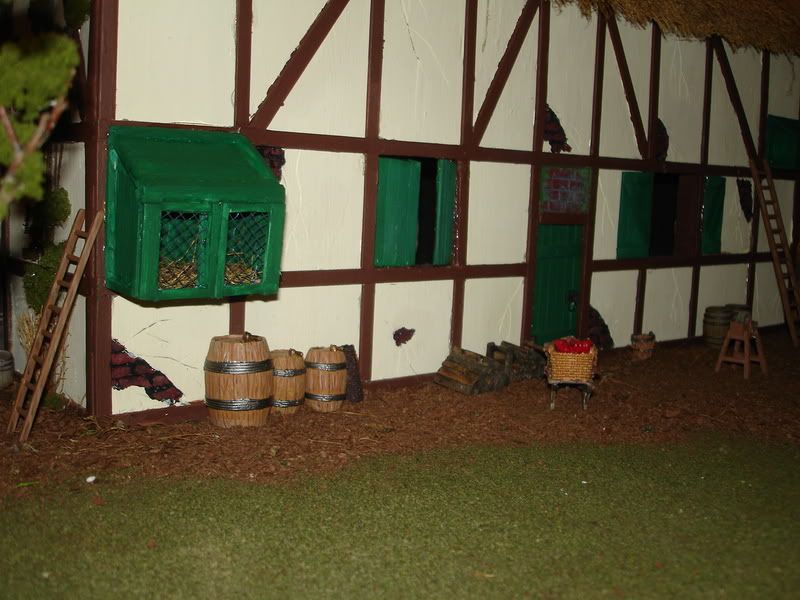
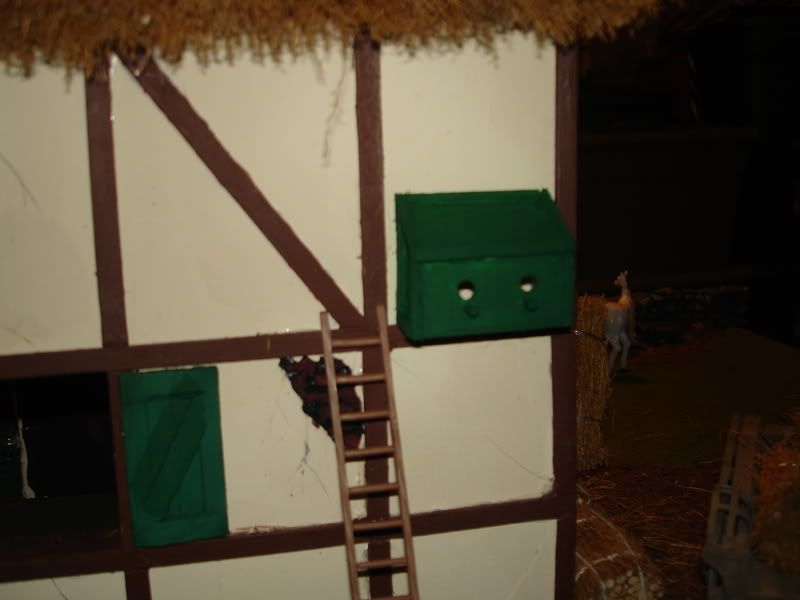
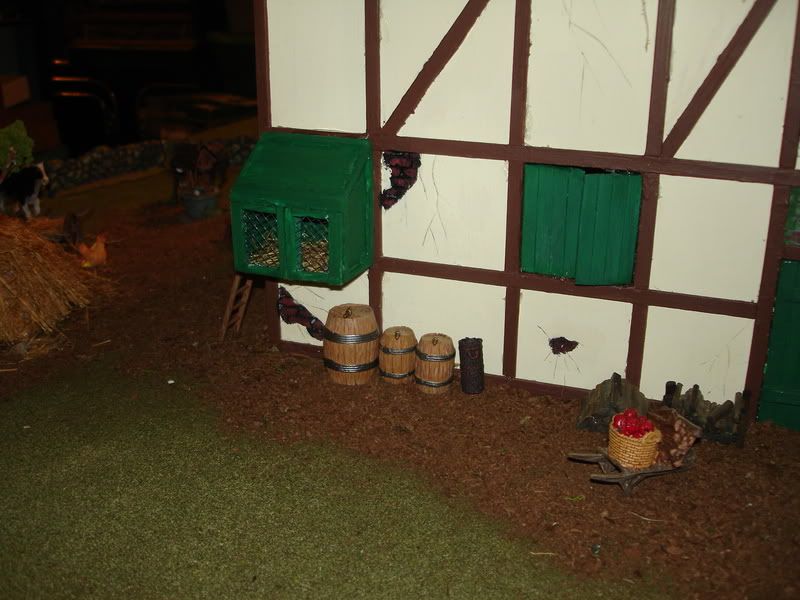
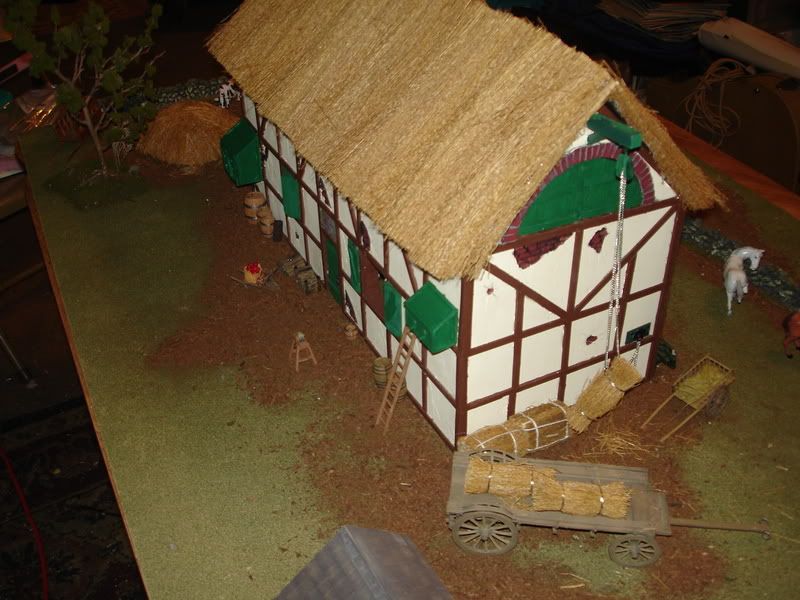
I started a barn to go along with the Inn I just finished and I took a few pictures of how I made the basic structure.
I know a lot of you guys who work with foam will find this very basic but it might help out a few guys just getting started with it.

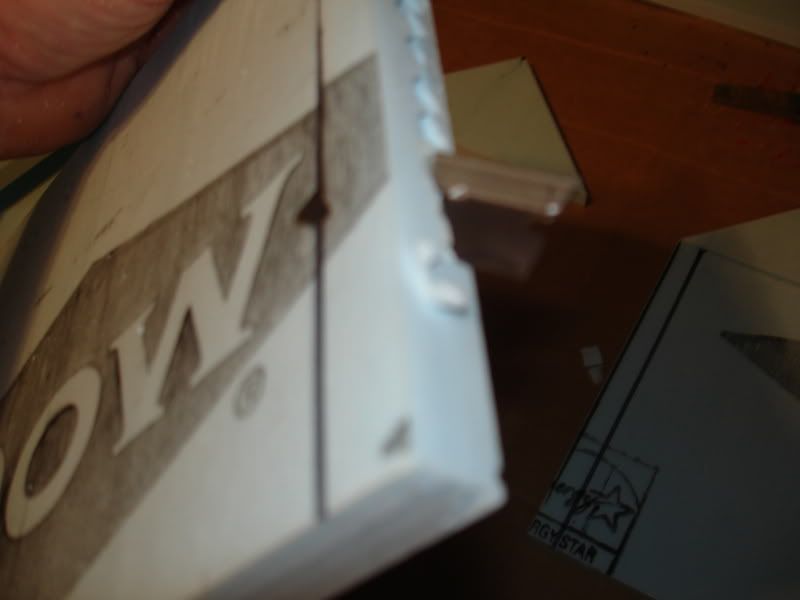
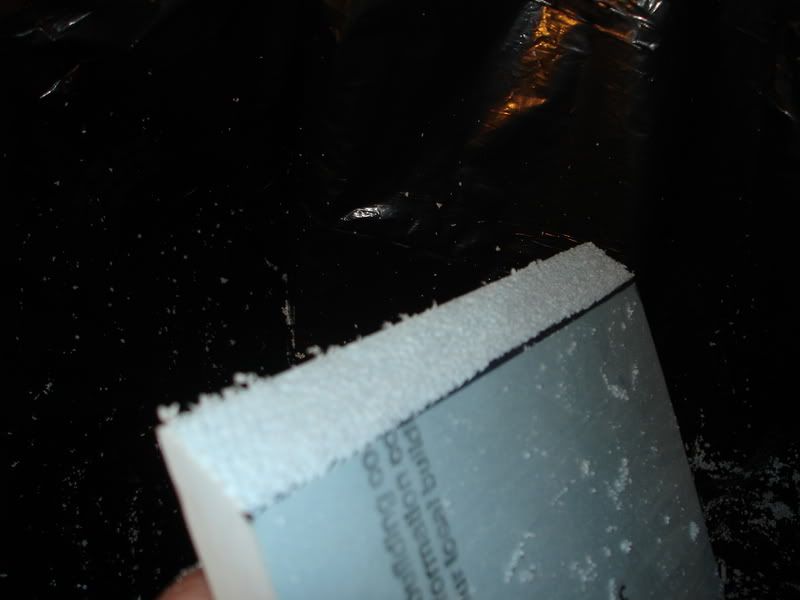
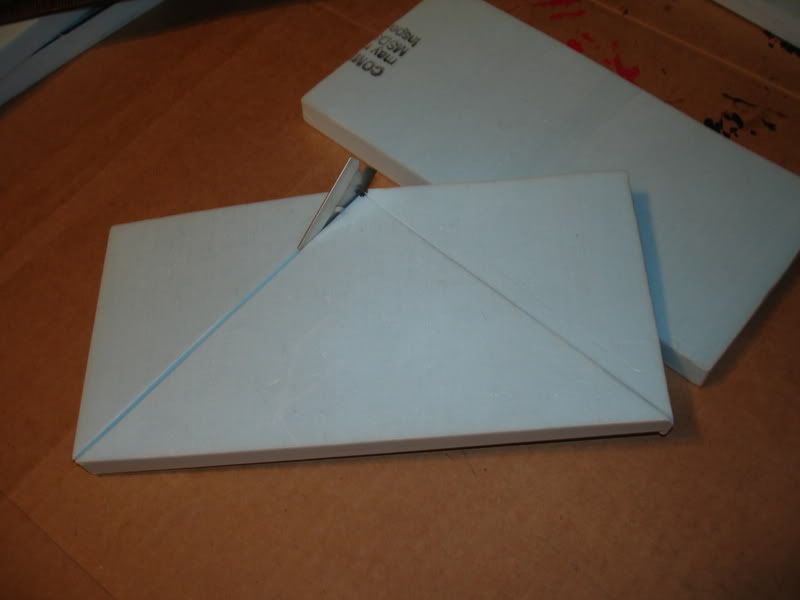
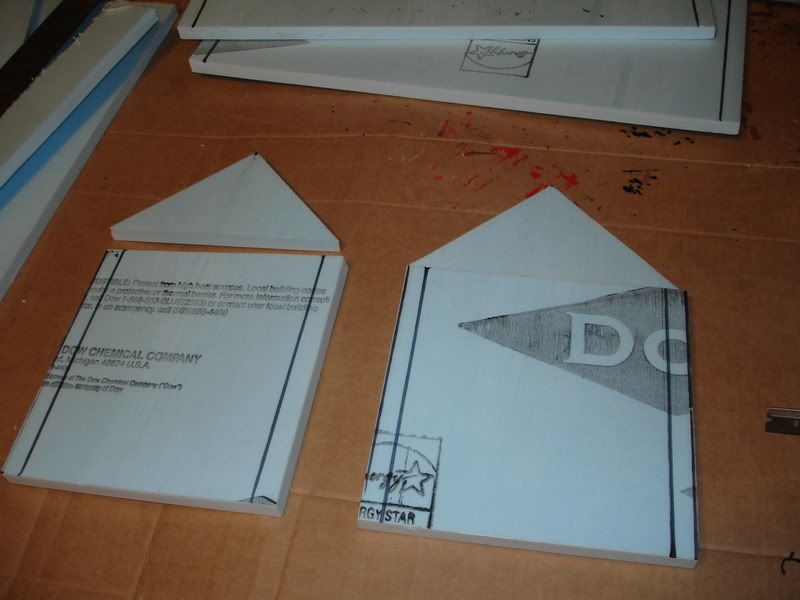
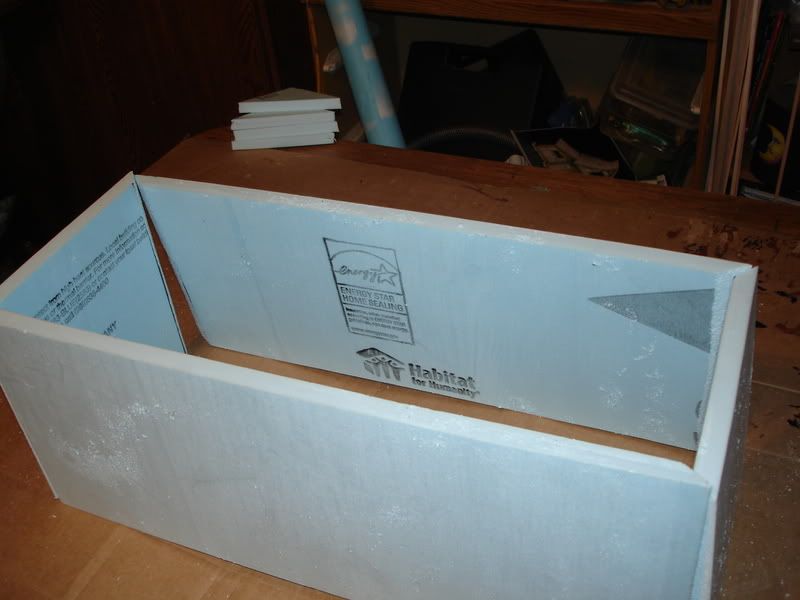
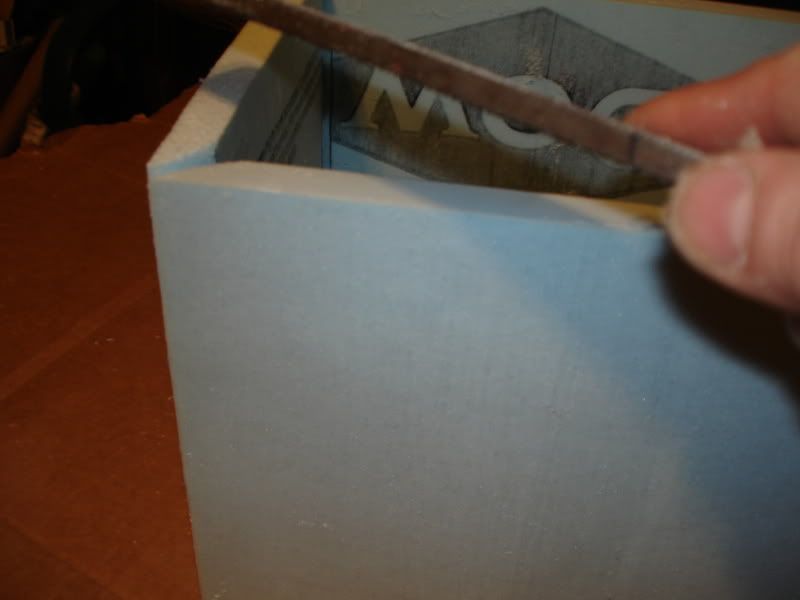
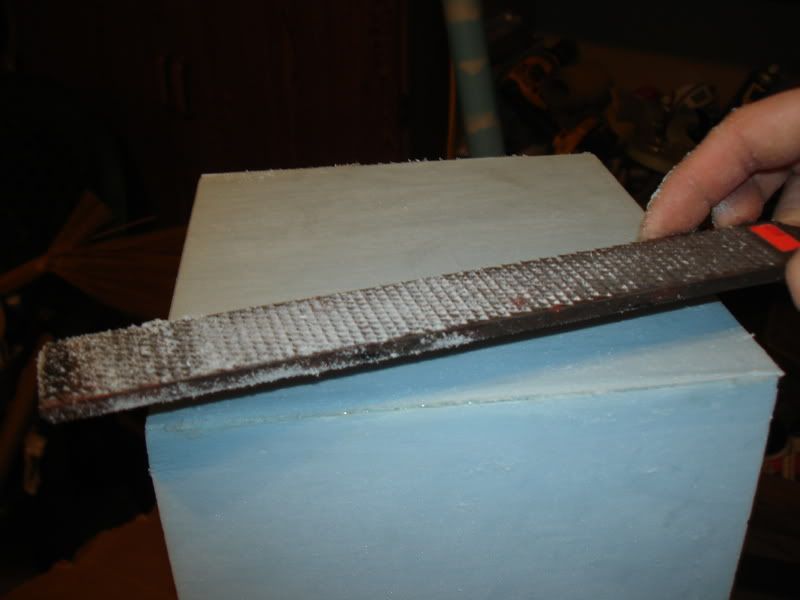
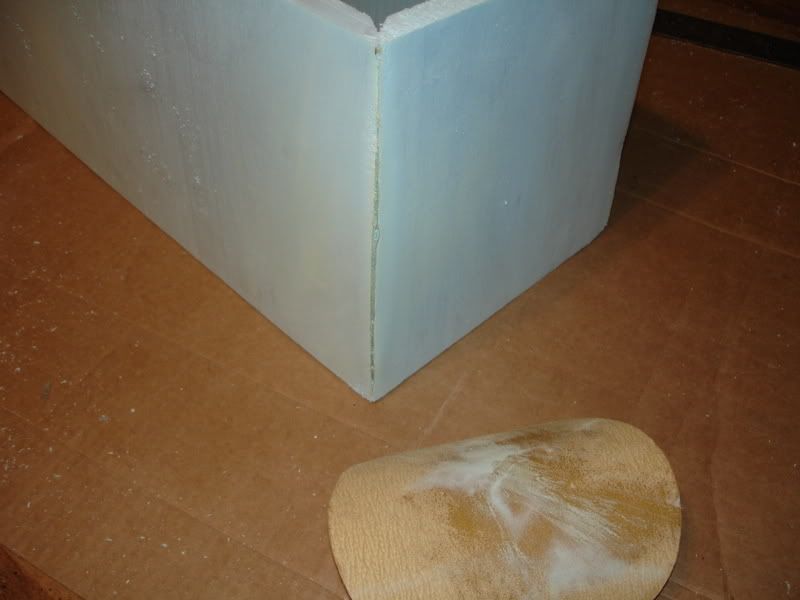
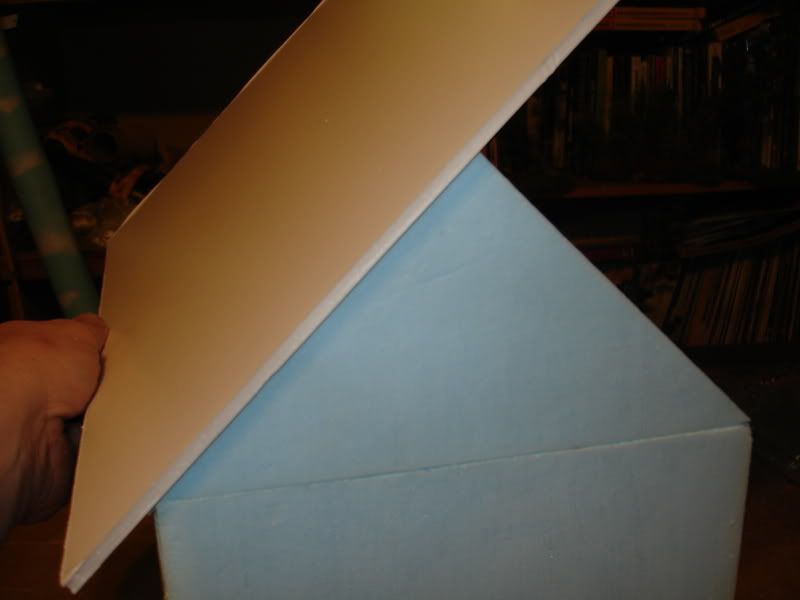
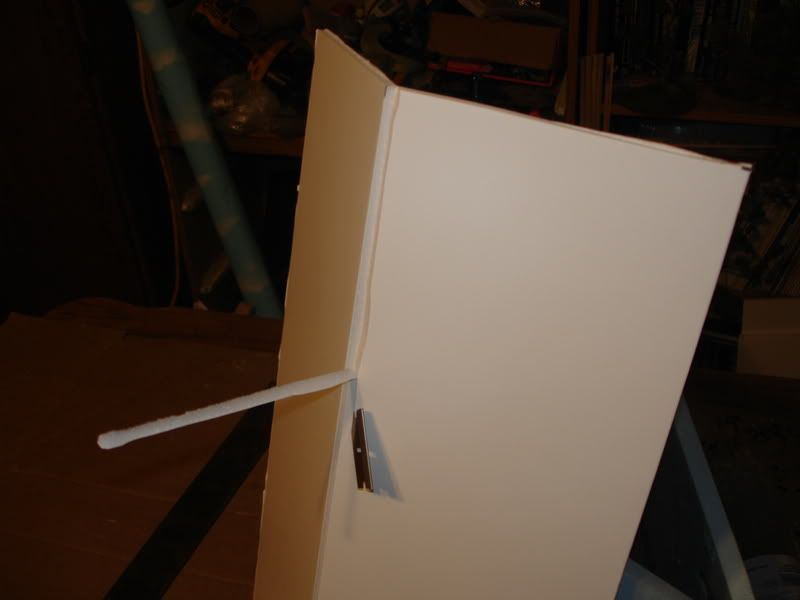
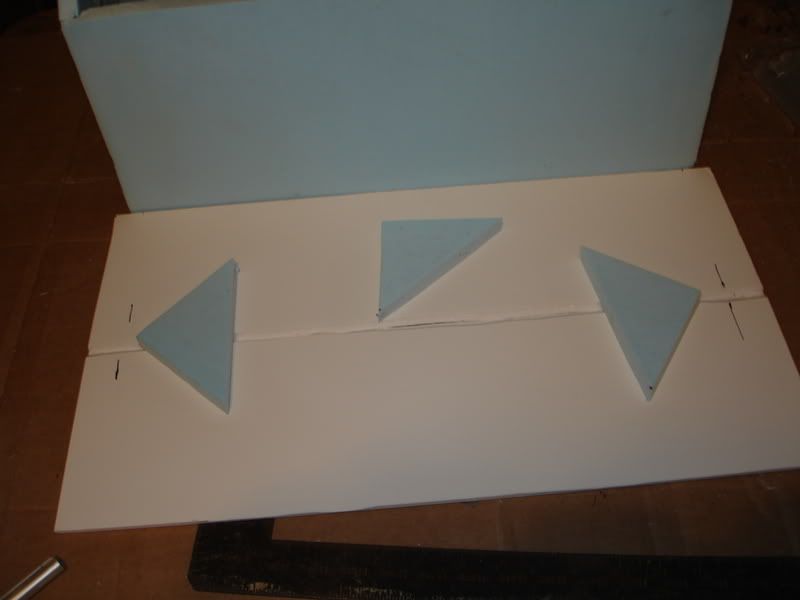
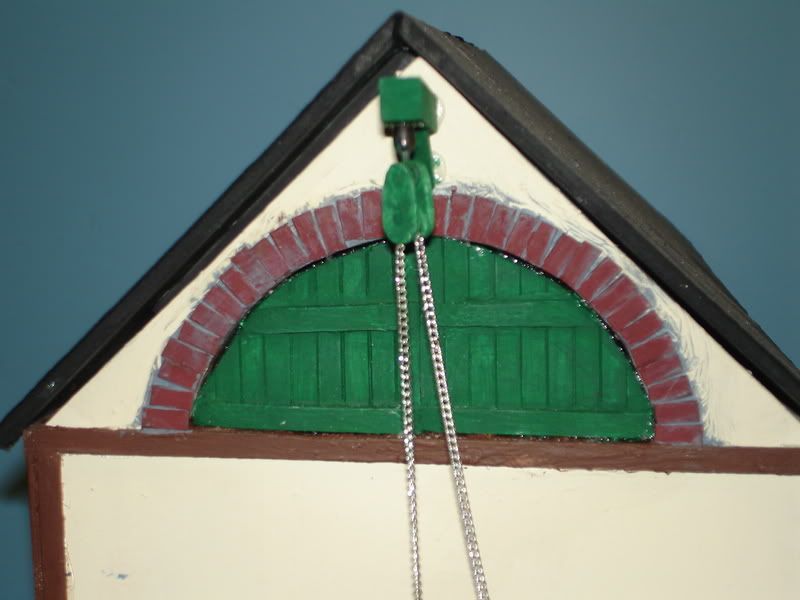
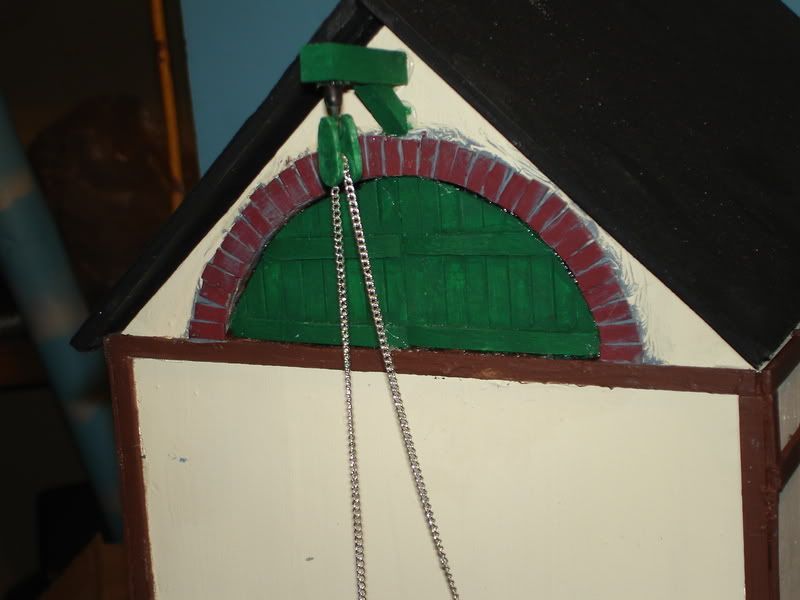
I also added 45 angle cuts to the corners so you don,t get that overlap look on the sides where the foam joins together, this is optional and its easier without them but I don,t like the overlap look on the corners.
I,ll start the photos and you,ll be able get a better idea of how its done.
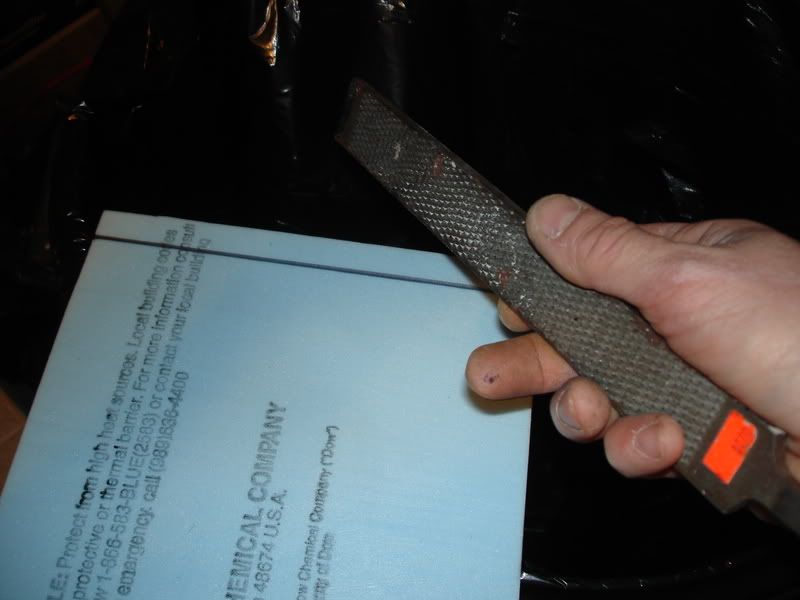
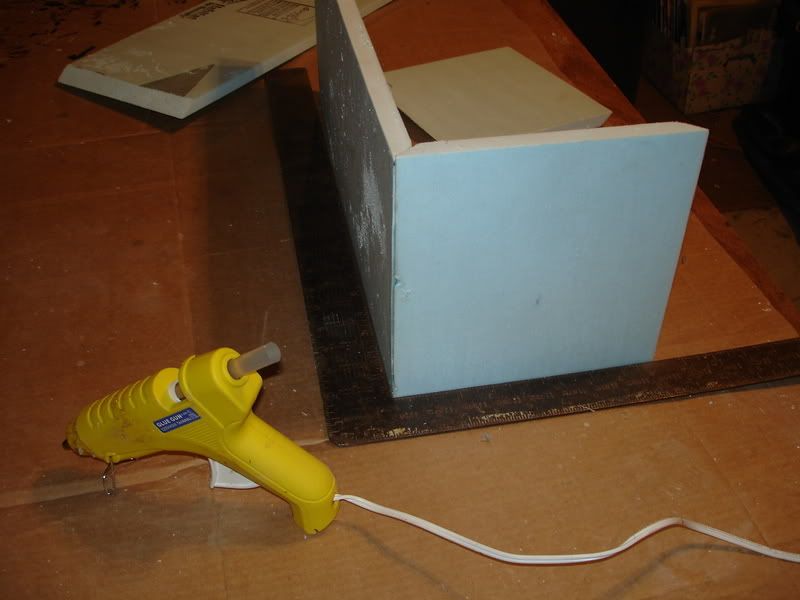
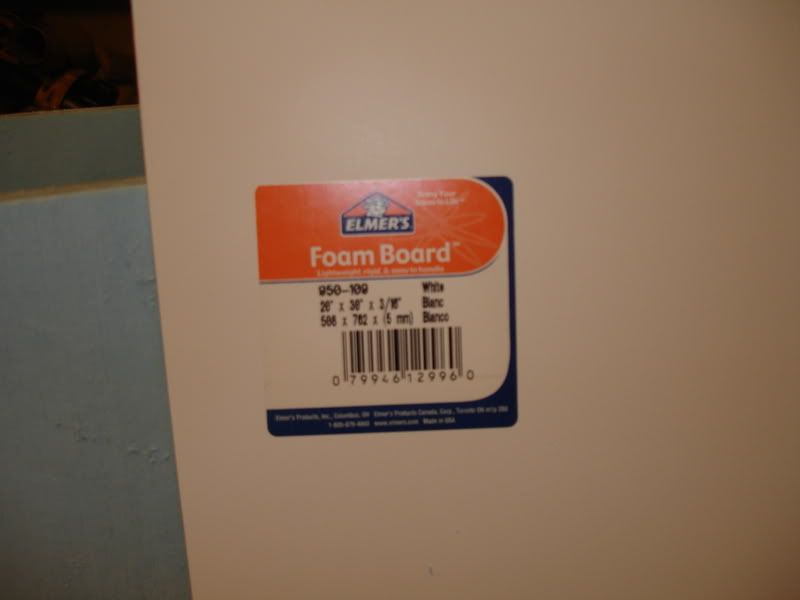
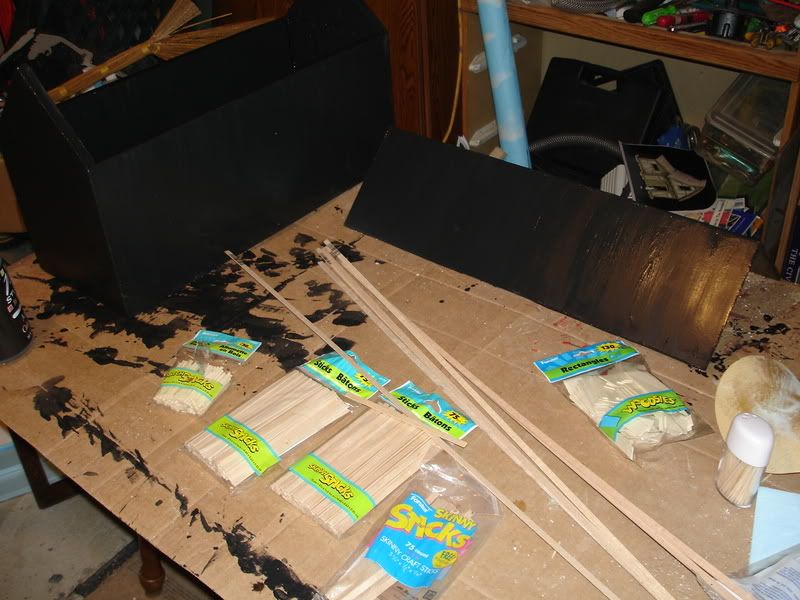
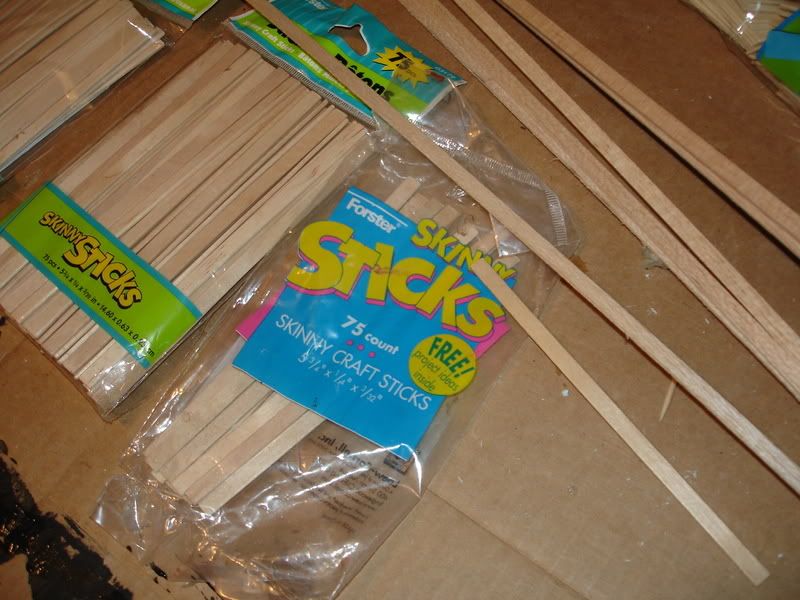
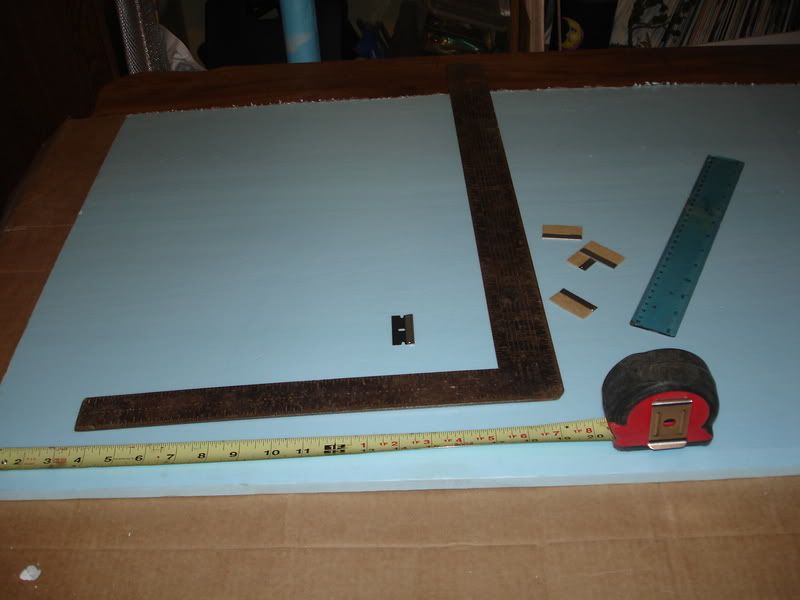
Here are the basics of what you,ll need to get started! A hot glue gun is best for doing this because you can work faster but White or wood glue also will work. Always test what you use on this foam on a scrap piece first because you might get a chemical reaction and melt the foam.
002.jpg

Some of this foam now comes covered in a plastic covering, remove this before you start. It should peel right off.
006-1.jpg

004-1.jpg

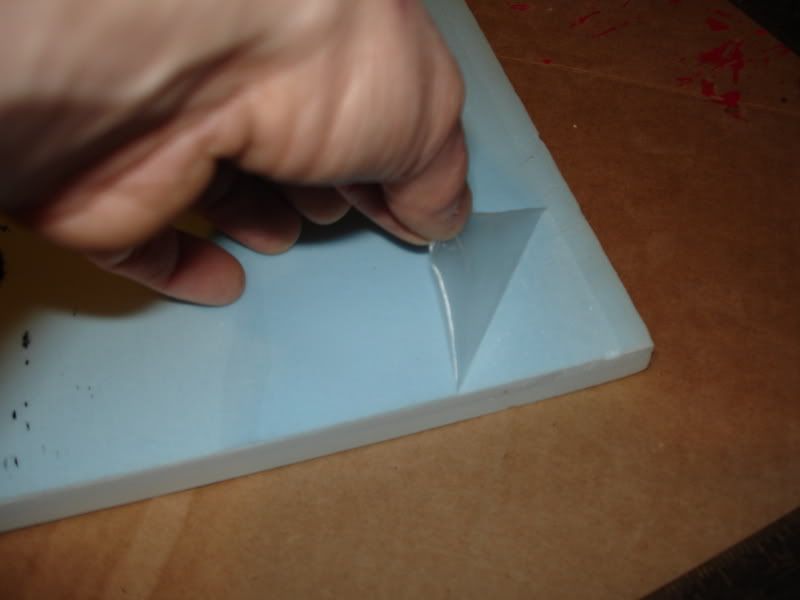
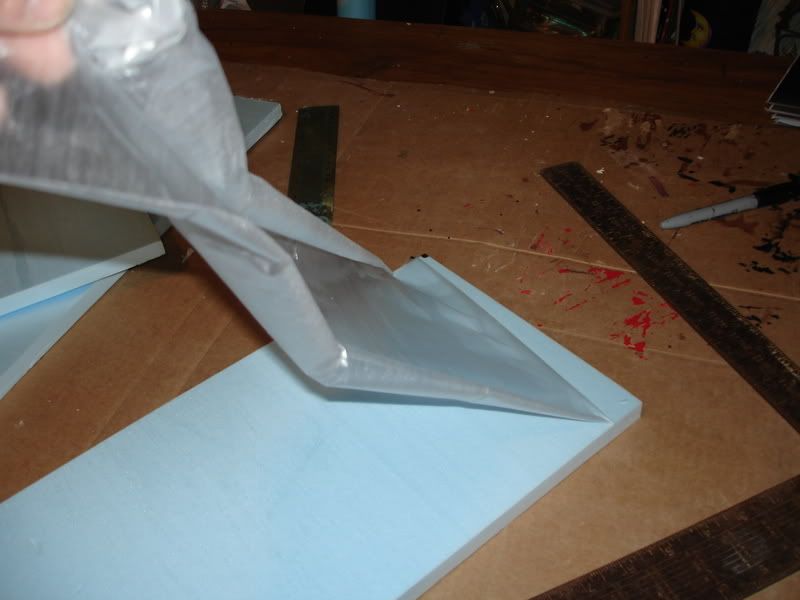
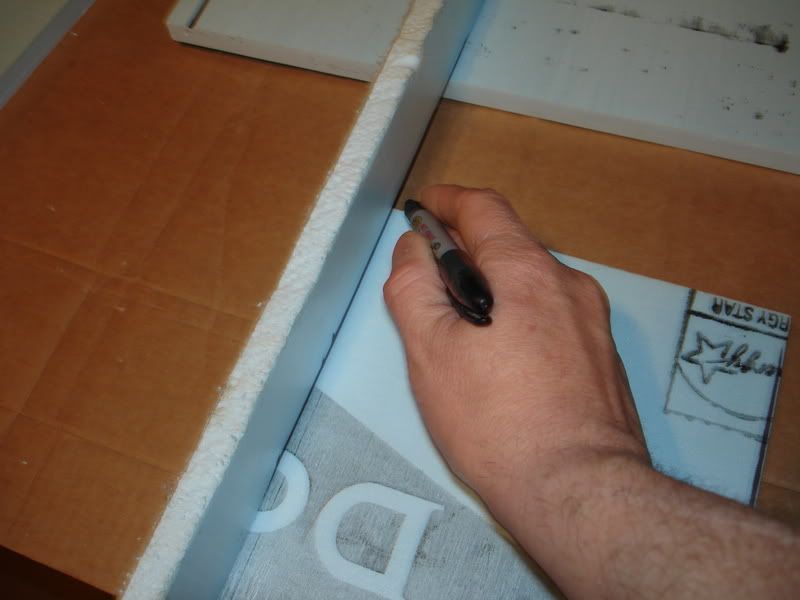
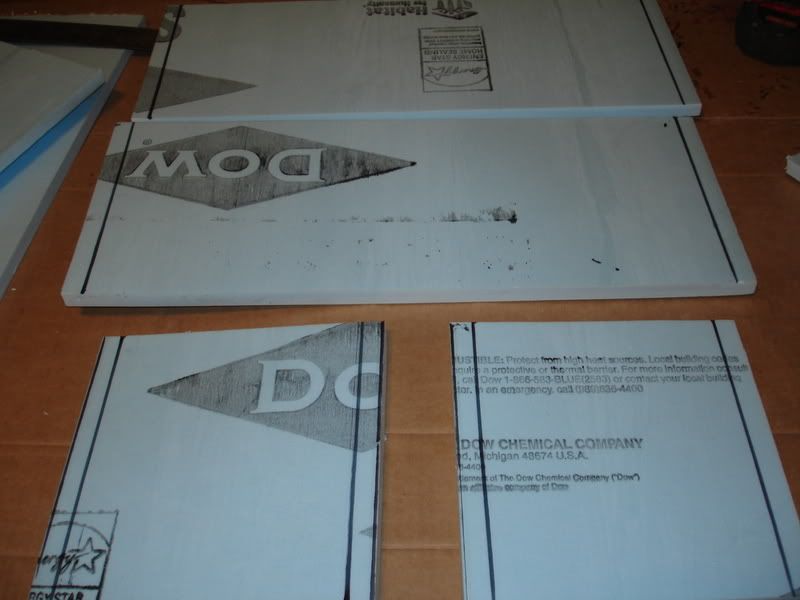
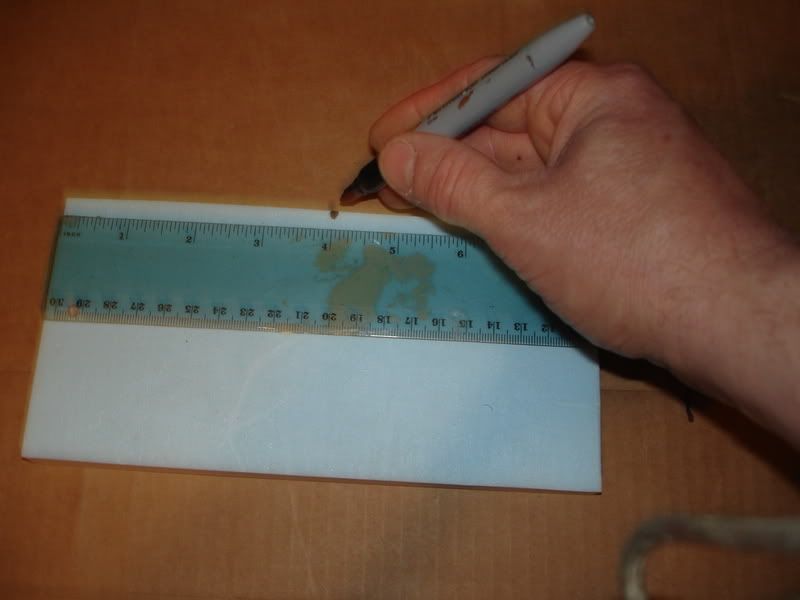
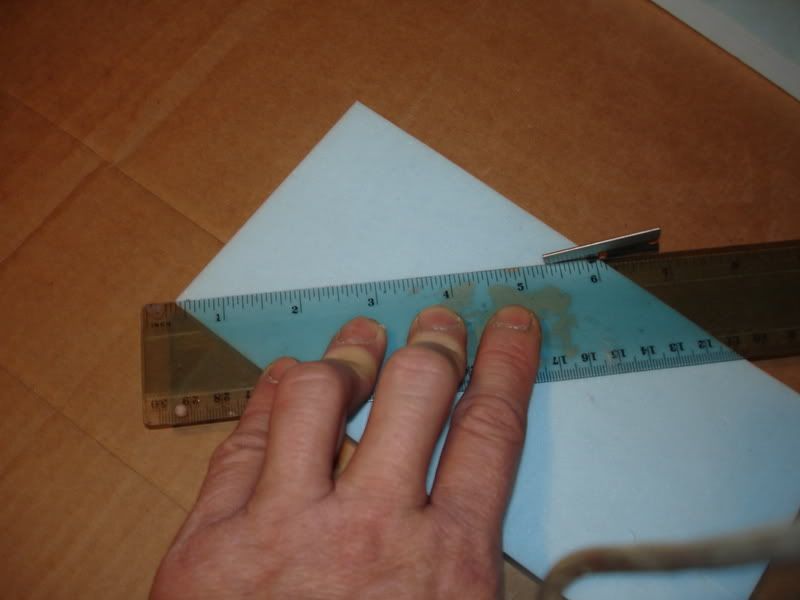
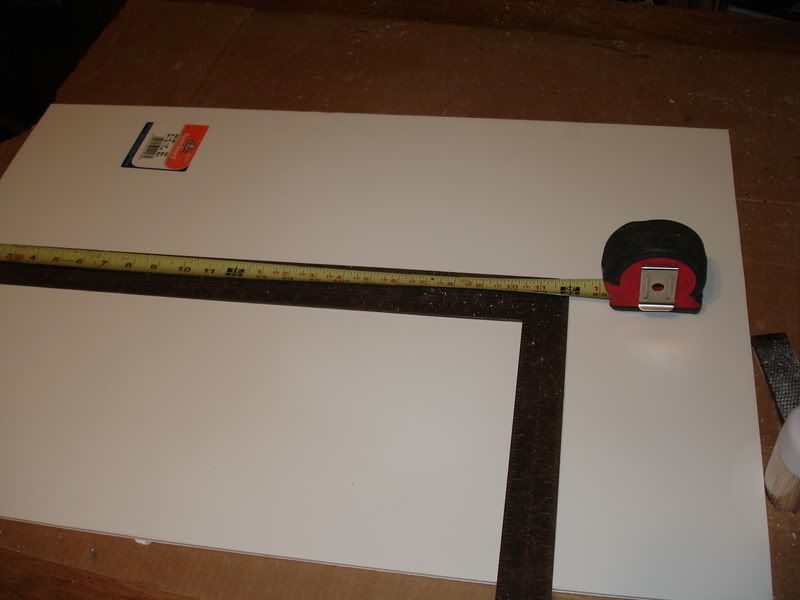
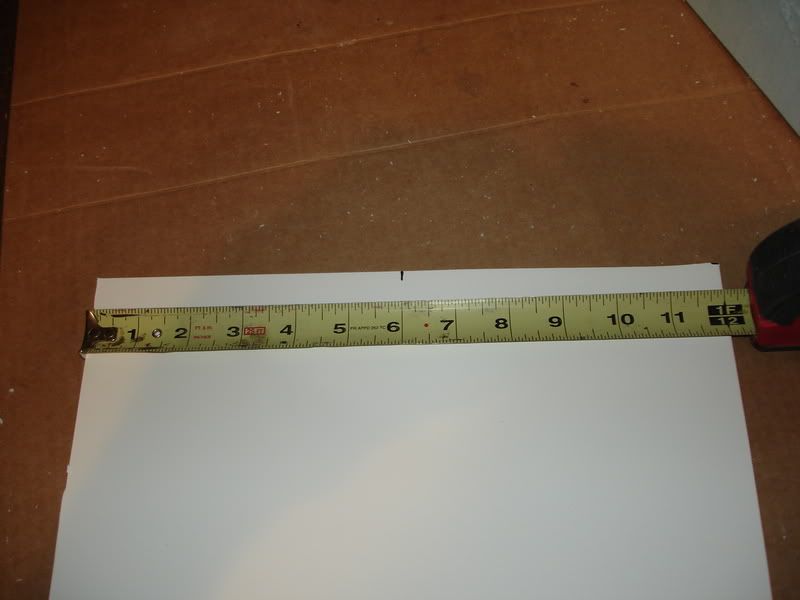
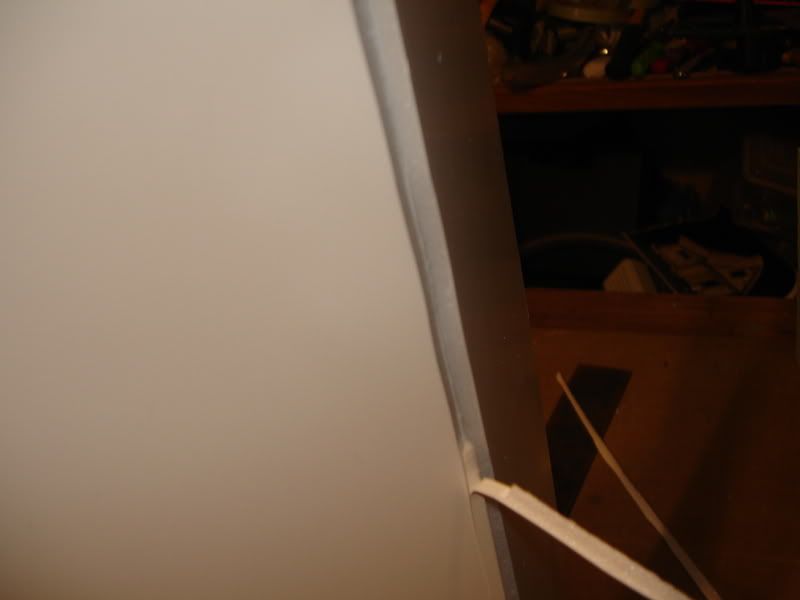
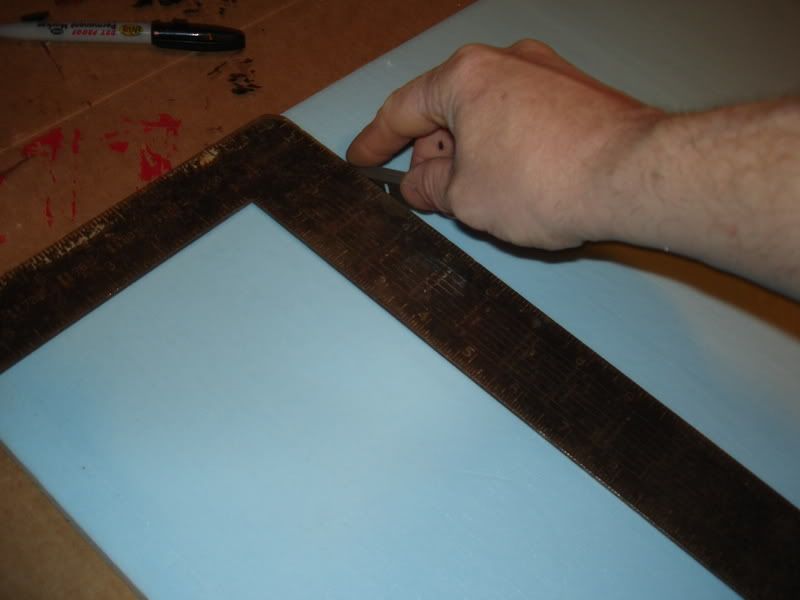
Figure out how big your building is going to be and cut your pieces using the Tee square and razor blade to get straight square cuts.
Try and keep even measurements that are easy to divide, This will help with windows and doors ect. to help line them up.

007-2.jpg
 
Another interesting project Tim. How did you get the 45 degree cuts on the corners to come out straight? Did you do those with your knife?
 
Use the side of a table to cut the pieces all the way through because the foam is pretty thick and the razor isn,t that long. A longer razor knife would work better but these short razors will work also, you just have to make the first cut as deep as possible holding tight to the side of the tee square and as straight as possible!
007-2.jpg

012-1.jpg

Here are the 4 sides of my building. Next step is to add my 45 cuts for joining the corners.
012-1.jpg

Grab a scrap piece and hold it to the edge of the corner and take a marker and draw a line. This will be what needs to be cut away on a 45 angle to join the corners. Also notice that I kept all the writting on the foam on the inside. Sometimes the ink sinks through the paint after your done painting it so try and keep the writting on the inside. The maker might also bleed through your paint also so stay away from permanent markers and if you do get any bleed through in your paint a quick layer of white glue over the area will stop the bleed just let it dry and paint over it.
015.jpg

Here are the pieces all marked for cutting!
016.jpg

Cut the corners with the razor blade but staying just shy of of your final goal, you,ll take the rest off with the fill. This way you can fine tune the fit. Unless your going to finnish the inside also this don,t have to be perfect on the inside but be very careful not to destroy the outside corners that will show. file just a little at a time checking your fit as you go!
026.jpg

026.jpg

023.jpg

024-1.jpg

024-1.jpg

Do this over a large barrel to avoid a mess as filing this stuff can get real messy. Sand paper will work also and work from coarse to fine for a better finnish.
 
A bastard type file works great for filling this stuff quicker! But remember this stuff makes a mess so do it over a large barrel.
021.jpg

Next is the roof pitch. My building is going to have timber trim so I added the roof peak seperate from the other sides. The timber trim will hide the seam. You can vary the pitch of the roof to the way you like.
Find the center of the piece and mark it and then cut from corner to corner using a ruler or something with a straight edge.
Save the scrap pieces, these will work as bracing for the inside of your roof!

017-1.jpg

018.jpg

019.jpg

020-1.jpg
 
Check that your pieces are ready for glueing and start up the glue gun.
029.jpg

Glue the pieces together using the tee square to make sure there straight!
031.jpg

If you have any high edges or corners a bit off you can still file them a bit.
033.jpg

036.jpg

038.jpg
 
Now you can add on the roof peeks. Some broken down tooth picks will help support them and if using white glue tooth picks will help support the pieces while the glue is drying.
039.jpg

For making roofs I like to use this foam board but you could just use foam for this also. I like the foam board because its thinner and the foam inside can be cut away to get the roof angle and the paper covering on it holds the shape together in one piece.:cool:
040.jpg

040.jpg

045.jpg

Hold the foam on side of the building roof pitch and get an idea of how much over hang you want and get a measurement but try and keep it even so its easy to divide in two and then cut to size!
046.jpg

048.jpg
 
Get a cut down the middle using the T-Square enough so it parts but not all the way through. Then cut out on both sides of this on 45 degree angles and remove the pieces being carefull not to cut all the way through, you just want enough to make a 45 angle or whatever your roof pitch is. this dosn,t have to be perfect. Then you can glue on the roof braces you saved from cutting the roof pitch before!
048.jpg

051-1.jpg

052.jpg

054.jpg

056-1.jpg
 
Excellent stuff Tim. It's always good to see how others work with this stuff. Never even thought about doing 45 degree cuts to hide the joins.

Tim, I'm not familiar with the foam board you're using (haven't seen it this side of the water). Is it the same type of styrofoam with a thick paper coating on either side?

Enjoying the how to. :)

Simon
 
This is going to be a half timbered building so I,m going to glue basla woodstrips to it. Here are a few pictures of the wood strips I use. The skinny sticks are the same size as the balsa strips so I mix and match them saving the balsa strips for longer sections because the skinny strips are cheaper. The balsa is a lot easier to cut and I just use the razor blades to cut it. The skinny sticks are tougher and I use my mini hobby saw to cut those.
These are also great for making all kinds of projects also and are great for doors windows stairs ect. ect..
058.jpg

059.jpg

Heres a photo of how far along I,ve come so far! I,ve still got a ways to go but its coming along.
This time I painted the building first and added on the trim pre painted and its working out a lot better then trying to cut in and keep touching up the paint on the trim.:cool:
001.jpg

003.jpg
 
Excellent stuff Tim. It's always good to see how others work with this stuff. Never even thought about doing 45 degree cuts to hide the joins.

Tim, I'm not familiar with the foam board you're using (haven't seen it this side of the water). Is it the same type of styrofoam with a thick paper coating on either side?

Enjoying the how to. :)

Simon


Any art supply store or picture framing shop should have it Simon. I think it also called foam core board.
 
Great thread Tim, thanks for showing us a step by step on how it is done. Looks quite simple and I think the only thing that would hold you back would be one's own imagination !! :)
 
Excellent stuff Tim. It's always good to see how others work with this stuff. Never even thought about doing 45 degree cuts to hide the joins.

Tim, I'm not familiar with the foam board you're using (haven't seen it this side of the water). Is it the same type of styrofoam with a thick paper coating on either side?

Enjoying the how to. :)

Simon

If your taking about the white stuff? Its cardboard with a foam center thats sold real cheap over here in the states for school project boards and is great for making roofs and could even be used to make buildings also.
 
Another interesting project Tim. How did you get the 45 degree cuts on the corners to come out straight? Did you do those with your knife?
Thats where using another piece of foam and drawing the line comes in! If you cut just shy of that line and fine tune with the file or sand paper and check your joints slowly you can get a pretty good fit. The inside dosn,t have to be perfect, just watch out you don,t destroy the outside corner.
 
003.jpg

This brick arch was made from balsa wood strips cut to size and painted brick red then glued in place using white glue so I had time to ajust the bricks in place. The doors are from skinny sticks and the hinges on the door are the ends of zip ties painted black and hot glued on. I,m trying to make some kind of hinges so they open and close.
Still a long way to go on this one but I,ve got a lot of ideas including a rabbit cage built to the side of the building.
I got the idea from my daughter side tracking me into making her a cage for her bunnies.
Now to scale that one down a bit???
086.jpg

084.jpg

083.jpg

081.jpg

088.jpg
 
Once again my friend you've provided us with another wold of knowledge and it's looking good Tim. Simon I used the 1/2" board that's availabe to build both the hospital and commissary storehouse and the 1/4'' for their roofs........The Lt.
 
Thanks for the info on the foam board guys, I'll have a look out for it.

Tim, nice touch with the zip ties for hinges on the door - looks good.

Simon
 
Another great thread Tim !
Thanks to your posts (and ones from other forum members) I got plenty of ideas... and want to implement them.
Thanks for sharing your work.
Michel
 
A little more progress on the barn!
I added some shutters and did some work to the back and side of building also. I started the back, adding a door a couple of windows and timber trim. None of any of this is even close to being finished but while I had my camera out I snapped a few pictures.
I added a hoist and loading window to the side, also far from finished. I used the skinny sticks for almost all of this finish work on the trim, doors shutters ect. The brick arches are also wood strips cut to size and painted also, then glued in place.
049.jpg

054-1.jpg

057-1.jpg

062.jpg

067.jpg

070.jpg
 
I just finished the barn tonight and threw together a quick little set up to take a few pics of it.
I added some broken sections here and there where the bricks are exposed and tried to scratch in a few cracks here and there but I noticed I left some of the blue foam showing through and I need to get a black marker and go over the cracks with it to make them show up better.
I also added some vines growing up the side again like the other building I did. And I made the rabbit cage and also a little pigeon coup on the side also.
The thatched roof is a temp roof till I get in the mood to do another single roof with the popsicle sticks, which is very time consuming.
I also made a few hay bails with the left overs from the thatched roof.
The rabbit cage and pigeon coup were made of small pieces of wood hot glued together. I also made that little stool today tou see in one of the pictures while I was at it.
Looking back at the photos I see I,ve got a few things to touch up but its pretty much all done!
Here are a few photos.
005.jpg

003.jpg

023.jpg

024-1.jpg

017.jpg

070.jpg

076.jpg

077.jpg

078.jpg

086.jpg
 

Users who are viewing this thread

Back
Top