How to, foam barn (1 Viewer)

fishead19690

Command Sergeant Major
Joined
Nov 3, 2005
Messages
2,555
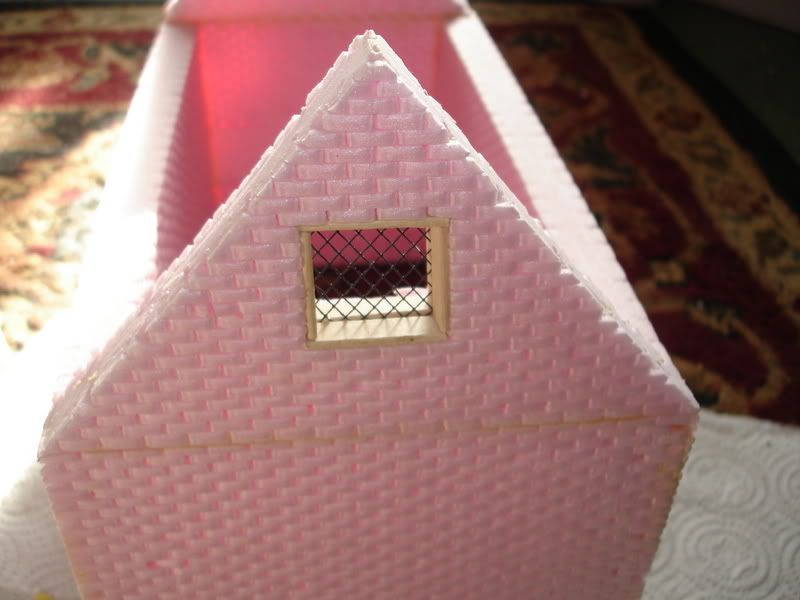
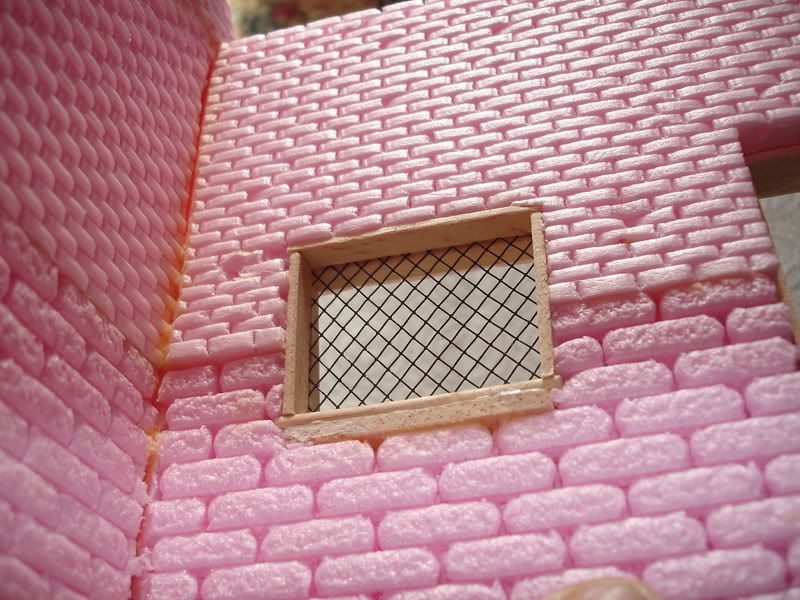
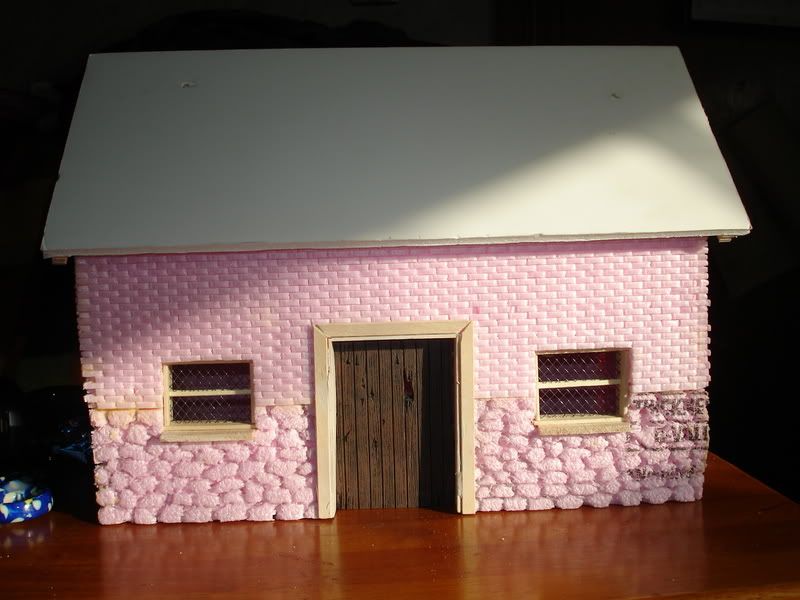
Mike(modwalls) gave me a few of his foam walls the last time I saw him and I finnaly got around to doing something with them.
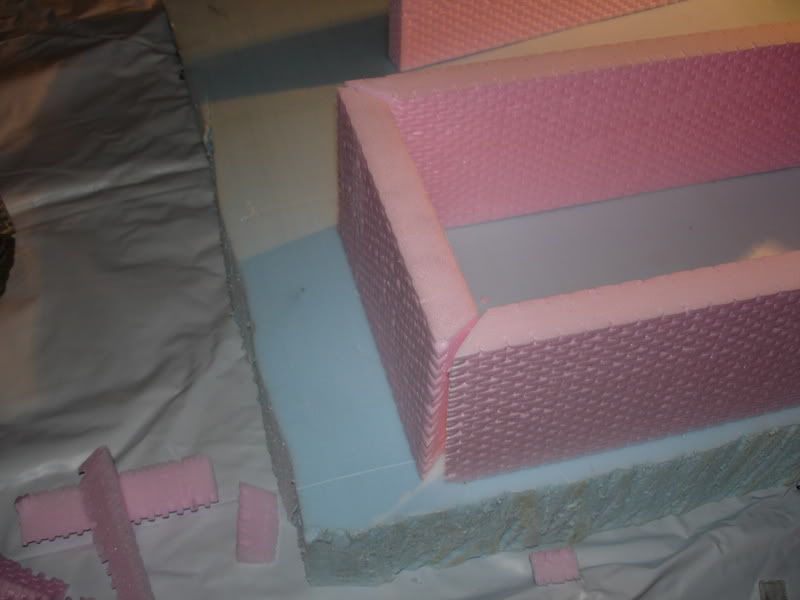
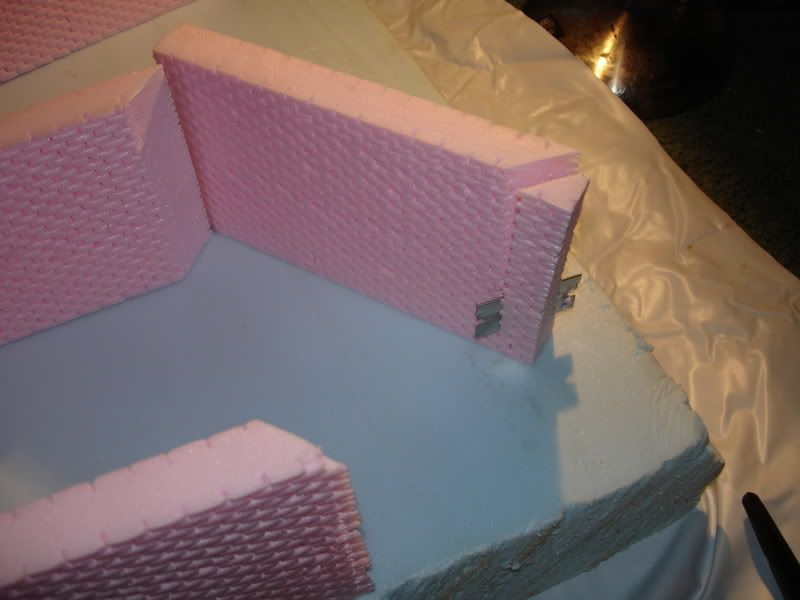
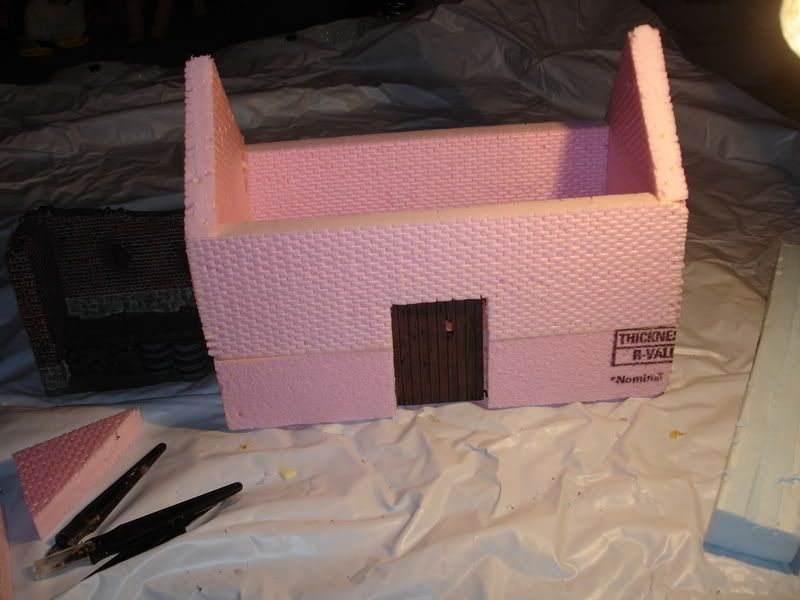
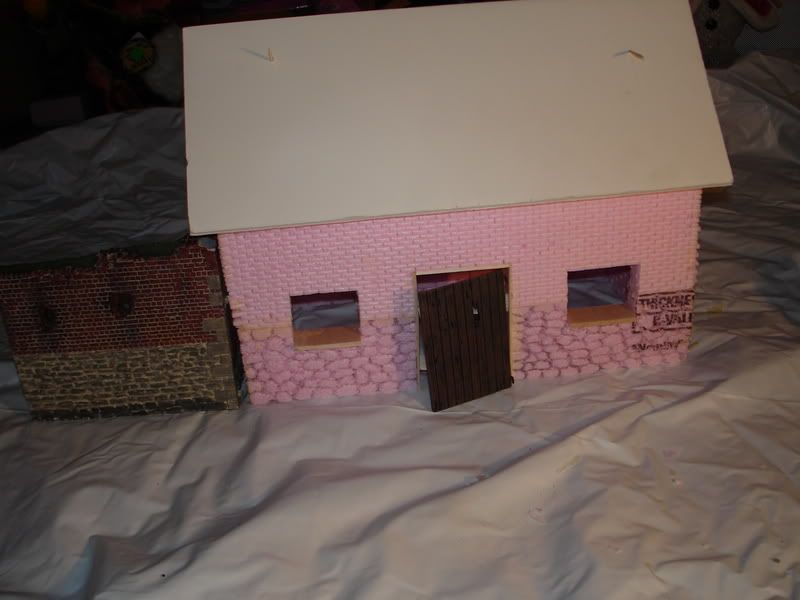
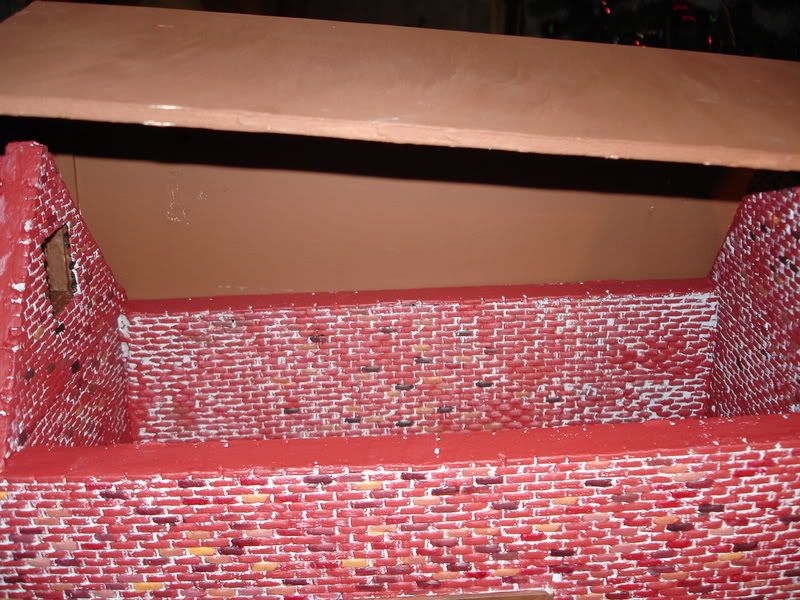
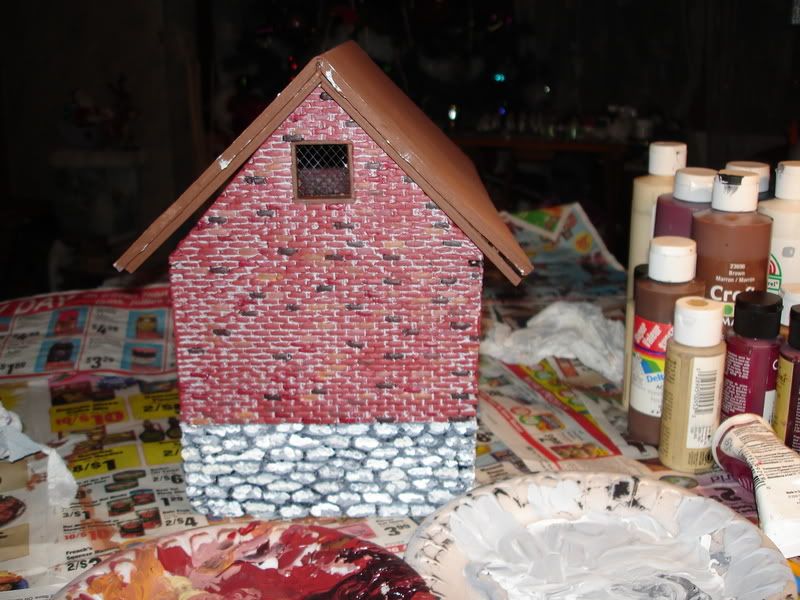
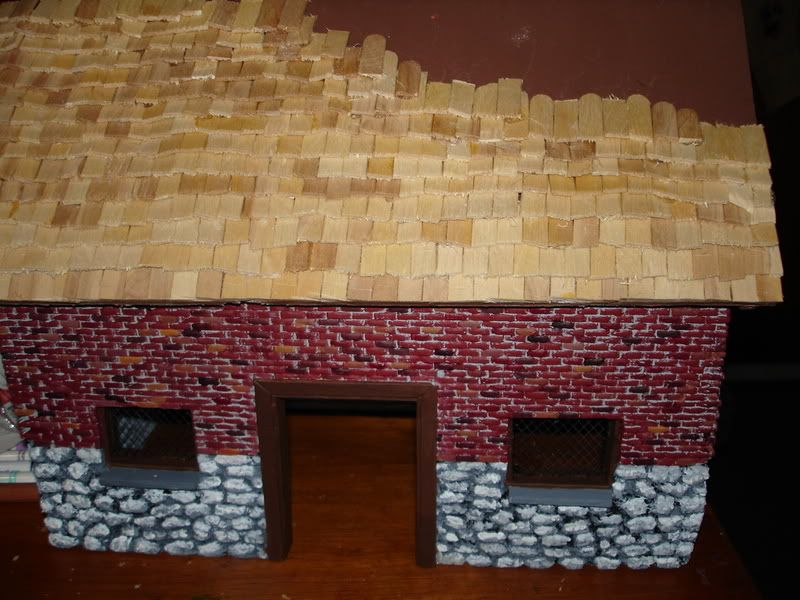
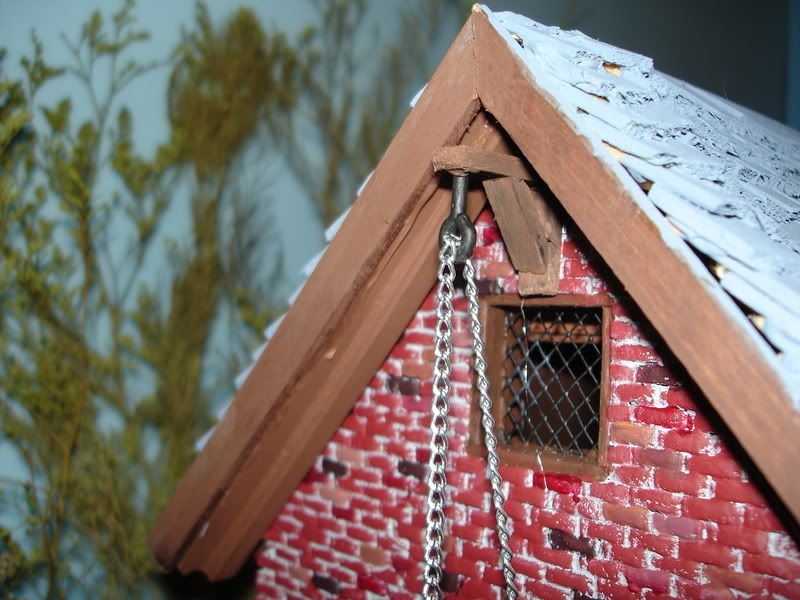
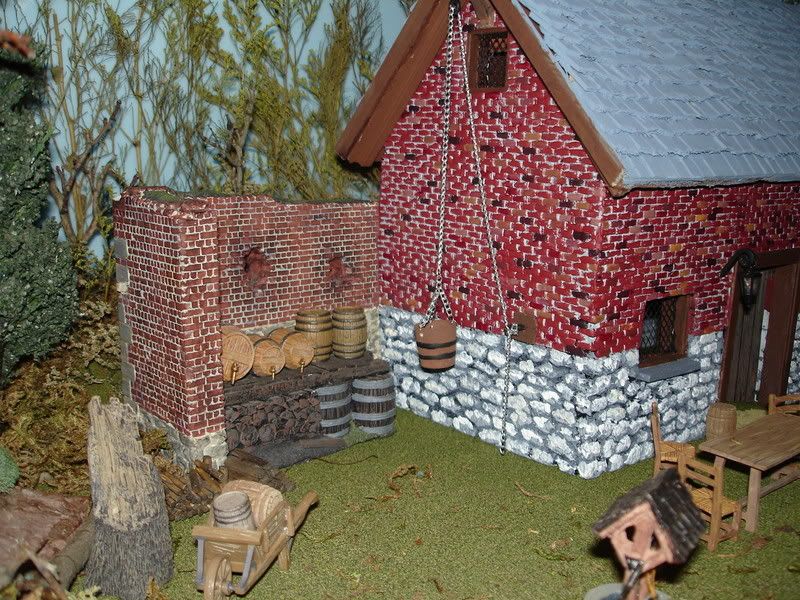
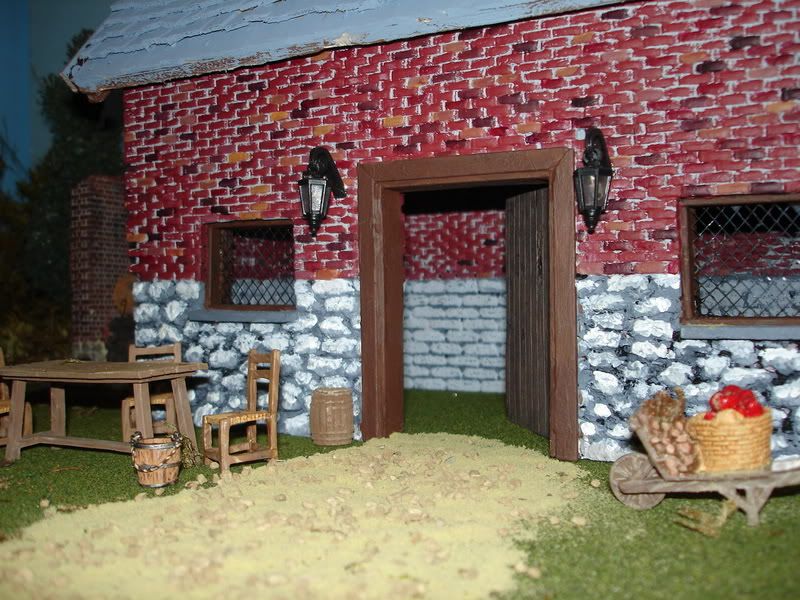
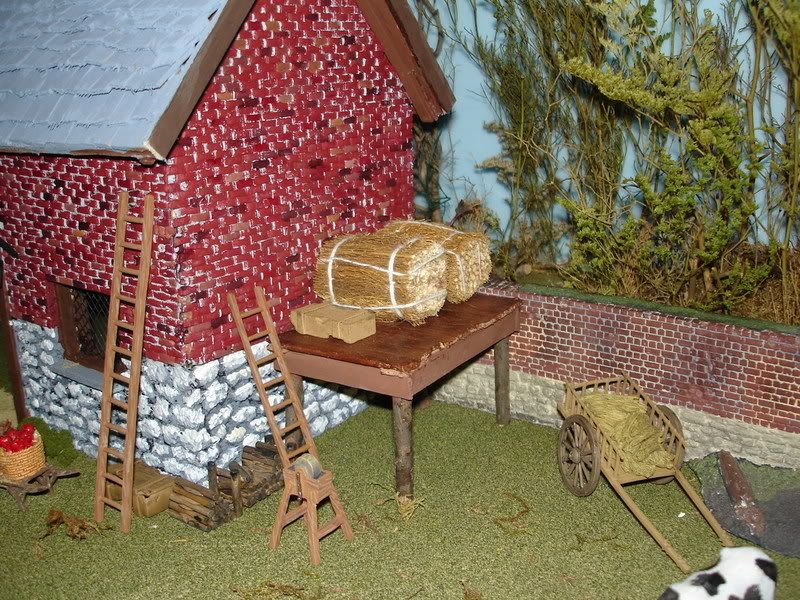
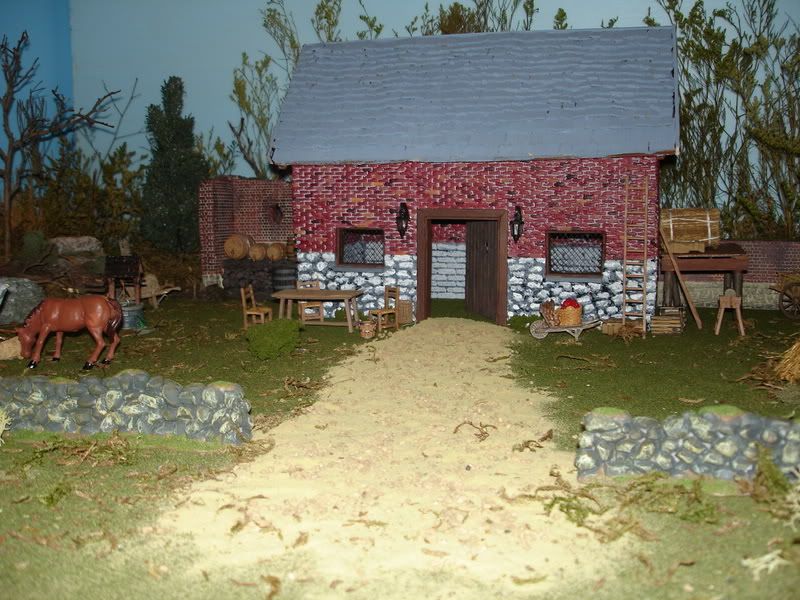
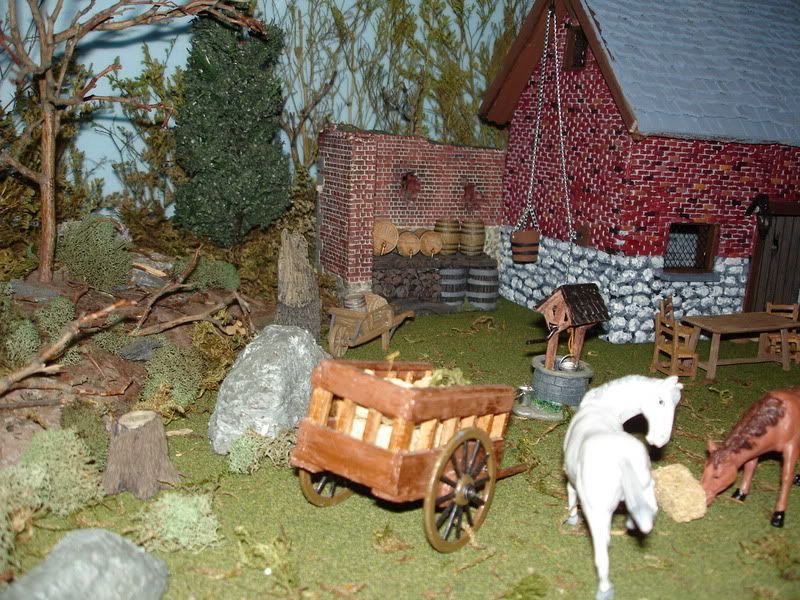
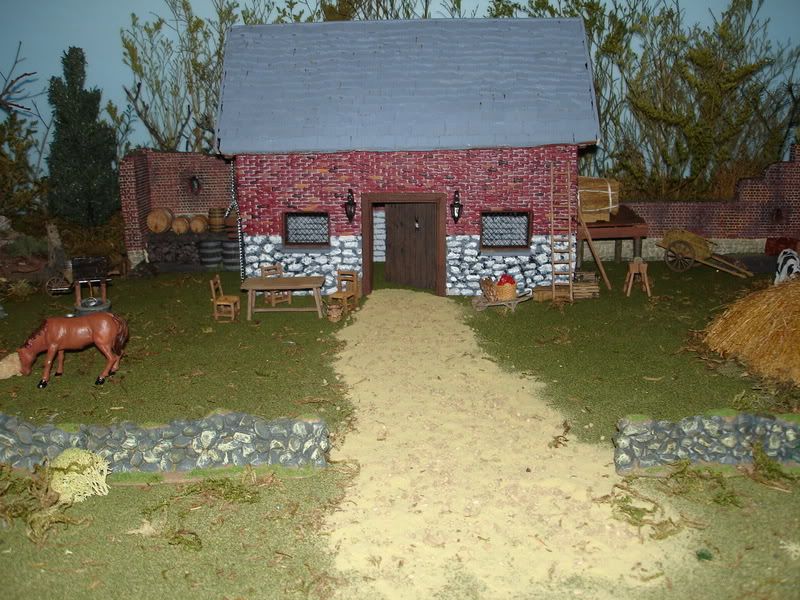
These are the latest brink patterens he has come up with and he gave me 5 unfinnished 12inx4in pieces of these brick walls and I decided to try and cut them up and piece them together to make a small building with them.

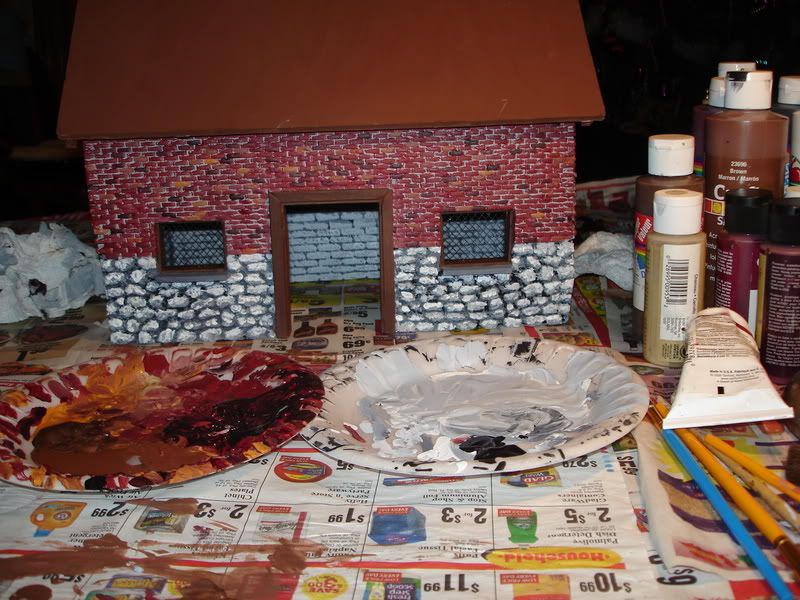
I was a bit limited on the size of the building having just these 5 sample pieces to work with but I think the building came out alright none the less.

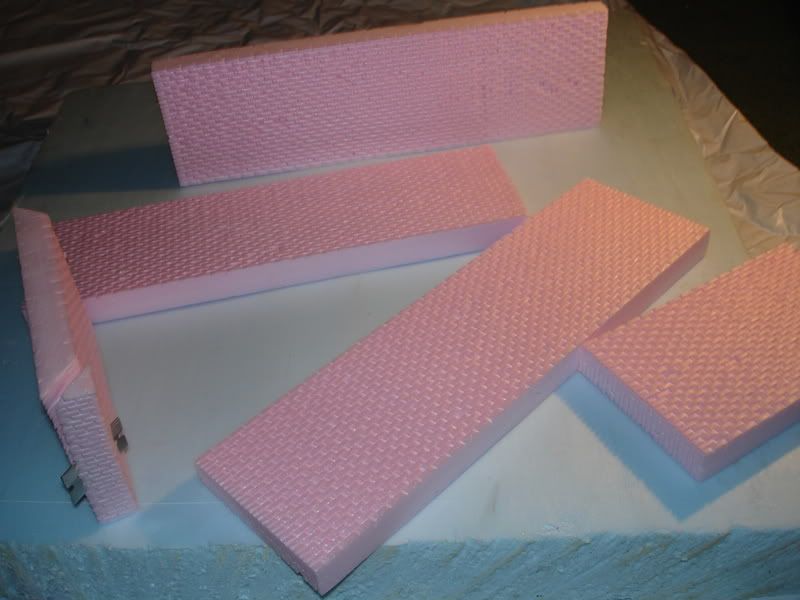
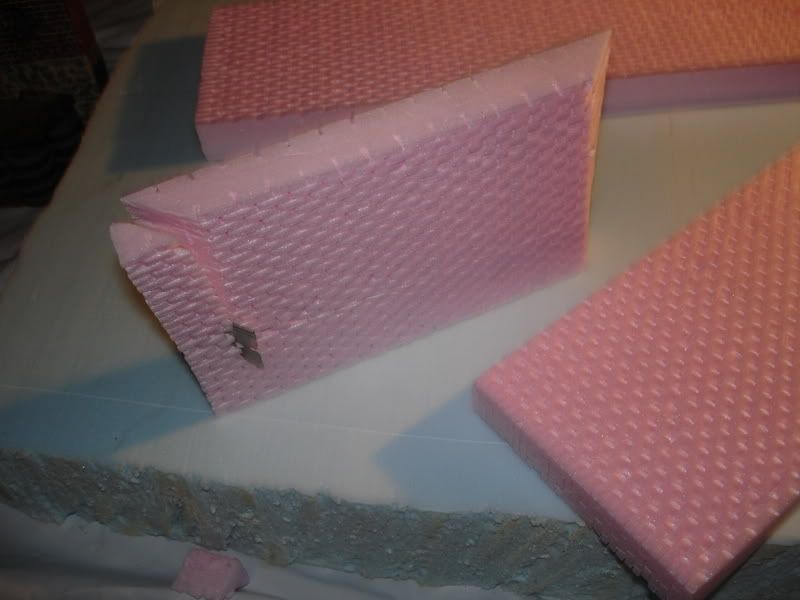
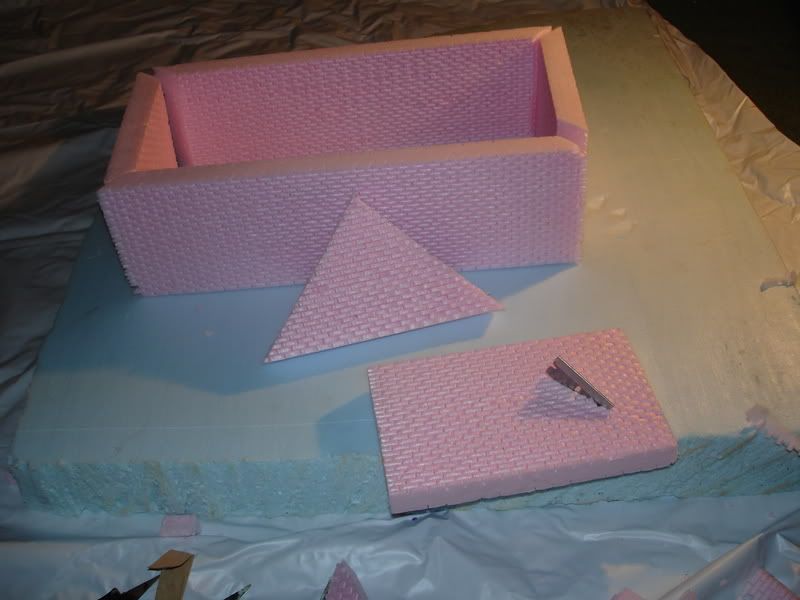
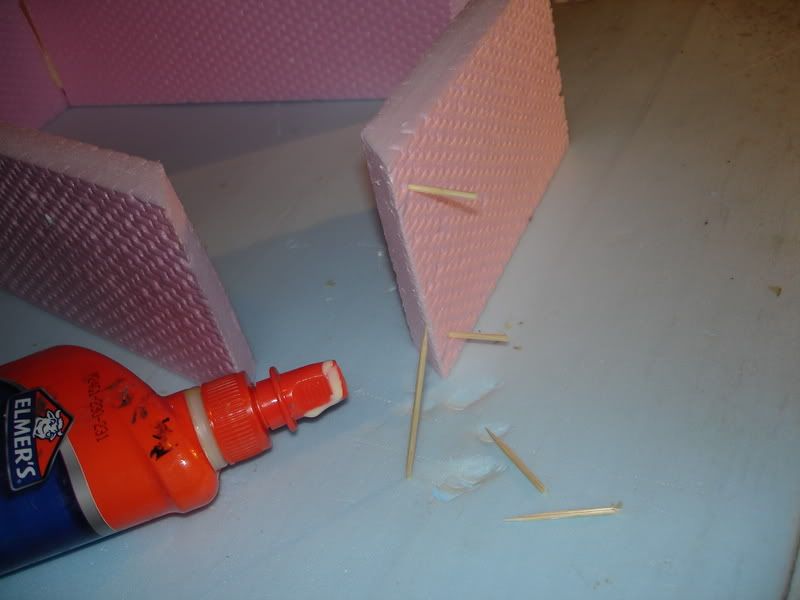
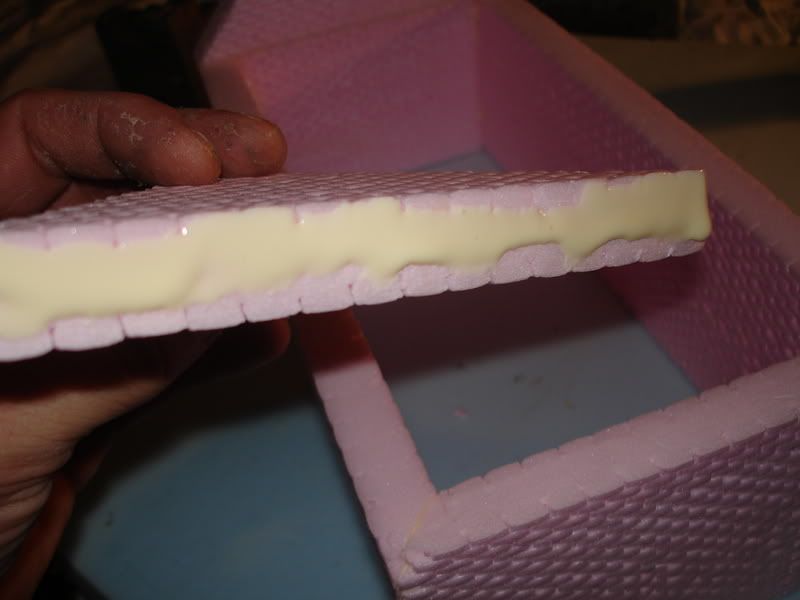
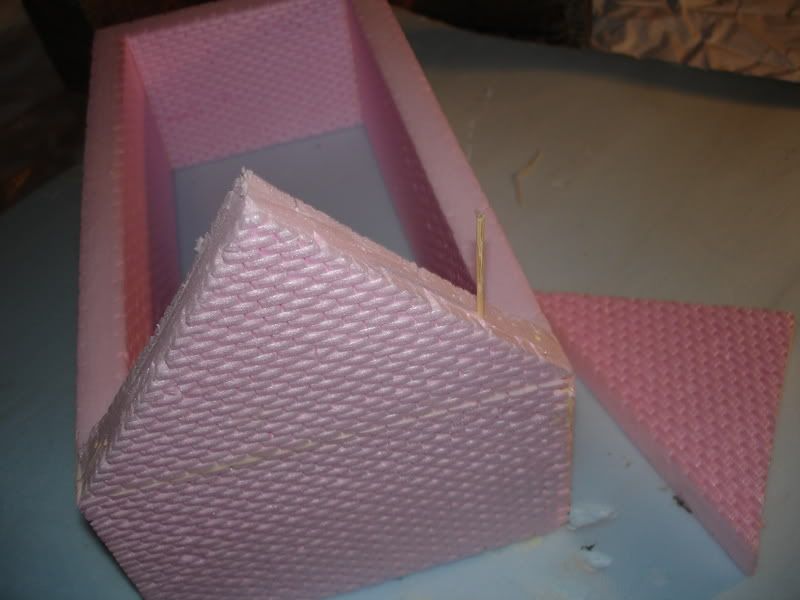
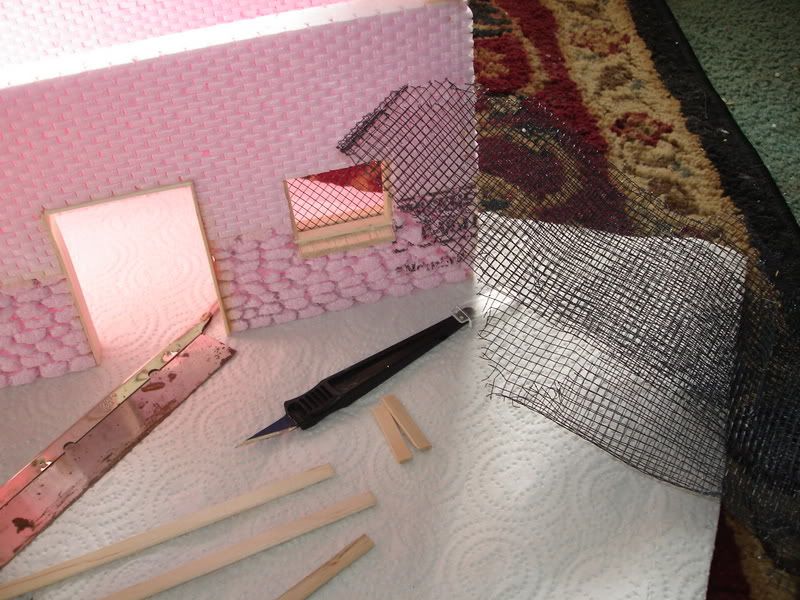
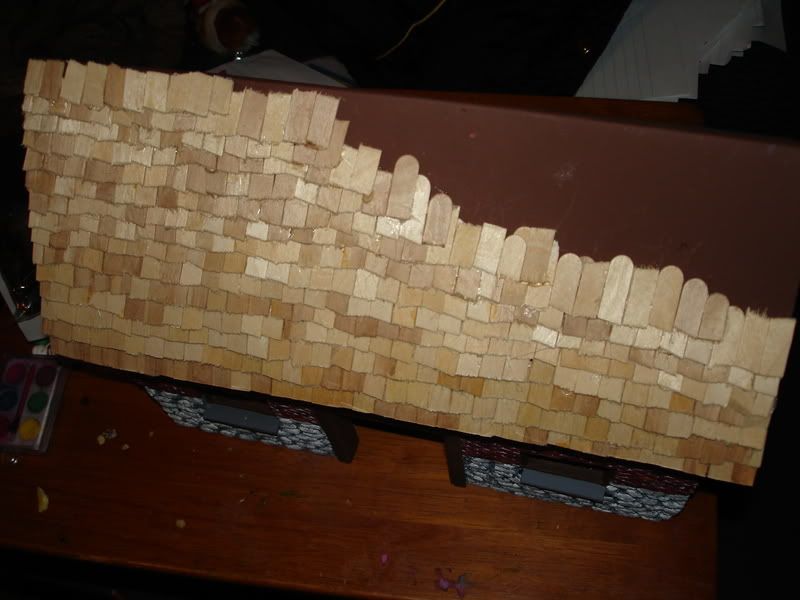
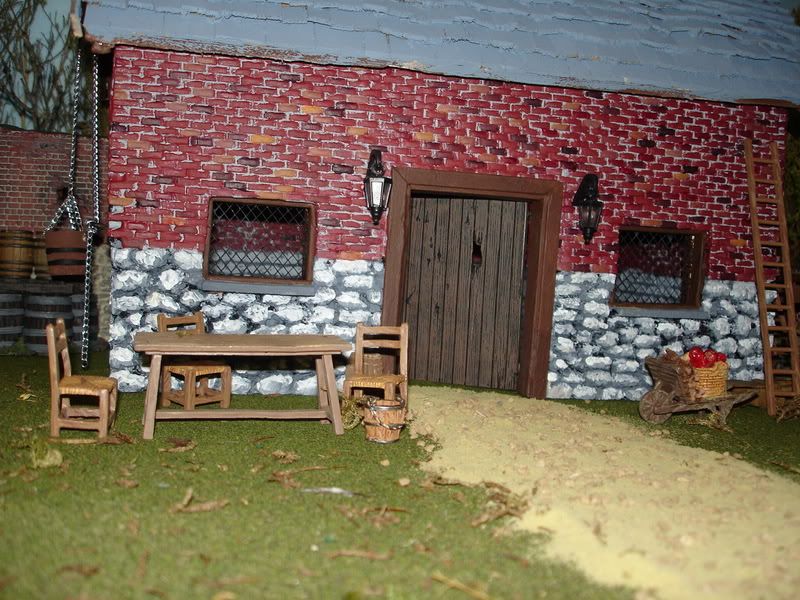
Here are the sample pieces that Mike gave me. I used two of the 12in pieces as is and just cut the sides on 45degre angles. I then used another piece cut in half for the sides of the building and also cut the edges on 45degree angles to join to the other pieces. I then used another piece cut in half to make the roof peeks.
DSC04607.jpg

DSC04608.jpg

DSC04612.jpg

DSC04613.jpg

DSC04614.jpg
 
I used wood glue and broken tooth picks to glue and hold the pieces together
DSC04616.jpg

DSC04621.jpg

DSC04618.jpg

DSC04622.jpg

The roof was made of a foam board that can be bought in most craft stores and is sold as project board like what kids would use for school projects. Its really nice for making roofs because its thin foam with a thick paper coating on both sides.
I was able to cut a center line down the middle of the roof and then cut two 45degree angles into the foam and bend it to shape and the paper on the other side of the foam held it together and I just added some glue into the 45degree cuts. I used two pieces off foam under the roof also cut on 45,s and glued and held in place with tooth picks also but I later removed these and made a better looking balsa wood bracing later because I didn,t like the look of the foam. I,ll take a few pictures of the new under side of the roof and post them latter. Heres a picture of the roof, note the tooth picks through the roof. They are holding pieces of foam under the roof in place as the glue dries.

DSC04626.jpg
 
I carved the stones under the bricks into the foam by hand with a pencil.The windows were made from pieces of balsa wood and an old window screen.

DSC04627.jpg

DSC04629.jpg

DSC04631.jpg

DSC04632.jpg

If you look at the inside of the building you can see where I stuck the tooth picks to join the two halfs you can also see more of mikes older brick work. I used pieces of some other walls he gave me as the foundation but put them on backwards so the stone pattern was in the inside and carved my own stones on the outer unfinnished sides. This gave the inside of the building a great look also and I hade the rough stone look on the outside that I wanted also.

DSC04633.jpg
 
I used cheap craft store acrilics to paint the barn and mixed most of them myself. I first painted the whole buildindg black as a starting primer and then mixed a cement looking color and painted all the bricks a greyish cement color and then dry brushed them a burgandy looking brick color leaving the cement looking color in the cracks.
I them mixed various brick looking colors and painted every few other bricks different colors for a more realistic look.
DSC04636.jpg

DSC04639.jpg

DSC04642.jpg


The roof was made from broken popsicle sticks. I wanted a rustic look so i cracked the sticks to get that jaged edge look and I hot glued them onto the roof. This took awhile but i liked the finnished results.

DSC04643.jpg

DSC04644.jpg
 
I dress it up a bit by adding a door from a britains north gate set and some lights that use to be xmas street lights and I also made a hoist to the higher side window with a small eye hook and end of a fishing hook some cheap chain and some balsa wood pieces.
DSC04661.jpg

DSC04662.jpg

DSC04657.jpg

DSC04666.jpg

DSC04669.jpg

DSC04653.jpg

DSC04651.jpg

DSC04645.jpg
 
Hi Tim,

Abosolutely outstanding work! Your final painting of the bricks and your roof work are magnificent! Thanks for the great "how to" lesson and for sharing the fruits of your labor with us!

Very impressive work!

Warmest personal regards,

Pat :)
 
A terrific lesson for anyone looking for a fun project. You really did a wonderful job!

Njja
 
Fish, Simply wonderfull! What fun !Looks top notch all the way. I'm envious!
Thanks for the pix and lesson. I'll employ your techniques when I get a chance.
I love barns!:D
Thank you very much!

FUB
 
Fish,
Stunning, just superb work to say the least. I think there is a future for you in the buildings area of the hobby........
 
Thanks guys but Mike needs to share in the credit here because I could never have come up with such an amazing brick pattern on my own.
 
So what. :rolleyes: Are we supposed to be impressed just because you took some glue, a bit of old beat-up and obviously scared foam board, a few broken and unusable popsicle sticks, and some old rotten paint and did something with them like that. :p

Well guess what, I AM.:cool::)

Very nice work. Also, you presented your work in a great way for us to learn how to do it. Between you and Alex I have found that this old sea dog can still learn new tricks.:cool::):)
 
Tim, great job, you can build a Houghamount with that talent of yours. I'll have to supply the bricks. I will try to do a how to brick when I get a chance. Ive been going all out lately, now with all this snow, it's really slowing me down. Like those diamond windows, is that the red stuff I showed you, of is it something else? Also the hay pull is a great effect. Mike:)
 
Mike the windows are from an old screen but I liked your idea also but the window screen is a lot more ridgid and easier to work with. We have to get back together again after the holidays and maybe do a couple of buildings together and do a joint diorama or something. Conversions,scenics,buildings ect...:cool:
This weather has been horrible lately,we,ll have to find a weekend without snow after the holidays. How has it been up there? It took me 5 hours to drive home from work thursday. A 60mile ride that should have only taken me an hour without the snow.
 
Great job FishSticks! I hate cutting out the bricks when I make a building with brick work. Did you say if the brick work was also cut out or stamped somehow? Thanks. Stay in touch. Nick:)
 
Great job FishSticks! I hate cutting out the bricks when I make a building with brick work. Did you say if the brick work was also cut out or stamped somehow? Thanks. Stay in touch. Nick:)

Mike(Modwalls) cut the brick pattern into the foam by hand. He made a jig to get straight even uniform cuts into the foam. He said he is going to post his own how to thread so he,s the guy to explain his method better.
 
Thanks for the "step by step" pictures, your detail is amazing, very talented work.

Michael
 
Tim, great job, you can build a Houghamount with that talent of yours. I'll have to supply the bricks. I will try to do a how to brick when I get a chance. Ive been going all out lately, now with all this snow, it's really slowing me down. Like those diamond windows, is that the red stuff I showed you, of is it something else? Also the hay pull is a great effect. Mike:)

Cant wait to see the how to. I've been planning to do a Hougmont farmhouse as soon as I have $$ to buy some Coldstream gaurds.
 
As far as a how to, setting up cameras and stopping between cuts, is not my thing. However, I just traded with Matt at Hobby Bunker some of my brick work sheets. They measure, 22" long X 15" wide X 3/4" thick. I know Matt and his father Bill, will be making some cool buildings from them in the future. I believe Matt is going to have them Form-Tech when he can. I seen some of the things Matts dad was working on, good things to come. Maybe in the future the sheets will be availible for sale from the Hobby Bunker. I hope this helps, there are a lot of great building makers, that could do fantastic things with these.:)
 

Users who are viewing this thread

Back
Top