Restoring Brunswick Hussars- New Hope Designs. (1 Viewer)

Hazebrouck

Sergeant
Joined
Aug 30, 2010
Messages
627
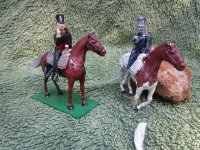
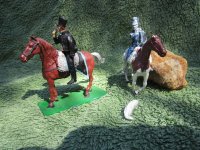
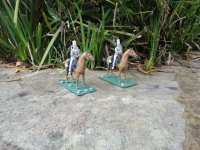
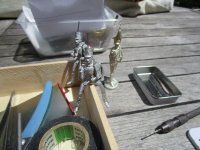
With a break in the offing coming up I thought I might have a go at restoring these two oldies.

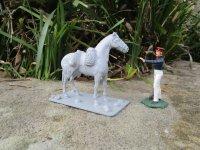
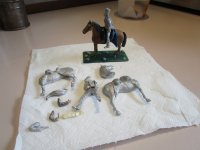
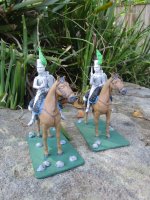
These are New Hope Design troopers of the Brunswick Hussars. The kit is MA 0952 and apparently only 500 of these were produced. If that is true then you are looking at two fifths of one percent of production.

Del Prado make a mounted figure very similar to this one.

The painted figure on the base is missing a sword and sabretache but otherwise is complete. The second figure is missing an arm, sword and sabretache. His horse has some leg problems but I think they can be straightened out.
I’m not sure how I will go about the missing arm but have some ideas.

Both are missing plumes from their helmets.

These will take a while to restore and I will show some progress images in the future.

Scott
 

Attachments

  • IMG_5132.jpg
    IMG_5132.jpg
    195.1 KB · Views: 226
  • IMG_5137.jpg
    IMG_5137.jpg
    181.2 KB · Views: 212
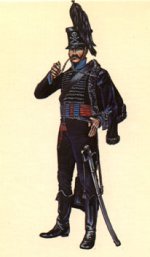
Here is an images I found on the web from the New Hope Catalogue showing the figure.

Scott
 

Attachments

  • New Hope Prussians..gif
    New Hope Prussians..gif
    19 KB · Views: 175
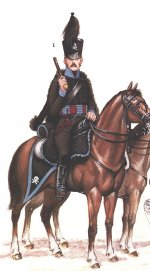
I have the relevant Osprey book. I'll see if I can scan the images and post them for you.

Prost!
Brad
 
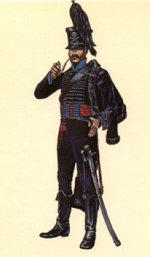
Here it is :
Brunswick, Trooper, Peninsula 1813
Wr-Brunswick-1813-Peninsula-.jpg

Best
 
Thanks Mirof and gents.

Yes that is the image the figure is modelled upon. The blue looks very blue/grey in the image. Some I have seen painted use a lighter blue though I suspect that colour is how the blue is meant to be.

Scott
 
For that shade of blue, which is to my eye close to cornflower blue, I use either Model Master's French Blue, or a Tamiya blue, whose designation escapes me at the moment. They're both a light blue, but not so light as Testor's Light Blue enamel, which is a very light blue, a sky blue. I use French blue for Prussian dragoons, for example, or for Bavarian troops.

Hope that helps, prost!
Brad
 
?
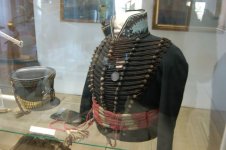
Uniform is Black
Distinction is light blue
Here an original :
but as this uniform is 200 years old, I assume that the blue passed away and was originaly a bit darker
brunswick.jpg
 
?
Uniform is Black
Distinction is light blue
Here an original :
but as this uniform is 200 years old, I assume that the blue passed away and was originaly a bit darker
View attachment 183496

WOW,

where is this uniform found ??

Which museum?

I'd love to see it sometime I'm wandering around Europe :)

John
 
Sorry

I don't knw, found the picure on Pin Interest, there was no source
 
Have been working with the damaged horse first. Straightened the legs out first in hot water before stripping the paint and glue from it. Reassembled and found a lot of gaps. Filled the gaps with filler and realized that I had inadvertently put some filler into the sheepskin texture mounted under the saddle. I understand now why the model aircraft fraternity use masking tape placed alongside the length of seams when filling gaps. Will paint the horse and see how it looks- can always strip the putty and paint from it again if it is too obvious.

Trying out JohnnyBach's lentil technique on the base as well.
 

Attachments

  • IMG_5138.jpg
    IMG_5138.jpg
    147.4 KB · Views: 149
Slowly making some progress with these figures.

I Have been painting the first horse and experimenting with blue colours for the facings. There is some variation in books and illustrations as to the shade of blue. ‘Uniforms of Waterloo’ by Haythornthwaite, Cassin-Scott and Chappell describe the colour as sky blue as opposed to powder blue. A few images of re-enactors show a darker blue as well.

I have ended up using Tamiya Sky Blue which is darker than powder blue. I think it will look good with the gloss finish as it will contrast with the mostly black uniform.

The horses are missing blanket rolls and these will need to be made from milliput.

I have stripped the paint from the other horse and the two figures.

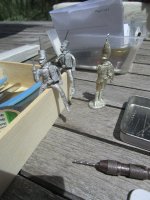
Both figures are missing sabretaches and swords. I have a Valiant Miniatures Brunswick Hussar dismounted figure on the way down here. I will use the sword and sabretache from this kit as a pattern for the mounted figures. Probably make them from plastic card and milliput.

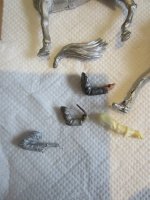
The Valiant Miniatures figure has a pipe in one hand- a meerschaum I believe. By chance in my pile of spares I have an arm holding a similar pipe (see image) and I will use this to replace the missing arm on one of the figures. I will probably get away with painting the cuff facing on this arm, possibly even scratching the outline into the cuff area of the arm.

Then the plumes for the headgear, scratch up some bits for the horse harnesses and then some reins… a fair bit to do but getting there slowly.

Scott.
 

Attachments

  • IMG_5148.jpg
    IMG_5148.jpg
    86.5 KB · Views: 144
  • IMG_5151.jpg
    IMG_5151.jpg
    105 KB · Views: 139
  • Valiant brunswick hussar.jpg
    Valiant brunswick hussar.jpg
    21.3 KB · Views: 141
Pretty much painted the horses apart from some shading and now starting on the figures.

My Valiant Miniatures Brunswick Hussar kit has arrived too so will start making swords and sabretaches once the figures receive some paint.

Still have to make some blanket rolls for the saddles as well.

Scott
 

Attachments

  • IMG_5164.jpg
    IMG_5164.jpg
    181.1 KB · Views: 122
...The Valiant Miniatures figure has a pipe in one hand- a meerschaum I believe...

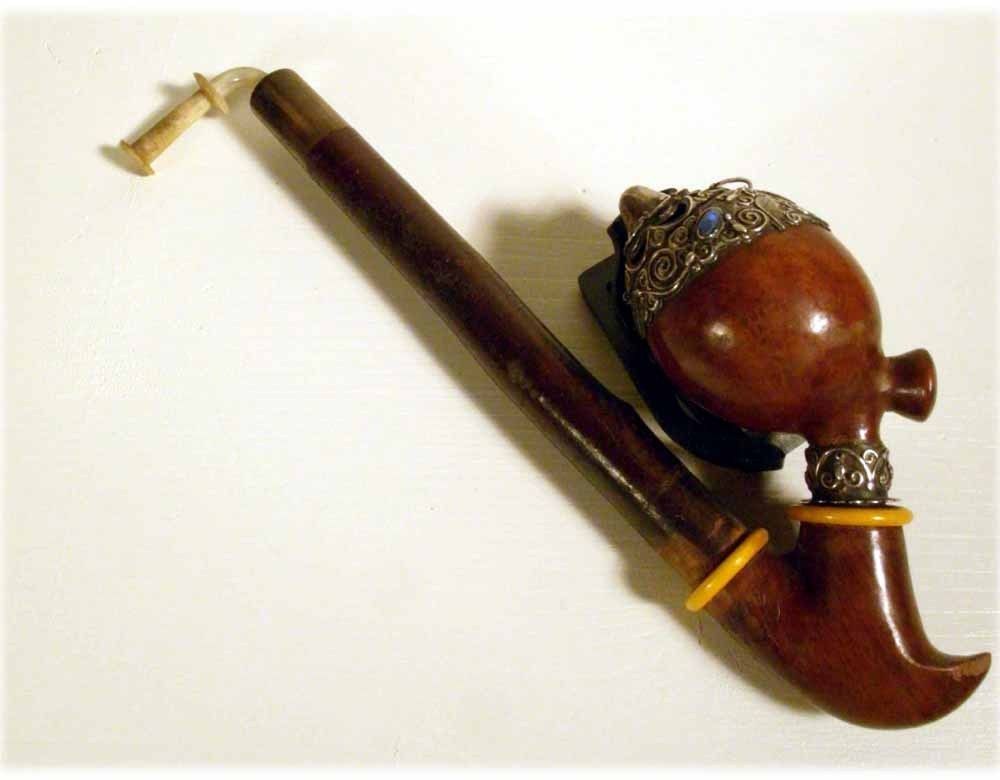
Not a meerschaum pipe, but a pipe with a separate bowl and stem, similar to these examples, this one, with a wooden bowl:


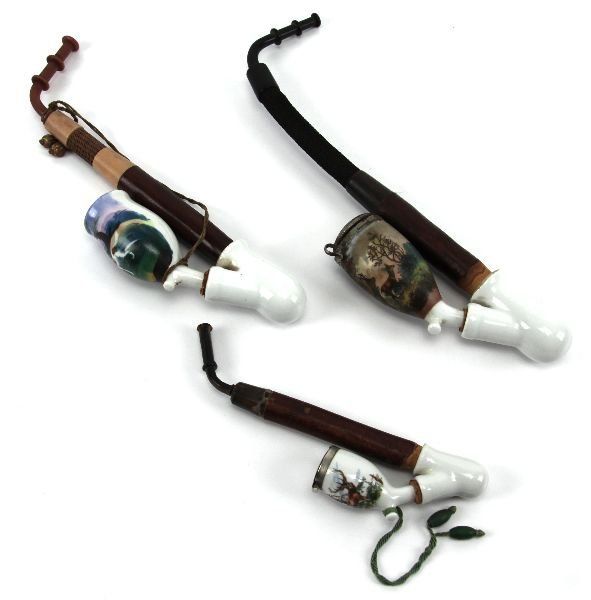
and these, with porcelain bowls:


Those are examples of the style that became popular at the end of the nineteenth century and is now fixed, or stereotypical, of what the Germans sometimes call "grandfather pipes". In the illustration of the Duke of Brunswick in the Osprey book, he is depicted holding such a pipe, with a wooden bowl.

This type of pipe seems to have replaced the simple clay "tavern pipes", in German lands, at least, by the turn of the nineteenth century, but whether or not the style was in use anywhere, before then, I'm afraid I don't know. I know that all the illustrations I have seen from the eighteenth century, eg, Seydlitz at Rossbach, show clay pipes.

The bowl could be lidded or not, and the lid and fittings were often of silver, or nickel, in less-expensive models. There were often cords wrapped around the stem and the bowl, holding the pieces together. And the stems ranged in length from short, like in the photos above, to longer than arm's length. The separate shaft, base and bowl allowed the owner to swap out bowls, and just as with drinking vessels, you might have a bowl to commemorate things like your military service, membership in a club of some kind, your local Landesvater or your city or state, student societies, and so on.

And so prost, with a bowl of fine K. u. K. Kanaster!
Brad
 
Brad,

Thanks for the info regarding the pipes. The painting instructions for the Valiant figure suggest the pipe should be painted white as well.

I am thinking for the mounted figure I will paint it brown as per the wooden shown in your post. The uniforms being largely black I am planning on painting the hands on the mounted figure in white gloves to contrast with the pipe and the uniforms.:eek:

Scott
 
Drawing some inspiration from diverse sources today!

Firstly JohnnyBach's Life Guards thread.

Secondly the Australian politician Christopher Pynes book 'A letter to My Children' where he writes "My father and I would use the now-vacant bedrooms upstairs to handpaint Napoleonic era model soldiers and stage battles between them"- I wonder what happened to those soldiers?

Anyway back to the grind. Using the Valiant figure as a guide I have started repairs to the helmet plumes. I drilled a small hole in the top of each helmet where the plumes were mounted and cut a section of paper clip to act as the rod for mounting the plume and araldited the rod into position.

Now to use the Warhammer greenstuff putty to sculpt some plumes- more to follow!
 

Attachments

  • IMG_5226.jpg
    IMG_5226.jpg
    121.2 KB · Views: 103
  • IMG_5227.jpg
    IMG_5227.jpg
    106.4 KB · Views: 101
GW putty! I had a play with the two-part epoxy party last night and made an attempt at putting the hair on the Brunswick Hussar helmet plumes.

It shaped very well but found it quite dry on the surface when I cut the pattern into the putty. Is there anything you can add to it to soften the surface slightly?

Fairly happy with the results.

Scott
 

Attachments

  • IMG_5240.jpg
    IMG_5240.jpg
    151.2 KB · Views: 82
  • Valiant brunswick hussar.jpg
    Valiant brunswick hussar.jpg
    21.3 KB · Views: 80
GW putty! I had a play with the two-part epoxy party last night and made an attempt at putting the hair on the Brunswick Hussar helmet plumes.

It shaped very well but found it quite dry on the surface when I cut the pattern into the putty. Is there anything you can add to it to soften the surface slightly?

Fairly happy with the results.

Scott

I use milliput - and that softens with moisture - so a dab of water does it. Never used that stuff - but maybe it works the same way??? j Try an experiment perhaps Scott?? jb
 
Will do JB. I ended up redoing them again last night as I thought they were too big and used a brand new X-acto blade which seemed to work better.

I have seen video of the GW people using the putty with Vaseline. It looks like it works well-

https://www.youtube.com/watch?v=mNSvo3NR92Y

They also have some rubber sculpting tools.

Scott
 

Users who are viewing this thread

Back
Top