Swapping knapsacks (1 Viewer)

Major Busgen

Private 2
Joined
Jun 4, 2015
Messages
99
Has anyone tried to remove knapsacks from Britain's figures?
I thought it would add variety, for example on these Brunswick figures but I wouldn't want to damage them.
Would they come off with gentle leverage?
36153_123F14C87E80D.jpg
 
My guess would be no they will probably take a bit of sawing and cutting to remove. You may have to just sacrifice a figure to find out unless Ken or someone who has modified these type of figures jumps in to say what the deal is.

Dave
 
Last edited:
I suspect that they are attached to the figures via a pin or lug cast on the backpack, that fits into a hole in the figure's back. Or, there's a pin or lug cast on the figure's back, and the hole is in the knapsack. You could try gently prying one off. If I'm correct, it'd pop off. Dave is correct-Ken Osen is probably the one who could best say how the figures are mastered and put together.

The thing is, if you remove the knapsack, are you going to proceed with removing the molded-on straps from the figure? You may be getting yourself into more of a project than you first imagined.

Prost!
Brad

Thanks Dave and Brad for your helpful thoughts.
I certainly wasn't intending to remove any molded-on straps, merely to swap one type of backpack for another.
I'm sure you're both right: the definitive answer must come from Ken.
KEN: Are you there?!
Bill
 
over the years I have come across a few figures where the knap sack has come off and I have seen how they are put together in a factory. The knapsack will have a little pin sticking out of it that fits into a hole on the back of the soldier. it will come off with a little force but some of the paint off the back of the soldier may come off with it causing a paint chip but this will be covered up when you attach the new knap sack.

I will have a look in my garage I'm bound to have one somewhere to show you.
 
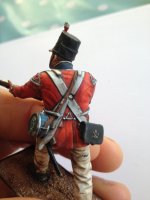
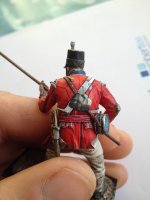
here are a couple that I have in my cabinet. on the first soldier you can see the hole clearly but on the next one the pin has come off the knap sack and has stayed in the hole if this happens when you do it then the knap sack will not attach securely back to the soldier. So there is some risk in attempting to change the knap sack.

01.jpg

001.jpg
 
here are a couple that I have in my cabinet. on the first soldier you can see the hole clearly but on the next one the pin has come off the knapsack and has stayed in the hole if this happens when you do it then the knapsack will not attach securely back to the soldier. So there is some risk in attempting to change the knapsack.

Thanks Iwan for taking the trouble to find and photograph those figures.
Your mention of a pin on the back raises another concern:
Even if the knapsack can be eased off, I suppose there is no guarantee
that the pin on one knapsack will necessarily line-up with the hole on a different figure.
Perhaps it's best to leave well alone.
Bill.
 
Last edited by a moderator:
Thanks Iwan for taking the trouble to find and photograph those figures.
Your mention of a pin on the back raises another concern:
Even if the knapsack can be eased off, I suppose there is no guarantee
that the pin on one knapsack will necessarily line-up with the hole on a different figure.

Perhaps it's best to leave well alone.
Bill.

You're correct; the pins may not line up. But it's not that much effort to replace the molded-on lug with another pin, and/or relocate the hole, as necessary. A piece of wire, like from a paper clip, a little CA glue or 2-part epoxy glue, and some putty to fill any remaining voids, and then touch up the paint. Not too much effort, just takes a little time.

Prost!
Brad
 
Hi...Just spotted this question.
These knapsacks were patterned at different times. The rectangular one was based on old illustrations by Knötel, and were perhaps a best guess reconstruction.

This is pretty common with earlier uniforms where little material culture for the common infantryman survives. Trousers, shirts, shoes, socks and braces are the probably the most rare items as they were worn until they were useless, or sold off to civilians. This is often followed by simple equipment that although produced in thousands, become obsolete and issued until existing stocks are worn out, destroyed, discarded or sold to other countries.

The newer knapsack we are using is based on a surviving one in the Swedish army museum that was clearly surplus from the British army and was probably part of a stand of arms and equipment sent to Sweden by the British to insure that their relationship was mutually beneficial against the French. This example was clearly marked for the British 1st Foot Guards and was complete with all straps and a fine example of the British cylindrical mess tin with linen cover as illustrated in paintings from the same period by Denis Dighton.
The Bruswickers were supplied from British stores, so I upgraded the newer releases with this knapsack and mess tin.

The Figures:
The earlier ones have a tapered square locating lug on the rear face along with a female receiver in the back of the figure. Later ones use a round pin with a hole in the back of the figure. If you would like to change them some may be harder to remove than others. Many are soldered, a few are super glued. Either way they can be modified when removed by grinding away the male connector and relocating them on the rear of the figure using higher viscosity CA (super) glue. Plan on some touch up...but this can be done with acrylic paints.

Another note...by the 1780s many knapsack were painted with linseed oil based paints to make at least the flap water resistant. Sometime around 1808-10 it seems that black became more common as a color and additives were used to "improve" the finish. When these painted items were new the finish had a bit more luster to them, although it was short of what I would call glossy.
Take a look at the 1866 US Army Quartermaster photographs to see the finish on the double bag knapsacks and haversacks and you will see what I mean.


Sorry to go on...but I hope it helps.
Ken
 
Thanks Iwan for taking the trouble to find and photograph those figures.
Your mention of a pin on the back raises another concern:
Even if the knapsack can be eased off, I suppose there is no guarantee
that the pin on one knapsack will necessarily line-up with the hole on a different figure.
Perhaps it's best to leave well alone.
Bill.

It was no trouble Bill. the cabinet is right next to my table and my phone was handy, just took 5 minutes. Personally I wouldn't bother changing them just in case something gets damaged.

Iwan
 
Hi...Just spotted this question.
These knapsacks were patterned at different times. The rectangular one was based on old illustrations by Knötel, and were perhaps a best guess reconstruction.

This is pretty common with earlier uniforms where little material culture for the common infantryman survives. Trousers, shirts, shoes, socks and braces are the probably the most rare items as they were worn until they were useless, or sold off to civilians. This is often followed by simple equipment that although produced in thousands, become obsolete and issued until existing stocks are worn out, destroyed, discarded or sold to other countries.

The newer knapsack we are using is based on a surviving one in the Swedish army museum that was clearly surplus from the British army and was probably part of a stand of arms and equipment sent to Sweden by the British to insure that their relationship was mutually beneficial against the French. This example was clearly marked for the British 1st Foot Guards and was complete with all straps and a fine example of the British cylindrical mess tin with linen cover as illustrated in paintings from the same period by Denis Dighton.
The Bruswickers were supplied from British stores, so I upgraded the newer releases with this knapsack and mess tin.

The Figures:
The earlier ones have a tapered square locating lug on the rear face along with a female receiver in the back of the figure. Later ones use a round pin with a hole in the back of the figure. If you would like to change them some may be harder to remove than others. Many are soldered, a few are super glued. Either way they can be modified when removed by grinding away the male connector and relocating them on the rear of the figure using higher viscosity CA (super) glue. Plan on some touch up...but this can be done with acrylic paints.

Another note...by the 1780s many knapsack were painted with linseed oil based paints to make at least the flap water resistant. Sometime around 1808-10 it seems that black became more common as a color and additives were used to "improve" the finish. When these painted items were new the finish had a bit more luster to them, although it was short of what I would call glossy.
Take a look at the 1866 US Army Quartermaster photographs to see the finish on the double bag knapsacks and haversacks and you will see what I mean.


Sorry to go on...but I hope it helps.
Ken
You didn't "go on", Ken. All you've said is helpful both in terms of the figures and also the historical background to the knapsacks used by British troops and some of their allies at that time.
I was particularly interested in your remarks about "waterproofing". I had wondered for some time whether knapsacks would appear "shiny". It is certainly my understanding that cartridge boxes would be on the glossy side.
Bill
 

Users who are viewing this thread

Back
Top