A beach dio. (1 Viewer)

waynepoo

Colonel
Joined
Jan 3, 2012
Messages
9,725
I was asked to create a D-Day beach dio/base for a friend and would like to share the process in this thread for those interested.
First up it is not historically accurate and artistic licence has been taken. I started with a timber base stained and glossed, easy for most handy with a saw and hammer so no need to go over that. I had to make two separate bases as this was required for ease of transport and space needs. The second step then was to add the polystyrene to create the layers eg; the beach rising up to the bluff.......


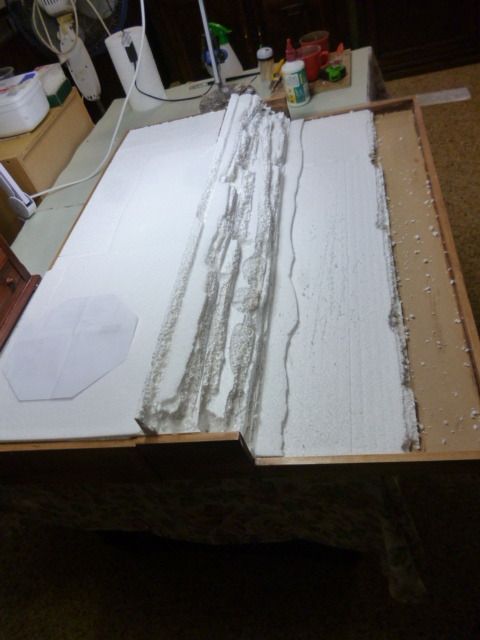
The base layer of foam on the higher/back base as a overhang to meet up with the rear of the forward base thus covering the join. more to follow.
Wayne.
 
The dio when complete will incorporate the K&C German bunker and coastal gun so I had to lay these out and then terraform so to speak the around them by adding layers of foam until you have the desired high and ect. In this case a trench around the gun emplacement and leading to the rear of the bunker. To soften the edges of the foam and create the contours I used turps, brush small amounts along the edges and over time it eats away the foam thus creating the desired affect....


Wayne.
 
Nice dio! I love typing that!

I always felt that the bunker set from K&C represented really good value.
 
Nice dio! I love typing that!

I always felt that the bunker set from K&C represented really good value.
You know having started out big I have now down sized..:rolleyes2:..going to cost someone a bit more than a free feed :wink2:
Wayne.
 
Last edited:
You know having started out big I have now down sized..:rolleyes2:..going cost someone a bit more than a free feed :wink2:
Wayne.

Approach the hobby with the right mindset and it is a gift that keeps on giving!
 
The next stage is to create the soil and sand. For this the beach is real sand from my local beach, put though a sieve to remove all large bits of shell and pieces of grit. The soil is all so sand but in this case coarse river sand also sieved to which I added various model railway ballast until I was happy with the colour and texture. Coat the entire dio with pvc (white) glue with a brush, then cover entirely with the sand. The beach first then the bluff and upper area next. Once dry invert to shake over the excess sand and ect.


Wayne.
 
Looking good mate and you have given me some ideas on how I'm going to layer the foam for my mountain.

Tom
 
Great thread mate will read this one closely thanks and great idea look forward to the finished piece.
 
The trenches needed walls, these were done with paddle pop sticks / coffee stirrers, cut, glued in place, painted and dry brushed.


Then there were sand bags, painted, glued in placed and dry brushed, barbed wire supports also were added.


Wayne.
 
The next stage was the basic ground cover, for this I again used various flocks and etc from model railway supplies. Mixed together until I was happy with colour and texture. Remembering the Germans had only recently excavated the area the ground cover would not have been total, leave a area free right around the trench line. Again coat the area you want covered with pvc/ white glue then sprinkle the flock mix over this, allow to dry the invert and shake off the excess.


Wayne.
 
Having done all that I then created the bluff ground work and barbed wire, again a mix of model railway flocks and dried moss was used. The wire is metal insect screen cut up and sprayed brown and dry brushed.


Wayne.
 
Then the upper area was done.


I added the realistic water next over a coat of Tamyia Dark sea blue.


Wayne.
 
The finished beach dio, my friend will add his beach obstacles and figures and ect, I have used the only Yank I own to show scale.


Wayne.
 
That was quick ^&grin^&grin

Awesome mate got a few good idea,s for my future beach diorama.
 

Users who are viewing this thread

Back
Top