A problem with cutting up my sculps (1 Viewer)

Naps...just Naps

Specialist
Joined
Sep 10, 2010
Messages
360
Hi,
I’ve started to do some scratch built soldiers for my own use and there is one phase of the toy soldier sculpting process that has me beaten at the moment and that is how to divide/cut the figure up for the moulding process without damaging the sculpture or losing any of the figure or details.
I make my figures by first creating a wire skeleton. I use Milliput to build the figure up and then complete all the uniform and other details. Just like I have seen other people do.
The figure is then in its completed state ready for moulding. Because I am using a two part moulding system I then need to take off arms, packs and weapons etc.
Taking off the packs, water bottles and weapons is no problem because they are just Milliput. The problem comes trying to take an arm off the figure.
My figure has a wire skeleton running through the whole body. So I have to cut through the Milliput and into the wire underneath which is very difficult and so far has always resulted in re-work and repair of the figure because of damage caused during limb removal.
I also have the added problem of having to drill away some of the wire to make a plug socket for the arm that’s been removed.
I’m pleased with the final look of my figures but I’m taking far too long over each figure because of all the rework and messing around. It takes some of the pleasure out of it when you mess up your initial sculpture.
Does anyone know of a way around this problem? Or does anyone have a different method of creating the figure in the first place?

Thanks
Paul
 
One solution for future sculpts is to make your armature from putty, tip of the hat to Alan Ball for that one. I haven't tried it yet myself, but I plan to on future builds.

Another is to us a Dremel with a cutting wheel to disassemble the figure, at least as far as limbs are concerned, to cut through the armature.

Also, before you even make an armature, you might want to include in your design a plan for how the figure will fit in a mold. You might plan to mold straps on the figure, for example, and sculpt packs and equipment separately. I'm working on a figure now that will be standing with his right arm raised, holding his hat in a salute or greeting. I'm keeping the lines simple, anticipating how I will make a mold and cast copies.

Hope that helps, prost!
Brad

Hi Brad,
Thanks for the response and tips.

I really like the idea of using putty as the armature. I never thought of that before. That would work.
Not only would it be easy to cut and easy to make plug sockets in the body it would be easier to form and shape the skeleton.
I suppose the only down side to it is having to wait for it to dry rock hard before you can start the figure build.
But that's no big deal. I'm going to try it. Thanks.

After the first couple of disasters I did decide to make and cast separate packs, water bottles and scabbards etc so I now have a stock of those cast ready to assemble future soldiers.

You're right about planning the mould. It is vital as I have found out to my cost. That rubber solution is expensive to waste on badly planned moulds.
Thanks for your help it is much appreciated.
Paul
 
Hi,
I’ve started to do some scratch built soldiers for my own use and there is one phase of the toy soldier sculpting process that has me beaten at the moment and that is how to divide/cut the figure up for the moulding process without damaging the sculpture or losing any of the figure or details.
I make my figures by first creating a wire skeleton. I use Milliput to build the figure up and then complete all the uniform and other details. Just like I have seen other people do.
The figure is then in its completed state ready for moulding. Because I am using a two part moulding system I then need to take off arms, packs and weapons etc.
Taking off the packs, water bottles and weapons is no problem because they are just Milliput. The problem comes trying to take an arm off the figure.
My figure has a wire skeleton running through the whole body. So I have to cut through the Milliput and into the wire underneath which is very difficult and so far has always resulted in re-work and repair of the figure because of damage caused during limb removal.
I also have the added problem of having to drill away some of the wire to make a plug socket for the arm that’s been removed.
I’m pleased with the final look of my figures but I’m taking far too long over each figure because of all the rework and messing around. It takes some of the pleasure out of it when you mess up your initial sculpture.
Does anyone know of a way around this problem? Or does anyone have a different method of creating the figure in the first place?

Thanks
Paul
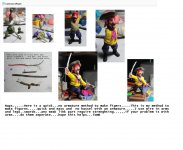
Naps.....try this method .....may help you work around a few problems.......cheers How too Pirate.jpgTomB
 
Hi,
I’ve started to do some scratch built soldiers for my own use and there is one phase of the toy soldier sculpting process that has me beaten at the moment and that is how to divide/cut the figure up for the moulding process without damaging the sculpture or losing any of the figure or details.
I make my figures by first creating a wire skeleton. I use Milliput to build the figure up and then complete all the uniform and other details. Just like I have seen other people do.
The figure is then in its completed state ready for moulding. Because I am using a two part moulding system I then need to take off arms, packs and weapons etc.
Taking off the packs, water bottles and weapons is no problem because they are just Milliput. The problem comes trying to take an arm off the figure.
My figure has a wire skeleton running through the whole body. So I have to cut through the Milliput and into the wire underneath which is very difficult and so far has always resulted in re-work and repair of the figure because of damage caused during limb removal.
I also have the added problem of having to drill away some of the wire to make a plug socket for the arm that’s been removed.
I’m pleased with the final look of my figures but I’m taking far too long over each figure because of all the rework and messing around. It takes some of the pleasure out of it when you mess up your initial sculpture.
Does anyone know of a way around this problem? Or does anyone have a different method of creating the figure in the first place?

Thanks
Paul
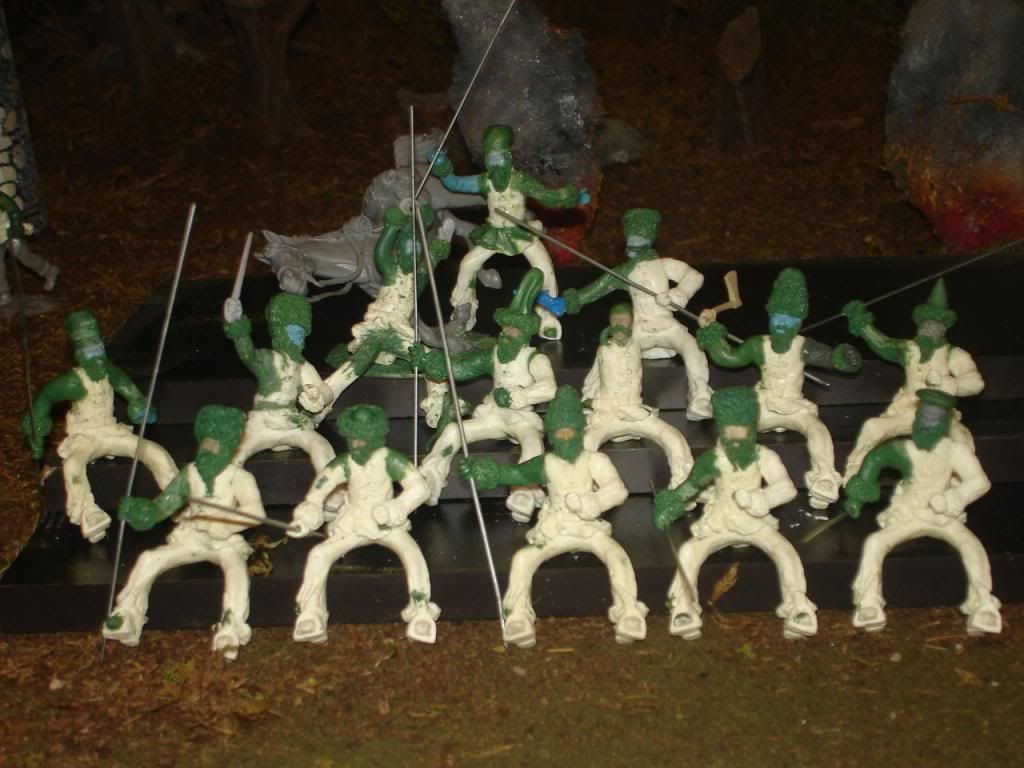
I,m no expert on this subject and have not done a lot of molding, but I scratch built and tried to mold a couple of figures and had the same problem with the arms being a molding problem so when I went to sculpt the next figure a mounted Cossack I tried doing the arms separate.
What I did was to sculpt the figure armless and then I drilled in small holes where the arms would come out and then put the wire into the holes and then applied the putty to the wire and sculpted the arms. I was able to pull the wire and arms back in and out of the figure after the putty had dried. It seamed to work pretty well for me and I was able to get the mold to work all right like that.

Maybe some of the real pro sculptors here on the forum can chime in and give us some tips on how sculpts are done for some of the bigger companies??? Maybe even a how to thread with tips, tools, and what they use. That would be really helpful to us hobby tinker around guys!^&cool

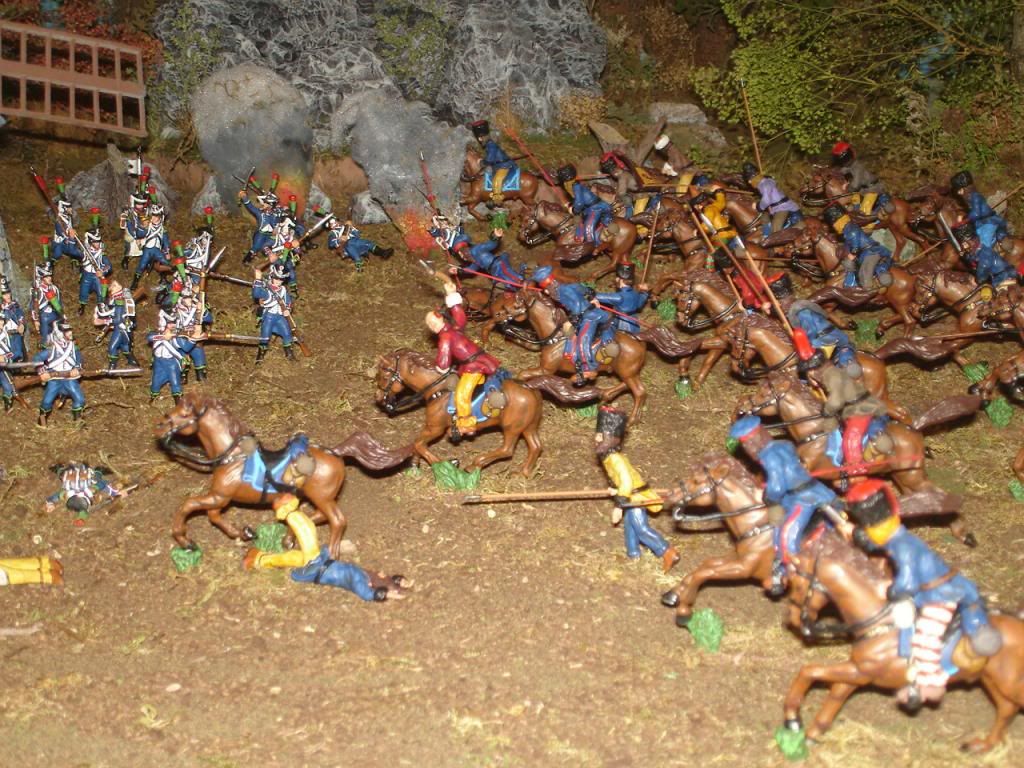
Here are a couple of pics of the Cossack I did showing how I did the arms.

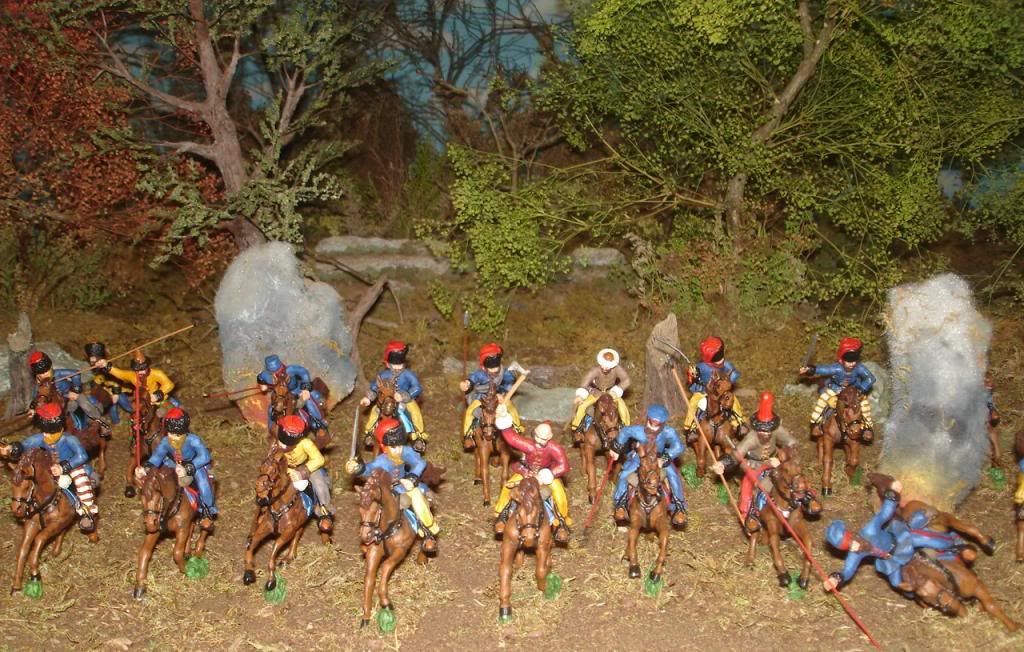
I cast a bunch of these guys in resin and because the arms are separate I was able to make many conversions from the same figure. You could also do separate heads and make various heads and arms and get a lot of mileage out of one body! I was able to get a couple of dozen different cossacks from that one body.


Last edited:
I don't think there are many formaly trained sculptors involved in the miniature figure world. We all just scrapped along and tried different things until we were happy with the results. In the days before the internet. every now and then you'd pick up an idea or think you'd invented a new technique (until you found out some one else had done that for years!) Now all you have to do is search google for "sculpting" and you'll find any amount of sites with tips and tricks. Here's a good one to start. http://www.planetfigure.com/forums/sculpting.25/

Martin
 
I,m no expert on this subject and have not done a lot of molding, but I scratch built and tried to mold a couple of figures and had the same problem with the arms being a molding problem so when I went to sculpt the next figure a mounted Cossack I tried doing the arms separate.
What I did was to sculpt the figure armless and then I drilled in small holes where the arms would come out and then put the wire into the holes and then applied the putty to the wire and sculpted the arms. I was able to pull the wire and arms back in and out of the figure after the putty had dried. It seamed to work pretty well for me and I was able to get the mold to work all right like that.

Maybe some of the real pro sculptors here on the forum can chime in and give us some tips on how sculpts are done for some of the bigger companies??? Maybe even a how to thread with tips, tools, and what they use. That would be really helpful to us hobby tinker around guys!^&cool

Here are a couple of pics of the Cossack I did showing how I did the arms.

I cast a bunch of these guys in resin and because the arms are separate I was able to make many conversions from the same figure. You could also do separate heads and make various heads and arms and get a lot of mileage out of one body! I was able to get a couple of dozen different cossacks from that one body.

Thanks for the great tips. I can see now that a few people have had the same problem and have found ways around it.
This forum is brilliant.
Cheers
Paul
 
I don't think there are many formaly trained sculptors involved in the miniature figure world. We all just scrapped along and tried different things until we were happy with the results. In the days before the internet. every now and then you'd pick up an idea or think you'd invented a new technique (until you found out some one else had done that for years!) Now all you have to do is search google for "sculpting" and you'll find any amount of sites with tips and tricks. Here's a good one to start. http://www.planetfigure.com/forums/sculpting.25/

Martin


That's a great link Martin. There are so many skilled sculptors out there. Very inspiring.
Cheers
Paul
 
Hi,
I’ve started to do some scratch built soldiers for my own use and there is one phase of the toy soldier sculpting process that has me beaten at the moment and that is how to divide/cut the figure up for the moulding process without damaging the sculpture or losing any of the figure or details.

Hi Paul.
I have not done any white metal casting for quite some time- but when I did I encountered the same problens than you discribe. Actually I think you do not need to worry too much at all since I think you do not have to cut the sculpt into too many pieces at all. We are just used to think that figures HAVE GOT TO BE SEPERATED into multiple pieces because professionally casted figures all seemed to be cut up and casted in multiple parts.
Spincasters need rather flat rubber discs to vulcanize the required mold. It follows the logic of spin casting to have rather straight parts without undercut wherein the molten metal shoots into the mold by centrifugal force.
The more complicated the anatomy of a figure gets the "wider" gets the mold. The wider the mold gets the cost will rise dramatically and you will most certainly loose the benefit of the spincasting technique as well since spincasting is not good for undercuts at all.

I trust you are useing RTV rubber to make your molds. In this case the width of the mold does not matter. It all comes down to clever designed feeding funnels where the molten metal can get in and and airpipes where the intrapped air can get out of the mold to ensure a good filling of the mold. Allways a good idea to part from the lego and oil clay method of building a two piece mold. Try casting a block mold and cut it open rather than useing a claybed for the first mold half etc.
It takes some practise to "Find" the sculpt inside the mold but it worked for me.
Have a look at my casting posts I did a while ago. I do cast in resin these days but the idea is about the same.

Have a look here, you will have to add an reservoir for the molten metal underneath your sculpt:
http://www.treefrogtreasures.com/fo...of-sculpting-casting-and-a-little-magic/page2

Good luck
regards
Wolfgang
 
Last edited:
Hi,
I’ve started to do some scratch built soldiers for my own use and there is one phase of the toy soldier sculpting process that has me beaten at the moment and that is how to divide/cut the figure up for the moulding process without damaging the sculpture or losing any of the figure or details.

Hi Paul.
I have not done any white metal casting for quite some time- but when I did I encountered the same problens than you discribe. Actually I think you do not need to worry too much at all since I think you do not have to cut the sculpt into too many pieces at all. We are just used to think that figures HAVE GOT TO BE SEPERATED into multiple pieces because professionally casted figures all seemed to be cut up and casted in multiple parts.
Spincasters need rather flat rubber discs to vulcanize the required mold. It follows the logic of spin casting to have rather straight parts without undercut wherein the molten metal shoots into the mold by centrifugal force.
The more complicated the anatomy of a figure gets the "wider" gets the mold. The wider the mold gets the cost will rise dramatically and you will most certainly loose the benefit of the spincasting technique as well since spincasting is not good for undercuts at all.

I trust you are useing RTV rubber to make your molds. In this case the width of the mold does not matter. It all comes down to clever designed feeding funnels where the molten metal can get in and and airpipes where the intrapped air can get out of the mold to ensure a good filling of the mold. Allways a good idea to part from the lego and oil clay method of building a two piece mold. Try casting a block mold and cut it open rather than useing a claybed for the first mold half etc.
It takes some practise to "Find" the sculpt inside the mold but it worked for me.
Have a look at my casting posts I did a while ago. I do cast in resin these days but the idea is about the same.

Have a look here, you will have to add an reservoir for the molten metal underneath your sculpt:
http://www.treefrogtreasures.com/fo...of-sculpting-casting-and-a-little-magic/page2

Good luck
regards
Wolfgang
Hi Wolfgang......I do not cast..have no idea how too...but....there is something I have always wondered about and you may have an answer.....I have seen small...perfect figures...with buttons...approx 10mm.... How can anyone make a figure so small......Is an original figure...maybe 60mm or less ...cast and recast in some type of shrinking molds ? the resin 1/35 figure's I have seen are terrific,,,,do they start as a larger scale and shrink-ed down a scale ?,,,,,,,,,regards TomB
 
Hi Wolfgang......I do not cast..have no idea how too...but....there is something I have always wondered about and you may have an answer.....I have seen small...perfect figures...with buttons...approx 10mm.... How can anyone make a figure so small......Is an original figure...maybe 60mm or less ...cast and recast in some type of shrinking molds ? the resin 1/35 figure's I have seen are terrific,,,,do they start as a larger scale and shrink-ed down a scale ?,,,,,,,,,regards TomB

Figures are made in all kinds of scales Tom, you just get used to making things small. One tip for making small buttons is to use a metal tube to form the circular shape. You can remove the hairs from an old paint brush or rotering pen, or brass tube can be easily shaped to the size of button you want.

Martin
Rodger....thanks for that......the best I can manage is 1/35 and that is a hassle.....funny thing....I find doing larger figures...70mm or more much harder to do than 54 mm even though it is easier to do the small details ...ie...buckle's,,,boots ,,weapons.....regards TomB
 
Rodger....thanks for that......the best I can manage is 1/35 and that is a hassle.....funny thing....I find doing larger figures...70mm or more much harder to do than 54 mm even though it is easier to do the small details ...ie...buckle's,,,boots ,,weapons.....regards TomB

I always find that there's a period of adjustment when changing scales, you get that used to making thing in 32nd scale that even changing to 1/30th scale, everything seams huge! Of course the larger you make something, the more detail needs to be added.

Martin
 
Hi,
I’ve started to do some scratch built soldiers for my own use and there is one phase of the toy soldier sculpting process that has me beaten at the moment and that is how to divide/cut the figure up for the moulding process without damaging the sculpture or losing any of the figure or details.

Hi Paul.
I have not done any white metal casting for quite some time- but when I did I encountered the same problens than you discribe. Actually I think you do not need to worry too much at all since I think you do not have to cut the sculpt into too many pieces at all. We are just used to think that figures HAVE GOT TO BE SEPERATED into multiple pieces because professionally casted figures all seemed to be cut up and casted in multiple parts.
Spincasters need rather flat rubber discs to vulcanize the required mold. It follows the logic of spin casting to have rather straight parts without undercut wherein the molten metal shoots into the mold by centrifugal force.
The more complicated the anatomy of a figure gets the "wider" gets the mold. The wider the mold gets the cost will rise dramatically and you will most certainly loose the benefit of the spincasting technique as well since spincasting is not good for undercuts at all.

I trust you are useing RTV rubber to make your molds. In this case the width of the mold does not matter. It all comes down to clever designed feeding funnels where the molten metal can get in and and airpipes where the intrapped air can get out of the mold to ensure a good filling of the mold. Allways a good idea to part from the lego and oil clay method of building a two piece mold. Try casting a block mold and cut it open rather than useing a claybed for the first mold half etc.
It takes some practise to "Find" the sculpt inside the mold but it worked for me.
Have a look at my casting posts I did a while ago. I do cast in resin these days but the idea is about the same.

Have a look here, you will have to add an reservoir for the molten metal underneath your sculpt:
http://www.treefrogtreasures.com/fo...of-sculpting-casting-and-a-little-magic/page2

Good luck
regards
Wolfgang

Hi Wolfgang. I have only just read your response to my thread. I just checked out your thread and your casting method is really impressive and interesting.
I need to find out if that Purex stuff is available locally and what it costs.
I do use RTV rubber and it is expensive and although the one piece mould is an interesting idea it could be costly if I mess up the cutting out of the sculpture but I might give it a try.
Thanks for the link to your great thread. I love those resin figures. Another option I could try.
Regards
Paul
 

Users who are viewing this thread

Back
Top