panda1gen
Colonel
- Joined
- Jul 29, 2005
- Messages
- 8,474
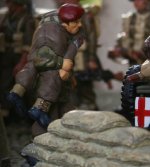
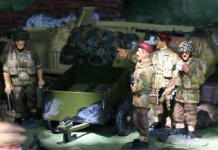
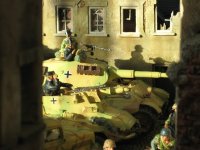
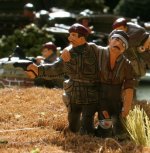
Re: battle for arnhem....
Thanks Chris, appreciate it.
Meanwhile, another VC.
http://www.marketgarden.com/2010/UK/frames.html
Lieutenant John H. Grayburn
2nd Parachute Battalion
The Parachute Regiment A.A.C.
1st Airborne Division
Citation:
Lieutenant John Grayburn was a platoon commander of the Parachute Battalion which was dropped on 17th September, 1944, with the task of seizing and holding the bridge over the Rhine at Arnhem.
The north end of the bridge was captured and, early in the night, Lt. Grayburn was ordered to assault and capture the southern end with his platoon. He led his platoon on to the bridge and began the attack with the utmost determination, but the platoon was met with a hail of fire from two 20mm quick-firing guns and from the machine guns of an armored car. Almost at once Lieut Grayburn was shot through the shoulder. Although there was no cover on the bridge, and in spite of his wound, Lieut Grayburn continued to press forward with the greatest dash and bravery until casualties became so heavy that he was ordered to withdraw. He directed the withdrawal from the bridge personally and was himself the last man to come off the embankment into comparative cover.
Later his platoon was ordered to occupy a house which was vital to the defense of the bridge and he personally organized the occupation of the house. Throughout the next day and night, the enemy made ceaseless attacks on the house, using not only infantry with mortars and machine guns but also tanks and self-propelled guns. The house was very exposed and difficult to defend, and the fact that it did not fall to the enemy must be attributed to Lieut Grayburn's great courage and inspiring leadership. He constantly exposed himself to the enemy's fire while moving among and encouraging his platoon and seemed completely oblivious to danger.
On the 19th September, the enemy renewed his attacks, which increased in intensity, as the house was vital to the defense of the bridge. All attacks were repulsed, due to Lt. Grayburn's valor and skill in organizing and encouraging his men, until eventually the house was set on fire and had to be evacuated. Lieut Grayburn then took command of the elements of all arms including the remainder of his company and re-formed them into a fighting force. He spent the night organizing a defensive position to cover the approaches to the bridge.
On 20th September, 1944, he extended his defense by a series of fighting patrols which prevented the enemy gaining access to the houses in the vicinity, the occupation of which would have prejudiced the defense of the bridge. This forced the enemy to bring up tanks which brought Lt. Grayburn's positions under such heavy fire that he was forced to withdraw to an area farther north. The enemy now attempted to lay demolition charges under the bridge and the situation was critical. Realizing this, Lt. Grayburn organized and led a fighting patrol which drove the enemy off temporarily, and gave time for the fuses to be removed. He was again wounded, this time in the back, but refused to be evacuated. Finally, an enemy tank, against which Lt. Grayburn had no defense, approached so close to his position that it became untenable. He then stood up in full view of the tank and personally directed the withdrawal of his men to the main defensive perimeter to which he had been ordered. He was killed that night.
From the evening of 17th September until the night of 20th September, 1944, a period of over three days, Lt. Grayburn led his men with supreme gallantry and determination. Although in pain and weakened by his wounds, short of food and without sleep, his courage never flagged. There is no doubt that, had it not been for this Officer's inspiring leadership and personal bravery, the Arnhem-Bridge could never have been held for this time. He was 26 years old.


 .
.