TomNT
Lieutenant Colonel
- Joined
- May 7, 2011
- Messages
- 7,986
Fellas
Last year i purchased a second-hand Collectors Showcase Arnhem sdkfz222 off ebay. When i received it, it did not have the two driver guide poles in the box. Anyone that has this vehicle will know that it comes with the poles detached from the vehicle and you have to attach them yourself. I asked the seller where they were and he told me he had no idea and wasn't aware they were missing.
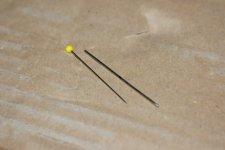
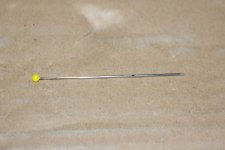
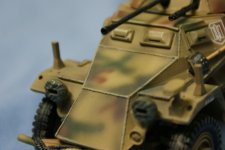
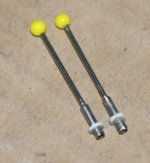
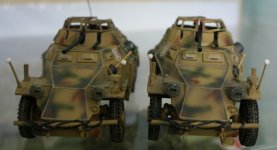
So i decided to make a pair myself and i have attached some pic's so you can see the end result. I made the poles from sewing pins with the balls on top, a hollow metal tube from an empty Humbrol 25gram plastic cement glue container (i cut the metal tube in half), hollow metal tubes that join watch bands together (one was bigger in diameter than the other and i cut both in half) and a plastic ink holder from a bic pen. Basically i inserted the sewing pins (i had to cut them down as well) into the cement tubes, then inserted the cement tubes into the first smaller watch band tubes which was then inserted into the second larger watch band tubes. Finally i sliced off two pieces (kinda like miniature hoops) from the bic pen ink holder and inserted them over the watch band tubes so they form the bottom of the poles. All the bits were stuck together with superglue. I then painted the poles and glued them onto the vehicle. I have included a pic with the poles mounted on the vehicle next to my second 222 which came with the original CS poles. The poles i made are on the vehicle on the right. Sorry about the close up pic of the vehicle being fuzzy.
P.S. A TF member by the name of villagehorse (Robin) suggested the sewing pins which led me to be creative and make the poles. Thanks Robin for your advice, it was very helpful.
Tom
Last year i purchased a second-hand Collectors Showcase Arnhem sdkfz222 off ebay. When i received it, it did not have the two driver guide poles in the box. Anyone that has this vehicle will know that it comes with the poles detached from the vehicle and you have to attach them yourself. I asked the seller where they were and he told me he had no idea and wasn't aware they were missing.
So i decided to make a pair myself and i have attached some pic's so you can see the end result. I made the poles from sewing pins with the balls on top, a hollow metal tube from an empty Humbrol 25gram plastic cement glue container (i cut the metal tube in half), hollow metal tubes that join watch bands together (one was bigger in diameter than the other and i cut both in half) and a plastic ink holder from a bic pen. Basically i inserted the sewing pins (i had to cut them down as well) into the cement tubes, then inserted the cement tubes into the first smaller watch band tubes which was then inserted into the second larger watch band tubes. Finally i sliced off two pieces (kinda like miniature hoops) from the bic pen ink holder and inserted them over the watch band tubes so they form the bottom of the poles. All the bits were stuck together with superglue. I then painted the poles and glued them onto the vehicle. I have included a pic with the poles mounted on the vehicle next to my second 222 which came with the original CS poles. The poles i made are on the vehicle on the right. Sorry about the close up pic of the vehicle being fuzzy.
P.S. A TF member by the name of villagehorse (Robin) suggested the sewing pins which led me to be creative and make the poles. Thanks Robin for your advice, it was very helpful.
Tom
Attachments

Last edited: