You are using an out of date browser. It may not display this or other websites correctly.
You should upgrade or use an alternative browser.
You should upgrade or use an alternative browser.
Enter the dragon! (2 Viewers)
- Thread starter noli-poli
- Start date
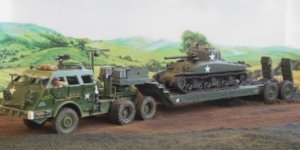
ENTER…THE DRAGON!
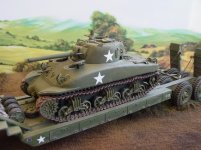
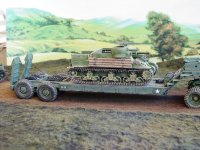
40-Ton M25 Tank Transporter
Standardize in 1943, it is a combination of M26 Tractor Truck and M15 Semi-Trailer.
It took 3 months and 5 days and working on it 6 hours a day (about 568 hours). Not as perfect as I wanted it to be but, with constraints in parts and materials it will do for now. It can be considered as a prototype if you may. The cost? Not counting man-hour, hereunder are the parts and materials used:
Plastic 1/35 Tamiya Dragon Wagon Kit ($ 65)
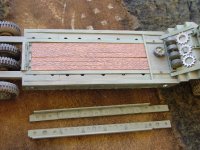
I used the Tamiya kit as reference and used some of its parts. A major part used was the goose-neck which I cut cross-wise and lengthwise to achieve a 1/30 scale size. grafted sheet-styrene in between the cut parts and reinforced with brass metal sheets. Later clad with more styrene sheet, I-bars and H-bars. To get the details, I “scalped” and grafted the Tamiya parts surface layer which I sanded paper-thin, embedded and glued to the surface. The rest was scratch-built to complete the section. To replicate the parts, I made a template by copying the Tamiya parts on a copier machine and blown-up to 17%...that’s the percentage you needed to achieve 1/30 scale template from 1/35 scale part. The rear wheel suspension and ramp skid assembly were also used but adjusted to fit 1/30 scale alignment. About 15% of the Tamiya parts were used.
Die-Cast Metal 1/25 First Gear Low-Boy Trailer ($175)
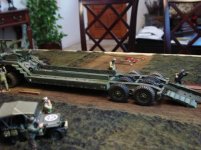
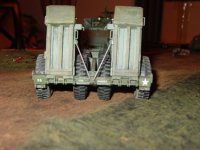
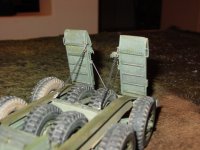
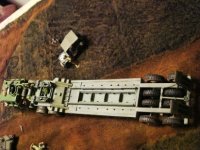
Only the trailer part was used. The tools and towing accessories that came with the set were perfect 1/30 scale. I disassembled the entire goose-neck part and used the bed as the spine of the M15 trailer. Cut-up to size and took out the rear wheel assembly. Re-built the rear wheel frame with brass metal and scalped Tamiya parts for surface details. Totally clad the trailer with balsa wood and sheet styrene. The trailer side panels and tool boxes were made by scoring the wood and adding brass hinges (the types you can find in doll house toy stores). The lock handles were made of etched brass. I used the square grid pattern available at a local train shop. Cut it up to make a rectangular shape and glued to the wood. I then added a micro nail at the center. About 25% of the FG parts were used.
Connected the scratch-built goose-neck at the base of the FG trailer and reinforced with micro-screws and brass metal for it to carry the weight of King& Country tanks and other AFVs.
For the tires, I used…
1/18 Century 21 WC 51 $ 50
1/18 Century 21 WC 57 $ 50
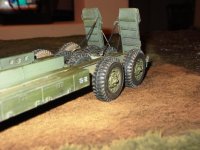
The tires are slightly larger than the KC M26 TRV. These are the closest thing that I can find that resembles the actual tires and rims of the M15.
Detailing King & Country’s M26 Truck Tractor
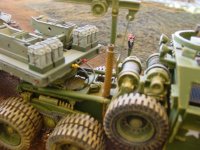
Added air-brake and reflector wirings on the rear of the M26. Also added a vise somewhere below the acetylene and oxygen tanks (by the rear door entry, driver side). Found this “G” gauge accessory at a train shop.
Other Materials
“G” Gauge Train Accessories $ 16
Assorted Styrene Sheets/T, H & I- Bars $ 25
Assorted Balsa Wood $ 15
Brass Metal Bars/pipes/sheets $ 50
Miniature Brass Hinges $ 25
Tools $ 75
Paints $ 25
Special decals $ 15
Books/Reference materials $ 39
…That’s a total of $625.00 excluding labor. Assuming a low-ball/sweat-shop price of $10/hour, labor cost is $5,680. Now I know why prototypes are expensive.
The major challenge in this project was recreating the goose-neck and attaching it to the trailer bed. Getting the correct size tires was also an issue and I spent an extra $150 from tires a bought which I cannot use (wrong thread, too small and no hubs to connect to the axle. The1/18 Century 21 WC51 and WC 57 were the closest that I can find).
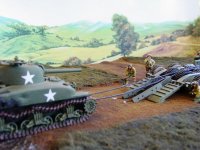
Attached are photos of the finished M25 Dragon Wagon. Enjoy!
Attachments
wwiibuff
Lieutenant Colonel
- Joined
- Mar 27, 2009
- Messages
- 7,400
Excellent work NP. It all looks great. So many hours of work here, and the results are fantastic. Thanks for posting your pictures. The Sherman looks like a repaint of the K&C damaged Sherman? Looks great sitting on the trailer. All the details, scratch building, accessory parts, etc. really do look nice. Thanks for taking the time to share your project with us. Congratulations on a job well done.{bravo}}
Forgot to add this photo...the rear of the kc m26 where i added air brake ans electrical wirings.
The damaged Sherman is a re-paint of the BoB snow covered Sherman (added tow hitch at the lower transmission cover). Tiger Tank is Honor Bound (Gold Edition).
N-P
The damaged Sherman is a re-paint of the BoB snow covered Sherman (added tow hitch at the lower transmission cover). Tiger Tank is Honor Bound (Gold Edition).
N-P
Attachments
Ken & Ericka Osen/H&A Studio
Command Sergeant Major
- Joined
- Jun 22, 2005
- Messages
- 2,113
You really did a great job here. I am sure this one-of-a-kind piece will be the center piece of your collection!
Ken
Ken
6th Wisconsin
Sergeant Major
- Joined
- Jul 2, 2008
- Messages
- 1,644
The work you did kicks butt more than Bruce Lee. Very impressive work with great detail!!!!
wayne556517
Lieutenant General
- Joined
- Aug 28, 2007
- Messages
- 16,125
Superb mate well done.
Users who are viewing this thread
Total: 3 (members: 0, guests: 3)


