Anybody out there know how to get this faded paint look/effect? I found these pics on a Gallery, but it didn't give contact info for the guy that painted it. I totally dig the way the colors blend & the faded look. Any tips or help would be hugely appreciated. Thanks

You are using an out of date browser. It may not display this or other websites correctly.
You should upgrade or use an alternative browser.
You should upgrade or use an alternative browser.
Faded paint help (1 Viewer)
- Thread starter scgatgbi
- Start date
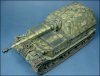
Here's a link to see better pics of the paint job. It's a bang up 1st rate paint job!
http://www.missing-lynx.com/gallery/german/gdferd.htm
http://www.missing-lynx.com/gallery/german/gdferd.htm
theBaron
Major
- Joined
- Mar 27, 2008
- Messages
- 10,555
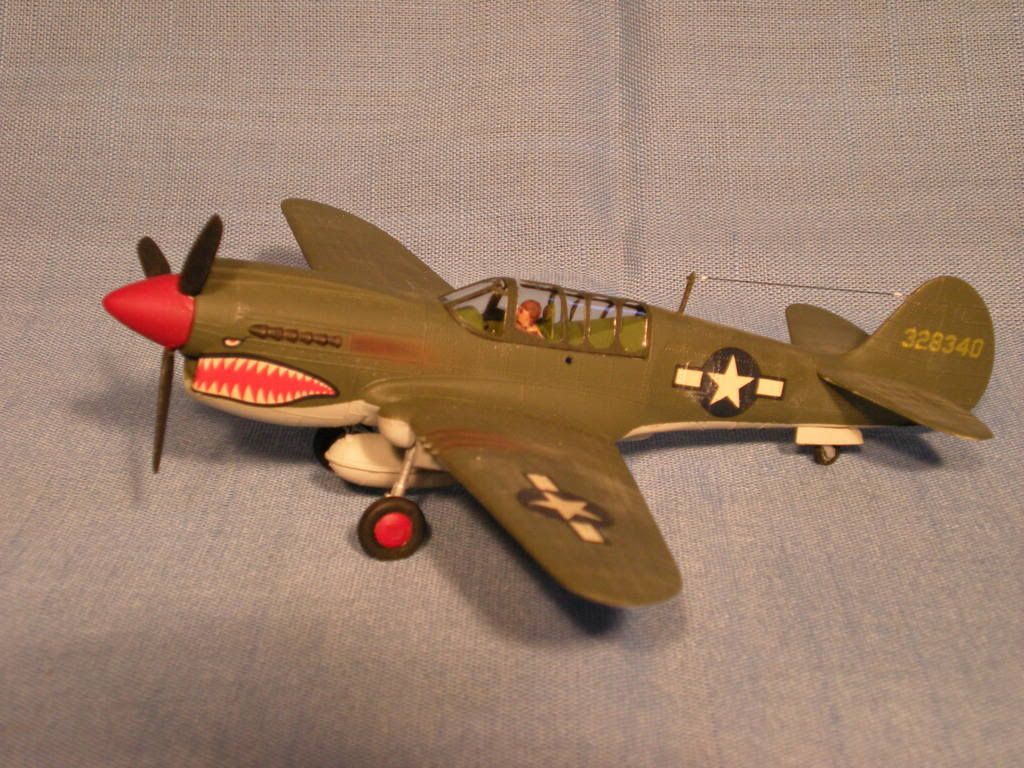
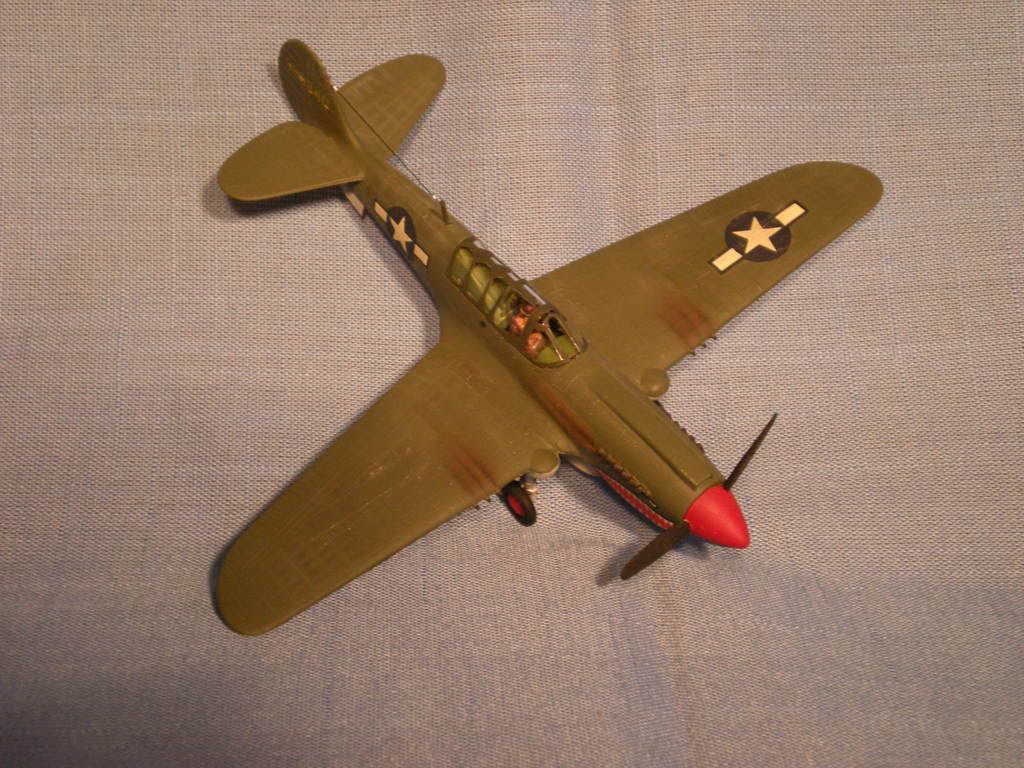
I use chalk pastels, too, such as using white and light gray to wash out blue or OD on my aircraft models. The only drawback is that they wear off unless sealed, and to seal them requires a couple of applications, because the seal coat will often tone done the faded effect, reviving the base color. But they're easy to work with, I just use an X-Acto knife to scrape chalk from the stick onto my palette, and apply with a brush. And you can use hairspray as a sealer (cheaper than DullCote).
To illustrate, here are some shots of a 1/72 P-40N that I weathered using chalks:

Hope to see some progress pics, prost!
Brad
To illustrate, here are some shots of a 1/72 P-40N that I weathered using chalks:
Hope to see some progress pics, prost!
Brad
Unfortunately I don't have or use an airbrush. What do you think was used for the wash? Just a light wash of the base yellow over the whole model? I haven't Tried (or learned) the Filter technique yet, any tips or links on how to do that? Thanks
TheBaron, not to go off on a tangent, but you brought up the pastel chalk.I've used it with varying success. The one thing about the chalk is the prep on it. Someone recently suggested picking up a cheap coffee grinder to make the powder. Have you heard of that? Seems like a pretty easy way to make up decent batches of the pastel powder. Especially if you do what I do & blend different chalk colors for dust or earth tones. I've never tried dullcote or hairspray to apply it. I've either applied it right after painting to the still slightly wet paint (works great for rust effects) or used a light ink wash & then dusted on the powder. the ink wash seems to do a good job holding it in place. The only drawback to that is the ink wash can obscure the base paint job if you're not carefull or don't want it to look to "dirty" and weathered.
I use chalk pastels, too, such as using white and light gray to wash out blue or OD on my aircraft models. The only drawback is that they wear off unless sealed, and to seal them requires a couple of applications, because the seal coat will often tone done the faded effect, reviving the base color. But they're easy to work with, I just use an X-Acto knife to scrape chalk from the stick onto my palette, and apply with a brush. And you can use hairspray as a sealer (cheaper than DullCote).
To illustrate, here are some shots of a 1/72 P-40N that I weathered using chalks:
Hope to see some progress pics, prost!
Brad
binder001
Command Sergeant Major
- Joined
- Apr 30, 2005
- Messages
- 2,729
You can "fade" paint in multiple approaches. One in to start with faded color - that is use a lighter color in general. However that tends to not be realistic as paint fades from sun and weather so the colors don't fade evenly. You can paint a vehicle in its base color, then go back and just paint the top or parts of the sides in a lighter color. This is best done with an airbrush, but I have done it with spray cans and with brushing. I have even done a 3-color approach with airbrushing - a dark color to undersides of surfaces, the base color shor from the side only and a lighter color shot from above. This accents the effects of light to bring up depth in a small model. Most modelers now use variations on "washes" or "filters" which are very thin applications of color to slightly change the base color or accent detail. A dark color wash (black, dark grey, burnt umber) can be used to make panel lines and grills stand out. The wash is often followed by dry brushing to highlight details and make the "pop out" to the eye. There are different schools of thought, so I suggest that you look at some of the model galleries on the internet, or look through model magazines like Military Modeling (out of England and a bit hard to get in the US, but a GREAT magazine) or FineScale Modeler which is readily available in the USA. The techniques used by plastic modelers and figure painters work fine for our "toy" stuff as well.
Gary
Gary
thebritfarmer
Moderator
- Joined
- Jan 29, 2008
- Messages
- 10,446
John Reid posted an excellent article on here about using pastels and weathering.
Here it is http://www.treefrogtreasures.com/forum/showthread.php?t=7713
Unfortunately he has moved the pictures in his photo bucket account so they no longer show up. I am sure if you pm'd him he could help.
Here it is http://www.treefrogtreasures.com/forum/showthread.php?t=7713
Unfortunately he has moved the pictures in his photo bucket account so they no longer show up. I am sure if you pm'd him he could help.
So do you just use a lighter shade or take the color & lighten it yourself by mixing it with white to get a lighter shade of the same color? I'm using Model Master & Poly S paints & the German Olive Green is pretty close in color between the 2 companies. is there another Green from either company that would work with those to give the faded look? My wife says I'm color blind (but maybe that only applies to clothes & home decor, chuckle) but I do have a hard time really differentiating between the subtle shade differences.
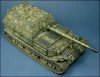
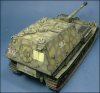
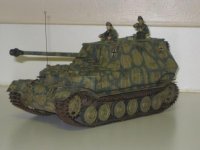
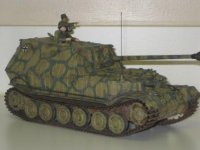
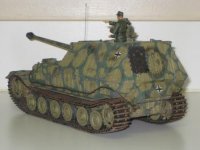
Here are some pics of a FOV Elefant I did in the same paint scheme, but didn't get the fading down. I like how the paint job came out (minus a few blunders. silly putty makes agreat mask, but can cause small "lumps"), but really wanted the more faded look.
Attachments
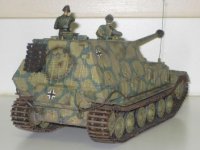
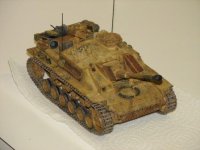
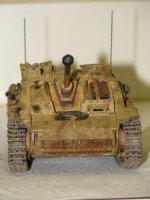
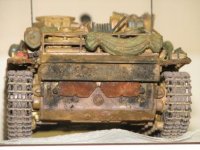
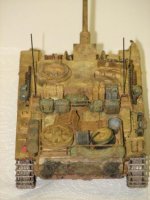
And a Stug from FOV that I re-did. I think the fading worked better on this one. But what helped with that was a mix of 2 different German Yellows & a ink wash with yellow ochre. You can see on the exhaust how adding the pastels to still wet paint works.
Attachments
theBaron
Major
- Joined
- Mar 27, 2008
- Messages
- 10,555
TheBaron, not to go off on a tangent, but you brought up the pastel chalk.I've used it with varying success. The one thing about the chalk is the prep on it. Someone recently suggested picking up a cheap coffee grinder to make the powder. Have you heard of that? Seems like a pretty easy way to make up decent batches of the pastel powder. Especially if you do what I do & blend different chalk colors for dust or earth tones. I've never tried dullcote or hairspray to apply it. I've either applied it right after painting to the still slightly wet paint (works great for rust effects) or used a light ink wash & then dusted on the powder. the ink wash seems to do a good job holding it in place. The only drawback to that is the ink wash can obscure the base paint job if you're not carefull or don't want it to look to "dirty" and weathered.
The coffee grinder is an interesting idea, but I suspect it would end up looking more like a Three Stooges short than a workbench
 I can't imagine needing that much powder at once, and while I can see laying up a supply and storing it ground, I've always gotten by on grinding what I need at the time. I just take the chalk stick and scrape along an edge, using the knife blade, depositing it into a cup on my palette. A couple of passes usually gives me enough. Then I blend it, like I would blend paints, or apply colors one at a time.
 On the P-40, for example, for the engine exhaust staining, I started with the lightest color, which covered the largest area of the stain, brushed that on, then added each successively darker color, in a smaller and smaller area, until I hit black in the very center. I did the machine gun exhaust stains the same way, except with fewer colors (brown and black), and on a smaller area. For the wing and fuselage surfaces, I mixed on the palette a very light gray shade with white and black chalk, and brushed it on with a wide brush.
I've also used the chalk to make mud, by adding a drop or two of liquid soap, a drop or two of water, and stirring till mixed, then applying it to the model. The soap helped keep it from running, and I could use a lot, to look like mud clogged in the road wheels and tracks on a halftrack, or I could also add a drop more of water to thin it, take a little on the brush, and streak it to look like mud spattered on the fenders and sides of the vehicle. But I like how easy they are to handle.
I got an inexpensive (maybe $10?) set of earth tone chalks at an art supply store, but I think Michael's or AC Moore might sell them, too.
I have an airbrush, but I'm afraid to use it
One of my modeling goals for this year, though, is to overcome that fear, because of the things you can do with an airbrush.YEah, I could see if you didn't hold the cover to the grinder on just how comical that might be. Of course the "master" of the house might not be so amused, chuckle. She'd have me sleeping outside with the cats for a month. I try to keep a stock of the powder for when the mood strikes, works great for dust/earth/mud. My favorite method for making a really dirty & mud clogged vehicle is to mix some craft paint (earth colored or whatnot), a little spackle, white glue, and craft sand together into a nice semi-glop consistancy & apply clumps of it. Once it dries it has a look and cosistancy that's hard to beat for chunks of mud & earth (you can even jam some static grass or whatnot into it). a little dry brushing and maybe an ink wash to blend it all together with a dusting of mixed pastel dust & viola!!!! a vehicle that's been dragged through a war zone. went off on a tangent there, I usually use a nail file for my chalks right now. tends to give a nice fine powder. I tried the hobby knife once & got bigger chunks than I wanted. I found a nice big set of the chalks on ebay for ~$10 or so. has like 50 different colors. Haven't been brave enough to even get an airbrush yet, so you've got me beat there, laugh. I figure I better learn to walk (or at least jog) before trying to run. There's enough stuff to learn with just a brush without diving into the airbrush yet. one day!
binder001
Command Sergeant Major
- Joined
- Apr 30, 2005
- Messages
- 2,729
scgatgbi- on "shading" the paint - you can lighten it with white, or yellow, or whatever looks like what you want. Take a bit and mix it, then paint it on a piece of plastic or an old model and see if that's what you want.
The pastels certainly work VERY well for creating a dusty or chalky surface.
Baron - don't be afraid of the airbrush. Do a bit of reading on the paint mixes and pressures then use some old items for practice. Nothing teaches you like experience. The only reason that I have tried to reduce spraying of paint is that my asthma is worse - so BE SURE TO USE A MASK and work in a ventilated area.
Back when I was a young lad and turning to model building I used my toy soldiers as practice subjects - I had a whole platoon of Marx soldiers in "jungle camo" suits. Then as I expanded I would take older models and use them for practice also (and then being young, I would blow them up with fireworks). So practice and try new techniques. I have been building tank and train models for 50 years and am still learning new stuff all the time.
Gary B.
maddadicus
2nd Lieutenant
- Joined
- Feb 8, 2006
- Messages
- 3,333
You folks are the experts, but I think the paint jobs already came out excellent..Really nice work...Michael
kilted vampire
Lieutenant Colonel
- Joined
- Mar 2, 2006
- Messages
- 7,900
You folks are the experts, but I think the paint jobs already came out excellent..Really nice work...Michael
I think so too! Michael
Using yellow for fading hadn't even occured to me, that may very well help out a lot. When I tried the white I wasn't totally happy with the result. especially for the german Greens & yellows. Maybe just a really light yellow shade added to the base color would work nicely, thanks!!!
redsoldiercollector
Private 2
- Joined
- Oct 31, 2007
- Messages
- 148
I accidentally discovered a way the other night. I sprayed my finish on some figures to close. They got a foggy look to them so I crushed some off and went over the areas with a bit mroe paint and they look like they have battle smoke on them
kilted vampire
Lieutenant Colonel
- Joined
- Mar 2, 2006
- Messages
- 7,900
Another thought for fading is to try using an overspray of a dust color.
Users who are viewing this thread
Total: 2 (members: 0, guests: 2)