Hancocks Beer Dray (3 Viewers)

johnnybach

Major General
Joined
Nov 24, 2010
Messages
13,663
Hi all - this is the start of a project that I've been promising myself to do - one of these days.

My story begins a few years ago - when a certain someone posted pictures of their gorgeous Trophy Brewers Dray. I loved it from first sight - including the geezer sat in the driver's seat - because that was my Grandad. Not only did he drive the Brewers dray - he drove THAT ONE - as he worked for Hancocks Brewery - based in my home-town of Cardiff, South Wales - before I was born, I might add.

I was in one of my favourite places the other day - "Dorset Soldiers Shop" - and I was discussing this very project with the owner, Giles Brown. I have tried to get a model of my own occasionally, but have been steadily outbid - and was reluctant to pay the prices demanded for one of my own.

So.................as usual.................my head started to try and work out what I might need to make one up - as I had already made a dray before - though not QUITE the same as my Grandad's.

To cut a long story short - I raided Giles' store-room - and left with some bits and pieces and a half-formed plan. I was going to "have a go" at a similar version of my own.

I bought these parts - but supplied my own metal sheet - which will become parts for the vehicle - such as the flat-bed of the cart. Here's a pic, which shows six metal barrels, a delivery shute/ladder - the driver (bowler hatted), four wheels, axles and front pivoting undercarriage for the front wheels/axle. I use brass rod for axles - and will also use this material for other parts - in due course.


The next pic shows how I mounted the rear axle under the cart. This was mounted on a piece of alloy metal (1.5mm) cut to a size to accomodate up to 12 barrels (9.5mm X 5.3mm). The axle was glued into pre-drilled holes ( part way through only) and also front axle being made up - and flat bed being strengthened at pivot point with additional piece of metal.


Next pic shows dry fitting of new parts - cut and filed to shape for the front end of the cart. Note driver seated temporarily on a barrel - as I was trying to establish how he would sit - leg clearances etc. Note footplate beginning to be formed.

Next pic shows draw-bar (horses connect to here with chains) being made up from thinner alloy material.


My next pic shows the front axle assembly and temporary piece of brass rod in central hole, which acts as a pivot point - to enable the front axle to steer the vehicle. Also shown is my attempt at a seat for the driver


Last pic for now, shows dray temporarily assembled up to this point. It also shows for the first time - my two horses. These are used Britains "Field Horses" (769), which I also purchased at Dorset Soldiers - from Giles' "Used Toy Soldier" range. Both horses were in need of some slight attention - and will be converted a little, to eventually look like dray-horses, instead of general farm animals. I was particularly keen to have two with appropriate head harnesses.

Well, that's where I am with this new project - so far. I would be grateful if anyone with a real Trophy Hancocks Brewery Dray set - would add any pics they might have - as it will help with the few pics I have already scrounged from the Internet - and will help others to see just what I am trying to achieve - with a slightly different version of my own. Thanks in advance - Johnnybach:salute::
 
Johnny,

Are you looking for any particular angle of the Trophy one?

Brad
 
Johnny,

Are you looking for any particular angle of the Trophy one?

Brad

Any you have please Brad. The front board seat would be useful - and also any of the horses. Thanks very much - in advance. jb:salute::

Looks like my last pic didn't transfer - so will try again.

 
Will do. Can it wait until Friday?

Brad

Absolutely Brad - Many thanks to you - for whatever pics you may show.:salute:: It will help me to see details better - and for others to see what I'm attempting do do - and also any differences I make. One difference being that my driver is a non-smoker, and he wore a bowler hat when "on deliveries", ( as my Dad told me), much to his amusement!. I was rather lucky that Giles had such a figure. jb
 
I did a little more work on my Brewers dray and the two horses today.

I have begun "dressing" the horses with some of the tack that they will use to attach them to my cart by chains. You can see the pre-drilled holes in the plate I fabricated and fitted on either side of the draw bar - (which goes centrally between the horses). I will also attach the horses to it by chains later. Note that I have mounted one horse on a stand already - but won't attach the other until both have been painted on the insides. You learn by experience - and trying to paint a pair already mounted is not a good idea!!! You may be able to make out that the horse on the stand - has two feet just off the ground. (I pinned the inner rear leg, for stability). The other horse has four feet grounded. The reason for this difference is - at some stage in the past, the one on the stand has been repaired - and a new front leg was grafted on. The new leg appears slightly longer than the original - and so the horse is slightly raised - which has altered the stance to look like this.

I quite like this slight difference - so instead of rectifying the original repair ( by removing the leg and shortening by a mil or two), have kept it like it was found. I think it will add just a little difference between essentially the same casting of the original Britains horses. When did you EVER see two horses exactly in step???

The draw bar has been fabricated, glued and pinned to the underside of the pivoting steering mount - so the wheels rotate and the cart can steer. Note also that there are now two low sides to the flat-bed of the cart - and I'm thinking of leaving the rear of the bed open, with the rear flap dropped down. That way, I can use my ladder/shute to "deliver" some beer barrels ( when I feel like playing with it!):D

The second pic below, shows the shaped front of the cart a bit more clearly - which was done by sawing and filing. The paper design will be the elevated sign above the driver's head ( Driver's name was Arthur - by the way - and he was my paternal Grandfather). I'll have a go at that sign tomorrow. I have a few more bits of dressing to do on the horses, such as blinkers and Horse Brasses etc - and then, I think the fabrication of parts can take a back seat - and I can start painting. Hancocks Brewery used Grey horses - as did the Trophy version.

That's when Brad's picture(s) of his lovely Trophy dray will come in ti its own - and I can get a much better idea of some more details. :salute::

Cheers - for now. jb


Johnny,

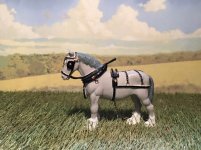
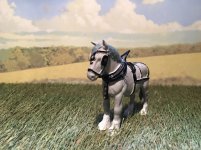
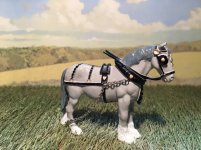
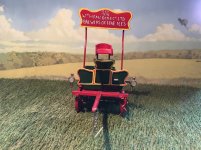
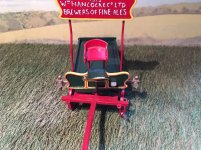
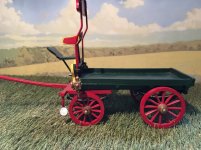
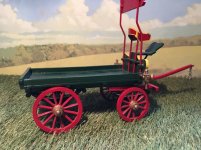
Here are photos of one of the horses. Both horses are the same. More to come after this.

image.jpegimage.jpegimage.jpeg
 
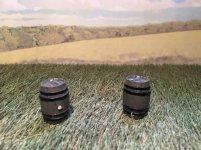
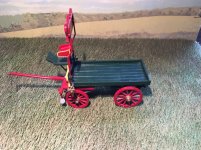
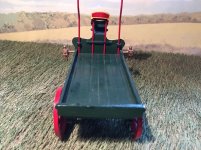
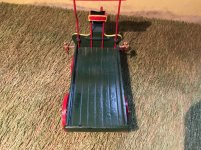
Couple more of the carriage and the driver.

Please let me know if you need additional photos.

image.jpegimage.jpegimage.jpegimage.jpeg
 
They are just excellent Brad. Just what I needed. :D I can see now - very small details - such as steps for driver to mount the high seat - and also tiny details such as how the sign-posts are held to the rear of the front board of the cart. The horses are MUCH more clearly defined - perfect for a painter! Thank-you so much for those.:salute::

I have done a bit more today on my version - and first re-did the driver seating - which on my first attempt was too far back. My second attempt is shown below - and becoming a bit fed-up with the metal-work - I sloshed a bit of undercoat paints about too - much more relaxing!;)


I decide to remake the footplate ( which I cut too short) and raise the seat a bit too. I also had an attempt at the sign-board and poles - but decided to paint the board before adding it to the vehicle (much easier to control the brush, that way). I've just glued the poles into pre-drilled holes in the flat-bed - and glued them to the back of the cart-front - but I'll now add milliput brackets - as shown on brad's pics - which will also make the sign-board more stable.

I've changed the feathering on the feet of the horse on the stand too - by adapting with milliput to give the "feathered hoof" look - similar to the Trophy version. I've left the other one - for now - so you can see the difference - but I rather like the new look. An all over coat of Matte cream paint will provide a sound undercoat for the Grey horse with black tacking. You may also be able to see the blinkers added too. Once the milliput is hardened - I will add some horse-brasses to the chest area. Note also the mounting "eyes" for the front attachment of chains. I bought some ladies earing wires in a pack from a market stall - which was selling craft items - very cheaply in a small pack of 20 or so. The idea is for crafters to make up earings using beads - but I find they are ideal for OUR use. I'll use them at the rear of the horse too - as they work out as pennies - and will do the job of attachment points for chains very well. Maybe, now you can see why I resisted mounting BOTH horses at the same time? If I hadn't kept one OFF the stand - it would have been far more difficult to do work on - or paint the inside areas of either horse.

I'm going to follow the Trophy colour scheme quite as shown - so Brad's exceptionally detailed pics will be invaluable here. Note my addition of a Britains Blacksmith in this scene - which I bought online ( in an e-bay lot ) minus his arms and anvil - but otherwise intact. An investment of just over£1 fitted him up with missing limbs and an anvil (Dorset again) - so have included him in my scene - and I'll paint him up at the same time.

Here's another family anecdote coming up. As I told you - my Grandfather drove this Dray for Hancocks Brewery - but HIS father (my Great-Grandfather) was a blacksmith. So in my scene - both of my ancestors appear - and Dad is helping his Son out with a repair to his dray - or maybe just shoeing a horse for him!!

You can probably tell - I'm enjoying bringing both of my ancestors back to life - with this really nice project!:D

How cool is that?:cool: jb
 
Excellent scratchbuilding, John! This is going to be a great piece, when you've finished.

About the beading wire--I have a small spool of it, too. I originally bought it with an eye towards using it to rig biplanes in smaller scales, but I've been using it lately to replicate ribbed flexible tubing or hoses. I wrap the beading wire around wire solder.

I look forward to seeing your next installment!

Prost!
Brad
 
Your wonderful painting has brought it to life!
- the project is beautiful and heartwarming..
 
Here's another update on a bit more progress. I had a first go with painting one of my horses last night - so had to wait until morning to post a pic as I didn't want to handle with new paint. I have decided that my pair of horses will be dapple-greys, so have begun the first coat that way. Note the immediate difference between the flat cream undercoated horse.

Note also, yet another figure who will find a place in my final set. He's the figure in front holding an end of the ladder/offloading shute which drops onto the back of the flat-bed (I will leave the flap dropped down), to load or offload the barrels at their destinations. My figure is an original Britains hollowcast figure known as " Man with Wheelbarrow" who had lost his wheelbarrow at some time in his past. He also parted with his feet and stand, at some point in his past too - so I made him a new stand, and pinned him to it up both trouser legs - and then gave him a new pair of feet made from milliput! Another bargain buy from my e-bay "stash" of Farm figures - which included the Britains Blacksmith seen earlier ( The Anvil is a Johillco copy BTW).

I also have a Britains "Cartier with whip", who I may have walking alongside my horses - currently under repair- so will see if he turns out to be a suitable candidate too.

 
The dray is starting to come together now - though still very wet paint stops me connecting the draw bar/front wheel assembly to the trailer. I painted all of the front of the sign, before connecting to the two upright posts - and just dropped grandad into the seat - to check that he has a bit of clearance.

Leave those parts to dry off - which will allow me to concentrate a bit on the horses.

 
The dray is looking brilliant JB and the Trophy horse is a nice "copy" of the Britains farm horse.
 
The dray is looking brilliant JB and the Trophy horse is a nice "copy" of the Britains farm horse.

Cheers Scott! I looked for some of the Britains "Cart Horse" (No.541) - as it would have had all of the tack already on it - but unfortunately couldn't find any suitable candidates.

So.............. on my recent visit to Dorset Giles had dug out of his stock, two used "Field Horse" (No.769), which, of course, didn't have the tack to pull a cart - but DID have the head-collar. However, I figured that even though they were not perfect (one had a repair underneath - and the other had that replacement leg which raised it slightly) - they were available - and repairs don't phase me - so for a tenner - I had them both. The tack is just rolled out milliput, cut to shape - with a smear of super-glue underneath to hold it in place. It cured nicely overnight - and was ready for an undercoat of matte cream next day.

So, well spotted - they ARE indeed really "copies" of 541 - but hopefully will look the part when attached. I have a bit of "horse-brassing" to do yet - and then fit the draw chains - and THEN - I can fit the second horse onto its stand - though I'm currently thinking that the whole thing might be far easier to handle and move - if I were to make a new stand which could take all of the pieces too. If I do - I'll keep the cart separate from it though, for maximum "playability".
 
I have been working on my pair of horses for my Dray - and didn't want to merely copy Len's marvelous pairing for the Trophy model. Instead, I relied on a memory that has stuck with me for around fifty years.

Back in the 60's, I can remember attending the Bath & West Agricultural show - and being mightily impressed by a Brewer's Dray in the showring - which had a pair of Dapple-Grey's pulling a dray full of Barrels. Can't remember the Brewer now, but it was a stunning sight - and dapple-greys have stuck with me as a favourite ever since. The horses were once a common sight around Cardiff until the late fifties, when they were mostly retired but still used at shows for promotional purposes. Hancocks Brewer's were taken over a bit later by Welsh Brewers - then Bass/Charrington - and finally the still family owned and run Brains Brewery - who still occupy the old Hancocks Brewery site in Cardiff. I'm led to believe that the hancocks name STILL lives on with a brew still made by brains - "Hancocks Home Brew" - which I recall was a very nice Bitter Ale.

I have tried to reproduce those memories with my current pair. Note chains now attached - which will link up to the front wheel assembly later on today - and maybe even the trailer - if all parts are dry enough. You may also note that I prefer to base most of my horses - and as these will never need to be split up - as they are a working pair - I've mounted them on a single stand. As you will see later, the draw bar will slide between them, so I had to leave enough space to link up draw chains etc, but all has been checked out for fit - before assembly. Anyhow, here are my pair of horses - for now, who I have been I calling "Atlas and Hercules". Hope you like them jb :D


Atlas and Hercules look spiffy JB. I remember as a kid running to the end of my Nans street to watch the Tetleys dray, giant white shire horses. What a sight!!
 

Users who are viewing this thread

Back
Top