Making A Photo Diorama (1 Viewer)

PolarBear

Major
Joined
Feb 24, 2007
Messages
6,706
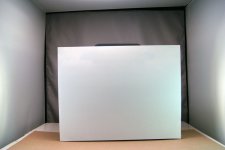
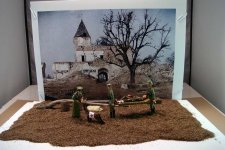
With a number of new members on the forum, I thought it might be useful to review the process of making a Photo Diorama. Like so many of us who use this process to display our collections, I owe a profound debt to Joe, the Lt. who has provided excellent examples for us to emulate. The Photo Diorama is a great way to go if you do not have a lot of space to display your collection in permanent diorama setups. It is much easier to archive one's scenes with this photographic process and with digital photography it takes up even less space. What follows in the frames below will be a step by step outline of how I made one of my recent Photo Dioramas.

Randy
 
Equipment:

DIGITAL CAMERA:

I use the 2007 version of the Sony Cybershot Camera which even for a beginner like me is easy to use. it has widescreen/HD capabilities as well as the usual 3:2 photo composition format.
 

Attachments

  • cybershot200front.jpg
    cybershot200front.jpg
    47.6 KB · Views: 559
Camera Rear View:

Here is the wide viewing screen on the back of the camera. It doubles as a touch screen with stylus where I can make all needed photo adjustments from an onscreen menu.
 

Attachments

  • cybershotback.jpg
    cybershotback.jpg
    38.3 KB · Views: 516
Tripod:

Just as important to me has been a good tripod. I chose a Kenlock model that is normally used for video cameras since it has wheels for easy movement in and out from the subject and a hand crank for raising and lowering the camera.
 

Attachments

  • kenlocktripodA.jpg
    kenlocktripodA.jpg
    12.1 KB · Views: 560
Photo Setup

To setup my scenes for photographing I use a Quantaray Portable Photo Studio available at any Ritz Camera Shop or online. The studio comes with 2 spotlights and a cloth booth (that can be folded for storage) providing filtering of the light and both grey and blue cloth backdrops. I have found from experience that I needed to add a 3rd light: an architect's lamp with a 60 watt bulb to light the scene from above. I will show my exact setup in a later frame.
 

Attachments

  • quantaray.jpg
    quantaray.jpg
    24 KB · Views: 503
Photo Editing Software:

Adobe Photoshop Elements


This is the basic amateur's version of Photoshop available for about $90 which will do most things you will need to spruce up your photos for posting: such as cropping, adjusting color, lighting, contrast, sharpness, etc. I have version 3.0 which has now been replaced by newer releases but they all work basically the same.
 

Attachments

  • adobephotoshopelements.jpg
    adobephotoshopelements.jpg
    44.8 KB · Views: 432
Choosing your subject:

Select the figure(s or vehicle(s) that you want to photograph as a scene. I have selected
W. Britain's Austrian Stretcher party from the Charles Biggs Premier Series. Here is a photo of the set from the Britain's catalog.
 

Attachments

  • 41031austrianmedics.jpg
    41031austrianmedics.jpg
    95.2 KB · Views: 604
Next: Select a background photo for your scene.

Since my subject is from World War I, I wanted a background that would be appropriate for the set. Since World War I was photographed and some photos were made using an early color process called autochrome I googled online for World War I color photos and found this site:

http://www.worldwaronecolorphotos.com/

I selected a scene of a ruined building in France.
 

Attachments

  • WWIchurch.jpg
    WWIchurch.jpg
    93.8 KB · Views: 614
I used Photoshop to improve the color of the photograph and then printed it out on my HP printer using HP premium Plus Photo Paper: Soft Gloss
 

Attachments

  • churchphotoshopped.jpg
    churchphotoshopped.jpg
    72.4 KB · Views: 566
Setting up the scene:

My next step is to set the stage for my scene inside the portable photo studio. I have a box inside that I can attach the background photo to with paper clips
 

Attachments

  • photoshoot1.jpg
    photoshoot1.jpg
    96.2 KB · Views: 576
Photo attached to box support:
 

Attachments

  • photoshoot2.jpg
    photoshoot2.jpg
    96.5 KB · Views: 253
Setting up the base:

I have styrofoam bases that I use to set up the ground cover and figures:
 

Attachments

  • photoshoot3.jpg
    photoshoot3.jpg
    95.8 KB · Views: 286
Adding scenic elements:


Here I add landscape or other elements to complement the figures. Notice the 2 white spaces. Here I have removed some of the ground cover for placement of the figures. After setting them in these spaces, I will brush in some of the ground cover to hide their bases.
 

Attachments

  • photoshoot5.jpg
    photoshoot5.jpg
    76.2 KB · Views: 252
Placing the figures:

I add my figures and the scene is about ready to shoot.
 

Attachments

  • photoshoot6.jpg
    photoshoot6.jpg
    94.9 KB · Views: 291
Final Photo setup:

Here you see my setup in action with its 3 sources of light. I will shoot the scene at different exposures, distances and angles and later choose the best image for posting.
 

Attachments

  • photoshoot7.jpg
    photoshoot7.jpg
    94.7 KB · Views: 275
Final Product:

Here is the finished photo after editing with Photoshop and ready for posting:
 

Attachments

  • AustrianMedicsWWISM2.jpg
    AustrianMedicsWWISM2.jpg
    95.6 KB · Views: 260
Here is a different photo of the same subject in its unaltered state prior to editing with Photoshop:

I hope this thread will help those members who want to try this form of diorama. Please feel free to contact me with questions.
 

Attachments

  • DSC01784.jpg
    DSC01784.jpg
    96.8 KB · Views: 259
By golly Randy, now I want to go out and become a diorama photographer. Great thread, I really have enjoyed it. Certainly a keeper for me for future ideas on how to branch out into this hobby.

Mike
 
By golly Randy, now I want to go out and become a diorama photographer. Great thread, I really have enjoyed it. Certainly a keeper for me for future ideas on how to branch out into this hobby.

Mike

Thanks Mike

I truly enjoyed your how-to on making scenics for your Crusaders.

Randy
 
Excellent Thread! One more way a collector can enjoy his hobby!
 

Users who are viewing this thread

Back
Top