Purchasing "job-Lots" (2 Viewers)

I want to show you a figure from this Lot next - which at first caused me a bit of head scratching - which is a bit strange - as he came without a head himself!


As you can see above - he looks like ( and indeed is) a Britain's figure, as it clearly shows underneath the horse the Britains marks. He has been repainted at some point - as a US Cavalryman.

Snag is - Britains didn't make him that way. He's a hollowcast alright - and Britains DID make some US Cavalry using this horse at the Walk - but it was of a figure in service dress (set 229). They made them from 1925 in a light Khaki uniform - and again from 1954 in a picture pack in a darker shade of grey-green.

So..... this figure, now without a head - has probably been converted at some point in his past - to an earlier form of US Cavalry by a previous owner - who probably replaced the head (and arm) with something else, and then repainted him.

Well, okay - I quite like that idea myself - and very fortunately, I had a head in my spares box, which might suit - see below.


I think that I'll try to keep him as a US Cavalryman, maybe during the ACW - and make him up as an NCO, using that new head. But for now - he's due for a complete paint strip. jb
 
Here's three more figures undergoing repairs - this time - all Cavalry.

The first figure on the left is by Cherilea - and was originally found with no head or right arm - which should have identified him as a lancer. However, I already have such a figure - now repaired back to near original spec. As this one was missing those two significant pieces - I decided to make this one up as a Hussar - so grafted on a Dorset spare head ( the arm holding drawn sword - still not fitted - as it's far easier to paint uniform with it off). Note also the horse's two front repaired soldered legs - from a previous owner's repairs. I spent about half-an-hour filing the excess solder down to get this far!

The other two pieces are interesting, to say the least. I originally thought they were battered Britains "Scots Greys" type of walking horse. Both were headless - and each had three broken off horse legs, and were in a very poor state of repair. The first clue that all was not quite right was the weight - they were over heavy.

Well, after the several old layers of paint and grunge came off - I found that these were very old fakes. Someone had made up a drop mould - probably from Plaster of Paris - and re-cast them flat in two solid halves - and then finally soldered them together. The joint had then been crudely completed with some form of old putty ( see the original look on the one in front for the joint and general appearance). The one now standing at the rear has had new filler applied - as well as three new leg added). I made the two supporting legs from metal pins down through the new base again - and then clothed them with new milliput putty. the third non-supporting raised leg - is another Dorset spare. I've painted them in a cream undercoat to show the effect better for this pic. They're probably not worth the time and effort to repair - but I rather like the challenge of trying to do something with them.

As I don't have any Scots Greys heads in my box - I'll be ordering some new spares from Dorset - to eventually complete these two figures as Troopers. must remember to add two scabbarded carbines - one for each.

 
...Well, okay - I quite like that idea myself - and very fortunately, I had a head in my spares box, which might suit - see below.


I think that I'll try to keep him as a US Cavalryman, maybe during the ACW - and make him up as an NCO, using that new head. But for now - he's due for a complete paint strip. jb

I like that idea, John! I like the pose shown above, looking to his 2:10. It sets him off from the typical toy soldier pose, which would be looking straight ahead. It's the same kind of difference, that made Britain's Lancer officer so cool, turned sideways in his saddle. I hope you stick with it, as you refurbish him.

Prost!
Brad

Yes - I will Brad, I like that pose too. I'll have to do a bit of reading about the times though - as I'm out of my comfort zone with ACW, and I like to get details right. I don't think the shabraque was the correct colours - or would be correct for a guy with NCO stripe down his pants - and he also didn't have any stripes on his arms when found anyway.

must read a bit more about it all.

jb
 
Yeah, I'm fairly certain it should be blue, for a Union trooper, with lace varied to reflect rank, varying for ordinary troopers, non-coms, and commissioned officers. I'd have to look it up, too. I haven't delved as deeply into the Civil War, as I have into the Seven Years' War or Revolutionary war, though I did teach a unit on it, when I taught US History. We didn't get into uniform details, though ;)

Prost!
Brad
 
Yes - I will Brad, I like that pose too. I'll have to do a bit of reading about the times though - as I'm out of my comfort zone with ACW, and I like to get details right. I don't think the shabraque was the correct colours - or would be correct for a guy with NCO stripe down his pants - and he also didn't have any stripes on his arms when found anyway.

must read a bit more about it all.

jb

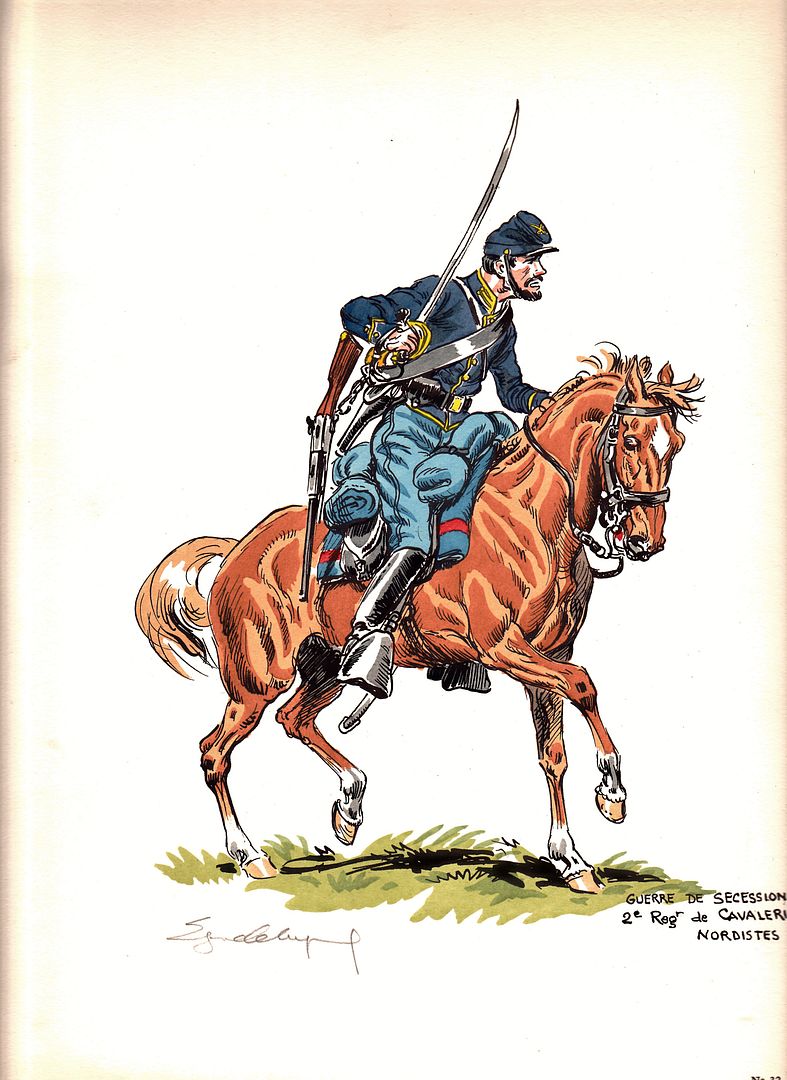
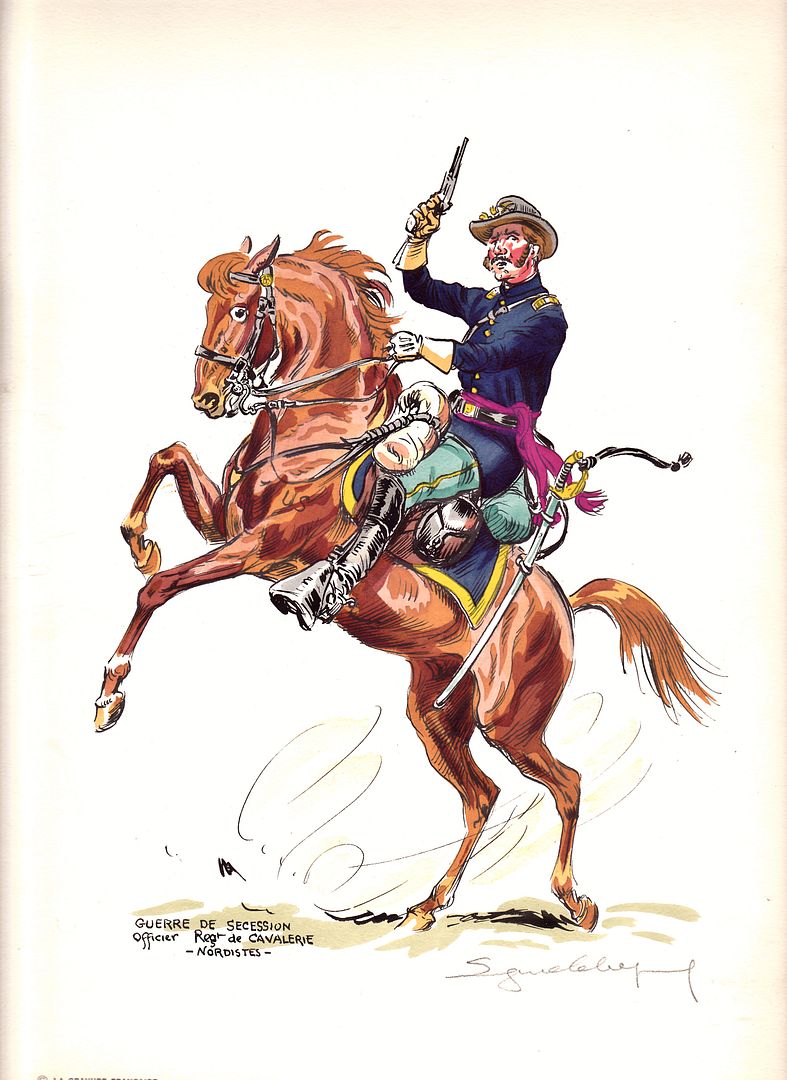
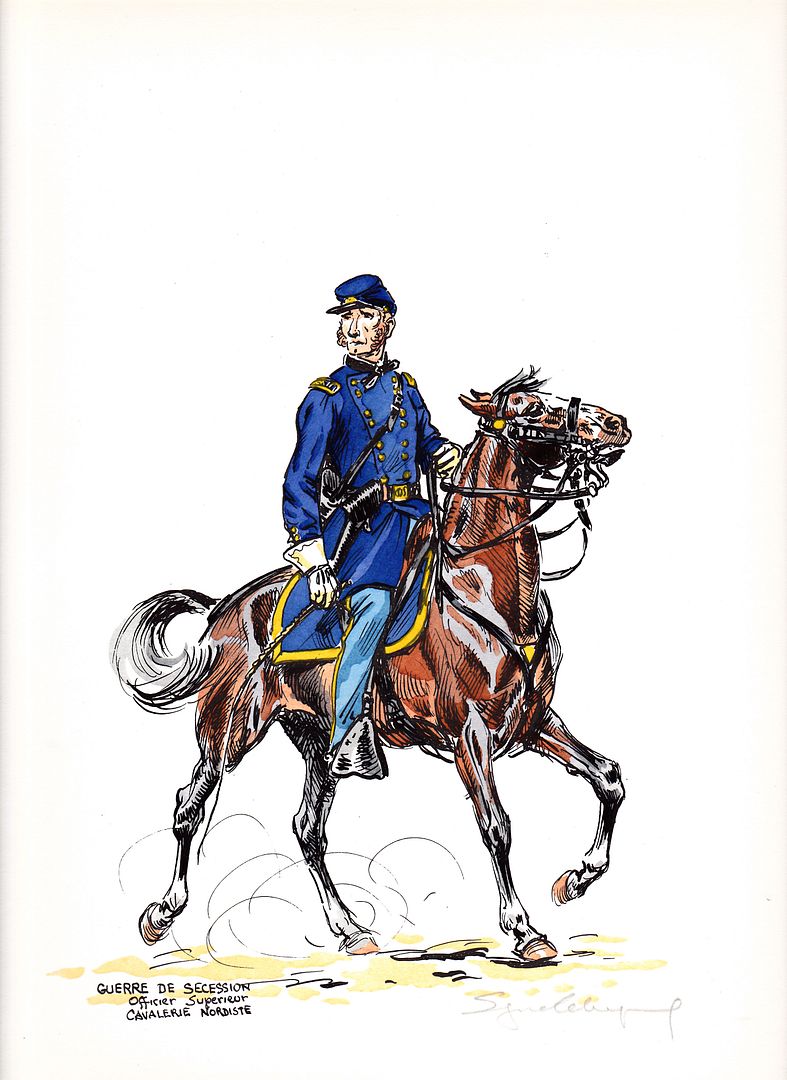
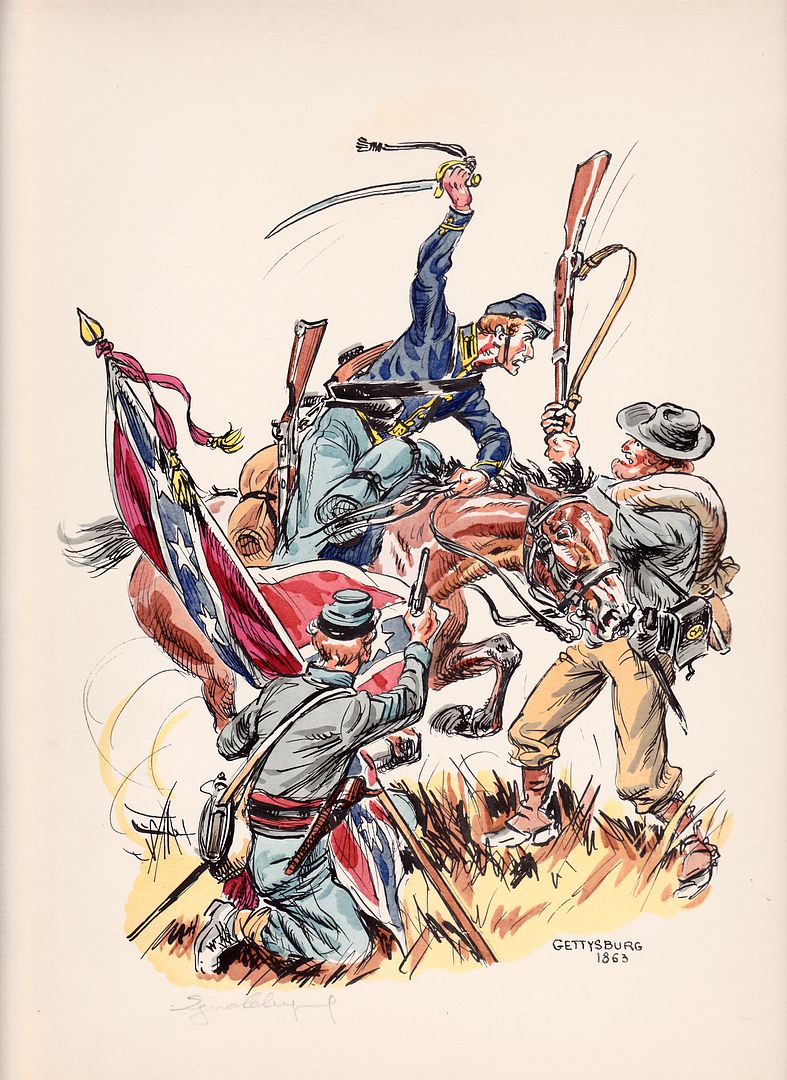
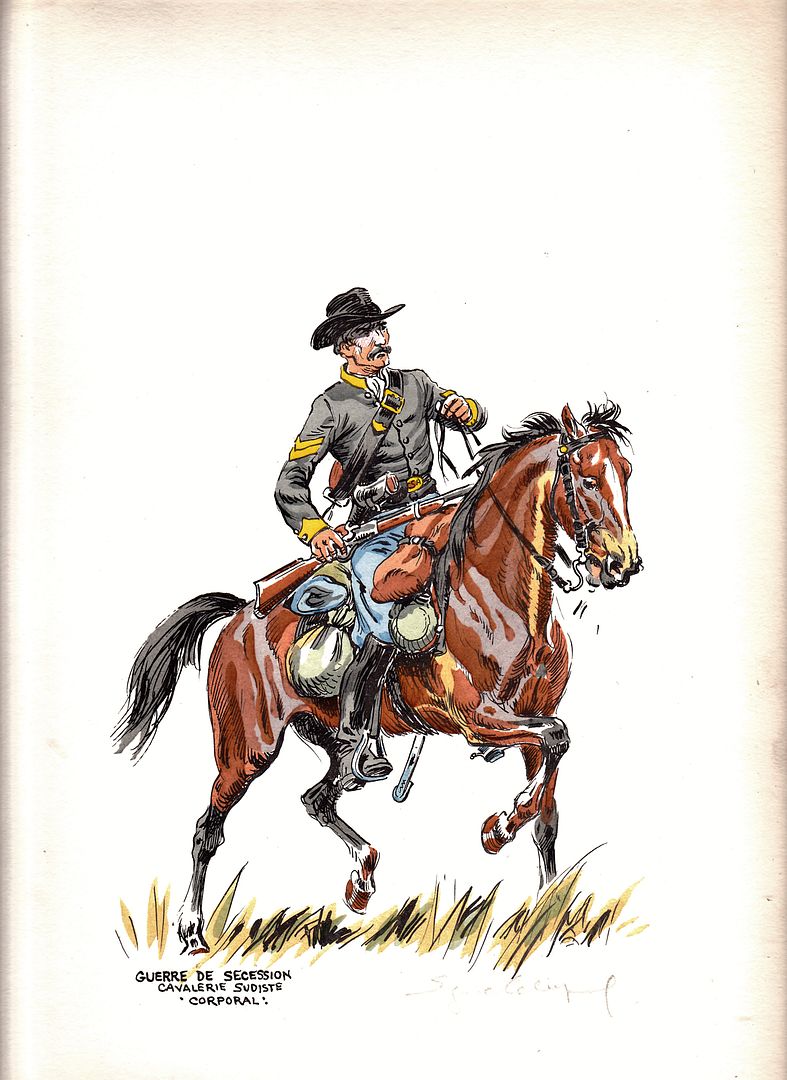
Hey JB, I am looking forward to this one also, here is a Leliepvre print or two or maybe even a Southern trooper?


Hey JB, I am looking forward to this one also, here is a Leliepvre print or two or maybe even a Southern trooper?


Thanks for those prints Ray - which are useful. My casting has the earlier longer jacket coat - rather than the shorter one. But the usual bedroll, saddlebags, canteen showing are useful reminders for me to add in. I aim to make my figure an NCO, rather than an Officer. I think I'll also make him a cavalryman - so light blue pants with yellow stripe ( as he was when found). I don't think a shabraque is appropriate for an NCO - so will make that a saddle blanket for this one - mostly hidden by all of the added on bits and bobs.

I also haven't been able to get hold of one of those Springfield carbines as a casting to hang off a swivel at a crossbelt - so will substitute a similar old piece - held in his hand instead. from my limited reading about this conflict - I've learned that there were several variations of "uniform" - on both sides of the war - and people often wore what they could get hold of - and used any weapons they could get too. So, I'm not getting too hung up about that.

Here's how he is developing - so far (below). I've now got him on a stand - and the head is now fixed in place - looking half-right. I've kept the sword where it was - as it's cast in. Note that I have given him a holstered pistol at the belt ( made from a filed piece of metal sprue). Also saddlebags and a large bedroll behind the saddle ( which neatly conceal the Officer type shabraque points). A smaller roll (cape?) was frequently carried in front too - so I'll maybe make another there. I'll have to model some gauntlets for both hands as well - to help unify the different arms I'm using. - and also a water canteen to hang somewhere. Looks like all leather belts and tack etc, are black - which makes things easier too. I'll use the lighter brown shades pic you showed for the nag! Cheers Ray. jb

 
Last edited:
Thanks for sharing those prints, Ray!


That feedbag on the Confederate trooper's saddle reminds me of a scratchbuilding tip from "Military Modeling", I think, and that was to take a small bead, wrap it with a square of tissue paper and tie it with a piece of thread. You'd get precisely that style of sack. I have never seen it depicted anywhere, though, till I saw this image. I've never modeled that particular item of kit, yet.

Prost!
Brad
 
An aside, too--Ray, if you haven't already, you ought to post these in the uniforms forum. They're good visual references for us painters.

Prost!
Brad
 
That feedbag on the Confederate trooper's saddle reminds me of a scratchbuilding tip from "Military Modeling", I think, and that was to take a small bead, wrap it with a square of tissue paper and tie it with a piece of thread. You'd get precisely that style of sack. I have never seen it depicted anywhere, though, till I saw this image. I've never modeled that particular item of kit, yet.

Prost!
Brad

Was that from Stan Catchpol's "Modelling Workshop" publication ?

I recall that booklet from the 80's, and remember being fascinated by the things he could accomplish.
 
Putting theory into practice - here's my first attempt at a canvas feed bag ( a bit of cream undercoat applied).


Other side - I made a canteen from milliput. On reflection, I may not have room for another bedroll - at front of the rider.


progressing. jb
 
Here's a few more cleaned up figures - ready to be painted now.

My first pair are Britains Household Cavalry - which I have converted to circa 1830's, by removing the old head and substituting one with the Romanesque helmet that they wore at this time. Hold on, I hear you say - you've done these before as Life-Guards. Well, yes I have - but this time, these are going to be Royal Horse Guards - in fact like the splendid pic below. The carbine was being carried this way around 1830's.

Note the added carbine in scabbard - and new sword scabbard added to each figure. The sword scabbard replaces a short, snapped off one - and the carbine has been added to these castings which were produced without one from the early 1900's, (the earliest Britains figures came with one cast in - so mine are modifications). The sword scabbard is a Dorset spare - whilst the carbine is carved from a piece of metal sprue. Both parts vare pinned and glued in place. I've also changed out the damaged arms for these figures - to a gauntleted one carrying the sword at the Low Carry. These aren't fixed yet - as I prefer to paint the upper body/head first, before attaching the arm to complete the figure. Just much easier to get a brush in that way.


My last pic shows those two very badly damaged lumps of metal - shown earlier - who will eventually become Victorian era, Mounted Royal Scots Greys.
I've shown one nearly completed - in an undercoat for his horse (they rode Greys, of course), and the second one at an earlier stage in development - which shows how I pin what will become the new legs to the horse first to a new stand. These will be sculpted with milliput - as were the other horse, which also began this way. I'm currently waiting for heads/caps to arrive from Dorset Model Soldiers, as spare parts. Once attached painting can begin - although I could paint the horse first anyway.

 
Last edited:
An aside, too--Ray, if you haven't already, you ought to post these in the uniforms forum. They're good visual references for us painters.

Prost!
Brad

Hadn't thought about it Brad but it's a good idea, I'll post some by Era. The colors are alittle off and I'll try to correct that as well
Ray
 
Hadn't thought about it Brad but it's a good idea, I'll post some by Era. The colors are alittle off and I'll try to correct that as well
Ray

Maybe you could have a categories for some of your excellent prints Ray. For example "ACW" for these? Then you could add to them, from time to time - as you (hopefully) find more?

I've been taking more time out from doing basic repairs with this guy - who is developing quite nicely now. Just put his right arm on - so will be able to work on him again later on this evening. It's nice to stop repairs for a while - and intersperse a little painting like this - helps break it up a bit. jb

Here he is at the moment - developing nicely. jb


Would be nice to see a troop of these with Standard and officer. :rolleyes:
Ray
 
Would be nice to see a troop of these with Standard and officer. :rolleyes:
Ray

It would indeed Ray - but when you go for a "job-lot", you're really stuck with what you can get. This one had already been converted once ( He was originally a Britains US Cavalryman in khaki from the old set 276). I also happened to have a spare US kepi head from a previous purchase of figures from Camp Randall (US firm).

So, a couple of lucky finds to make this guy up. Britains never made this ACW figure in the hollowcast era - can't really understand why not - as they would have been so popular. I think there were some later Deetail figures made of US Cavalry, which were plastic.

Glad you like him so far, Ray - might get hin completed later on tonight. jb
 
Corporal, US Union Cavalry - ACW. Mainly converted Britains WW1 US Cavalryman - with Dorset arm and rifle, scratch stand - and head by Camp-Randall USA. See original state of headless, one-armed figure at the start of the thread, which was bought as a job-lot of damaged figures. The price per figure came out at just under £1 for each figure. jb


Corporal, US Union Cavalry - ACW. Mainly converted Britains WW1 US Cavalryman - with Dorset arm and rifle, scratch stand - and head by Camp-Randall USA. See original state of headless, one-armed figure at the start of the thread, which was bought as a job-lot of damaged figures. The price per figure came out at just under £1 for each figure. jb

jb;

That horse is magnificent also !
Really like what you did with the legs.

Thank you for posting the process.
 
That is beauty !!! Looking for to seeing the Horseguards next :D

Thought you might Scott,:D

To be honest - these four below, were the main reason that I went for this job-lot in the first place. After completing my Life Guard Set 72 PLUS - you may have seen earlier, I had a hankering to do something similar with the RHG ( which once again, Britains never did).

This time, however, I won't be collecting up all of the figures before starting - I think that this set will gradually evolve. To this end, I've made a start by obtaining BOTH Officers that I will require ( one from 1837 - and the other from 1897).

You can see from the pic below that the Officer on prancing horse has already been converted to 1837 look by removing his head and substituting the head with Romanesque helmet - as have the two Troopers at the rear. Note that ALL horses this time, are of the later two-eared variety - so not quite the same as my Life Guard set (which used the earlier one-eared version for the earlier Trooper's horses). IF I eventually do a similar sized set to my earlier one - I will need 15 figures - so a start with four in pretty good nick from this one lot, is very acceptable.

I haven't shown the arm with sword at the low carry yet (though I have four to fit in my spares box), as it's far easier to paint some details without it being fitted. there's a new tail fitted to the left hand Officer's horse. Once again - all spares used so far originate from Dorset Model Soldiers jb


Users who are viewing this thread

Back
Top