Purchasing "job-Lots" (1 Viewer)

The figure turned out great, but I really like your flagstone base, John. That looks great!

Prost!
Brad
 
The figure turned out great, but I really like your flagstone base, John. That looks great!

Prost!
Brad
Thanks Brad, glad you like that base too. As I was painting him, I realised that he was predominantly black & white - or shades of grey. I have already done a few items in the past - where I did a "flagstone floor" in such shades, and I felt that this might look okay with this figure.

So.......I did it that way - thinking that if it looked naff, I could always overpaint it.

I didn't - so you can gather that I liked it too. :D jb
 
Last edited:
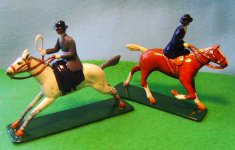
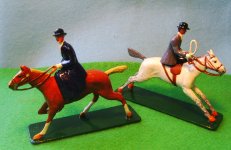
Moving on - I have had my next two "Fox-hunt" figures in my drawer for some considerable time - due to the unavailability of an appropriate head for either figure. Both arrived headless, when found - and I eventually tracked down a head with a bowler hat - which with a bit of modeling became appropriate for both figures. The part came from Dorset Model Soldiers - eventually. It is intended as a male head - but a bit of milliput work and a file, made it suitable for both gals.

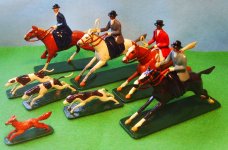
Both were mounted female hunters riding side-saddle. I painted up the Britains example on a white horse - and the similarly posed brown horse is an earlier pre-war version by Pixyland-Kew. They both however, go very well together, I think.

Here they are - both now completed - each with a new adapted head - see what you think.

PIC_4900.JPGPIC_4899.JPG

I have now placed them with my other more active hunters, from the "Full Cry" Britains set - along with the three running hunting dogs - to chase the fox. (My other set are the more passive "At the Meet" figures). All figures, from both sets, with the exception of two re-cast dogs - were found damaged and/or missing parts - so have been repaired and repainted. jb


PIC_4901.JPG
 
Excellent finish on those ladies, John! The brown really shows off your subtle shading to pick out the tack against the horse's color. Beautiful figures!

Prost!
Brad
 
Cheers Brad - glad you like 'em.

I have had those two - partly painted - in a drawer for months. Just couldn't find the heads for them.

So I ordered the male heads anyway - and with a few modifications - they worked. Great - I know what to do next time! Getting there with these two sets! jb
 
Next up - are a pair of Soldiers with Mine-detectors.

These are a pair of Charbens WW2 GI figures which date from around the 1950's. The Company ceased production around 1966.

These two bear a marked similarity to the well known TIMPO range of GI's, which is why I have also included a painted version at the rear, (by Timpo). Note that I based up the Timpo figure myself, as without it, it's a bit unstable. The Charbens figures include a rather neat little base which works very well. The easy way to recognize the two manufacturers of these figures - is that the Charbens figures have very little rim around the helmet when compared to the Timpo figures.

After removing remanants of paint and grunge from the front two - I found a number of small holes in the bodies - which were a combination of casting flaws and wear and tear. These were easy fixes using Tissue, Milliput and Super-glue. ( shows up in white on the metal).

{Larger holes have small pieces of tissue-paper poked into the hole, which are then soaked in super-glue. Once dried, Milliput can be applied - and when that is dry can be smoothed and sanded back to a smooth finish. Smaller holes just require a spot of glue and a tiny piece of putty pushed in. The glue sticks the putty in place}

Both are now ready for painting. jb

PIC_4924.JPG
 
Looking through a drawer I keep for "projects", I came across another pair of rather sad looking figures. They are Mounties - and are Britains so-called "second grade" figures, often referred to as "Spindly leg horses". These were sold cheaper than their first grade figures, for those who wanted more figures for their money.

However, these two, hardly had an intact leg between them - as is often the case with these thin-legged figures, as they are easily broken.

Now I have often thought it would be interesting to repair these figures - using the more normal sized legs - so I thought I would have a go - and see what they turned out like.

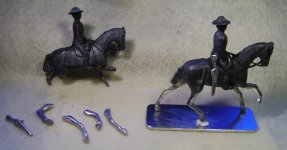
Hers's a couple of pics showing one - as it arrived - with broken off legs - and the other which I have begun repairs on by attaching four new trimmed up legs from my recently replenished "stash" from Dorset Model Soldiers, once again.

Note the new legs that I've chosen for the second figure to be repaired in front. These will be drilled and pinned to the broken figure in exactly the same way as the first. I've also attached a holstered rifle to my first figure - to make it a little more "interesting" . I'll show them again later on as they progress. jb

PIC_4925.JPGPIC_4926.JPG
 
Next up - are a pair of Soldiers with Mine-detectors.

These are a pair of Charbens WW2 GI figures which date from around the 1950's. The Company ceased production around 1966.

These two bear a marked similarity to the well known TIMPO range of GI's, which is why I have also included a painted version at the rear, (by Timpo). Note that I based up the Timpo figure myself, as without it, it's a bit unstable. The Charbens figures include a rather neat little base which works very well. The easy way to recognize the two manufacturers of these figures - is that the Charbens figures have very little rim around the helmet when compared to the Timpo figures.

After removing remanants of paint and grunge from the front two - I found a number of small holes in the bodies - which were a combination of casting flaws and wear and tear. These were easy fixes using Tissue, Milliput and Super-glue. ( shows up in white on the metal).

{Larger holes have small pieces of tissue-paper poked into the hole, which are then soaked in super-glue. Once dried, Milliput can be applied - and when that is dry can be smoothed and sanded back to a smooth finish. Smaller holes just require a spot of glue and a tiny piece of putty pushed in. The glue sticks the putty in place}

Both are now ready for painting. jb

View attachment 235121
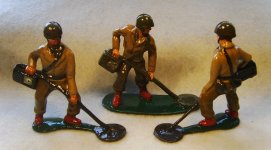

Painting of the Charbens Mine-detecting GI's have now been completed. I have also included the Timpo figure in the background - for comparison. Note that I don't follow either manufacturers' paint schemes - but try for a slightly more realistic Glossy Toy Soldier look. Both manufacturers figures are sufficiently alike enough, for me to display them on the same shelf in my collection - especially when painted up in the same colour scheme. jb

PIC_4929.JPG
 
Looking through a drawer I keep for "projects", I came across another pair of rather sad looking figures. They are Mounties - and are Britains so-called "second grade" figures, often referred to as "Spindly leg horses". I'll show them again later on as they progress. jb

View attachment 235141View attachment 235142

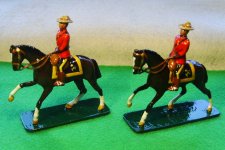
Well, after replacing whatever was left of the legs - they turned out like this;

Not exactly second-grade anymore, I think.

PIC_4930.JPGPIC_4931.JPG
 
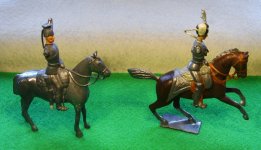
Here's another couple of my favourite Britains figures underway. This time from a slightly different source - as I bought them from a local "Collectors Market" stall, for a very reasonable price.

Both were damaged - and hope you can see some of the repairs from attached pics. Sorry about beginning painting before taking pics - I was so pleased to find them in an unusual place - I got stuck in before remembering to take a few snaps.

The Hussar Officer on prancing horse was a little squashed on the left side - but a little coaxing with a small screwdriver pushed his boot back out to the correct angle. This left a gap under the belly of the horse - which was filled and shaped back to it's original shape using Milliput. His arm with sword is also missing - so a suitable spare will be found from my box. Note also a new plume to his fur cap ( again a spare from Dorset). I think you may also see a filled hole just below his left hand - which will disappear one painted.

The other figure is a standing lancer. ( Dated underneath belly of the horse 18.8.1903 - so 115 years ago by date). Not in bad shape for that age of figure! A new lance and arm will be required, as the original was missing when found. Note also his carbine scabbard has been lengthened, as this too was snapped off, (pin and milliput repair). On the other side, his sword scabbard was also snapped off - so I removed what was left by surgery - and replaced it with a new spare part. (Note: all spare parts are from Dorset model Soldiers.) I keep a small stock of frequently required parts in, now. I usually keep the "movable arm" off until painting of chest areas are completed - and then fix them permanently in place. I still don't like movable arms and ugly rivets! jb

PIC_4932.JPGPIC_4933.JPG
 
As an experiment - I tried for a pic of the underside of my Britains Lancer - and to my amazement - it worked! (I have never taken a real close up with my camera before). I wedged the figure into my Optivisor, to hold it still enough to work the buttons on the camera - in case you're wondering what the heck that thing is!

I think you can make out the date quite clearly here, which Britains did at the time - to try to stop Piracy of their figures - using the law as it stood at the time, which required them to date them.

It's sometimes quite difficult to make out such dating for many old figures like this, until layers of old paint and grunge has been removed - just like this one was before stripping it off. It was not possible to see the date before cleaning up the figure.

I just love oldies like this one - and wonder sometimes, just how many hands they have been through since they were first made. I'll try to make certain this one looks all brand-new, all over again - and hope he will last another hundred years or so. jb

PIC_4937.JPG
 
Last edited:
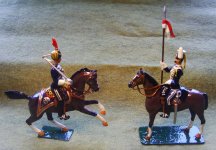
A little update on progress - shows that my Hussar Officer has now been completed. He's now an Officer of the 4th (Queens Own) Hussars, c.1890. These Britains " prancing horse " figures are among my favourites - so no surprise that I have around 10 of them in my collection. Whenever i see one at a reasonable price, such as this one - I just can't resist buying it.

The Lancer is at an earlier stage of development - mostly caused by my not being able to decide what Regiment to make him up as. But I've now made the decision that he will become a lancer of the 17th (Duke of Cabridge's Own) Lancers - so white plastron for him next.

Here's a couple of pics.

PIC_4938.JPGPIC_4939.JPG
 
Your hussar officer looks sharp, John! Nice finish! I look forward to seeing that old lancer in his new livery, too.

Prost!
Brad
 
Your hussar officer looks sharp, John! Nice finish! I look forward to seeing that old lancer in his new livery, too.

Prost!
Brad
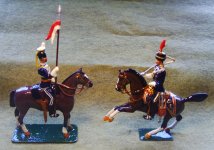
Thanks Brad - glad you like him too.

The old boy is also progressing nicely - and I think will look brand-new all over again when he's finished, which will be very satisfying, for me. I have a couple more slightly different Britains Lancer versions of this figure - so I think I will pull them out of the cabinet to show with him, when he's completed. jb
 
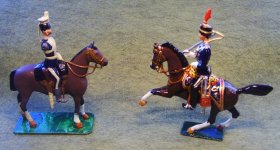
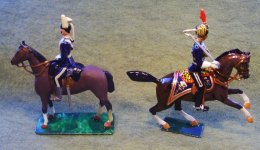
Well, here's the result of a few evenings work on my pair of old Britains figures - both in need of a little TLC when found.

My first pair of pics show two views of a Hussar Officer on a prancing horse - and a Lancer on a standing horse. Both required a few spare parts to complete them - and a complete repaint. I chose to paint them as an Officer of the 4th (Queens Own) Hussars, and a Lancer of the 17th (Duke of Cambridge's Own) Lancers.

PIC_4941.JPGPIC_4942.JPG

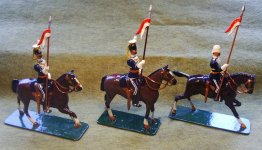
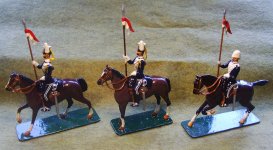
My Lancer proved to be a little bit "special", as he was dated by Britains underneath the belly of the horse to 1903. I already had a couple of examples of Britains figures, which I painted for the 17th Lancers - so I thought it would be nice to show them alongside my latest (though oldest) figure.

I've put my latest figure in the centre of both pics. All of these are now members of the 17th Lancers, though all of them were never made just like it by Britains. My latest standing horse figure was originally made as a 5th Lancers Trooper for set 23 in 1903. This set was dropped in the early 1930's when the 5th amalgamated with the 16th Lancers.

The Trooper on the walking horse was also never made this way by Britains. Mine was originally a Royal Scots Grey - which had this style of horse. When found he had several pieces missing - including the head - so I decided to make him up as a Lancer that Britains never made.

My last member of the Regiment is unmistakable due to his Foreign Service helmet. I made him up to look similar to figures from set 81, which was introduced in 1897. Known as the Ulundi Lancers, as this set depicted the 17th lancers in their Service Dress, with the distinctive white plastrons, at the battle of Ulundi, during the Zulu Wars. Mine is sadly, NOT an original from this set - but was made up from several bits and pieces to look somewhat like one. jb

PIC_4943.JPGPIC_4944.JPG
 
Last edited:
A smart trio of lancers there, John!

How many figures do you have in your collection by now?

Prost!
Brad
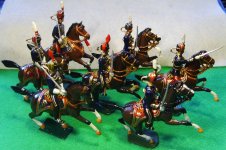
 
A smart trio of lancers there, John!

How many figures do you have in your collection by now?

Prost!
Brad

Cheers Brad - glad you like them.

As to how many? - I just counted up 39 in my Lancer collection ( I have them all on one shelf).

If you mean how many in total in my complete collection? - Answer is - I don't know - as I always give up counting before I get to the end. I estimate it must be about 4,000 or so??

And before you ask.................... my favourite is ....................the next one:D jb
 
If you liked the Lancers though - maybe you will also like my Hussar Officers on prancing horses - as I have 7 of these - so far. Here's a pic showing them.

Note that the front four are by Benbros - two are by Britains (including the one I just completed) - and the final one is a Dorset original.

I also have a Mounted Band for both Hussars (11th hussars) - and Lancers (16th Lancers) - which are by Dorset.

PIC_4945.JPG
 

Users who are viewing this thread

Back
Top