You are using an out of date browser. It may not display this or other websites correctly.
You should upgrade or use an alternative browser.
You should upgrade or use an alternative browser.
Roman Auxiliaries (1 Viewer)
- Thread starter Horus
- Start date
Horus
Major General
- Joined
- Nov 20, 2015
- Messages
- 13,486
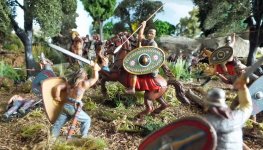
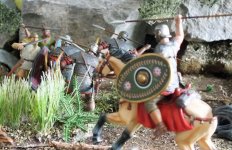
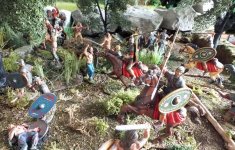
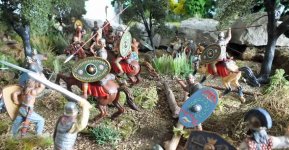
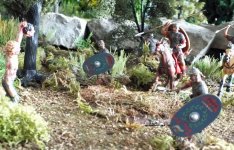
Great scene Steve with the Roman cavalry dispersing the enemy. Nice forest setting and background as well. Regards Greg.
Thanks Greg, TG's new Roman Cavalry are very nice indeed. Though I wish they'd stuck with the Auxiliary shield designs they'd already started with !
Steve
Ghostrider
Specialist
- Joined
- Jan 13, 2009
- Messages
- 375
Steve, you've created a great scene, and I'm especially intrigued by the groundwork. I'm curious what you used for the base material before placing the shrubs etc. It looks like actual dirt mixed with forest debris. Care to share that?
Joe
Joe
29 Let's Go
Sergeant Major
- Joined
- Mar 13, 2011
- Messages
- 1,741
Very well put together diorama and yes, your groundwork is well done. Really enjoy the action.
Steve
Steve
Horus
Major General
- Joined
- Nov 20, 2015
- Messages
- 13,486
Steve, you've created a great scene, and I'm especially intrigued by the groundwork. I'm curious what you used for the base material before placing the shrubs etc. It looks like actual dirt mixed with forest debris. Care to share that?
Joe
Very well put together diorama and yes, your groundwork is well done. Really enjoy the action.
Steve
Hi Guys
Thanks for the comments about the ground work !
Ok, I've use chipboard in various sizes to make modular boards and then given them a base coat of Brown acrylic paint (the cheap stuff kids use). When dry I apply another coat of the paint mixed with, PVA craft glue and dried used tea leafs. At this stage you can put ruts / Tank tracks in. Also you can if you wish on top of all this, sprinkle sparingly some green flock. ( Model railway type of stuff) though nothing too bright a green. Now you can add dried mixed herbs from the spice counter at the supermarket and the cheapest own brand one is fine. Sprinkle on and allow to dry. Now using a plant mister, mix up a approx. 4 parts water with 1 part PVA and a splash of brown or black acrylic paint. Spray on to your base to glue / seal it all down.
You can if you wish then lightly sprinkle some more herbs and allow to dry and then seal the herbs in again with just a mix of PVA / Water and allow to dry.
Stand board on side and give a tap to allow bits not fixed to drop.
And there you have a cheap base you can use for Forest or Jungle.
Don't forget to clean out the sprayer with clean water !
Next, you'll want some ground cover.
For the long grass: Paint brushes from £/$ or Euro store, usually pack of three 1"/2"/3"
Cut the bristles off at approximate length you'll want the grass to be.
For the bases this time I've used some paper backed foam board from a craft shop, which I got for another project. Cut pieces to you desired sizes with a craft knife and shape. I usually just do an oval shape nothing precise and bevel the edges with the knife.
Make a few indentations in the paper / foam doesn't matter whether you strip all paper off top or not. These will be where you are going to place your grass tuffs.
Paint bottom of base Brown if forest/ jungle floor or beige for sand and allow to dry. Doing this should stop the bases curling up when you've done both sides. One force cancelling out the other !
Now paint top same but mix in some PVA and whilst wet sprinkle some dried herbs on. When dry using a hot glue gun dab a spot of glue into each hole and then add your pre cut bristles in small clumps. (Mind you fingers as hot glue on skin is a bit painful !) at this stage you can spread the grass out a bit to be more naturalistic. give a couple of minutes to cool down.
Now you're ready to paint the grass how you want. I like to use Vallejo acrylic model paint. Favourite being Golden Olive for green or Buff for dried grass.
For bushes. Bases as before, for the bushes and undergrowth I've used coir which came from the coir lining for a hanging basket. Tear clumps off and glue unto base. For me hot glue worked best. then paint lightly, I mixed kids green and brown paint with PVA craft glue and then sprinkle some of those dried herbs on !
For the ferns. Bases as before. Plastic fern fronds cut down, washed in hot water and detergent, hot glued down on base together and painted. Also you could, get model railway palm trees and just use the fronds.Paint these as well.
Other bits and pieces are Model Railway, tuffs of grass, lichen, and then finally twigs and moss from garden.
Hope this helps and inspires you guys to make your own !
Steve
Horus
Major General
- Joined
- Nov 20, 2015
- Messages
- 13,486
Great Diorama Steve. Excellent photos. The TCS Celts work well with the TG Romans.
Thanks, yes TCS along with TG mounted and foot, the rest being castings I've painted up, though for the most part they're more Germanic type warriors, which will no doubt thicken the Dacian battle line at a later date fortunately the Dacians did have Germanic allies as well as in Roman Auxiliaries.
Steve
Ghostrider
Specialist
- Joined
- Jan 13, 2009
- Messages
- 375
Steve, many thanks for the tutorial on your ground cover method. I printed it out for future reference and will refer to it for upcoming projects.
Happy New Year.
Joe
Happy New Year.
Joe
Horus
Major General
- Joined
- Nov 20, 2015
- Messages
- 13,486
Steve, many thanks for the tutorial on your ground cover method. I printed it out for future reference and will refer to it for upcoming projects.
Happy New Year.
Joe
You're welcome Joe.
Cheers and Happy New year to you too and to all Treefroggers !
Steve
Users who are viewing this thread
Total: 2 (members: 0, guests: 2)


