
You are using an out of date browser. It may not display this or other websites correctly.
You should upgrade or use an alternative browser.
You should upgrade or use an alternative browser.
Stadden Napoleonics (1 Viewer)
- Thread starter Bessieres
- Start date


Hazebrouck
Sergeant
- Joined
- Aug 30, 2010
- Messages
- 634
Lovely old figures there. Thanks for showing them.
Scott
Scott


Brother Jonathan
Private 2
- Joined
- May 15, 2012
- Messages
- 134
I recently shared this photo on another thread: a British sergeant by Stadden that I picked up at the last OTSN. I was very glad to add a spontoon-wielding NCO to my Napoleonics.
(Sorry he's not painted, but he did come already primed.)
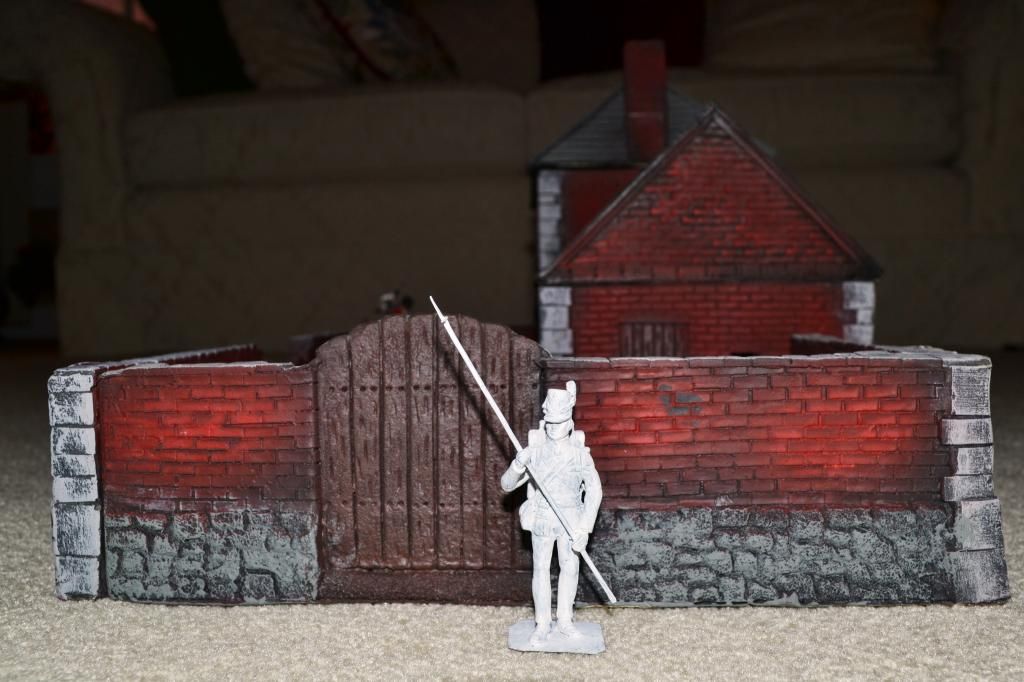
I've seen collectors here and elsewhere on the web debate what is the best kind of base for toy soldiers. Having acquired my first Stadden, I have to say I rather like the plain, razor-thin base.
(Sorry he's not painted, but he did come already primed.)

I've seen collectors here and elsewhere on the web debate what is the best kind of base for toy soldiers. Having acquired my first Stadden, I have to say I rather like the plain, razor-thin base.
johnnybach
Major General
- Joined
- Nov 24, 2010
- Messages
- 13,663
I recently shared this photo on another thread: a British sergeant by Stadden that I picked up at the last OTSN. I was very glad to add a spontoon-wielding NCO to my Napoleonics.
(Sorry he's not painted, but he did come already primed.)
I've seen collectors here and elsewhere on the web debate what is the best kind of base for toy soldiers. Having acquired my first Stadden, I have to say I rather like the plain, razor-thin base.
The ONLY snag with the thin metal bases on Stadden figures, is that they can become a little distorted a bit, over time - which I notice has happened with this one. I recently found six Mounted Knight figures - which, of course are a bit bigger than foot figures - and the distortions then get more noticeable. They still stand up well, but can look a little buckled if looked at closely.
If original bases get too noticeably buckled, or otherwise damaged, it's a relatively easy fix to remove the figure from any original base - and replace it with a new metal one. I usually fabricate mine from suitable alloy off-cuts, purchased from my local engineering company. This firm makes specialist replacement body parts for Sports cars - in an aluminium based alloy - and sell off small offcuts of thin sheeting - which can then be cut and filed to shape - and then drilled and pinned to feet of figures or hooves of horses. I usually use epoxy resin glue to fix the pins through the bases and into the feet/hooves of figures.
I have replaced many this way over the past few years, ( though not a Stadden, so far), and they look pretty good, once painted.
Here's a few that I made for some old Britain's figures ( which of course, didn't have bases originally - and easily get knocked over and damaged, as these were when found , because they don't have bases). The bases made work out at pennies each, because the off-cuts are so cheap to buy. Notice that I usually round off squared ends of bases by filing - but these can really be any shape you like - as the material is very easy to work with a junior hacksaw and small files. I just mostly like mine this way, as it's a more stable shape, with rounded off corners. Johnnybach

Mirof
Sergeant Major
- Joined
- Apr 1, 2013
- Messages
- 1,625
The first Stadden , Hinton Hunt , Lasset, were sold mounted primed and soldered on a thin metal sheet
Later, end 70ies),they will be sold as kit, delivered with or without bases ( also a lead-tin alloy )
So, it's easy to recognize first generation : thin metal sheet base
Here a Lasset

2 other Lasset I painted ... woops... more than 40 years ago ..


Later, end 70ies),they will be sold as kit, delivered with or without bases ( also a lead-tin alloy )
So, it's easy to recognize first generation : thin metal sheet base
Here a Lasset
2 other Lasset I painted ... woops... more than 40 years ago ..
johnnybach
Major General
- Joined
- Nov 24, 2010
- Messages
- 13,663
Some interesting figures shown here already. Here are six more of the mounted Stadden's that I found, which were mentioned earlier. Note the thin bases again with the clipped off corners. Again, because they are made of tinplate - note the slight buckling on some of them - and the slight rust-spots apparent on some, which need to be completely removed altogether before repainting. The shields are also of tinplate - which I think also shows up in Mirof's figure. Again, care needs to be taken to remove blemishes before repainting. jb


johnnybach
Major General
- Joined
- Nov 24, 2010
- Messages
- 13,663
Just to finish off my earlier post - I just remembered that I had a pic in my Photobucket Library - of five of my Stadden castings - in a finished painted state ( one is as yet not quite finished - as it's now in a different Country to where I currently am!).
These have been painted up as named individuals in their true Heraldic accoutrements, in my favourite Glossy Toy Soldier style. Note how well the typically thin, clipped ( and soldered on), bases have "come up" - after slight tweaking of some buckling to some - using a pair of unserrated jaw pliers. These figures and bases were all stripped back from their originally applied primer coat ( which in many cases were quite deteriorated), and then re-primed/ undercoated and finally varnished - after some minor repairs were made in some cases, to elderly castings. I was, however, very pleased with their general state, as found, - and delighted with how they eventually turned out. I've been looking for more - ever since! jb

These have been painted up as named individuals in their true Heraldic accoutrements, in my favourite Glossy Toy Soldier style. Note how well the typically thin, clipped ( and soldered on), bases have "come up" - after slight tweaking of some buckling to some - using a pair of unserrated jaw pliers. These figures and bases were all stripped back from their originally applied primer coat ( which in many cases were quite deteriorated), and then re-primed/ undercoated and finally varnished - after some minor repairs were made in some cases, to elderly castings. I was, however, very pleased with their general state, as found, - and delighted with how they eventually turned out. I've been looking for more - ever since!
jb
johnnybach
Major General
- Joined
- Nov 24, 2010
- Messages
- 13,663
Great painting JB..... gloss goes really well with colourful knights...
Well Done
John
Cheers John
glad you like 'em. As you showed earlier on in this thread - glossy goes just as well - with just about anything. Well done yourselfjbjohnnybach
Major General
- Joined
- Nov 24, 2010
- Messages
- 13,663
Very nice job
to make all those stars, crosses, lions the same size,do you use a kind of "pochoir"( stencil ) ?
Hi,Mirof - When doing this kind of thing, I always draw out an idea of what I'm trying to get to, at the same scale, and sometimes quite often, on paper - but I don't actually make a stencil. Most of my finished work is drawn to scale on paper - quite a few times at first - for my brain to get used to what my hand is about to do.
I then usually have a go at what I'm going to do with paint - as a scale paint-job on a piece of white plastic (margarine tub lid), just to see how it looks.
When I'm eventually satisfied - I just go for it - and paint things quite spontaneously - in freehand, on the painted figure. That's how I did all of these - and it seems to work for me. If I occasionally make an error - I know that I can always overpaint it all - and try again later. jb
Mirof
Sergeant Major
- Joined
- Apr 1, 2013
- Messages
- 1,625
Hi,Mirof - When doing this kind of thing, I always draw out an idea of what I'm trying to get to, at the same scale, and sometimes quite often, on paper - but I don't actually make a stencil. Most of my finished work is drawn to scale on paper - quite a few times at first - for my brain to get used to what my hand is about to do.
I then usually have a go at what I'm going to do with paint - as a scale paint-job on a piece of white plastic (margarine tub lid), just to see how it looks.
When I'm eventually satisfied - I just go for it - and paint things quite spontaneously - in freehand, on the painted figure. That's how I did all of these - and it seems to work for me. If I occasionally make an error - I know that I can always overpaint it all - and try again later. jb

Users who are viewing this thread
Total: 2 (members: 0, guests: 2)