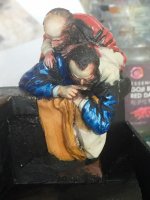
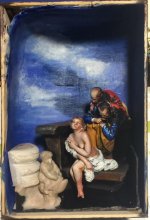
Susanna and the Elders (1 Viewer)

blaster

Captain
Joined
Sep 10, 2008
Messages
5,961
Yeah. This painting. Kids shouldn't follow this thread.:rolleyes:

I selected it because I wanted to do a classical painting but nothing too ambitious. Nudes are always very challenging to model and paint convincingly so I chose this one because the naughty bits were all tastefully covered and hopefully, the mods won't close me down... It's no worse that Cleopatra, ok guys?

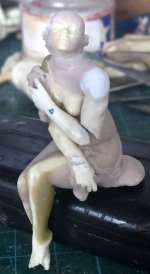
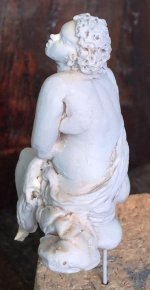
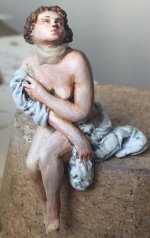
As it is a small piece, I decided to use larger scale parts 1/24 Preiser to start me off. I don't have many spares so I scavenged from my hoard and selected what was available. As the girl appears plump, I thickened up the legs with putty.

a.jpga2.jpga3.jpg
 
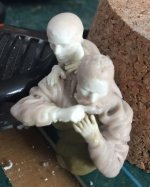
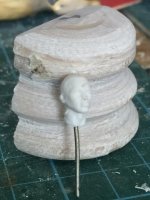
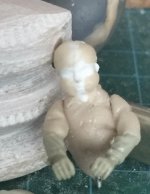
I did mention that she was plump in this painting, right? So I fleshed her out and also created two talking heads. Also, discovered that a woman Renaissance artist Artemesia Gentilischi painted two versions of this painting.

as7.jpg
 
I will be looking forward to seeing this one evolve ..... should be a masterpiece, just like the painting !!!!

John
 
Hi John,

Thanks for your good wishes. I am hoping the same, too...:)

I've started to add some details to Susanna. The elders are getting worked up-on, too (terrible pun).

Rgds Victor

aa6.jpgaa7.jpg
 
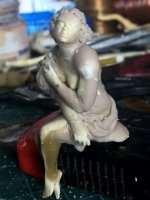
Starting to move quickly on this piece. Most of Susanna has been sculpted except for the drapery. The elders are also coming along.

Surprisingly, its quite easy to do this piece.

a.jpga2.jpg
 
Almost finished Susanna. Now finalising the elders. I also knocked up the masonry for the bath.

az.jpgaz2.jpgaz3.jpg
 
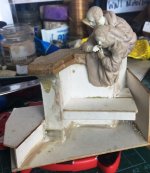
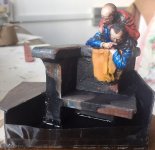
I've completed the masonry structure. Here are the figures posed on it. I still need to figure out a fountain structure partly hidden.

a.jpg
 
Ive sprayed Susanna with a light undercoat primer ready for painting.
Still working on the elders.

af.jpgaf2.jpgaf3.jpgaf5.jpg
 
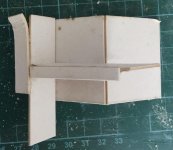
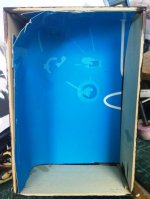
I made a box to fit into the picture frame for this piece. A simple background was stuffed into the box.

The elders have been fully sculpted onto the masonry which has been nearly completed.

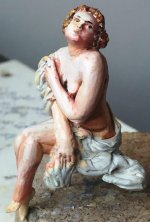
Painting has started on Susanna.

a4.jpga2.jpga.jpg
 
Started on Susanna with oilpaints. As you can see, shading the human body is not so straightfwd. The close-up highlights the blemishes.
I will let this layer dry and then gently rub over the painted surface to tamp it down and blend in the colours (dry blending - you heard that here first hahaha).
Actually, it might be similar to blending with pastels.

We live and learn....sigh.


ax2.jpg
 
I am cleaning up Susanna (almost Freudian) for another round of painting.

The elders were repositioned on the masonry and resculpted.

I also created a fountain structure to be placed on the left side of the painting.

a3.jpga2.jpga7.jpg
 
After another round of cleaning, resculpting and painting, here is the final proposed placement within the shadowbox. Looking promising, I think.

There will be a white cardboard frame for this scene to hide the edges. The scene will be placed higher to allow for a label to be placed underneath within the frame. The label helps to reframe the overall scene to be similar to that of the painting.

ad.jpg
 
Some more WIP on the elders added with putty. Notice the new right hand. I also raised the retaining wall to the left side.

aaa.jpg
 
I spent some time to paint the elders and more importantly, I sealed off the front of the masonry and poured in a thin layer of acrylic gloss varnish.

Susanna's head was decapitated and repositioned.

aaa.jpgaaa2.jpg
 
Now starting on the last part which is the fountain and cherub to the left. I cut a turned part in half for the fountain. The cherub is just a suitable smaller sized head with putty body.
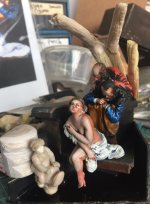
a4.jpg
 
Worked more on the cherub.
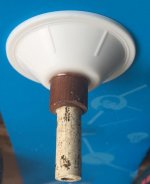
After a critical examination, I resculpted several areas on the elders and repainted these. Susanna was finally fixed into place. I knocked up some branches and tested the placement of the pieces within the frame. As mentioned earlier, There will be a label under the painting but within the frame.
So far this looks good and the last part is to try to insert the fountain and the cherub.
 

Attachments

  • aa4.jpg
    aa4.jpg
    58.3 KB · Views: 100
  • aa7.jpg
    aa7.jpg
    105.3 KB · Views: 98
  • aa.jpg
    aa.jpg
    75.9 KB · Views: 96
  • aa6.jpg
    aa6.jpg
    58.6 KB · Views: 100
I cut up the masonry and attached the fountain base to it. The branches are further developed.

The cherub proportions are more or less defined. Best that I can make out is that the cherub is riding on a snail, a common theme in fountains.

These are placed in the shadow box to test the placement.

The upper fountain basin is being crafted from household items.

aaa.jpgaaa2.jpg
 
Now moving at a fast pace. I finalised the cherub and attach him to the piece. The piece was placed inside the box for checking.

a.jpg
 

Users who are viewing this thread

Back
Top