You are using an out of date browser. It may not display this or other websites correctly.
You should upgrade or use an alternative browser.
You should upgrade or use an alternative browser.
Susanna and the Elders (1 Viewer)
- Thread starter blaster
- Start date
blaster
Major
- Joined
- Sep 10, 2008
- Messages
- 6,527
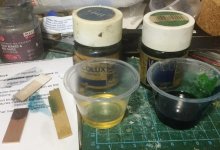
Here is my simple test run for the casting resin. I had bought a set about 2 years back and it might not work.
Did two batches, one just to see if the resin will set hard and the other with some translucent dyes added.
Both batches set hard overnight and the dye did not separate out from the resin into globules, which meant that both products were compatible.
Did two batches, one just to see if the resin will set hard and the other with some translucent dyes added.
Both batches set hard overnight and the dye did not separate out from the resin into globules, which meant that both products were compatible.

jazzeum
Four Star General
- Joined
- Apr 23, 2005
- Messages
- 38,882
You might find this article about Artimesia Gentileschi interesting.
Blood, Passion and Captivity: Gentileschi’s Life is in Her Paintings
https://www.nytimes.com/2020/10/05/arts/artemisia-gentileschi-national-gallery.html
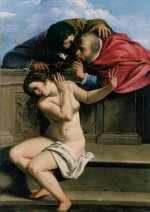
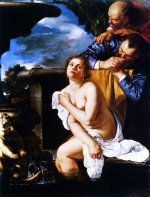
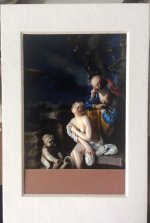
Frankly, I’ve always preferred this version of the painting.
Blood, Passion and Captivity: Gentileschi’s Life is in Her Paintings
https://www.nytimes.com/2020/10/05/arts/artemisia-gentileschi-national-gallery.html
Frankly, I’ve always preferred this version of the painting.
Attachments
blaster
Major
- Joined
- Sep 10, 2008
- Messages
- 6,527
Hi Brad,
I did. Thanks.
I was aware of the Artemesia Gentilischi show as I was checkin g outher background and the context to this painting.
She did at least 6 versions of Susanna and the Elders.
This theme was also very popular with numerous Classical artists including Rembrandt, Tintoretto, van Dyck.
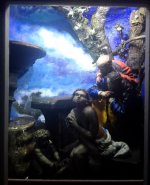
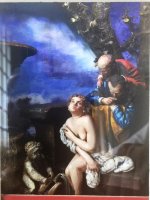
My choice on selecting the version to translate into a shadowbox diorama was based on several considerations:-
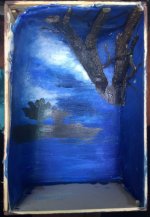
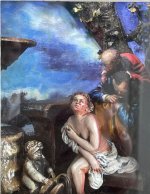
1. The painting had to be translatable. It stands to reason that I would prefer paintings which had tighter brushstrokes and clear details. This painting was quite clear and almost stark but it created a problem. Susanna is just separated from the two elders by a low wall which was perpendicular to the plane. Behind was the sky and in front, there was this thin sliver of a pool. If this was a shadowbox, where would the wall and pool ends abut into on the shadow box edges?
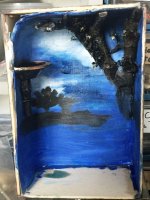
My other painting which I selected had some perspectives and I can use this feature to make the masonry and pool ends vanish off into the box edges. Furthermore, the painting is quite dark and the edges of the masonry can disappear into the darkness.
2.The painting had to be interesting from a compositional point. The painting I selected had other pictorial elements including a fountain and a cherub with some foliage in the background. The wall also had angles. All of these can be used to mask off any edges which has to abut against the box sides.
3. The amount and colour of flesh. In my experience, naked bodies are not easy to paint in miniature. Hence I try to select for bodies which are not too bright, too smooth as these are very difficult to get right. I'm also mindful of the mods victorian attitude hahaha.
Rgds Victor
blaster
Major
- Joined
- Sep 10, 2008
- Messages
- 6,527
blaster
Major
- Joined
- Sep 10, 2008
- Messages
- 6,527
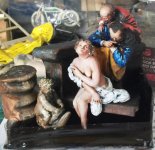
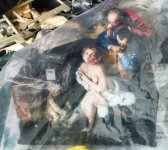
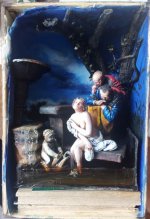
I added several water spouts emanating from the snail and made from fibre optics, bent and glued in place. Then the final upper layers of casting resin were poured. The piece was covered in plastic wrap to protect it from dust.
Some additional water effects were added from plastic wrap and liberally covered with UHU which when it dried, starts to froth creating a bubbly effect.
The piece was placed into the box and raised up by simple wooden spacers and fixed with epoxy glue. Awaiting minor touchups with paint and a dullcote varnish before completion.


Louis Badolato
Lieutenant General
- Joined
- Apr 25, 2005
- Messages
- 18,421
Just amazing, Victor!:salute::
blaster
Major
- Joined
- Sep 10, 2008
- Messages
- 6,527
Hello Louis and Steve,
Thanks for your very nice comments. This was planned so in theory, it should have gone smoothly. In practice, I had to shift angles here and there as the space was a little tight. Hence I kept resculpting the Elders. Making the fountain was a stroke of luck. Pouring the resin was also lucky as everything was rather old stock and there was no guarantee that the stuff would work.
Rgds Victor
blaster
Major
- Joined
- Sep 10, 2008
- Messages
- 6,527
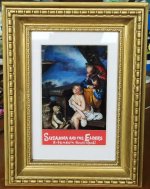
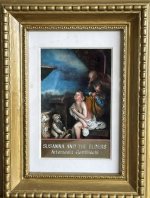
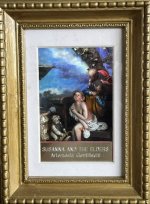
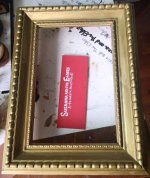
Some delay was encountered as I painted the frame in gilt and made a label for the piece. The reason for repainting the white frame was because I had made a mistake of drilling thru a small hole to screw in the magnetic latch. After I had patched up the hole, I could not neatly match the repaired area and so I decided to redo the whole frame in gold. It looks better in gold anyway...hahaha.

Obee
Major
- Joined
- Aug 27, 2009
- Messages
- 6,172
Hi All,
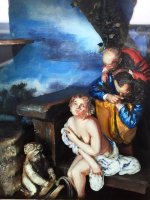
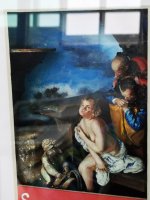
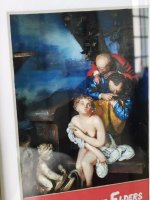
And finally, the scene is framed! A very nice and compact piece.
The climate change glare phenomenon continues to bug my IP camera so I've taken several shots.
Hope you enjoyed this thread.
Rgds Victor
Great to see this masterpiece coming to life in a 3-d format.
Thanks for showing us the process of creation, step by step,
well done,
John
Obee
Major
- Joined
- Aug 27, 2009
- Messages
- 6,172
I took this picture in the day and with the internal light source switched on. The light source illuminates the interior but due to its limitation, this small box diorama is best viewed with an external light source as well.
Much better for viewing the colours, just like the real painting,
John
Users who are viewing this thread
Total: 2 (members: 0, guests: 2)


