
You are using an out of date browser. It may not display this or other websites correctly.
You should upgrade or use an alternative browser.
You should upgrade or use an alternative browser.
Tone down fake plants (1 Viewer)
- Thread starter ccdc11
- Start date
mikemiller1955
Lieutenant General
- Joined
- Aug 3, 2008
- Messages
- 17,492
Chuck...
yes...agreed...the plastic plants are too glossy...
I just finished a new tropical diorama last night....
you need a matte paint...satin or glossy does not do the job...
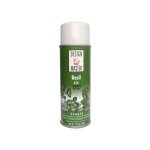
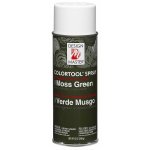
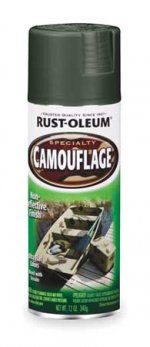
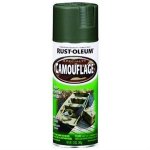
I use spray cans of Design Master's and Rustoleum...
Design Masters is about twice the price as Rustoleum...
Home Depot has Rustoleum...
Design Master can be bought on line......or at Michael's or Hobby Lobby...the best 2 colors are Basil and Moss...
acrylic paint does not seem to adhere well...
I made a dipping solution that looked okay til I started touching them...
then a lot of it chipped off...
if you need to call...send me your # in a PM...
good luck...
yes...agreed...the plastic plants are too glossy...
I just finished a new tropical diorama last night....
you need a matte paint...satin or glossy does not do the job...
I use spray cans of Design Master's and Rustoleum...
Design Masters is about twice the price as Rustoleum...
Home Depot has Rustoleum...
Design Master can be bought on line......or at Michael's or Hobby Lobby...the best 2 colors are Basil and Moss...
acrylic paint does not seem to adhere well...
I made a dipping solution that looked okay til I started touching them...
then a lot of it chipped off...
if you need to call...send me your # in a PM...
good luck...
Attachments
mikemiller1955
Lieutenant General
- Joined
- Aug 3, 2008
- Messages
- 17,492
Chuck...enough to cover them...and if you miss a spot or two...Mother Nature isn't perfect...^&grin
Warrior
Lieutenant General
- Joined
- May 12, 2005
- Messages
- 15,335
I'd do things a bit differently; I'd prime the whole thing with flat black primer, then dry brush the plants three or four shades of green, dark to light, this is how I painted the palm trees I had for sale at the various fall toy soldier shows, everyone loved them. This approach is tedious and bit time consuming and there's a technique to dry brushing, but the result is very realistic IMO...……………………...
wayne556517
Lieutenant General
- Joined
- Aug 28, 2007
- Messages
- 16,248
I'd do things a bit differently; I'd prime the whole thing with flat black primer, then dry brush the plants three or four shades of green, dark to light, this is how I painted the palm trees I had for sale at the various fall toy soldier shows, everyone loved them. This approach is tedious and bit time consuming and there's a technique to dry brushing, but the result is very realistic IMO...……………………...
Dry brushing?
mikemiller1955
Lieutenant General
- Joined
- Aug 3, 2008
- Messages
- 17,492
I'd do things a bit differently; I'd prime the whole thing with flat black primer, then dry brush the plants three or four shades of green, dark to light, this is how I painted the palm trees I had for sale at the various fall toy soldier shows, everyone loved them. This approach is tedious and bit time consuming and there's a technique to dry brushing, but the result is very realistic IMO...……………………...
can't argue with that...
George...
that's how I did these palm trees...
except I did a base green...
no primer...
then a dry brush of brown...
topped with a dry brush of yellow...
it takes a little more time...
but it looks better...
Attachments

mikemiller1955
Lieutenant General
- Joined
- Aug 3, 2008
- Messages
- 17,492
probably 200 little plants on this diorama...I was too lazy to dry brush all of them...^&grin
ccdc11
Sergeant First Class
- Joined
- Sep 14, 2010
- Messages
- 1,171
Wow thanks,
I guess I will try versions of both. I have started to learn to drybrush so it may not work so well, but I have 50 of each to practice on.{sm4}
I picked up a can of flat rustoleom today but they only had color called forest which hopefully will work.
I bought magic water, palm trees and date palms and plants, so I've spent money to try to make this one look good. Most often I set up a simple temporary diorama because my real enjoyment of toy soldiers has always been setting them up. However getting more involved on the forum has given me the desire to create something as close as possible to most of what the guys on here do.
I am truly grateful for the offers of help that you guys have given me. And I think more importantly the push to try it myself, as I have never considered myself artistic in any way and I normally don't think I can draw a straight line with a ruler.
I will attempt a few this weekend, pics to come soon.
Chuck
mikemiller1955
Lieutenant General
- Joined
- Aug 3, 2008
- Messages
- 17,492
Chuck.....
I have seen several of your displays...
you're pretty talented...
I'm sure it will turn out fantastic...
you have the desire to create...
and that's all that matters...
I have seen several of your displays...
you're pretty talented...
I'm sure it will turn out fantastic...
you have the desire to create...
and that's all that matters...
theBaron
Major
- Joined
- Mar 27, 2008
- Messages
- 10,360
Dry brushing?
Dry-brushing is a technique in which you pick up a little bit of paint on the brush, and then drag the brush very lightly over the surface of the piece, hitting just the highest points of relief. That highlights them with the color. It's a common technique in weathering an armored fighting vehicle, for example.
It's best to use a brush with a straight edge, a "chisel tip". Pick up some paint with the tip of the brush, then drag the brush over a piece of paper towel a couple of times, to remove the excess. Then drag the brush over the piece, lightly. You can build up the color through repeated passes.
Hope that helps, prost!
Brad
wayne556517
Lieutenant General
- Joined
- Aug 28, 2007
- Messages
- 16,248
Dry-brushing is a technique in which you pick up a little bit of paint on the brush, and then drag the brush very lightly over the surface of the piece, hitting just the highest points of relief. That highlights them with the color. It's a common technique in weathering an armored fighting vehicle, for example.
It's best to use a brush with a straight edge, a "chisel tip". Pick up some paint with the tip of the brush, then drag the brush over a piece of paper towel a couple of times, to remove the excess. Then drag the brush over the piece, lightly. You can build up the color through repeated passes.
Hope that helps, prost!
Brad
Thanks Brad helps Alot
Warrior
Lieutenant General
- Joined
- May 12, 2005
- Messages
- 15,335
Dry brushing?
It's hard to explain, easier to demo, but here goes; you dip the brush in the paint, then you go back an forth on a piece of paper until most of the paint is off the brush, ie, "dry" so to speak, then you go over the piece and you'll see some of the paint will attach, you keep doing this over and over and the color gradually builds on the item, leaving some black from underneath showing to give it depth.
Then you take lighter color and do it again, then a lighter color again until you've got three colors on the item over the black base coat to give it even more depth.
If you've seen any of the scenic I paint, that is how I do it...……………….
mikemiller1955
Lieutenant General
- Joined
- Aug 3, 2008
- Messages
- 17,492
wayne556517
Lieutenant General
- Joined
- Aug 28, 2007
- Messages
- 16,248
Ta mate
Users who are viewing this thread
Total: 2 (members: 0, guests: 2)