Toy Soldiers ... --- Starting from scratch.. (1 Viewer)

Wolfgang

Guest
Joined
Jul 10, 2008
Messages
85
Hallo,
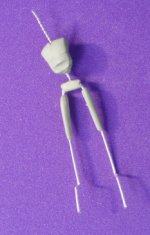
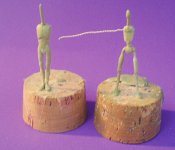
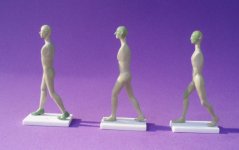
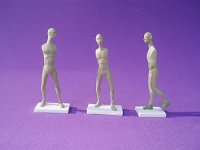
it took longer than I thought - well here are the results of some newly sculpted dollies that I will cast in tin, refine and than us as a basis for further sculpting, please mind the long necks - they will become handy as sculpting proceeds. Next step will be the making of molds an casting .... to be continued - hope you will enjoy...
regards
Wolfgang
 

Attachments

  • starting.jpg
    starting.jpg
    65 KB · Views: 619
  • inmaking.jpg
    inmaking.jpg
    93.4 KB · Views: 625
  • 3front.jpg
    3front.jpg
    81.1 KB · Views: 633
  • 3x.jpg
    3x.jpg
    94.5 KB · Views: 630
  • 1front.jpg
    1front.jpg
    62.7 KB · Views: 614
Re: Toy Soldiers ... --- some more

there are 6 poses finished so far another two are in the making and another three planned..
 

Attachments

  • 3xn (2).jpg
    3xn (2).jpg
    79.8 KB · Views: 383
This is going to be interesting and informative :) First question (of many I'm sure); what do you use for the bodies? Is it some kind of putty? That is some skill forming it into a human shape. :)

Thanks for taking the time to post these, I know how long these sort of threads can take.

Jeff
 
Re: Toy Soldiers ... --- some more

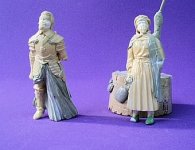
ok could not resist this are my latest sculpts for my line of 75mm elastolin toy soldiers to be casted in resin once (whenever) finished
Wolfgang
 

Attachments

  • elasto.jpg
    elasto.jpg
    93.7 KB · Views: 379
This is going to be interesting and informative :) First question (of many I'm sure); what do you use for the bodies? Is it some kind of putty? That is some skill forming it into a human shape. :)

Thanks for taking the time to post these, I know how long these sort of threads can take.

Jeff

Hallo Jeff,
yes it is a two part epoxy putty (the grey stuff) I used for most of the sculpting. This one is called Miliput it has been around for a long time, you got to mix equal parts together to form a soft doughlike clay. It will harden after some hours depending on the surrounding temperatures. Afterwards it forms into a pretty hard material that can be shaped by grinding and cutting. Basically most sculptors start up with some kind of amature (skelleton) made of wire or anything else to give the basic shape of the hume bone structure.
In order to get me some troops who fit together well (size an shape) I have decided to take this shortcut to produce a skelleton with a "mild" portion of beef on it. That will give me room to finish (cloth) later figures individually without getting through the routine of starting all over again at point zero. The upper Torso and the necks (heads) can get easily twisted to alter the desired pose of the figurine. Even some of the legs can be manipulated to give more variaty of posing the figure. Doing like this also ensures equal size among the troops - well more or less that is. I have not planned to use the faces the are just sculpted "to hold place" for the final "real" sculpting afterwards. Anyway lots of possibilities - I am wondering what the results will be. Haven t decided of what to sculpt as a first figure yet----- any sugesstion here ????????????
Can't wait to see the finished first toy soldier since I will try out a way of GLOSS painting technique I thought up - never done it before.
Wolfgang
 
Wolfgang,
Looking forward to this. I've no knowledge of sculpting, molds etc, so I appreciate the 'ride along'. The sculpts already look fantastically detailed.
Cheers
Simon
 
Looking forward to your work! This will be a real treat!


Njja
 
Wolfgang, Great stuff!!! Looks like your off to a great start. What size are these figures?
Look forward to seeing more of your work! How about some 54mm Napoleonics?
 
Wolfy Baby you are the man! Really would like to see the whole process. I am a novice to sculpting and mold making. Casting I am learning all the time but have been doing it for awhile with some good results.
 
Having no knowledge of sculpting, I will enjoy watching your progress.
 
Having no knowledge of sculpting, I will enjoy watching your progress.

Thank you evrybody for your responses. The sculpting of the figure at the -stand still- pose slowed down the mold making procedere. I would not have guessed that anatomy on that figure is so difficult to master, allready spent double the time on it then on any of the other sculpts and still only got 70% done. I will post a pic on the progress soon. The moldbuilding material is sorted out and finally organized. I vulcanize my molds (as I do for resin casting) to create 2-part-drop-molds so it is all a bit different from using liquid rty rubber. Preperations might take longer but I have parted from using rtv - too messy, too expensive, too much waste and the results do not qualify with heat vulcanizing rubbermolds.
Coming back soon - thanks for your interest

Wolfgang
:eek::eek::eek:

Mold making is going to be a high priority with me. I am curious as to the vulcanizing process vs the RTV. It seems as if you prefer the Vulcanize method.
 
Thanks, Wolfgang, for sharing this SBS with us! I'm with KV, I'm just at the beginning of trying sculpting, too, but sometimes it's a little intimidating. Starting sculpting can be like diving in to water that you know is cold, you probably should just take the plunge.

Prost!
Brad
 
Mold making is going to be a high priority with me. I am curious as to the vulcanizing process vs the RTV. It seems as if you prefer the Vulcanize method.

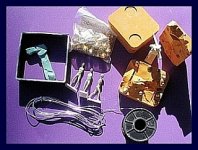
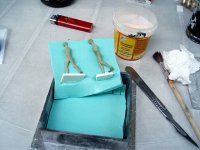
Here a picture of the set up of the material needed to vulcanize a mold.
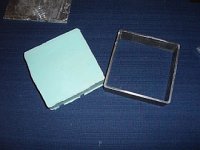
The orange molds where made with a comercially available alumiun mold (not shown) widely used by goldsmithes - rather expensive. The tan-coloured resin figure is a copy of an 70 years old Lineol soldier I have planned to convert and cast. If there is interest it could be worth an extra thread. The poly-bag contains mold locks made of brass being used to ensure tight and secure fit of the two mold halves, Some soft aluminium wire and solder which will be used to create the necessary cavaties for venting the mold during casting. Also shown some uncured rubber that is the small light-blue piece of material inside the rectangular steel-frame. This steelframe is my madeshift version of the rater expensive aluminum frames available. It only cost a please-please look at my favourite local blacksmith workshop. It is a simple cutoff piece of an steelprofile - by no means ideal regarding heat conduction and stability, I hope it will stand the pressure needing to be applied during the vulcanizing-process. Not shown the talcum powder which acts as an release agent between the two mold halves. That is basically all you need plus you - masters - ... the things you want to copy in white metal.
Hope to get started tomorrow packing the mold and bringing it all together for vulcanisation.
To be continued... out for a party tonight!
See you tomorrow or perhaps the day after
 

Attachments

  • Neddfullthings.jpg
    Neddfullthings.jpg
    93.8 KB · Views: 188
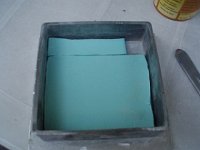
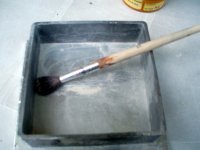
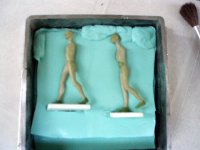
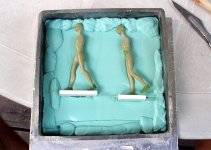
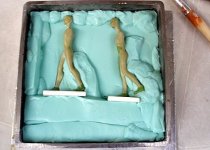
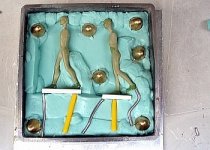
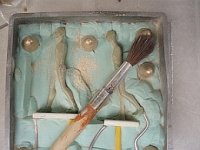
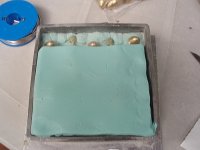
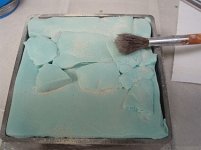
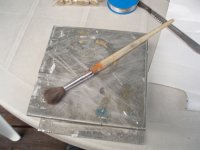
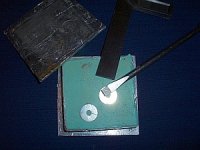
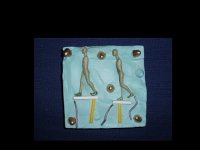
The following shows the process of moldmaking.
regards
Wolfgang
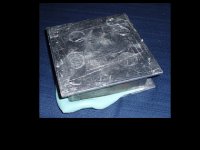
 

Attachments

  • 2.jpg
    2.jpg
    89.1 KB · Views: 147
  • 1.jpg
    1.jpg
    47.8 KB · Views: 144
  • 3.jpg
    3.jpg
    78.5 KB · Views: 149
  • 4.jpg
    4.jpg
    58.5 KB · Views: 148
  • 5.jpg
    5.jpg
    52.6 KB · Views: 140
... and so on
 

Attachments

  • 6.jpg
    6.jpg
    46.7 KB · Views: 136
  • 7.jpg
    7.jpg
    92.7 KB · Views: 139
  • 8.jpg
    8.jpg
    87.8 KB · Views: 138
  • 9.jpg
    9.jpg
    90.4 KB · Views: 145
  • 10.jpg
    10.jpg
    91.4 KB · Views: 139
and more pictures
 

Attachments

  • 13.jpg
    13.jpg
    76.1 KB · Views: 130
  • 14.jpg
    14.jpg
    85.6 KB · Views: 135
  • 15.jpg
    15.jpg
    63 KB · Views: 134

Users who are viewing this thread

Back
Top