Toy Soldiers ... --- Starting from scratch.. (1 Viewer)

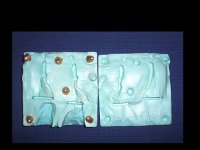
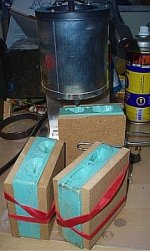
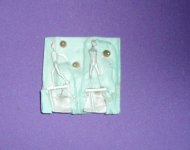
This is what I got so far. Another two molds are ready giving me 6 poses in total. Next step is the cutting of venting and casting funnels. Wooden plates have to be cut to aid casting.
Casting will be the next step. I am not happy with the mold frames, not everything turned out the way I wanted. Still they are only dollies so far - for final production molds I have to do better.
See you soon with mmore pictures from the casting process, hope it will work out.
regards
Wolfgang
 

Attachments

  • 16.jpg
    16.jpg
    93.1 KB · Views: 183
Following with interest. But what did you use for a heat source. It looks like you used the plate for pressure.
 
Following with interest. But what did you use for a heat source. It looks like you used the plate for pressure.

Hallo,
no - usually the plates only act as a top and botton base for the mold to be put in a vulcanzing press to keep the heating plates clean and unscrachted.
regrads
Wolfgang
 
Hallo,
no - usually the plates only act as a top and botton base for the mold to be put in a vulcanzing press to keep the heating plates clean and unscrachted.
regrads
Wolfgang

So do you use a commercial model vulcanizer?

Thanks for all the input.
 
Hi Wolfgang,
Like KV, watching with great interest. Thanks for taking the time to show us this side of the hobby.

Cheers
Simon
 
So do you use a commercial model vulcanizer?

Thanks for all the input.

Well I got something comercial coming in soon, with or without the "comercial" means there are a lot of ways to apply heat and pressure to an aluminum or in this case steel-mold-frame. Took me a long while to gain experience parting from a lot money over the years - but finally getting there. One is never 100 % happy with the results and doing this as a hobby it is the fascinating side of it all to try out what was out of reach yesterday and do what seems impossible a year ago. Never trust people "experts" who know it all - what might work for them does not neccesarily work for me.
regards
Wolfgang
 
Hi Wolfgang,
Like KV, watching with great interest. Thanks for taking the time to show us this side of the hobby.

Cheers
Simon

A pleassure to do so!!! Hope to finnish the molds tonight. The weather is much to nice and I have been a bit lazy on the hobby so far. But this will be continued and there shall be some castings on the table be coming weekend, thanks for your interest
regards
Wolfgang
 
Wolfgang, Very interesting. I have not done any molds of this sort but needed to learn!
Got me going now, I'll have to take a crack at it.
Thank you!
FUB
 
Whatever suits moldframe and rubber best. Heatsources: Oven, Vulvanizer, Boiling water etc.,
Pressure: Vulcanizer, c-clambs, vice or anything homebulit
Wolfgang
 
Did some cating tonight. To start - all molds filled well but I have a lot to try out and do better next time. I will clean and and photograph the castings soon. A unpleasant long list of lessons learned will follow as well -- good thing the molds have served their purpose but won' twin a beauty contest. Lot of room for improvement hopeing for your comments.
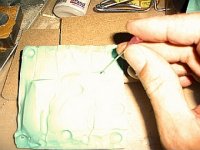
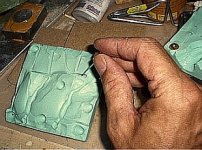
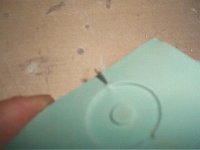
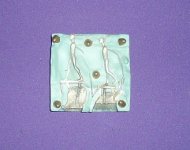
The following is on preparing the molds. Clever thing to do is to punch holes from the bases at an right angle through the rubber that will vent this troublespot during casting very well - had no problems here. Use a cut off oneway needle (dremel the slit side off in a straight cut - that will produce a great punching tool.. be carefull doing that and watch your fingers!!!), providing you are not on drugs anyway you should get them at your local pharmacy please mind the spagettishaped piece of rubber that was released with such a punch it will leave a small hole in the rubber mold - lousy pictur but perfect venting. Close the molds with two cut-to-size peaces of wood for stability and preventing the cast metal to leak out of the punchholes. Don't even think of drilling holes - it won't work in rubber, believe me.
To be continued
regards
Wolfgang

P.S. Could not resist to start the fun part allready, took one of the castings (call them dollies) an started shapeing my first TOY SOLDIER. The faces can be worked on very well since the metal is more sturdy than the epoxy clay and will hold fine detail very well too, hard to work with anyway - yet another new experience
 

Attachments

  • T1a.jpg
    T1a.jpg
    96.7 KB · Views: 158
  • T1B.jpg
    T1B.jpg
    96.9 KB · Views: 159
  • T1.jpg
    T1.jpg
    87.9 KB · Views: 154
  • T2.jpg
    T2.jpg
    93.1 KB · Views: 152
I learned about the punturing tip frm Bob O' Connell. I talked to him for awhile. He is a pretty nice guy. Makes great wagons!
 
I'm a little late to the party but have read the thread with great interest. Some nice material presented. With doing conversions I need to look at learning to cast parts versus buying a whole figure just for conversion parts. I will be following with interest. Thanks for the presentation.

Gary
 
I'm a little late to the party but have read the thread with great interest. Some nice material presented. With doing conversions I need to look at learning to cast parts versus buying a whole figure just for conversion parts. I will be following with interest. Thanks for the presentation.

Gary

Hallo Gary and anybody else
you are all more than welcome, happy to see as much interested collectors here as possible. Hope to gain knowledge myself as this continues. As written at the beginning this is all knew to me as well, I was much more envolved in casting resin over the last couple of years. Hope to switch from this "black&white" how-to on molds, castings and prototypes to the glossy colourfull side of painting which I have not done for years either. Hopeing to see a lot of your inputs here in order to assist
Thank you all and best regards
Wolfgang

First of all you will need plenty of GREEN paint! :D

This has been a very informative and interesting thread. Thanks for doing this.

Jeff
 
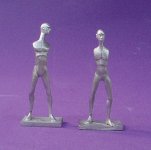
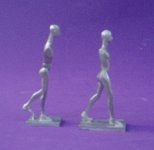
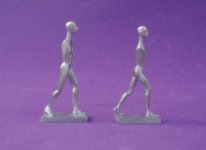
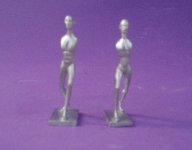
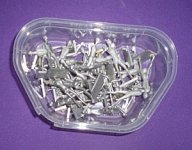
Here are some pictures of the casting. I am not to happy with them, the metal I used is^n't good enough.
Wolfgang
 

Attachments

  • s1.jpg
    s1.jpg
    81.4 KB · Views: 139
  • s2.jpg
    s2.jpg
    85.5 KB · Views: 138
  • s3 (2).jpg
    s3 (2).jpg
    90.4 KB · Views: 130
  • s4 (2).jpg
    s4 (2).jpg
    95.9 KB · Views: 128
  • s5 (2).jpg
    s5 (2).jpg
    83.2 KB · Views: 130
A pic of the filled mold.
I I started using the castings allready and will post the results soon. As poor as they might look they serve the pourpose. They are a good aid for the sculpting process - just the basic shapes of poses to be used.
regards
Wolfgang
 

Attachments

  • s6 (2).jpg
    s6 (2).jpg
    79.9 KB · Views: 149
  • s7.jpg
    s7.jpg
    54.9 KB · Views: 147
If you are going to be using them as a basis to sculpt figures I think they will suit your purpose just fine. I do not see the problem myself. It should be very handy to have so many blanks around.:)
 

Users who are viewing this thread

Back
Top