How to convert plastic figures (1 Viewer)

fishead19690

Command Sergeant Major
Joined
Nov 3, 2005
Messages
2,555
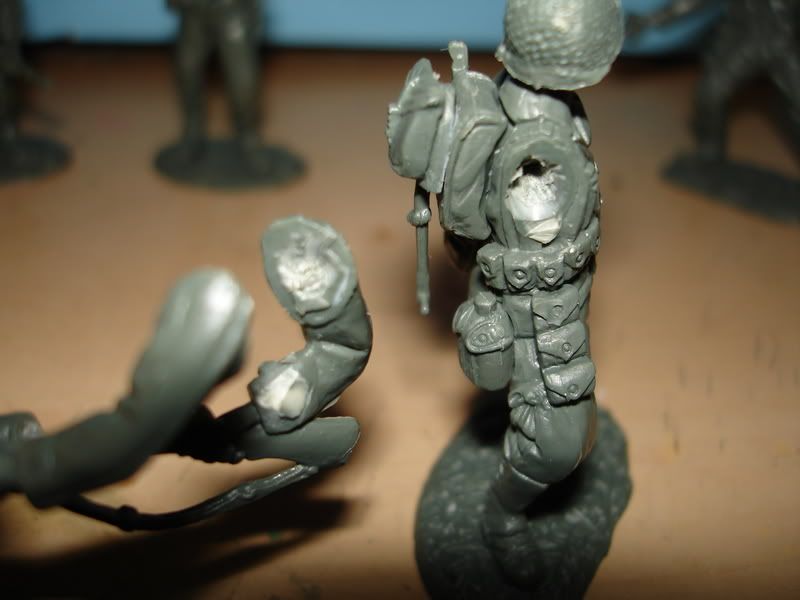
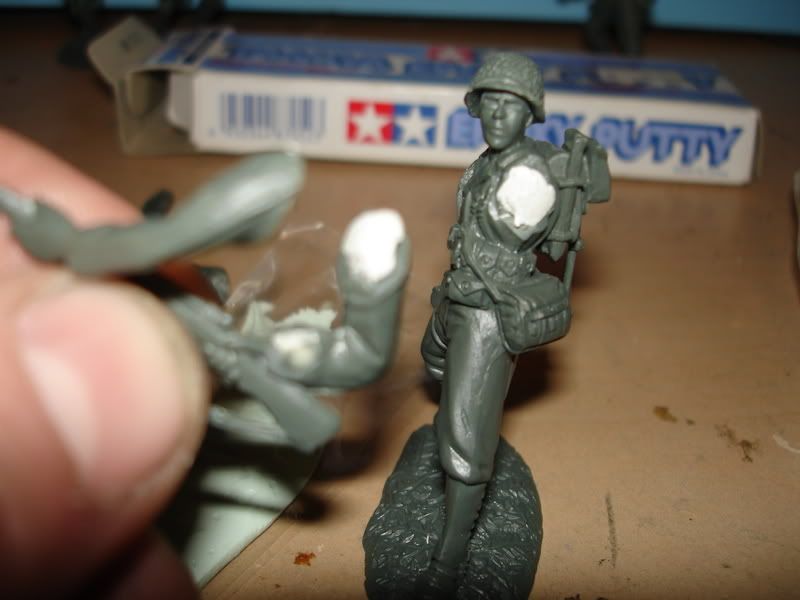
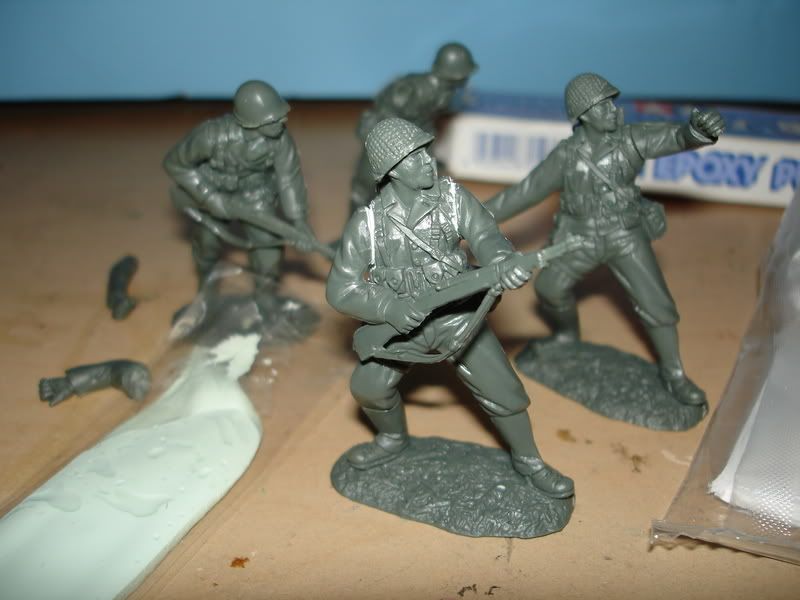
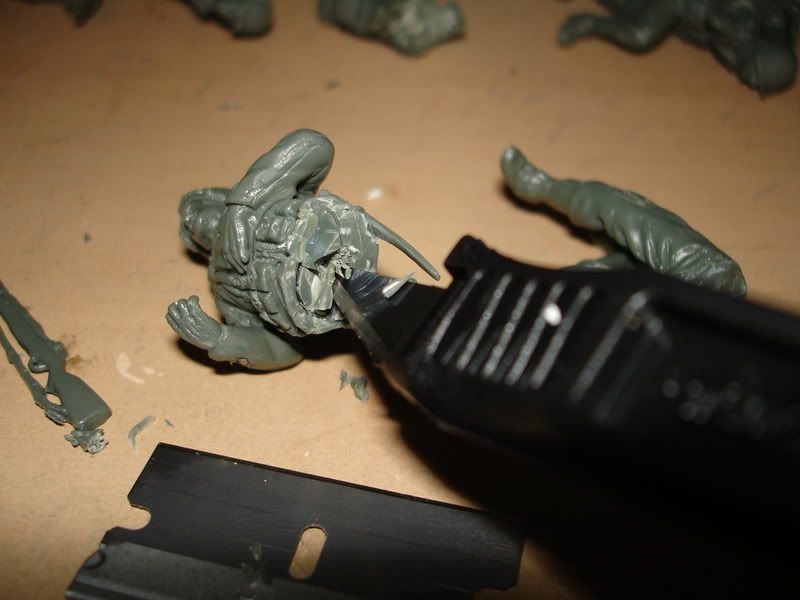
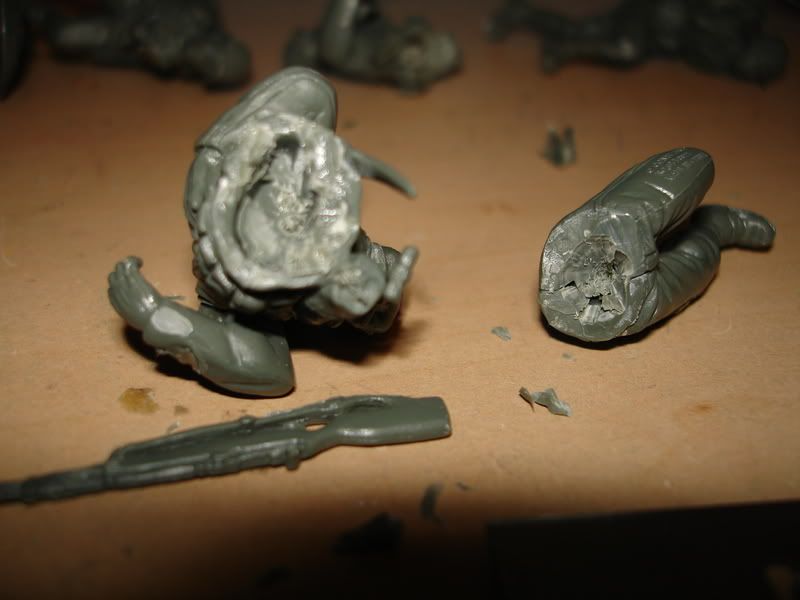
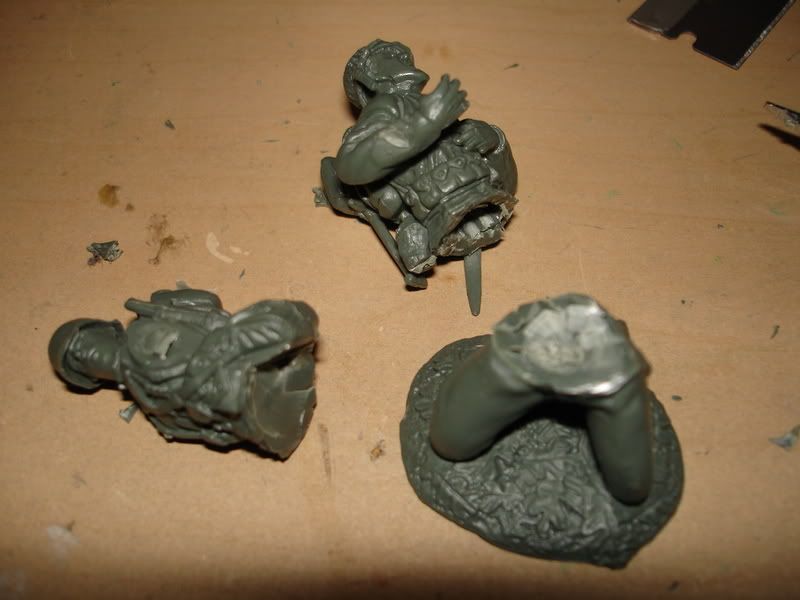
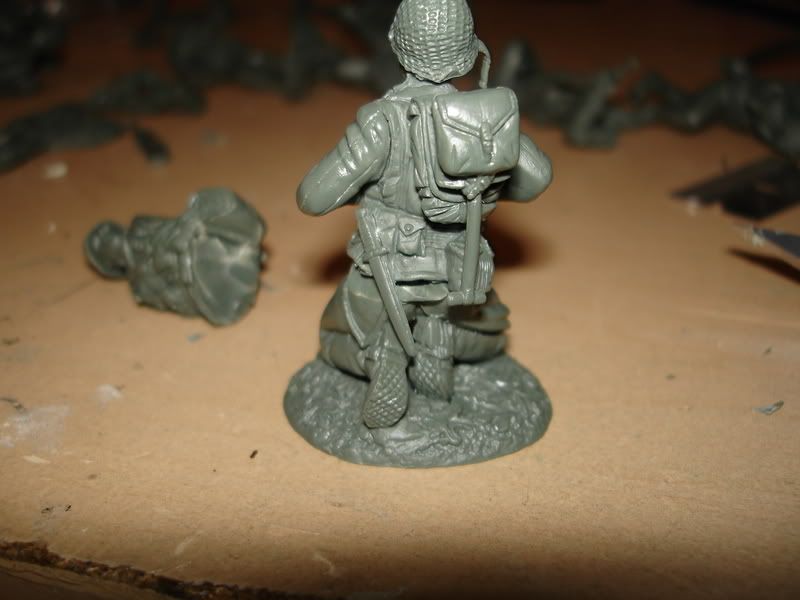
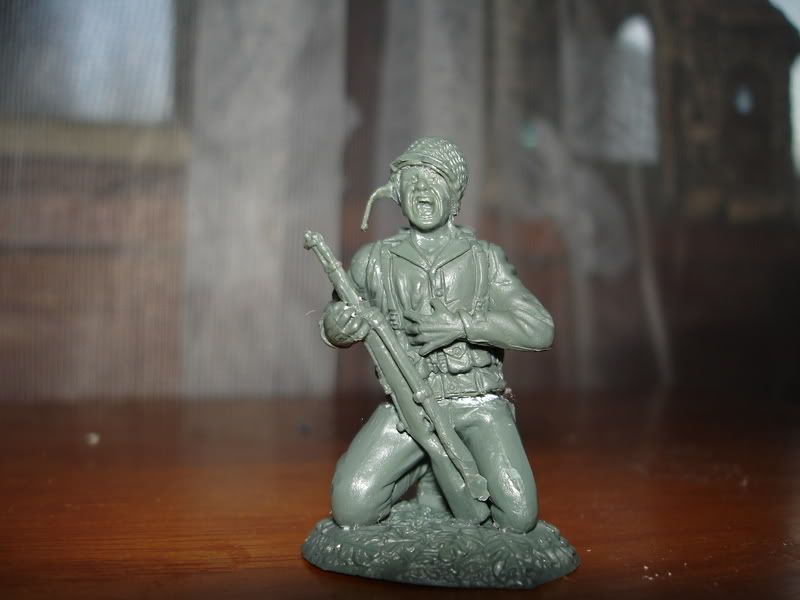
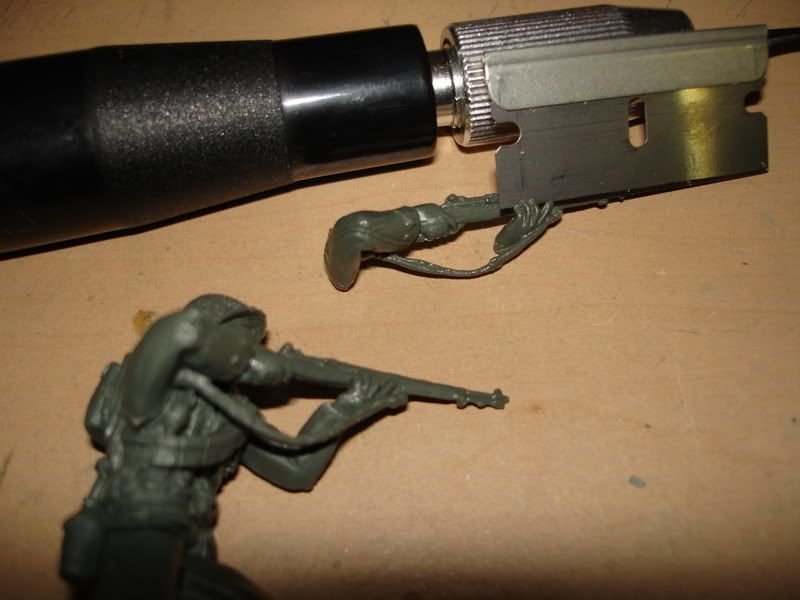
I figured I,d start a thread on how I convert my plastic figures with some pictures added in of the tools and supplies I like to use and maybe we can share some ideas and walk through a couple of figures with a step by step of how we each do ours and maybe we can learn something from each other and trade some ideas.

I,ll try and get us started with the tools and stuff that I use and walk through a couple of conversions. Lets start with what to use or at least what I use as I know we all have our own way of doing things which is what could make this thread interesting.
DSC01976.jpg

DSC01977.jpg

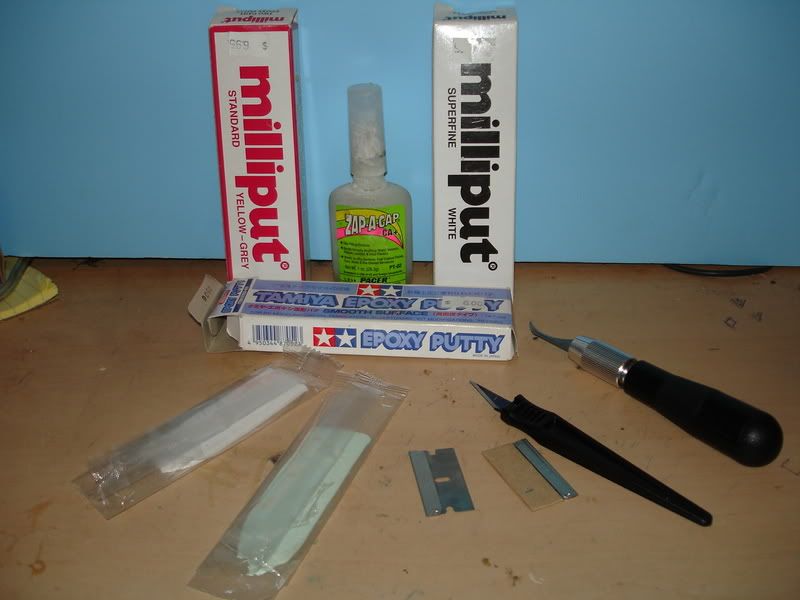
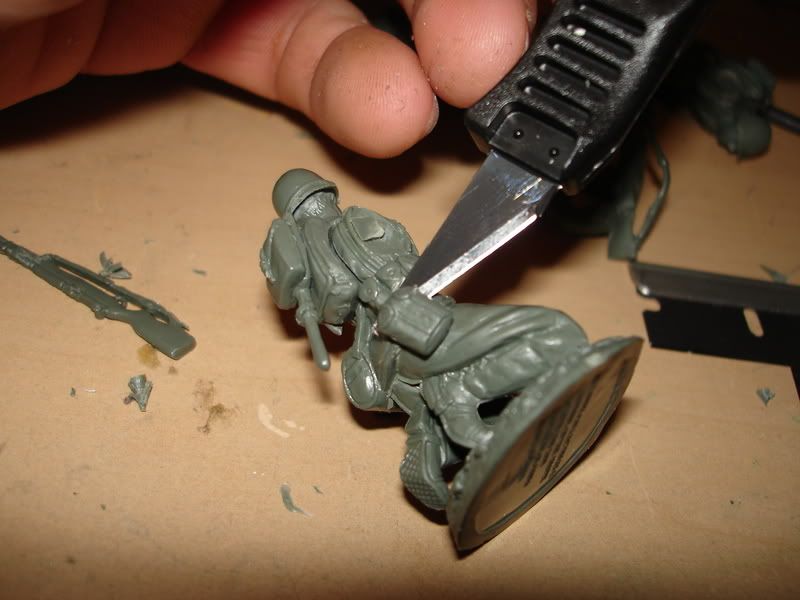
The first picture is what I use to cut the figures and the 2 part putties that I use and also my favorite glue zap a gap.
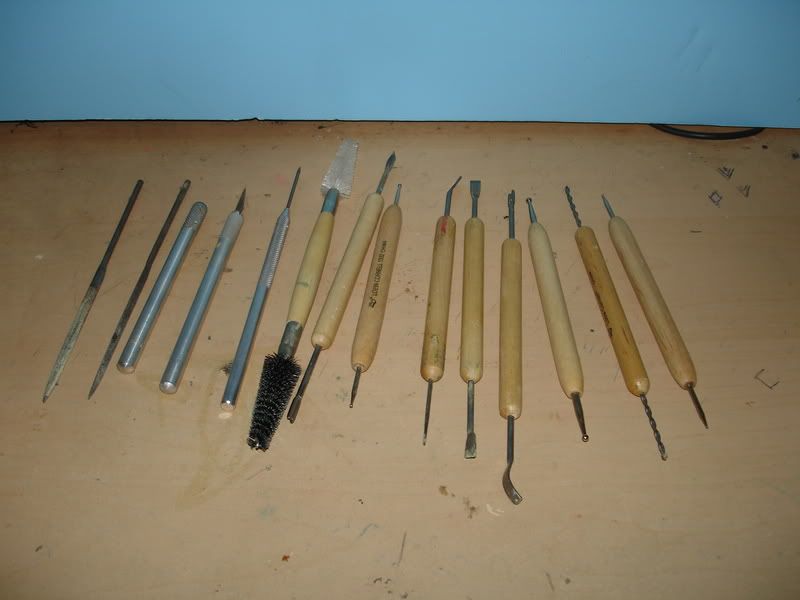
The second photo is some tools that I like the use to shape the 2 part putty and some small files.
 
O.K. Lets get started by selecting some figures to convert. Get a bunch of figures out of similar body size so that the parts will match up, Nothing looks worst then figures converted with body parts that are oversized or under sized and can ruin the whole look of the figure. Useing figures from the same manafacturer and set seem to work better most of the time but the scale and body parts can still be a bit different.

Now that you have your figures out start to look them over and get some mental visaul ideas of what to do with them. I also some times will chop up a bunch and just start to see which parts seem to work on what figures. And once in awhile I have an idea of what I want in my head already and have to search through figures to find parts for what I want to do.

I,m doing some of those conte G.I. conversions for gary so I took a few pictures of them as I chopped them up.
Lets get to the first picture so you can see how I do my conversions!

This first picture shows a figure that I already removed the arms from and also shows how I take the point of the hobby knife and make a hole into the arm sockets and arms themselfs to be filled with 2 part putty. This helps to hold the figure together better and acts kind of like the pins that some guys put into there conversions to hold them together.
DSC01980.jpg
 
The next photos show how you mix the putty by making 2 equal sized balls and then mixing them together well and then fill both the arm sockets and the arms with the putty.
DSC01981.jpg

DSC01982.jpg
 
Now put the arms onto the body poistioning them where you want them making sure they look good and fit well if not do some reshaping cutting or filling as needed. don,t worry about the extra putty you can scrap it off but its more important to make sure it fills in the gaps that you made.
DSC01983.jpg
 
Now that you have the arms on where you want them and they look good you can scrape off the extra putty. Also notice in the back ground are the 2 figures that were used to make the conversion.
DSC01984.jpg
 
After you,ve tried a few easier conversions like simple arm and head conversions you can venture a bit further. Lets look at cutting a figure in half at the waist. I know that there are things like hot knifes and dremel type tools and stuff like that but I just use my razor blades and hobby knife. I like the testors fixed blade disposable hobby knifes because I can put the presure needed to figures in half and I know the blade is not going to move on me.

This is where you need to be very careful not to cut yourself because the presure that is needed to cut through the waist section will give you a REALY bad cut.

DSC01986.jpg
 
Its sometimes easier to remove iteam around the waist of the figure before you cut them in half, you can replace them by glueing them back on latter.
DSC01993.jpg
 
Once you have your figure cut in half you can hollow out the pieces like you did for the arms to allow the putty to get up in there to hold the figure together better.
DSC01990.jpg
 
Here is a picture of the hollowed out pieces almost ready to be joined.
DSC01991.jpg

DSC01996.jpg
 
Now you want to start to place the 2 halfs together to see where you need to trim to get the 2 halfs to fit best. Once you have trim the 2 pieces to a point where they look good you can add the putty and poistion it till it looks good and clean off and shape the putty.
DSC01997.jpg
 
Here is a picture of the completed conversion. The riffle was also cut off in this conversion and replace in a new position. This was just glued back on using the zap a gap glue.
DSC02070.jpg
 
Tim,

Great thread! It's always nice to see how others are doing it, and you're pic guide makes for very easy viewing.

Thanks for taking the time.

Simon
 
In this conversion the right arm I wanted to use was from a firing position and had 2 hands on the gun, so one of them had to be removed. This can be done with the hobby knife or razor blade just take your time and be careful this can be a bit tricky and takes awhile to get used to doing this but can open the door for a bunch more conversions if you can get used to removing unwanted parts like this.
DSC02000.jpg

DSC02001.jpg

DSC02003.jpg

DSC02004.jpg

DSC02050.jpg
 
Very informative a great presentation. But now you bear the responsibility of turning us into Junior Jack the Rippers not to mention all the cut fingers. Just kidding great job MR Fish, thank you for sharing your expertise.:p
 
Tim, good stuff. I thought I was looking at my bench top for a moment. I think you should note, with these new Conte figures, the hot water way works great. It might cut down the bandaid use. Convert On Mike.
 
Good point I forgot to add that In.
Thats what this thread is for to keep adding too. Why not post a few hot cold shock treatment conversions on here with a few notes on how to.

A couple of the running poses that I did on these conte conversions had to have the hot cold shock treatment to get them to rebalance on there bases because the riffle no pointing forward put the figure off balance and they would not stand up but this is a simple fix, just run your hot water till it gets, hot then bend the figure to the new position, run it under the hot water for a couple of seconds and then under the cold and it will take and hold the new position that you bent it to.
Another way to get off balance figures to stand is to make the base larger with some 2 part putty. you can also add some broken sticks or grass broken bricks ect.ect. to the new base to make it interesting while your at it.

This is also good for fixing plastic figure that have those guns that were made to shoot around the corner also. A lot of plastics come packed in bags and are bent all over the place but a simple hot cold shock will make them good as new.

This can be taken a step further with the water a bit hotter and figures can be twisted into new positions for no knife conversions. Heads, legs, arms even waists can be converted using this method. Now you just have to worry about burns instead of cuts!!!:p
 
Last edited:
Good point I forgot to add that In.
Thats what this thread is for to keep adding too. Why not post a few hot cold shock treatment conversions on here with a few notes on how to.

A couple of the running poses that I did on these conte conversions had to have the hot cold shock treatment to get them to rebalance on there bases because the riffle no pointing forward put the figure off balance and they would not stand up but this is a simple fix, just run your hot water till it gets, hot then bend the figure to the new position, run it under the hot water for a couple of seconds and then under the cold and it will take and hold the new position that you bent it to.
Another way to get off balance figures to stand is to make the base larger with some 2 part putty. you can also add some broken sticks or grass broken bricks ect.ect. to the new base to make it interesting while your at it.

This is also good for fixing plastic figure that have those guns that were made to shoot around the corner also. A lot of plastics come packed in bags and are bent all over the place but a simple hot cold shock will make them good as new.

This can be taken a step further with the water a bit hotter and figures can be twisted into new positions for no knife conversions. Heads, legs, arms even waists can be converted using this method. Now you just have to worry about burns instead of cuts!!!:p

Tim,

Your description of the "Hot and Cold" treatment method is excellent information. Thanks for sharing it!

Warmest personal regards,

Pat
 
Tim, I am definitely going to try the putty method. I usually have to go back and press the pins in. This is good info, thanks Mike.
 
Tim,
Thanks for the great demonstrations! I learned a lot from reading your posts. That took a lot of work to type up and photograph and we appreciate it. Your thread was so informative it begged for its own subcategory, so as you can see I created "Plastic How-Tos" and moved it on in.
This is the sort of posting that really adds value to the forum. I look forward to reading more.

Regards,
 
Hi Tim, some great info there, particularly in regard to the hot-cold treatment. You make it all look easy, I tried to convert some Britains Deetail figs years ago but somehow I chopped the arm off at the wrong angle the opposite side from where I started cutting. I guess the solution would be to cut "around" the body part in a circular fashion rather than straight across.
 

Users who are viewing this thread

Back
Top