How to convert plastic figures (1 Viewer)

Tim,
Thanks for the great demonstrations! I learned a lot from reading your posts. That took a lot of work to type up and photograph and we appreciate it. Your thread was so informative it begged for its own subcategory, so as you can see I created "Plastic How-Tos" and moved it on in.
This is the sort of posting that really adds value to the forum. I look forward to reading more.

Regards,

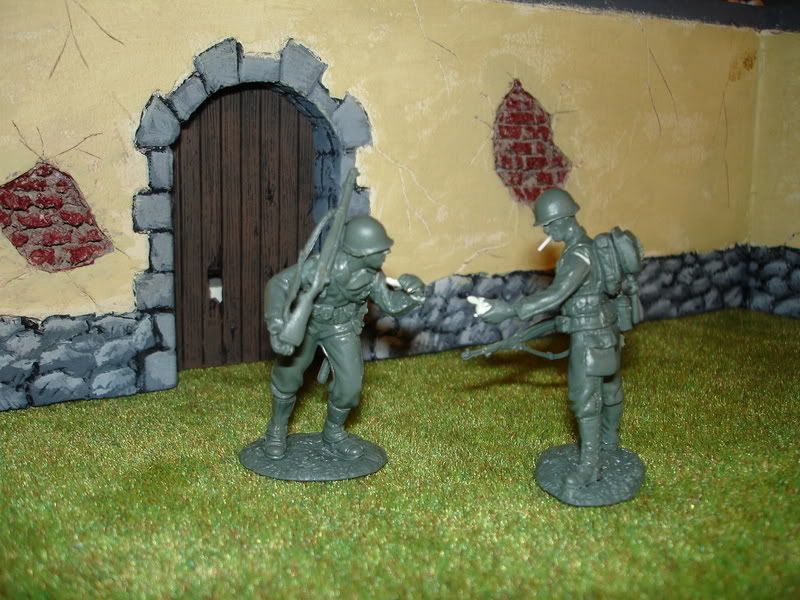
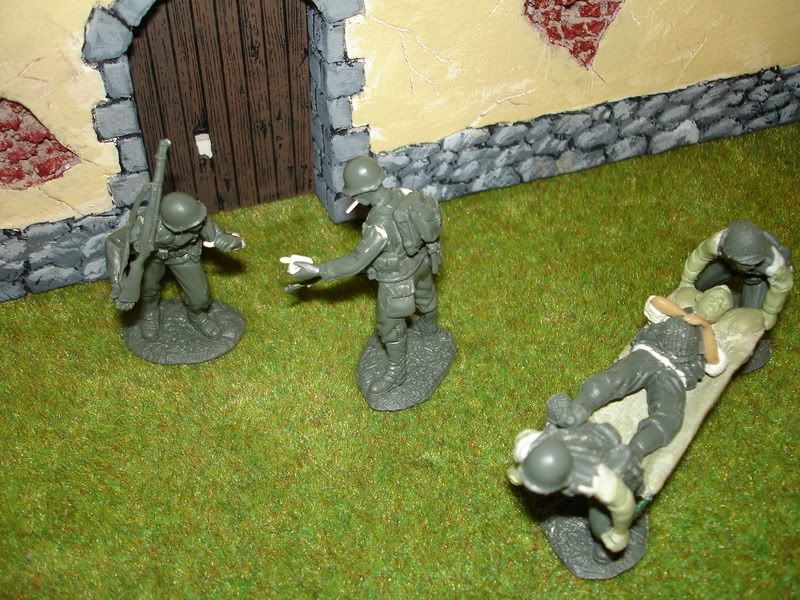
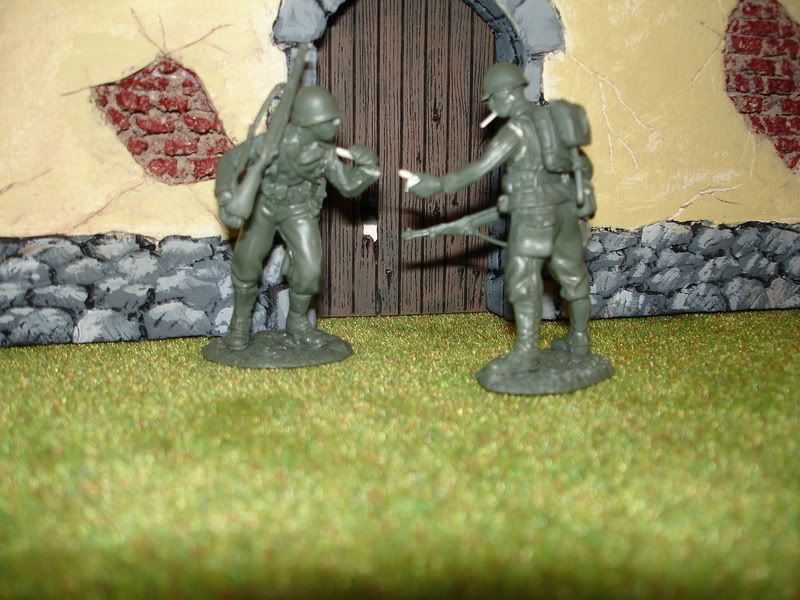
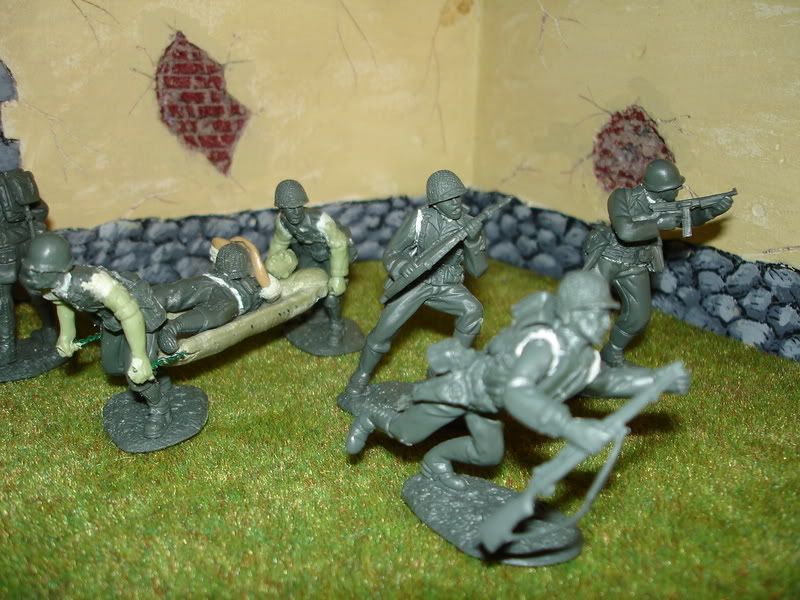
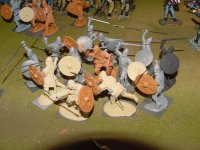
Thanks Shannon and thanks to every one else also and I hope this will inspire new blood into this end of the hobby and hopefully others will share some of there ideas also. I have been wanting to start a thread on converting that was a bit more imformative and finaly got around to doing it.

I hope this helps others just getting into this hobby because there dosn,t seem to be munch in the way of books or other info on this subject out there and I kind of just learned what I know by trail and era and i,m still learning myself and I hope that others will teach what they know also and we can all learn from each other. just be very careful and watch your fingers and other body parts and always cut away from yourself. Maybe we can start another thread on our favorite bandaids.:p
 
Hi Tim, some great info there, particularly in regard to the hot-cold treatment. You make it all look easy, I tried to convert some Britains Deetail figs years ago but somehow I chopped the arm off at the wrong angle the opposite side from where I started cutting. I guess the solution would be to cut "around" the body part in a circular fashion rather than straight across.

Oz you bring up a very good point!
When you go to cut off a body part you want to make sure that you are cutting off the piece in a clean cut and getting all of the piece you want cut off in one shot and not taking to munch OR to little.
Its a good idea to make a pre shallow cut around the whole piece to be removed.Make the cut a little at a time in a circle around the body part. You can do some fine tunning on the piece and do some more trimming on the piece after you get it cut off and if you do cut to munch off you can use the 2 part putty to fill, replace, or remake anything that you messed up. You should try working with the 2 part putty, it can be used to make new body parts or equiptment for the figure altogether. You could sculpt a figure right from scratch with this putty so fixing a small section of body that you over cut is no big deal.
 
Tim, and others, another way to cut bodies in half is. Take a 4"x4" piece of pine, and slant the soldier over one of the edges. This gives you better leverage, and most of the time it gets the stand off the table. Before cutting, really study the figures for waist proportionality. Like Tim says, always try to cut away from your fingers.Good Stuff Mike.
 
Hi Tim, thank you for the pictures on the demo. I haven't had much luck with the hot/cold treatment but will try again.:D
 
Thanx Vamp! Here are a couple more that I did this week. These next couple show how the use of 2 part putty and pieces from other figures with the use of 2 part putty can open up new doors and ideas for your conversions.

The first 2 figures are meant to be a set of figures sharing a smoke after a hard day. Its good to think up little 2 and 3+ figure ideas where the figures can work together, I think they look realy cool and kind of tell a little story when put together.

In the other photo I used parts from various figures along with 2 part putty. You can mix all kinds of parts to come up with all kinds of new ideas.
The stretcher was made out of 2 part putty and some floral wire which was all that I had around at the time, which was not strong enough so I twisted 2 pieces together real tight and it seamed to work O.K. then the rest is 2 part putty.

The guy on the stretcher was all chopped up from varouis pieces, the legs and body are from 2 differnt conte pieces, the head is TSSD and the arms are from a marx viking with 2 part putty sleaves.

The stretcher bearers have arms from TSSD figures with a bit of 2 part putty and took awhile to get positioned right onto the body. They also had to have the hands hollowed out to hold the stretcher also. They need to be cleaned up a bit still and need a bit of filing cutting and filling still to make them look more natural. I think I might redue the stretcher and do it with some brass rod the next time but first I,ll try a bit of carving and fileing first and see if it looks any better.

Just a few more ideas for you guys. Think outside the box and try and make the parts do what you want too! If there not fitting to do what you want them to chop them up and put them back together with 2 part putty and cut carve and shape what you need to get the figure you see in your head into a finnished figure. I first fish through all my parts looking for what will work, if I find nothing I start to CUT!!! I had to cut off and reposition the hand on one of the smoking figures which is a little tricky but can be done with a bit of work. I wanted the other arm holdindg the gun in that marching position and had nothing like that so I had to cut the riffle from another figure and had to cut the hand grenade out of a figures hand from another pose to place the riffle into but I got what I wanted. Its all in studying your figures for the parts you need or the parts you can make work, with a bit of work.

Happy chopping guys!!!
DSC02160.jpg

DSC02161.jpg

DSC02162.jpg

DSC02164.jpg

DSC02169.jpg
 
The wall in the back ground is the wall that I made from pink foam that went on the side off the house that I made. I tried To dress it up a bit by making cracks in it and craved some broken bricks into it.
How does it look now?
I want to try the same thing on the house also but wanted to try it on the add on wall first incase it didn,t turn out well. I want to repaint the bottom stone a bit better and add some vines growing on it also and if it comes out good I,ll do it to the rest of the house and weather it up a bit also.

DSC02188.jpg

DSC02174.jpg
 
Last edited:
Pretty cool stuf there Fish. You've really gone to town on the GI's!
Very good tutorial you have going here.
I still havent carved anybody up for a while. Busy screwing up some metal guys.

I have 200 GI's set aside to paint and or convert. but it looks like I wont get to them for a while.

Anymore Napoleonics ready for the blade?
I hear rumors of AIP Something Nappy but nothing confirmed.
FUB
 
Great stuff Tim, I like the cigs being handed out. They were like gold to them. The famous line was, " don't forget to check the bodies for smokes". The building looks good also. I've been to busy for chopping. I will try to put together a how to build a poor mans building. They are made completely out of cardboard and foam. Keep on converting, great ideas Mike.
 
Tim good thread, I was just reviewing page two of this thread. That poor wounded soldier seems to be sreaming in pain as you are sliceing him in half. I have been doing these since 99, and I am going to try the putty way. I will try the zap also. I am still going to convert more Canadian rubber Germans and Paras, when I do, I'll get them posted. Convert On Mike.
 
I am still going to convert more Canadian rubber Germans and Paras, when I do, I'll get them posted. Convert On Mike.

Mike,

Do you use the soldering iron technique for converting the Canadian made figures?

Simon
 
Pretty cool stuf there Fish. You've really gone to town on the GI's!
Very good tutorial you have going here.
I still havent carved anybody up for a while. Busy screwing up some metal guys.

I have 200 GI's set aside to paint and or convert. but it looks like I wont get to them for a while.

Anymore Napoleonics ready for the blade?
I hear rumors of AIP Something Nappy but nothing confirmed.
FUB

I haven,t done any napoleonic conversions for awhile now and still have boxes full of conversions that I started and never got around to finnishing or painting them up. I,ve got all kinds of different napoleonics conversions, civil war, mexicans, G.I.,s and others just a lack of time to finnish it all, so many projects that I just lost interest in and went off in a different direction. I still have a bunch of your russains in the half painted state that I want to finnish also. I bought a couple of sets of those G.I.s just because they looked cool and the next thing I knew I was going crazy chopping them up and got off track again. I really wish that conte would come out with some plastic napoleonics like those G.I.s :cool:

I like the A.I.P napoleonics and thats good news to me that there going to come out with more of them. Any rumor as to what they,ll be? I hope they,ll be foot figures because i,m not to crazy about there mounted figures, I think Italeri has the best mounted figures. Hopefully its something that,ll fill some gaps in whats missing out there and hopfully the sculpting will look good also.
So what on your chopping table??? What metal guys are you messing around with? Some kind of converting of napoleonics I hope! Anything new with those?
 
To Simon, yes I cut them in half, take pins and slide them into the under side of the upper half. I get them as tight as possible. Then I take the solder iron, and in quick sliding lightly pressing strokes, meld them together. If there are large gaps any where, just cut little pieces from the wide bases. Mike.
 
To Simon, yes I cut them in half, take pins and slide them into the under side of the upper half. I get them as tight as possible. Then I take the solder iron, and in quick sliding lightly pressing strokes, meld them together. If there are large gaps any where, just cut little pieces from the wide bases. Mike.

Cheers Mike,
I'm new to this method, but am finding something satisfying in slicing them up and then melting them. I used to do the same sort of thing when I was a kid, but no the results are a little more pleasing.
Simon
 
To the melting members of mutilation, maiming, and mastering your Contes. Make sure you do it in a well ventillated area. I tend to make a whole batch first, and on a good day about 50 degrees or so, do them on my deck. In summer, I do them in my attic, with a fan blowing the smoke out the window. Cut straight Cut small. Mike.
 
Hey Fishsticks! :D Those conversions are awesome! I wish I could do that, I'd have a field day with my 10 yr old's soldiers. LOL. Someday I will attempt to convert a soldier or two like the way you do it. What a great idea. Thanks a lot for the tips, they are very, very interesting and helpful.........Nick:)
 
Hey Fishsticks! :D Those conversions are awesome! I wish I could do that, I'd have a field day with my 10 yr old's soldiers. LOL. Someday I will attempt to convert a soldier or two like the way you do it. What a great idea. Thanks a lot for the tips, they are very, very interesting and helpful.........Nick:)

Hey nick glad to see you back over here!!! Why don,t you get a couple of boxes of band aids and give it a try again.:p
These new conte figures are great for conversions and paint up nice also and would go great with your dioramas and you could chop up the figures to make poses that would be costum made to go with your diorama and munch cheaper then painted metal.
They also make civil war figures and many other eras also and would be a cheap way to do something other then WWII with your dioramas.
I noticed you,ve gotten a few civil war figure and a civil war diorama would be cool and a lot cheaper with painted plastics and there are a bunch of plastic civil war figures out there and if you convert you can make a ton of different poses.

I really like the Civil War Era. I just started to collect ACW a couple of weeks ago. My fingers are all cut up from building dioramas and buildings so I'm already half way there. LOL.
 
At long last and thanks to Matt at Hobby Bunker , I got my hands on some Emhar 1/32 Viking warriors. Very very pleased.Nice poses, poseable bendable yet semi stiff plastic.Several appear usefull as Saxon Huscarls as well. I started cutting on a few.Nothing major, just some weapons changes, started mixing conte parts as well, a few old Timpo and Britians swords and axes I still had in a baggie and some piano wire spears .I make those at the shop with hammer, anvil and bench grinder.
I glued them all to steel bases.Going to trim those before priming.
A couple hours last nite and a little more today and I have a nice 36 figure warband that now just needs painted.I love painting dark ages so maybe I'll break the painting block thats plauged me for some months.
Some look more like Saxons to me and they'll find a place in a Saxon shieldwall .
Overall if you like Dark ages the Emhar Vikings are very good and I was pleased to see them.They mix well with the Contes. There are a few that are a bit slim but beautiful figures.Hopefully their 1/72 Saxons will GROW to 1/32 so we have even more poses to alter.Normans Cavalry would simply be fantastic.

FUBAr
 

Attachments

  • VIKS.jpg
    VIKS.jpg
    67.9 KB · Views: 1,636

Users who are viewing this thread

Back
Top