Startup of a Normandy Hedge grow Diorama (1 Viewer)

Sahara

Command Sergeant Major
Joined
Apr 7, 2008
Messages
2,657
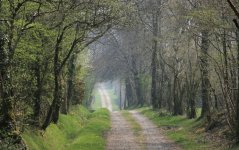
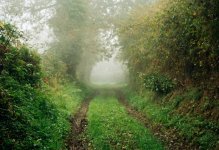
Hey guys here are some picks of a diorama I'm starting up. These are early picks and the diorama has a long, long way to go. This will be specifically for FLs Normandy American Paras. It will basically be a diorama of an American assault on a MG position. I put the German sniper in the photo for scale ref.

IMG_1917.jpg

IMG_1916.jpg

IMG_1915.jpg
 
Hello Sahara,
Great job! It's a big Dio! (what size?)
It wil be a vey nice display for your paratroopers. Vive la Normandie!
Cheers
Xavier
 
Hey Sahara...Nice start friend!!...look forward to see how it turns out. I"m a sucker myself for large diorama"s, always try to start small but it
has a way of getting larger every day..Before i know it it is a full shelf diorama....GOT TO THINK SMALL!!!!!!!!!.

Steve
 
Looks Good...Your off to a good start {bravo}.....Can't wait to see the final pictures:smile2:
 
Can't wait to see your progress on this-it's going to be a great one.
mike
 
Thanks for the nice comments and support fellas. I'll keep it updated as it goes along. This is what I got completed today. Once again it is a long ways off so just bear with me. The diorama is 3 ft by 2.5 ft. Sorry about the couple photos that were blurry.
IMG_1942.jpg

IMG_1939.jpg

IMG_1935.jpg

IMG_1933.jpg

IMG_1926.jpg
 
Coming along very nicely Joe, can't wait to see it finished when you have your Paras vs. some Germans in full battle mode...Sammy
 
looks good Joe.If it's half as good as your Roman dios it will be great.
Mark
 
Hi Sahara,
you're doing a fine job here, creating your new diorama base.
I am sure it will end up being useful for many, many photo sessions to come and I am looking forward it.
Konrad
 
Looking awesome already Joe...thanks for the sharing the dio in progress. Can't wait to see it all finished w/ the FL figures on it.

Joe
 
Thanks for the kind words guys. Im looking forward to filling this diorama out with plenty of FL figures. Granted my 101 boys might be running around between the hedgerows for a while until their adversaries arrive. Ill keep the thread updated as the project moves along. If I get a chance Ill take a couple pics of my completed Roman fort and post them as well. I know I posted some pics of the Roman fort in the past but none of the final product.
 
One more pic. I can't seem to find that shade of dirt I like in between the hedges. Any suggestions?

IMG_1957.jpg
 
One more pic. I can't seem to find that shade of dirt I like in between the hedges. Any suggestions?

IMG_1957.jpg

Looking good!!!!....Nothing beats the real thing... you could try taking a walk down a dusty forest track or farm road and scoop up a couple of bags of that stuff, (it"s that sandy brown/greyish stuff you need) Then spread white pva glue quite thickly on the road area and drop the stuff you collected on top (thickly) give it around 10/15 minutes to sink in to the glue, then tilt the board to let the surplus slide of the road.
Then if you"ve timed it right you cans tamp it down with the end of an old paint brush or make wheel or tank tracks with an old model, if the glue oozes through no panic just sprinkle a little more dirt with an old spoon and make the tracks again till you are happy..Let it dry 24 hours and your tracks will have hardened like concrete, then if you wish you can drybrush with enamels or oils to highlight for effect.. ..have fun !!!.

Steve

Thanks for the suggestions Steve. I will definitely utilize some of your techniques on the diorama. I need to make some tracks near my MG position. I think your method will work excellent.
 

Users who are viewing this thread

Back
Top