A bid of sculpting, casting and a little magic... (2 Viewers)

Wolfgang_UK

Sergeant
Joined
Dec 5, 2009
Messages
695
Hi,
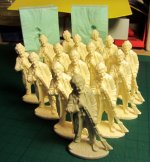
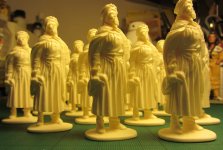
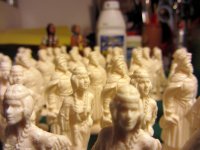
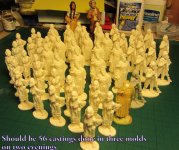
I did a bid of resin casting lately which some of you might find interesting.
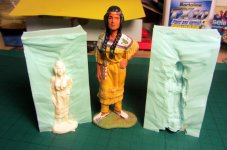
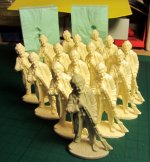
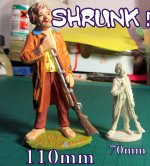
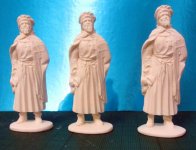
All figures are 70mm scale either sculpted by myself or altered by pure magic (see pictures).
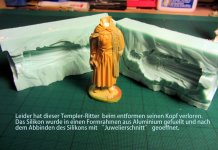
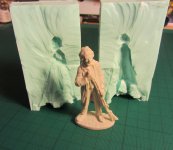
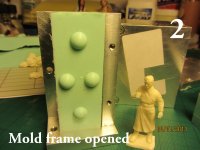
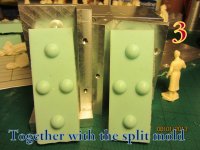
Silicone rubber (the light green stuff) used is a great knew product I have found recently
made by a company called PUREX it is called PICOSIL-GRUEN, mixes 1:1 by volume
and sets in about 30 minutes - fantastic stuff. It is supposed to work with low melt
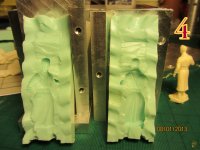
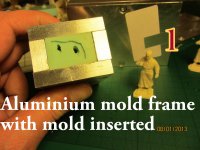
whitemetals as well but I could not test it yet. Vulcanised molds last for at least 50 castings in resin which is absolutley premium since the usual rate 15-20 castings. Mind you all my castings are one piece castings which does put a lot of stress to the molds due to the "Pulling-Forces" involved.
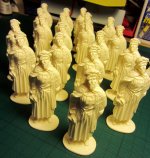
Resin used was EazyFlow 60. Both rubber and resin was cured under ca. 90 PSI pressure resulting in absolutly bubble free molds and castings.
Enjoy
regards
Wolfgang3.JPG1.JPG2.JPG
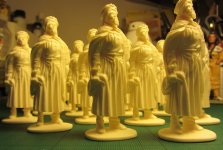
 
allright time for some magic.........
 

Attachments

  • d.JPG
    d.JPG
    167.5 KB · Views: 550
  • c.JPG
    c.JPG
    220.2 KB · Views: 566
  • a.JPG
    a.JPG
    284.8 KB · Views: 559
  • b.JPG
    b.JPG
    173.4 KB · Views: 558
some of the the hardware on display
 

Attachments

  • 7.JPG
    7.JPG
    162.6 KB · Views: 550
  • 4.JPG
    4.JPG
    173.8 KB · Views: 556
  • 5.JPG
    5.JPG
    147 KB · Views: 530
  • 6.JPG
    6.JPG
    167.4 KB · Views: 550
Outstanding, Wolfgang, ausgezeichnet! Very crisp castings, especially the Templar.

Prost!
Brad
 
Thanks for that, can you recommend a cheaper alternative? I have only ever used Prince August rubber moulds, and my home made plaster ones.
 
How did you achieve a casted figure without bubbles ruining the surface of the figures?
 
How did you achieve a casted figure without bubbles ruining the surface of the figures?

By useing a dental pressure pot, high quality silicone rubber and almost ten years of real expensive trial and error ...
As far as the "right" casting resin is concerned, if casting small figures in just one piece useing a two piece mold never believe what it says on the tin, -without the right hardware you will hardly cast anything really bubblefree.

regards
Wolfgang
 
Last edited:
Finally I managed to basecoat some of the castings. I use thinned Gesso to do so. It does require some time to dry up but it really is a primer with some "Tooth" to paint on. It does receive the
paints very well much helped by the white colour of the Gesso. Don't enjoy to paint a yellow shirt on a grey basecoat.

I will shift this thread on my trials of painting some "Medival Military Order Warrior Monks" to the Painting-section as soon as I have made some progress- hopefully this weekend.

Did some research over the last couple of days - most interesting subject and fortuneatly the casted figure is "UniOrder" enough to cover a timespan of at least 400 years without a dramatic change of fashion. More of that later, for now here are the first three Volunteers haveing received their basecoat.

I will paint three figures at a time and see how long the enthusiasm for this interesting subject will last.
See you later at the "Painting" side.
regards
Wolfgang
 

Attachments

  • IMG_1476.JPG
    IMG_1476.JPG
    179.4 KB · Views: 273
New Project

New Converting/Casting Project useing 1/24 Elastolin Plastic Castings

Hi,
I would like to present some "In Progress Shots" of a commission I am undertakeing for a french collector of Elastolin figurines. Collecting Elastolin figures is a hobby enjoyed by quite a few collectors in Germany who are foremost eager to recreate a piece of their own childhood memories. I will not go too much into detail about collecting Elastolin (lot to find at the www.) but a few hints might be helpfull.

The very basic demands of nowadays collectors are:
Any figurine to go with the original Elastolin figure range does have to look as it has been produced by Elastolin.
Best if the "original" figure is still there somehow with added rather than exchanged parts.
The figure must be produced in plastic (which means resin). Using metal is a clear "No go"


Now takeing on a commission is quite a challange since one is somewhat limited by those demands and all I actually received was the subject and the wished for pose.

But I will not dive deeper into that. This is supposed to be only about the "How To" for collectors who are allready trying to produce their own line of figurines in plastic or who have a general interest in the
more technical -yet very creative- side of the hobby.

A word of caution, this will not be too bright or colourfull nor will this start tonight and be through and done with by tomorrow. Allready spent weeks on this project but still got a lot of in front of me.
The final chapter shall consist of the painting of the figurines which I am rather convinced might catch the attention of a few collectors regardless the project's scale, kind and subject.
The pics I will put up here are eihter self explaining or I will post a brief comment to go with them.
Anyway if you wish to know more or if anything remains unclear please ask.

Converting and casting Toy Soldiers (mainly Elastolin) in resin has over the years become a great passion of mine and as far as building and painting of toy soldiers is concerned it has overtaken that pleasent part of the hobby by far .....

Enjoy
Regards
Wolfgang
 

Attachments

  • 02 (Kopie).JPG
    02 (Kopie).JPG
    44.6 KB · Views: 180
  • 01a (Kopie).JPG
    01a (Kopie).JPG
    56.8 KB · Views: 179
  • 01 (Kopie).JPG
    01 (Kopie).JPG
    38.3 KB · Views: 179
  • 02a (Kopie).JPG
    02a (Kopie).JPG
    66 KB · Views: 180
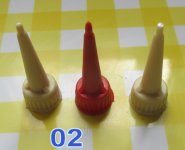
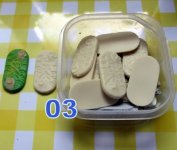
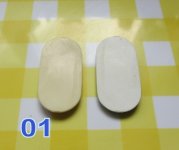
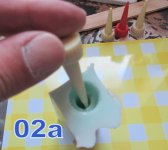
You have to start somewhere. First pictures on bases and the preperation of the pouring funnel of the mold where the resin will be cast into later on. I made resin copies of a tip of an graphite bottle for future uses as well. A casted copy can be much better worked with than the original soft plastic one.
A original Elastolin base was refined and casted as well.
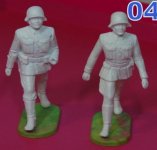
Picture 04 shows the reworked original Elastolin hard plastic German Army soldiers. Reworking ment to get rid of all the mold lines and engrave the areas around the belts etc. Of cause the helmets are looking awfull which is due to the original steel molds that where used for injection casting which do not allow for undercuts, that is why the shape of the helmets is so awfull.
 

Attachments

  • 02b (Kopie).JPG
    02b (Kopie).JPG
    53.9 KB · Views: 173
  • 04 (Kopie).jpg
    04 (Kopie).jpg
    43.8 KB · Views: 173
Re: A bit of sculpting, casting and a little magic...

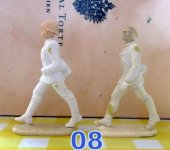
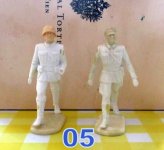
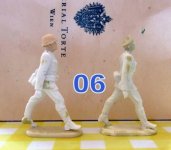
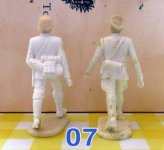
Now the two master poses are ready. Figures got reworked and the heads where swopped with new heads from the spare box.
05 (Kopie).JPG06 (Kopie).JPG07 (Kopie).JPG08 (Kopie).JPG
 
Last edited:
Ausgezeichnet, mei Liaba! Excellent work!

Have you thought about modifying any pieces to produce figures that Elastolin did not have in the catalog?

Prost!
Brad
 
Ausgezeichnet, mei Liaba! Excellent work!

Have you thought about modifying any pieces to produce figures that Elastolin did not have in the catalog?

Prost!
Brad

Thank you Brad, yes that is exactly my motivation. Haveing great fun doing so.
Kind Regards
Wolfgang
 
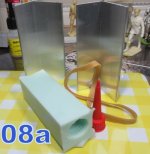
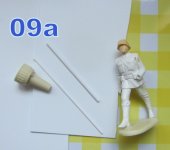
Mould-makeing is next. The master figure has got to be sprued up in order to build the mold.
Those sprues serve as either pouring funnels or escapes for the trapped air inside the mould.
Next picture shows what is needed for the sprueing, a clean piece of styrene, small sticks of styrene for the evacuation funnels and a casting funnel. This is the casted piece you have allready seen on one of the previous photos.

09a (Kopie).JPG
 
Thank you Brad, yes that is exactly my motivation. Haveing great fun doing so.
Kind Regards
Wolfgang
Just looked in on this thread Wolfgang - and am full of admiration for your expertise and skill at producing "new" figures. :D

Love what you've done with them. Well done. :salute::jb
 

Users who are viewing this thread

Back
Top