A Gordon for Me (1 Viewer)

Shame they closed up shop.

Yes, DUCAL made some wonderful figures, and many sorts of obscure items such as mascots, drum horses etc.

A friend of mine, here in perth bought a lot of castings on EBay last year, when jack was selling them off, with the intention of getting me to pant them. I love Scots so its a pleaseureable task.

The first lot were Drum Majors,
Royal Highland Fusiliers, King's Own Scottish Borderers & Black Watch
3drumajors.jpg

Argyll & Sutherland, Cameron, and Seaforth Highlanders
3drumajors2.jpg

then Drum Major & drummers,
Gordon Highlanders
gordondrums.jpg


John
 
Hi Brad. Well - there you have it from the horses mouth - so to speak. Obee taught me how to do it (although he didn't know it).^&grin I followed his site for painting tartans. I am doing these in what I call the "simplified" method - viz;

First; give two coats of Oxford blue over the tartan area

Second; paint the grid of green over the blue - try to get even squares of blue left.

Third; either paint in - or like me "cheat" and draw in with fine line waterproof black ink pen, through the blue squares of the grid.

Fourth; fine paint the yellow lines through the (wider) green lines.

Needless to say, make sure each colour is dry before going on. This is where I stop - for the Gordons Tartan. Other tartans - just add in other colours. The first three steps give you a simple Government or 42nd tartan (Black Watch).:)

Obee adds in other lining - but as I am going for a large group - I have found that putting too much detail in, concentrates the eye on each figure too much and actually makes the finished group look to fussy - and even overworked. So, in a large group I keep each piece plainer. Well, that's my excuse anyway! Hope that makes sense.:confused:

But PLEASE do look at how John (Obee) does it. As far as I'm concerned - he's the guy - though the way John Firth does it blows me away too. If you want a simple method - well that's mine above.

Best of luck - do have a go - johnnybach.:smile2:
 
Military Modelling Magazine has shown variuos methods of painting the "sett" over the years. The problem is that nobody ever shows a method for keeping a steady hand !^&grin:salute::

Martin
 
It's funny you should mention that Martin. I have tried various methods over the years - as I think everyone gets "the shakes" from time to time. With me, it has something to do with diet, strange as it may sound. I always know when I need food, as my hand begins to shake - just a little. So, if I start that little "shake". I go and eat something. Bread and butter, biscuit with a cuppa - anything. Then it goes away.

Sounds daft - but try it! Works for me.

Another thing is - confidence. IF you start off thinking - "Ohmygod I'm gonna make-a-mess-of-this! Guaraanteed - you will.

Practice first!

Get my old friend the margarine tub lid out. Paint one inch squares in Oxford blue on them. Then follow the recipie for Government tartan. Pretty soon - after (say) 3 kilos of marge - you will be butter - oops! sorry - better - than when you started. Then, when you have exhausted your supply of marge lids - have a go at a kilt!

Remember - if you goof up - you can overpaint with blue - and start over.

Then - when you've finished - you can have a large scotch - and start shaking all over again - Simples!%^V

Hope this helps. johnnybach

I've been painting setts (tartans) for thirty years and I find that I do exactly the same as aiming a weapon, that is hold my breath, paint a line, hold, paint and so on. It also helps that I usualy try to remember to engrave a line in the master in the first place.:D I've also just started wearing glasses! I don't paint any better (or worse) but my eyes don't get tired as quick. It's hard to admit you're getting older.^&grin

Martin
 
I think I got there first with reading glasses! I also use a magnifying lamp thing - and I bought an Optivisor thingy. I have tried this gadget out - and it does work with some of the fiddly bits - but go back to the lamp mostly.

Yes to the shooting/breath thing. Snag is if it's a long line and the brush runs out of paint - so you dip it in again - and then-----------find you've run out of breath! A bit like swimming under water.

Hey - that's a thought - if the line's too long - you could drown!!

I think that like most things in life - the more you do it - the better you get at it. I think these are going to turn out alright. You sort of get a feel for them. Some are pigs - and others are okay. Yes it does help if the sculptor helps you out a bit - so - don't forget - engrave the helpful lines! I think I'm ready for a few more pics. jb
 
I hope that you can see from my picture below, that the first Standard Bearer is nearing completion - except for some details like black spat buttons - and of course the Colour. He has had one coat of varnish, so that I can hold him without smudging paintwork. Next to him is the less finished version - so you can perhaps see the progression. The WO figure (to the left of the SB) is also a bit more developed, with tartan more or less done. I have his arm with pace stick below, but will have to make his scabbarded sword next, and try it with his arm before placing them - as it may be a tight fit under the left arm - so will keep fitting sword and arm until it looks natural.

At the rear - you can see the Mounted Colonel - painted in the same way as the others. I will finish the Colonel and varnish _ THEN start on the horse. This way I can paint the figure whilst holding the horse - and paint the horse by holding the varnished figure. Result - no smudging of either.

PIC19.jpg


Below are some arms and the Colours - which are progressing. I prefer to paint cuff details etcetera before fitting sometimes - as they are easier to handle and get at awkward places. They have all been cleaned up and dry fitted - so I know they will fit in place. Once I am ready - I will glue in place - then touch in or overpaint where required. Note the three black dots on the WO's cuff. This will have a spot of gold applied - which should make the buttons "pop" - or stand out more. I think that I will overpaint his hand white - to give him gloves - like the other members of the Colour Party.


PIC20.jpg


Is this going okay - and is this the sort of thing you want to see?? johnnybach
 
Brad,

Martin has pointed you to THE BEST on-line 'How to paint taratns' page...... I use it all the time, and find it brilliant....

http://www.angelfire.com/tx/ToySoldier/tartan.htm

OK, now I'll stop braggng, its one of my pages :) :), but you can see the results here http://members.upnaway.com/~obees/soldiers/scots.htm

John

PS I'm currently painting 3 x Black Watch drummers, and have 5 more Seaforth drummers to go, all DUCAL.

I was wondering if Johnny was going to say he used your page, too, John! Your site is one of my bookmarks, and I've wanted to try your method for the tartans. May have to put those PA Highlanders into the queue....

Prost!
Brad
 
Brad - If ever I get stuck - and am not sure what to do next - I stop what I'm doing - and think.

Hmmmmmm.............. "Wonder if Obee's done one of these?"

Then I go to the pages - and have a look. 9 times out of ten - he's done one - and I'm off again! If the tartans look a bit frightening at first. One step at a time on the margie lids for a bit - then I'm off again. He's helped me through quite a few crises - and best of all - he never knew it!

Fair dinkum mate - as I think they say in them thar parts! (Gawd knows what it means though!). Hope you enjoyed the leeks. johnnybach%^V
 
I found this postcard - and will be using him (mostly) as a guide for painting my drummie - whilst the pipers are good too. I think the date isn't quite right though - as these are later. Not sure about the socks on the drummie as my books suggest red and black for 1865. That's what I'm going with - unless anyone knows differently? jb.

PipesDMjr.jpg
 
Two pics below show development of figures. The WO figure centre, has had broadsword added(modified spares scabbard with milliput basket). This was a trial and modify fit - as arm had to be fitted with pace stick. The first view below shows basket hilt - painted ready.


PIC21.jpg


The second pic shows him turned - to show lug just below surface of shoulder. Once dry this will be filled - as will joint to shoulder with milliput and then touched in. Note many features of Officer uniform, such as dirk, broadsword officers pattern sporran - as this is the Sergeant Major of the Regiment (RSM today).

PIC22.jpg


All others are showing progress to uniform - and have been included so as to show how each one's features, and uniforms are being worked up. The Standard bearer to the right of RSM is near completed - needing Standard to be fitted - maybe tomorrow. Note that I leave base painting to last - as I try not to handle figure until varnish is dry - I use the base to handle whilst painting wherever possible.

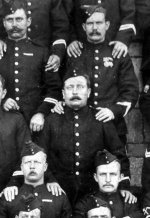
Interesting to note that ALL members of the Army were obliged to grow a moustache at this time. It was encouraged before 1854 - but made compulsory after that date - and stayed in force until WW1. :salute::

I wonder what the gals of the Kings Troop RHA would make of that ordertoday???(PS light-hearted comment only!)%^V

To be continued. johnnybach
 
These are looking really sharp jb !!

Interesting to note that ALL members of the Army were obliged to grow a moustache at this time. It was encouraged before 1854 - but made compulsory after that date - and stayed in force until WW1. :salute::

I wonder what the gals of the Kings Troop RHA would make of that ordertoday???(PS light-hearted comment only!)%^V

To be continued. johnnybach

Funny you should mention that. I was looking through one of my new books and now you mentioned it in that particular section the soldiers did have rather fancy moustachios !!

Who knew :)
:salute::
 
There was an interesting thread on the Victorian Wars Forum about 'taches. It would seam that although it was compulsory to wear one, there are lots of photos from the period of soldiers without. Another case of once you tell a squady he has to do something, he'll try his best not to!.

Martin
 
There was an interesting thread on the Victorian Wars Forum about 'taches. It would seam that although it was compulsory to wear one, there are lots of photos from the period of soldiers without. Another case of once you tell a squady he has to do something, he'll try his best not to!.

Martin

Here's some beauties
 

Attachments

  • John%20Thomas%20(allegedly).jpg
    John%20Thomas%20(allegedly).jpg
    60.6 KB · Views: 86
Do you remember the TV series "Bootsie and Snudge" - I seem to remember that Bootsie was "excused boots" and always wore daps. (sorry - plimsoles to you persons east of the border - Gotta be careful wot you say now!).

Perhaps there were the " usual suspects" then - who were "excused tashes" - for a variety of reasons??

e.g. I gotta sore lip, Sah!":salute::

"I gets a rash unless I shaves, Sah!":salute::

" It's the mossies Sah - there givin' me Gyp - they are - cos of me tash, Sah!":salute::

Or the old favourite " It's against my religion, Sah!":salute::

As well as several unprintable reasons that I just know squadies might give!!^&grin

I can certainly still remember a few of them, Martin!%^V
 
Before going on to post photos of latest development of my figures a word or two is necessary on rank badges for the NCO's of the colour party. The Sergeant Major for the 92nd Gordon Highlanders (today's RSM) will have four chevrons on his lower arm. I couldn't find a picture of the 92nd to conform this - but the picture below shows Sgt. Major Motion of the 93rd (Sutherland Hihlanders in 1865). His picture is captioned as 1870 - but MUST be earlier - as he is wearing French Cuffs - which were replaced by Gauntlet cuffs in 1868. [This shows how careful you have to be in taking for granted that a book editor has got it right!]

Clearly shown above the cuff - are the four chevrons of a Sergeant Major of the time - with what appears to be a crown above it. These chevrons are point down and on the lower sleeve - and this is how MY Sergeant Major will wear his badges of rank. Note also, that at this time NCO's wore their rank on both sleeves. In my book (literally) a picture is worth a thousand words. (The book? "Argyle & Sutherland Highlanders" (2005) by Alastair Campbell).


img025.jpg


The three Colour Sergeants will wear their badges of rank a little differently. At this time (1865) they wore the usual arrangement of three chevrons (with a backing of the facing colour - in this case yellow) on their LEFT arm - but on the right - above a single chevron (like today's lance corporal) they wore a somewhat unusual badge - see illustrated below: ["A Dictionary of Military Uniform" (1977) by Bill Carman]. As you may be able to make out - this badge changed again in 1868 - but as I am making my group to 1865 - I will show this arrangement - albeit - in miniature!


img026.jpg
 
Work today has progressed my figures as below. The Queens Colour Ensign (they used the term Ensign in 1865) is just about finished. Just some minor tweaks when the paint is dry (such as flag-staff black) and to clean it up - before a second thin coat of varnish to seal everything in - and give the glossy finish that I like.

As mentioned before - the Sergeant major is "getting there" too. Things like black buttons on spats required. The four chevrons can be seen above the French cuffs - like Sgt. Mjr. Motion's pic. earlier.

PIC24.jpg


The pic. below shows his other arm - they certainly had an armful! Other things to note again - are the development of the Gordon's tartan - where I think you can see the progression of added colours - as mentioned before. At the rear, the Colonel's trews have had the green lines added to form a grid over the blue base. I'm not too sure about the green base for the Ensign - though I think Jeff might like it - seems a bit pea-soup?? What do you think??? johnnybach

PIC23.jpg
 
You may be right about the Sergeant Major's cuffs but don't forget that it often took quite awhile from the order for new uniforms to them actualy being issued. It depended on where the regiment was stationed at the time and old patterns had to be worn out first. The Royal Welsh Fusiliers for instance wear the collar ribons to comemorate the fact that their uniform was out of fashion, because they had been serving abroad.
By the way, what's the picture of the foot guards in desert DPM?

Martin
 
You had me scratching my head for a moment or two then Martin - and then I twigged! Background!!

I often use books to blank out the background to photo's - usually what I'm reading at the time - and this time - the one that came to hand was "Black Watch" by John Parker,(2005). Picked it up in the UK last time over. Not the best choice, perhaps, for the photo!

Yes - to the fact that uniforms had to wear out back then ( quite rightly, in my opinion) - so I suppose we can forgive the date gaffe. But the point I'm making is that you often have to make a choice between the history book printed evidence - and the photographic evidence -in order to ascribe a date to something as basic as this.

I think I am probably 80% correct in my assumptions here, (in 1865). Another view is that the chevrons should be lower sleeve with points up - or even, perhaps, on the upper arm - but on balance - I think this is the best option - from what I have read ( and seen in photograph). I am always willing to hear another point of view, however. It's only paint!

Such points are sometimes confusing I agree - and has frequently confused me ( and dare I say - you too perhaps?). However, I have made a choice here - on balance - and I am trying to show how I made it to others.

The bottom line is - it's going to be a Toy Soldier - for me!

A bit more done today - anyway. johnnybach
 

Users who are viewing this thread

Back
Top