Battle for Arnhem.... (2 Viewers)

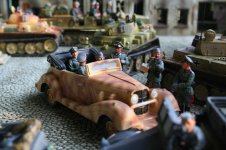
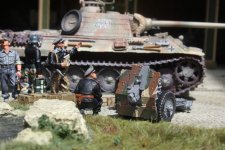
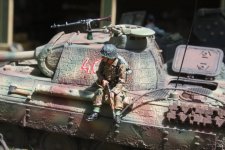
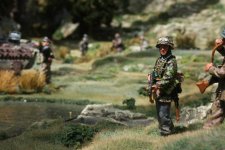
Von Maltzahn’s 107[SUP]th[/SUP] PB attack had temporarily blocked the advance north yesterday and he would now try again. The difficult terrain had not revealed an alternative route for an attack, so he would have to advance the same way as before.

IMG_2284sr.JPG Officers discuss the plan of attack

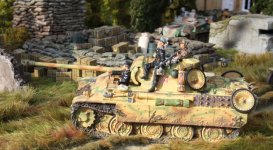
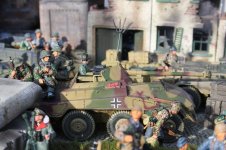
IMG_6235sr.JPG A Panther crew prepare

IMG_6612sr.JPG A panzer grenadier wishes they would get on with it
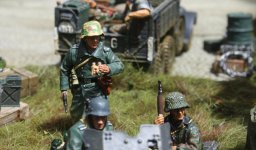
IMG_6323csr.JPG His CO wishes he would get off his backside
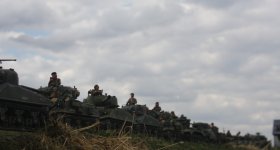
300csr1.JPG A congested Club Route still presents a target rich environment
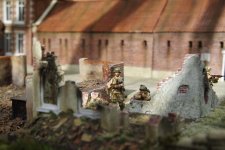
 
As before the noise of the advance was covered to some degree by the noise of XXX Corps, autumnal mist also helped. Pte G Mullins of 1/327 Glider Infantry Regiment’s (GIR) outpost line noted the noise of tanks to the east during the night but they thought that they were so close they must be their own.

IMGP6922sr.JPG


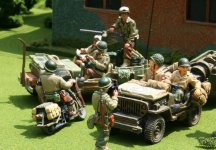
Confirmation came at dawn when an Anglo/American jeep patrol to the SE of the bridge found itself, ‘amongst your chaps?’, asked a British Colonel – ‘no’, came the reply, ‘they are Germans’. They decided to get out of there, fast, reversing under fire.

IMG_7422sr1.JPG


Forewarned, CO C 1/327 GIR stood to, joined by other troops nearby, including around 30 HQ clerks, as outposts were overrun by the 1034 Grenadier Regiment, leading the advance.

IMG_2567sr.JPG


The supporting Panthers were still limited by the terrain however and the guns of the 81[SUP]st[/SUP] AT Battalion kept them, ‘at a respectful distance’, according to the official history.

IMG_1877csr.JPG
 
Great post Kevin! 👍😎😎😎😎 Tomorrow is Thanksgiving here in the United States, and your friendship is one of the things I am thankful for.
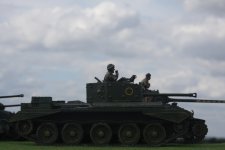
 
Although the Germans had assembled a greater force than on the 19[SUP]th[/SUP], the arrival of ten Cromwells from 15/19 Hussars and a Battery of Sextons (25pdr SP Guns), both attached to the 101[SUP]st[/SUP] Division, tipped the balance in favour of the defence.

159sr1.JPG A Cromwell manoeuvers for position

The leading Cromwell tank was unfortunately destroyed by hastily laid US mines, but the volume of small arms, AT and artillery fire was sufficient to stop the German attack, whose own lack of artillery was a significant disadvantage.

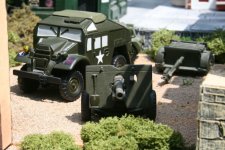
IMG_9456sr1.JPG Early wooden K&C 25pdr

IMGP6688csr.JPG A British officer organizes on club route
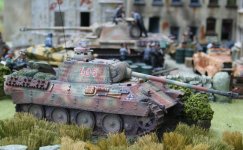
The 107[SUP]th[/SUP] PB withdrew, leaving 4 burning panthers and many dead. He lost 6 tanks in all, in both attacks – 10% of his valuable Panthers.

img_992369red2.jpg HB Panthers and crews, early K&C staff car plus others
 
As previously stated, Market-Garden was a series of immediately unrelated and yet complexly intertwined skirmishes and battles, each of which would add or subtract to the overall outcome. The story of the battles around Best and their impact on the ability of XXX Corps to hold Son Bridge and progress quickly to link with the 82[SUP]nd[/SUP] around Eindhoven might have fitted at this juncture. However, I have arbitrarily decided to focus instead on the parallel story to the advance of XXX Corps so far, that of 2 Para and their exploits in Arnhem itself from the 17[SUP]th[/SUP] – 20[SUP]th[/SUP] September 1944. This short narrative is based mainly on the official history.


Before I deal with XXX Corps on the 19[SUP]th[/SUP] September, I shall highlight some other parts of this complex campaign starting on the 17[SUP]th[/SUP] September 1944. I now repeat some background that I already posted:

1[SUP]st[/SUP] Airborne had not been dealt ‘a particularly good hand’ in the planning by 1[SUP]st[/SUP] Airborne Army.

1. Proximity to some Ruhr flak and the fighter airfield at Deelen north of Arnhem, meant drop zones to the east of Arnhem could not be safely used.

2. The RAF had insufficient transport aircraft so the risk to the transports was high in the planning essentials.

3. They were allocated DZs west of Arnhem. The wooded country to the west meant DZs in open ground several miles from the three targeted bridges – the road, rail and pontoon bridges.

4. The lack of transports, including those borrowed from the USAF, meant that the British Division needed three lifts, even though it was smaller than the US parachute division equivalents.

5. On the first day the lift was:


a. The 1[SUP]st[/SUP] Para Brigade (roughly equivalent to a US PIR), consisting of 1, 2 and 3 Parachute Battalions, by parachute to Renkum Heath with orders to march on three routes close to the river and seize the Arnhem Bridges.


b. The 1[SUP]st[/SUP] Airlanding Brigade was dropped by glider at Reijerskamp with orders to secure follow up DZs and LZs and secure resupply DZ at Lichtenbeek. It consisted of 1 Battalion the Border Regt, 2 Battalion South Staffs and 7 Kings Own Scottish Borderers.

c. Divisional HQ, Div Arty and Divisional troops were landed by glider at Heelsum. This included 1[SUP]st[/SUP] AB Recce Sqn and their jeeps.

6. The plan for the second day (10.00 18 Sept 1944) was to parachute 4 Para BDE (10, 11 and 156 Para Bats) at S Ginkel with orders to move to Lichtenbeek and secure the NE perimeter of the town. The balance of the first lift would be taken to their respective DZ/LZs.


7. On the 3[SUP]rd[/SUP] Day (0930 19 Sept) 1[SUP]st[/SUP] Polish Para BDE would land in two parts, by parachute south of the road bridge to link with 1[SUP]st[/SUP] Para BDE on the bridge and glider elements would land north of the Rhine at Joanna Hoeve to strengthen anti tank defences.

8. XXX Corps were due to link up during 19 Sept.

A short history and account of the 2nd Battalion Parachute Regiment's Operations at Arnhem, 17[SUP]th[/SUP] to 20th September 1944 – derived from the official history.

The task given to the 2nd Battalion was in two phases:-

Phase one - To seize the three Bridges over the Rhine at Arnhem

Phase two - Later to establish the Western half of the Brigade sector forming a bridgehead North of the main road Bridge, to allow the advanced units of the 2nd Army free passage, and deny use of it to the enemy

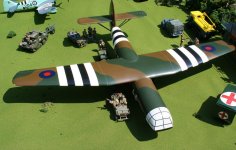
IMG_7342csr.JPG 2 Para load up into very rare K&C mahogany glider
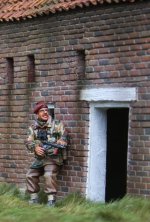
IMG_5328csr.JPG On the ground 2 Para advance to the bridges (K&C para (P) and John Gittings scenics)
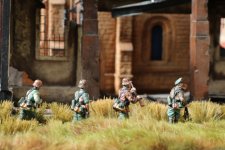

IMG_0735sr1.JPG (HB) SS squad looking to block the paras from Arnhem (TM Terrain and JGM scenics)
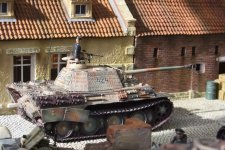
IMG_0987sr.JPG German armour near key targets gets ready to move (HB Panther, JGM scenics)
csrIMG_1873.JPG XXX Corps struggles in endless traffic jams (K&C with JGM scenics)
 
As previously stated, Market-Garden was a series of immediately unrelated and yet complexly intertwined skirmishes and battles, each of which would add or subtract to the overall outcome. The story of the battles around Best and their impact on the ability of XXX Corps to hold Son Bridge and progress quickly to link with the 82[SUP]nd[/SUP] around Eindhoven might have fitted at this juncture. However, I have arbitrarily decided to focus instead on the parallel story to the advance of XXX Corps so far, that of 2 Para and their exploits in Arnhem itself from the 17[SUP]th[/SUP] – 20[SUP]th[/SUP] September 1944. This short narrative is based mainly on the official history.


Before I deal with XXX Corps on the 19[SUP]th[/SUP] September, I shall highlight some other parts of this complex campaign starting on the 17[SUP]th[/SUP] September 1944. I now repeat some background that I already posted:

1[SUP]st[/SUP] Airborne had not been dealt ‘a particularly good hand’ in the planning by 1[SUP]st[/SUP] Airborne Army.

1. Proximity to some Ruhr flak and the fighter airfield at Deelen north of Arnhem, meant drop zones to the east of Arnhem could not be safely used.

2. The RAF had insufficient transport aircraft so the risk to the transports was high in the planning essentials.

3. They were allocated DZs west of Arnhem. The wooded country to the west meant DZs in open ground several miles from the three targeted bridges – the road, rail and pontoon bridges.

4. The lack of transports, including those borrowed from the USAF, meant that the British Division needed three lifts, even though it was smaller than the US parachute division equivalents.

5. On the first day the lift was:


a. The 1[SUP]st[/SUP] Para Brigade (roughly equivalent to a US PIR), consisting of 1, 2 and 3 Parachute Battalions, by parachute to Renkum Heath with orders to march on three routes close to the river and seize the Arnhem Bridges.


b. The 1[SUP]st[/SUP] Airlanding Brigade was dropped by glider at Reijerskamp with orders to secure follow up DZs and LZs and secure resupply DZ at Lichtenbeek. It consisted of 1 Battalion the Border Regt, 2 Battalion South Staffs and 7 Kings Own Scottish Borderers.

c. Divisional HQ, Div Arty and Divisional troops were landed by glider at Heelsum. This included 1[SUP]st[/SUP] AB Recce Sqn and their jeeps.

6. The plan for the second day (10.00 18 Sept 1944) was to parachute 4 Para BDE (10, 11 and 156 Para Bats) at S Ginkel with orders to move to Lichtenbeek and secure the NE perimeter of the town. The balance of the first lift would be taken to their respective DZ/LZs.


7. On the 3[SUP]rd[/SUP] Day (0930 19 Sept) 1[SUP]st[/SUP] Polish Para BDE would land in two parts, by parachute south of the road bridge to link with 1[SUP]st[/SUP] Para BDE on the bridge and glider elements would land north of the Rhine at Joanna Hoeve to strengthen anti tank defences.

8. XXX Corps were due to link up during 19 Sept.

A short history and account of the 2nd Battalion Parachute Regiment's Operations at Arnhem, 17[SUP]th[/SUP] to 20th September 1944 – derived from the official history.

The task given to the 2nd Battalion was in two phases:-

Phase one - To seize the three Bridges over the Rhine at Arnhem

Phase two - Later to establish the Western half of the Brigade sector forming a bridgehead North of the main road Bridge, to allow the advanced units of the 2nd Army free passage, and deny use of it to the enemy

View attachment 256050 2 Para load up into very rare K&C mahogany glider

View attachment 256051 On the ground 2 Para advance to the bridges (K&C para (P) and John Gittings scenics)


View attachment 256047 (HB) SS squad looking to block the paras from Arnhem (TM Terrain and JGM scenics)

View attachment 256048 German armour near key targets gets ready to move (HB Panther, JGM scenics)

View attachment 256049 XXX Corps struggles in endless traffic jams (K&C with JGM scenics)
Great stuff, Kevin!😎😎😎😎😎👍
 
Great stuff, Kevin!😎😎😎😎😎👍

2 Para: The plan for carrying out those tasks was as follows. After the parachute landings the Battalion would advance with all possible speed:

(1) A Company would lead and seize the Main Bridge West of the town.

(2) C Company was to seize the North end of the Rail bridge and pass one Platoon to the South bank. They were to then link up, from the South with A Company on the Main Bridge. C Company was then to consolidate the bridgehead by establishing their part of the Battalion sector for Phase two.

(3)
B Company was to seize the Boat (Pontoon) Bridge and hold it as the left flank of the Battalion sector in Phase Two.

IMG_5325csr.JPG


The Bigger Picture:

The Germans facing this substantial Allied onslaught were Field Marshal Walther Model’s German Army Group B. It was Model’s job to turn chaotic withdrawal into capable defence – and to do it quickly.


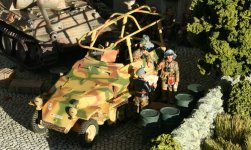
IMG_4317csr.JPG Model visits 2nd SS Panzer Corps (K&C staff car and grenadiers, HB tank and crew, JGM scenics)
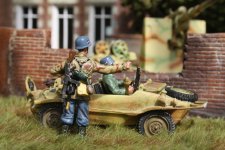

Under his command, Model used the meagre forces of Colonel-General Kurt Student’s First Parachute Army

IMG_8059sr.JPG paratroops discuss the results of reconnaissance (K&C, NMA, JGM pieces)
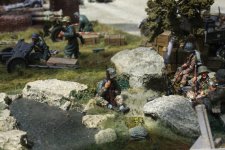

and General Gustav von Zangen’s Fifteenth Army to defend up to Nijmegen, while Kampfgruppe (battle group) ‘von Tettau’ and Lieutenant-General Willi Bittrich’s II SS Panzer Corps, specialists in defence against airborne landings, were located around Arnhem.

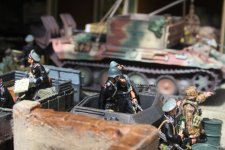
IMG_6397sr.JPG part of 15th Army rest before launching attacks on 2nd Army
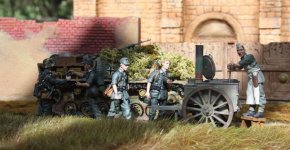

The two battered armoured divisions that made up Bittrich’s II SS Panzer Corps, 9th SS Panzer Division and 10th SS Armoured Division, amounted to no more than 3000 men each and had only about 12 functioning tanks between them. As a onsequence, they were reconfigured as SS-Kampfgruppe ‘Hohenstauffen’ and SS-Kampfgruppe ‘Frundsberg’ respectively (a ‘Kampfgruppe’ or ‘battle group’ being an improvised formation smaller than a division).

IMG_2699rcsr.JPG Some of 2nd Panzer Corps' battered troops after their near destruction in Normandy (HB field kitchem, modified K&C StuG)
 
Intelligence:

The Allies were aware of German weaknesses, although the euphoria of their speedy advance and the amount of information flowing into various headquarters did tend to muddy the intelligence waters. Nevertheless, information from Ultra codebreaking was reliable and 21[SUP]st[/SUP] Army Group did have a good idea of enemy strengths and dispositions. Although not privy to Ultra intelligence, First Allied Airborne Army did know of the existence of II SS Panzer Corps at Arnhem and that it was very weak. However, although Operation Market Garden commanders did not necessarily lack information about the enemy, many did underestimate what the enemy was still capable of achieving.

IMG_6002sr.JPG 2nd Panzer Corps were known to be very weak after their long retreat

The 2[SUP]nd[/SUP] Battalion was in possession of detailed cascaded information of enemy defences and concentrations. Based upon interpretation of the available data it did not expect anything except hurriedly organised resistance in Phase One.

IMG_2936csr.JPG 2 Para hoped to use strategic surprise to gain their objective before the Germans could react


It was expected however, that the enemy would react strongly as soon as they recognised the Allied threat. The 1[SUP]st[/SUP] Airborne Division, and therefore 2 Para, did expect heavy counter-attacks in phase 2, with the likelihood of tanks, which it would have to face alone for two days until the arrival of the XXX Corps.

IMG_4937sr.JPG 2 Para would have liked to have faced a proverbial 'man and his dog', but they knew from experience that the dog could bite ......

Model created order out of disorder very quickly and, faced with defenders of the calibre of Student and Bittrich, Allied optimism was not well founded.

IMG_9222csr.JPG Senior German officers on the ground were competent, extremely experienced and trained in defending against airborne attack.
 
Strength at the Arnhem Bridge


XXX Corps were scheduled to reach 1[SUP]st[/SUP] Airborne (on Tuesday the 19[SUP]th[/SUP]) after 48 hours and cross the lower Rhine via, ideally, the Arnhem road and rail bridges.

395csr.JPG XXX Corps were delayed, see previous posts
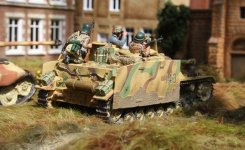

There was in practice a race to put tanks and heavy equipment in Arnhem by both sides. In the event, the speed of the German response was unexpectedly swift and violent, whilst XXX Corps was held up at every turn and 1st Airborne failed to establish more than Battalion strength at the Bridge.

IMG_9278csr.JPG StuGs proved useful at Arnhem

680csr.JPG Reconnaissance troops did their best to find ways to Arnhem - see previous posts
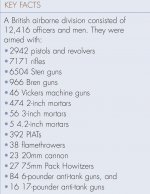
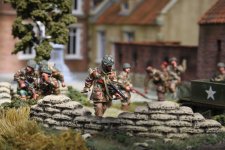


Here is the summary of the weapons available to a whole British Parachute Division.

Capture 1st Airborne equipment red.jpg


I should like to emphasise again that only half of the division could be dropped on the first day seven miles from the target. Only a quarter of the Division, 1[SUP]st[/SUP] Parachute Brigade, was available to assault Arnhem.

The other half of the first drop, 1[SUP]st[/SUP] Airlanding Brigade, was needed to defend landing, drop and resupply zones.


In the event, only one third of 1[SUP]st[/SUP] Parachute Brigade, essentially one Battalion strength (most of 2 Para plus others), reached the bridge. So only a third of a quarter of the division made it to the bridge, approximately 1/12, but the weapons were not shared evenly. For example, Frost had no 17 pdr AT guns at the bridge.

IMG_5321sr.JPG Once landed the paras were relatively lightly equipped and relatively immobile
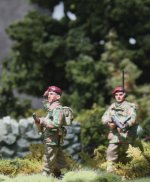
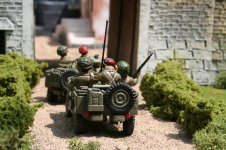
 
Communication breakdown

Some loss of communication between the bridge and divisional headquarters in one of the drop zones was expected, because 13 km (8.1 miles) separated them and the main radio was the Type 22 set, with an effective range of 5 km (3.1 mi).

The British radios did not function at any range; some had difficulty receiving signals from just a few hundred metres and others received nothing at all. It was found after landing that the radios had been set to different frequencies, two of which coincided with German and British public broadcasting stations.

011cbsr.JPG

Other theories have been advanced to explain the greatly reduced range of the 1st Airborne Division radio sets. John Greenacre's study points out that radio communications failure were experienced by the division before, were warned about prior to the operation and were provided for by bringing extra field telephone wire. The more powerful WS19HP set was used by the 1st Brigade on D+1.

IMG_9480sr.JPG

The only means of calling for air support was through two special American units dropped with the 1st Airborne Division. These units were equipped with "Veeps": jeeps having Very High FrequencySCR-193 crystal sets. However, it was found impossible to communicate with aircraft on the higher of two frequencies and the sets could not be tuned to the lower frequency.Despite efforts to re-tune them, one set was soon destroyed by mortar fire and the other abandoned the next day, cutting the only possible link with RAF fighter-bombers.

The pilots were under orders not to attack on their own initiative, since from the air there was no easy way to distinguish friend from foe; together with poor weather, this led to a lack of air support.

IMG_0189sr.JPG rare K&C mahogany aircraft

After the war it was found that the Royal Corps of Signals was either unaware or failed to tell divisional signals of the communication problems identified in November 1943 due to sun spots by the Scientific Advisor's Office to the 21st Army Group. Urquhart ordered the 4-metre (13 ft) aerials to be used, which were useless due to the physics of radio propagation. The wrong frequencies were part of the same problem due to signals personnel not knowing the science of radio communications.

The practical result was that communication between 1st Airborne units was poor while German defences were being coordinated and reinforced.

img_2493csr.jpg HB radio team

311src.JPG K&C command halftrack
 
The Bigger Picture:

Sunday 17 September was warm, dry and bright – ideal conditions for an airborne assault. Overnight, and throughout the morning, German airfields and anti-aircraft defences were attacked by the heavy bombers of Bomber Command and the US Eighth Air Force.

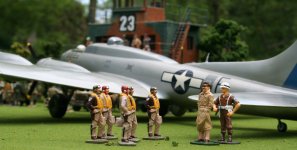
IMG_7465sr.jpg extremely rare early wooden K&C mahogany B17 with glossie Clark Gable and bomber crew
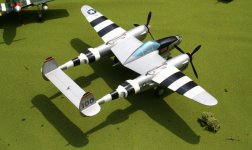

Swarms of Allied fighters and fighter-bombers continued to strike German anti-aircraft artillery, until the airborne divisions began to land in the Netherlands at around 1300 hours.

IMG_7386csr.JPG rare early K&C mahogany P38

300 (2)sr.JPG Figarti AAA


By just after 1400 hours, some 20,000 combat troops, 511 vehicles, 330 artillery pieces and 590 tons of equipment had been safely landed. The parachute drops and glider landings were highly accurate and heavily concentrated: the airlift was an outstanding success.

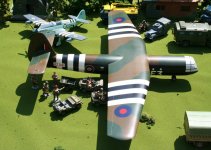
IMG_7335csr.JPG extremely rare early K&C mahogany Horsa loads prior to take off
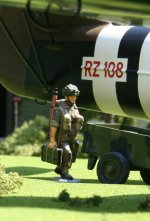
IMG_73491csr.JPG K&C AN series paratrooper
 

Meanwhile, the lead element of XXX Corps, the Guards Armoured Division, opened the ground-based part of the operation and began to move forwards up the Eindhoven road from Neerpelt.

IMG_9441sr1.JPG rare, early K&C wooden Guards Armoured Division Sherman
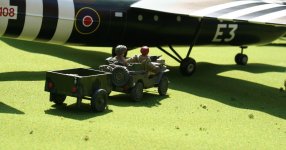

West of Arnhem, the landing of Brigadier ‘Pip’ Hicks’s 1st Airlanding Brigade in 320 gliders and the drop of the 2278 men of Brigadier Gerald Lathbury’s 1st Parachute Brigade were extremely successful and met with very little German opposition.

IMG_7314csr1.JPG extremely rare early K&C mahogany Horsa and AN series jeep
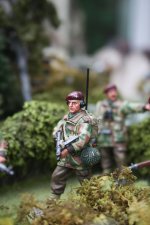

As the airlanding troops set off to defend their landing zones for the second lift, the parachutists prepared to march to their objectives along three code-named routes. The 1st Battalion the Parachute Regiment was to advance along ‘Leopard’ route to take the high ground to the north of Arnhem.

007sr.JPG K&C MG series paras


2nd Battalion, followed by 1[SUP]st[/SUP] Parachute Brigade Headquarters, was to head along ‘Lion’ route and take the railway bridge and Arnhem road bridge.

059csr.JPG

3rd Battalion was to push down ‘Tiger’ route and assist at Arnhem road bridge.

060sr.JPG
 
Happy days Louis, lots more from then to come......

The Bigger Picture: On the German side, it was soon clear what was happening. Model was staying at the Tafelberg Hotel in Oosterbeek, a village to the west of Arnhem, when the British began to land in the countryside to the west of Oosterbeek.

IMG_4300sr.JPG


He rapidly deduced the likely focus of the attack and after evacuating his headquarters, organized a defence.

IMG_4324sr.JPG


Bittrich sent a reconnaissance company of the 9th SS Panzer Division to Nijmegen to reinforce the bridge defences, which would lead to a notable event later.

IMG_0485sr.JPG

IMG_5054sr.JPG

IMG_8596sr1.JPG

By midnight, Model had gained a clear picture of the situation and had organized the defence of Arnhem. The confusion usually caused by airborne operations was absent at Arnhem and the advantage of surprise was lost.

During the operation, the Germans also recovered a copy of the Market-Garden plan from the body of an American officer, who should not have carried it into combat.
 

The first serious opposition that the 1[SUP]st[/SUP] Parachute Brigade ran into was to have important consequences for the Battle of Arnhem.

Training in the woods of Wolfheze just by the landing zones were 435 men of an SS battalion commanded by Major Sepp Krafft. Quickly appraising the situation and realising that time was of the essence, Krafft moved his men into a defensive block.


IMG_3287rcsr.JPG Krafft's men take up blocking positions (K&C WS series}
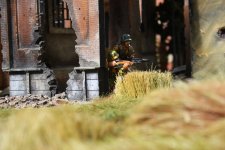
IMG_3452sr.JPG


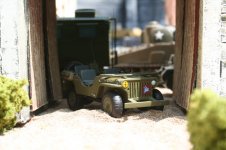
This immediately stopped the jeeps of an important coup de main force, Major ‘Freddie’ Gough’s Reconnaissance Squadron, which had been sent along Leopard route to seize the Arnhem road bridge.

IMG_9454.JPG ultra rare very early K&C para jeep prior to loading
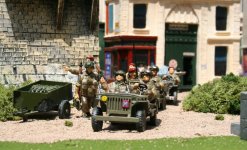
IMG_9492rcsr.JPG AN series jeeps set out on the attempted move to the bridge
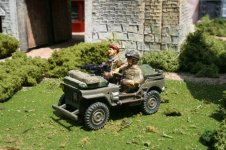
IMG_9485sr.JPG AN series attack jeep tries to manouver
 

Users who are viewing this thread

Back
Top