Captkronos
Specialist
- Joined
- Dec 29, 2009
- Messages
- 342
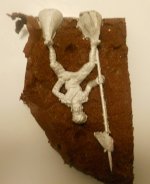
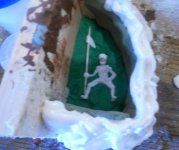
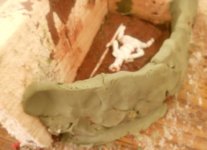
In my never ending quest to save money, I am trying to move past the standard square/rectangle shape of molds, since there is much dead space which equals silicon going to waste. I am trying this, clay walls fit around the figure, with spray foam sealant behind the clay. The only problem will be when drop casting, the mold won't have a flat edge to lay on the table, I will probably just put the mold in a pan with sand all around to support it. I'll update this thread with more photos and results. By the way, my secret tip of the day, Play-Doh works incredibly for simply pushing your master into it to get the first half of the mold. It does not contain sulfur and does not affect the curing of the silicon. I'm giving you gold, Gold, I tell ya'!
Yours in home casting cheapskates,
- Captkronos
Yours in home casting cheapskates,
- Captkronos

")