how to make natural looking rocks (1 Viewer)

Guy

Major
Joined
Feb 11, 2010
Messages
6,604
For my next BoB dio I need some natural looking rocks on the foreground of my dio.
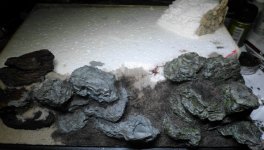
here I show you how I did it in 3 steps
the first picture shows you the 3 steps together
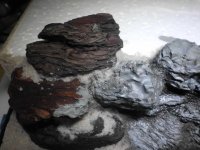
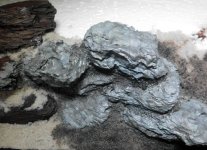
I use natural bark which you can buy in any garden centre. Find some matching pieces and glue them together ( white wood glue)
Then I paint them in a basic coat of greys ( revell enamels matt 75 and matt 77 with here and there a touch of matt 45 and 67 ) when completely dry I give the rocks a coat of heavy deluted dark brown oil paint
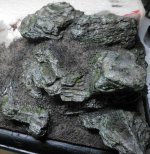
when dry I use AK slimy grime dark and slimy grime light to add the moss effect
finally I accentuate the cracks in the rocks here and there with some black -slightly deluted - oil paint
and that is the result / Pitty most of it will be covered in snow, but the vertical sides will still be visible, so i did not do all the work for nothing
guy:)
DSCI0260.JPG

DSCI0263.JPG

DSCI0262.JPG

DSCI0261.JPG
 
That's a very clever idea! You get a very good representation of rock formations like slate or shale. For anyone doing French and Indian War, if you wanted to depict rocky outcroppings in the Susquehanna basin, this is the perfect idea.

Thanks for sharing this, Guy!

Prost!
Brad
 
That looks great thanks for sharing the idea. I gone try it if I only find bark like that.
Janusz
 
Guy, never would have thought to try this. It is a great idea. A lot of shale in the eastern part of the US. Appreciate you sharing. Thx Chris
 
I use this since almost 40years, when a friend gave me the trick
WR-geant-2.jpg

Figurines from Grenadier, painted with Humbrol
Bark for the rock
Some DAS Pronto on top, you pat with a toothbrush for grass simulation

Nowadays, very good idea to tell this here on this forum

Best
 
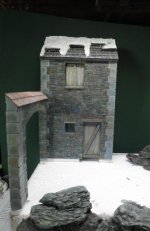
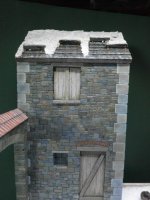
Made some progress since the last pics were taken . Finished painting my "Ardennes" House
guy:smile2:
DSCI0269.JPG DSCI0268.JPG
 
Looks very realistic, great work! Some how-to section for making such great house would be much appreciated by community here I think.
 
Looks very realistic, great work! Some how-to section for making such great house would be much appreciated by community here I think.

Janusz
The house is from a company called Dio Dump( plaster) But be aware, you only get half a house ( facade and one half wall)the rest you have to add and to build yourself
(and of course paint it and add the details you want !!!)
guy:)
 
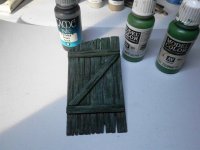
My farm needs a gate
I will explain how to make one
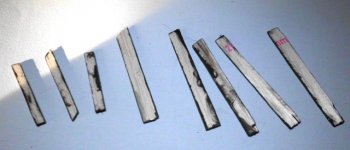
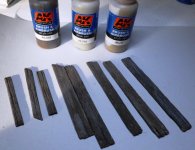
Picture 1 : cut some balsa wood strips to the exact measurements you need for your dio ( this is half a gate of course)
Picture 2: give the strips a coat of burnt umber, when dry give them an extra coat of grey: first use medium grey and end with light grey ( to obtain some colour variations)
When dry soak the strips in White Spirit ( this is very important it will make it very difficult for the upper coat of paint to stick to the wood) , then give them a coat of green . I used flat green and olive green ( you can use whatever colour you want of course)
Let it dry for a max of 5 minutes. Then with some sticky tape take some of the upper green coat away ( the result will be: chipped paint)
Finally give the whole structure a coat of slightly deluted black ink and glue it together
In picture 3 you can see the end result .
repeat the same for the other half of the gate
guy:)

DSCI0270.JPG DSCI0271.JPG DSCI0272.JPG
 
Janusz
The house is from a company called Dio Dump( plaster) But be aware, you only get half a house ( facade and one half wall)the rest you have to add and to build yourself
(and of course paint it and add the details you want !!!)
guy:)

forgot to add the house is 1/35 scale , so you will have to adapt it to 1/32-1/30 scale by adding a few mm here and there
guy:smile2:
 
Janusz
The house is from a company called Dio Dump( plaster) But be aware, you only get half a house ( facade and one half wall)the rest you have to add and to build yourself
(and of course paint it and add the details you want !!!)
guy:)

Thanks for info I didn't know this company. I see they have interesting products.
 
My farm needs a gate
I will explain how to make one
Picture 1 : cut some balsa wood strips to the exact measurements you need for your dio ( this is half a gate of course)
Picture 2: give the strips a coat of burnt umber, when dry give them an extra coat of grey: first use medium grey and end with light grey ( to obtain some colour variations)
When dry soak the strips in White Spirit ( this is very important it will make it very difficult for the upper coat of paint to stick to the wood) , then give them a coat of green . I used flat green and olive green ( you can use whatever colour you want of course)
Let it dry for a max of 5 minutes. Then with some sticky tape take some of the upper green coat away ( the result will be: chipped paint)
Finally give the whole structure a coat of slightly deluted black ink and glue it together
In picture 3 you can see the end result .
repeat the same for the other half of the gate
guy:)

View attachment 167479 View attachment 167480 View attachment 167481

Thanks for this.
I'm planning already from some time to make some buildings or fortification. Till now I made only dioramas with nature - trees, river etc. (like this www.treefrogtreasures.com/forum/showthread.php?52642-Traders-visit-in-a-village)
One question is how you fix balsa elements together, normal glue for wood? It means long waiting for dry before continuing?

Janusz
 
Janusz, diorama building is all about patience , but there is rapid drying white professional wood glue out there on the market if you want to go fast .
guy:)
 
Thanks for this.
I'm planning already from some time to make some buildings or fortification. Till now I made only dioramas with nature - trees, river etc. (like this www.treefrogtreasures.com/forum/showthread.php?52642-Traders-visit-in-a-village)
One question is how you fix balsa elements together, normal glue for wood? It means long waiting for dry before continuing?

Janusz

I don't know of any fast drying white glue...but plain old cheap white glue works fine...if the wood is clamped together to dry...it dries faster and much firmer...a fan on it even makes it dry faster...pretty dry in a few hours...but definitely dry overnight...if the glue squeezes out onto an area you wish to dry brush, paint or stain...be sure and get it off...or it may show up after painting and leave a blemish...excess glue can be removed easily with a small old wet paintbrush...
 
My farm needs a gate
I will explain how to make one
Picture 1 : cut some balsa wood strips to the exact measurements you need for your dio ( this is half a gate of course)

Wooden coffee stirring sticks work, too, though for this particular build, they'd probably look a little too uniform. But they are a great source of planks in various scales. They can be used for clapboards on a house, Luftwaffe field revetments, US aircraft carrier decks in 1/72 or 1/48, I think. Here in the States, you can find them in most grocery stores. I got a box from the vendor who stocked our coffee supplies at work.

I'll second Mike, I use plain ol' white glue, to glue up wood in this application. I use Elmer's. It does take a while to set up, but it's good for gluing pieces of wood, because it penetrates the grain. If you need to undo the join, you can use warm water to dissolve the glue again. It's also good for gluing clear parts, like window panes. CA glue can fog clear parts, if the vapors given off as the glue cures can't vent from the space. In scale modeling, I use white glue to attach aircraft canopies and other windows, and also, as a gap-filler.

Prost!
Brad
 

Users who are viewing this thread

Back
Top