
You are using an out of date browser. It may not display this or other websites correctly.
You should upgrade or use an alternative browser.
You should upgrade or use an alternative browser.
M2 half-track (3 Viewers)
- Thread starter noli-poli
- Start date
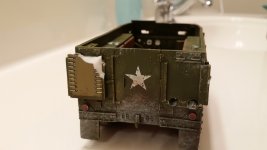
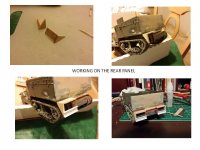
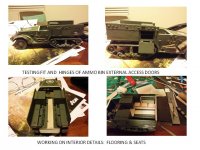
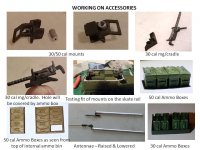
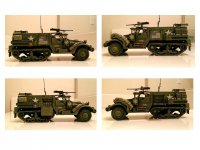
Scratch-building the m2 halftrack: The extreme makeover begins
the extreme makeover begins
the extreme makeover begins
Attachments
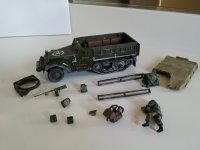

Scratch-building the m2 halftrack: The extreme makeover begins
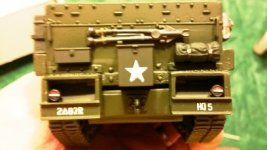
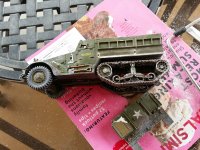
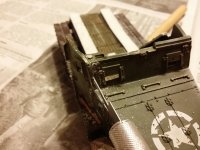
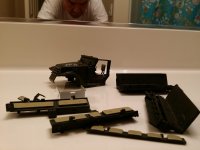
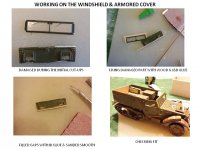
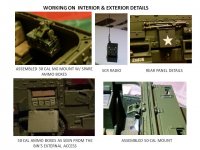
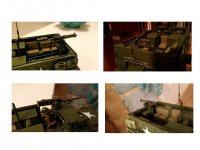
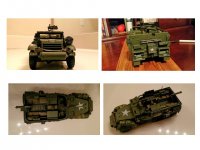
Removing the armored windshield cover, more cut-ups and prepping-up the floor board. Using Century 21 Half-track side armored panels and floorboard as replacements.
Removing the armored windshield cover, more cut-ups and prepping-up the floor board. Using Century 21 Half-track side armored panels and floorboard as replacements.
Attachments
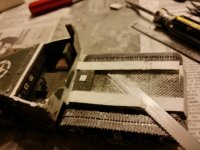
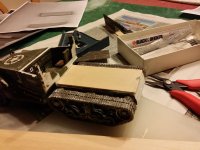
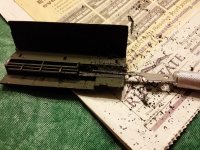
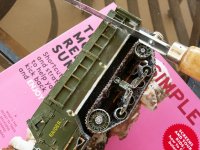
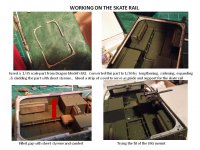
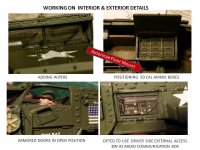
Work continues...at this stage i am starting to despair what have i done!! To many details and finger nails super glue damaged. A lot of sanding , filing and drilling. Got to wear a mask as my allergies are starting to act up Achoo!
Attachments

wayne556517
Lieutenant General
- Joined
- Aug 28, 2007
- Messages
- 16,000
BRILLIANT thread and work mate

wayne556517
Lieutenant General
- Joined
- Aug 28, 2007
- Messages
- 16,000
What a superb thread effort and result mate loved every post from you well done your are a craftsman.
Go for Broke
Sergeant Major
- Joined
- Jun 18, 2008
- Messages
- 1,585
just awesome.
Artillery_crazy
2nd Lieutenant
- Joined
- Jun 14, 2008
- Messages
- 3,482
Fantastic!
Congratulations on the great project.
Cheers
A_C
Congratulations on the great project.
Cheers
A_C
King & Country
1st Lieutenant
- Joined
- May 23, 2005
- Messages
- 4,930
Fantastic!
Congratulations on the great project.
Cheers
A_C
Allow me to add my heartiest congratulations on a superb piece of work!
Very, very well done, Andy.
Great work... truly some great vision and craftsmanship.
My only question would be why cut up a piece that probably started off north of $100 to begin with when a model from Dragon or Tamiya would have been significantly cheaper to start with as a base for this custom job? Not trying to nitpick, just to understand the rationale.
Thanks!
My only question would be why cut up a piece that probably started off north of $100 to begin with when a model from Dragon or Tamiya would have been significantly cheaper to start with as a base for this custom job? Not trying to nitpick, just to understand the rationale.
Thanks!
Users who are viewing this thread
Total: 3 (members: 0, guests: 3)