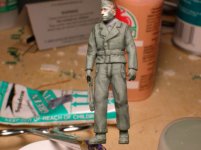
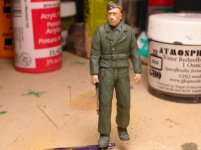
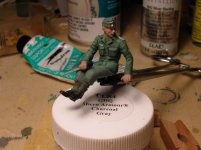
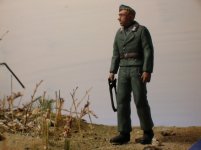
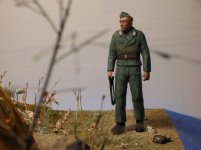
I have started work on the pantherturm crew figures and I thought I would share my figure painting technique with you guys, "Hacksaw Man" is the first of the three. Waterbased acrylics were used throughout and though my technique may not be the best out there, it has always produced good results for me.
I start out by painting the uniform in a hand-mixed feldgrau. This "base" colour is painted on the uniform and cap. I then add just the slightest touch of black to the base colour and paint it into all of the creases and folds present on the uniform and cap.
Once that is dry, I mix just a touch of white to the original base colour on my pallet and "drybrush", highlighting all of the high spots on the uniform.
When that layer is dry I go back to my base colour and dilute it to the point of near transparency and wash the whole thing, blending all base, dark and light colours together. When the figure is completely done I will seal it with a light shot of Testors clear flat spray.
More pics later - lot's more work to do on "Hacksaw" and his Kamaraden,
razorboy


![DSCN1416 [].jpg](/data/attachments/14/14897-add780b041732e7d4a25c0907f044545.jpg)
![DSCN1417 [640x480].JPG](/data/attachments/14/14898-c6879ad0d1da5b0d1ff2f7d9ea83847a.jpg)
![DSCN1419 [640x480].JPG](/data/attachments/14/14899-4fe27ac936dd99e7bd8fbb19bf66cdc9.jpg)
![DSCN1420 [640x480].JPG](/data/attachments/14/14900-0a8357f884e3764a6fffc3bdc27a1482.jpg)
![DSCN1433 [640x480].JPG](/data/attachments/15/15029-f8450a5bb633bf9bc7ba1bf0e666c9dc.jpg)
![DSCN1434 [640x480].JPG](/data/attachments/15/15030-6a9151a600443a17cb97f0d5527c2bd0.jpg)
![DSCN1435 [640x480].JPG](/data/attachments/15/15031-97d33b7015211da9f6d29bb23b1210c6.jpg)
![DSCN1436 [640x480].JPG](/data/attachments/15/15032-5b6fb38c461e8436b57bddf07a4f660b.jpg)
![DSCN1521 [640x480].JPG](/data/attachments/15/15625-41939f07d1e87ce7f8b46e4e7e2d769f.jpg)
![DSCN1523 [640x480].JPG](/data/attachments/15/15626-80eb683025a8faf9791e6a88d53fa552.jpg)
![DSCN1524 [640x480].JPG](/data/attachments/15/15627-80dcf6c3e9f81fbe7487ca3fbbe57321.jpg)