Guys...
I have a few pics of the WWII dug out and thought it may help to show the work behind to get it built.
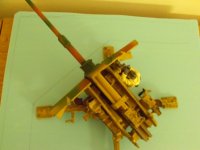
As with most dioramas I build it starts with whatever I am asked to build or fancy doing. In this case so many WWII late war pictures show the Flak 41 and other similar variants in this type of setting so, when K&C released one I thought I would have a bash.
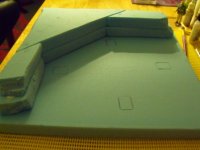
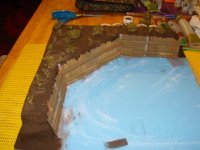
Its construction is foam board primarily and, at first I placed the gun onto a cut section of board and, mapped out where I wanted the embankment. The first pictures show the pencil lines mapping out where it would be and the shape.
The next part entailed cutting smaller pieces of foam board (it was easier than polystyrenes as its cut exactly to the shapes I wanted) I attach with white glue or scenic bond that type of stuff and, as you can see the embankment is done, its really that simple.
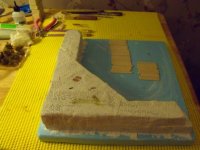
Next stage was to cover the foam board with an armature bandage similar to when you have a cast from hospital and available in all good model shops. Its great for covering anything including anything you don't like the look off. Its quick drying and, is rock hard and can be drilled sanded.
Next I would have covered the whole structure in plaster but, I have started using celluclay/claycrete which, is a paper mache based product but, I really like this product (don't forget if your covering foamboard to add some white glue either to the mix or before applying the celluclay to help it stick to the board and not crack)
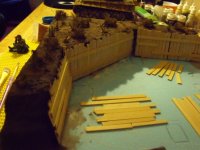
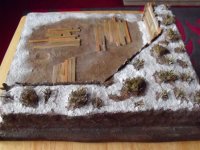
Once this was applied I added some short clumps of grass around the top of the embankment as the troops would have dug down about 6 feet. This was made from rope strands cut and painted green brown and weathered a little with white acrylics.
Next the whole embankment was painted burnt umber as an undercoat for building up the earth tones I also used several Mig pigments to achieve a realistic ground effect.
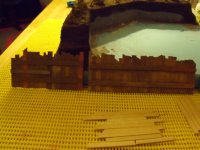
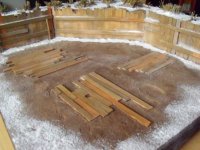
Next was making the wooden support fence that would have been needed to support the earth from caving in on the troops and the gun. This was made from thin balsa wood and was cut in varying sizes and chipped at the ends to add realism. Laid flat on the base horizontal panels were adhered with white glue. Next panzer aces and model air acylics were painted on I primarily use old wood and new wood for effect and used some khaki for tonal variation. I used Mig pigments winter wash on a couple of planks to give a painted effect on some of the wood.
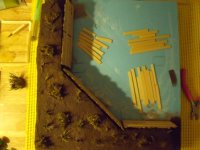
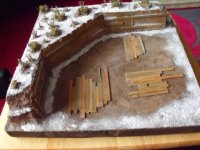
Once these were done I mixed some celluclay and white glue and adhered them into place. As the pics show I also wanted some planks to have been placed on the ground surrounding the gun itself for the troops to walk on so, again they were cut and weathered different colours.
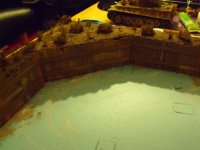
Once they were finished its just a case of applying celluclay to the ground (sorry, the pics of this for some reason did not work)and adding the wood in the areas which would have the gun crew on. I placed some slight and some more so impressions from the foot plates of the gun to show where it had been sitting.
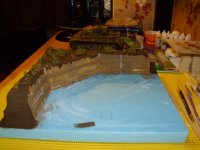
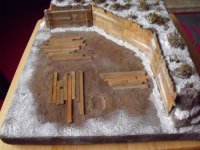
Once this medium dries I help it along with a art heat gun (though I have melted a good bit of foam board forgetting not to move the heat) it was weathered in similar earth tones and allowed to dry. Finally, snow was applied with scenic bond and placed in areas where it would have lay partially undisturbed. It took about ten hours of work to do this dio not including waiting for things to dry.
Hope it helps
Mitch

")