Werner Von Braun or, was it werner Von Flakypaint??? (1 Viewer)

Mitch

Major General
Joined
May 1, 2010
Messages
13,519
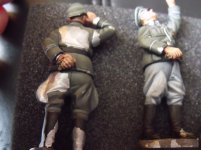
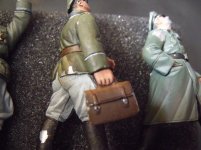
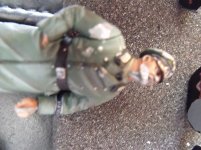
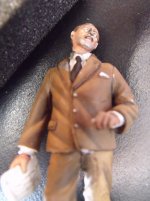
A few people have contacted me about the sets that have paint issues and damage either because they have not had the issues as bad as I have mentioned or, want to see them and how they can be sorted.So, I will start with some of the figures from the V2 series

Well, I have just received a number of sets today and thought its time to do a thread. These are the figures which the paint is flaking from and, there is also the V2 launch pad which, will come later but, is in similar state. What this shows is that these issues happen and are at first look appalling but, that they can be sorted and look as good as new. Probably down to insufficient primer or, non at all from looking at them and scraping the paint which actually just comes away.

This is not a bang Figarti (the title is a little attempt at humour!!) but, just to show what happens to a lot of these sets and, still does happen. I know from my own sets that I had issues of paint flaking on a number of sets up to and including the Nashorn. so, this is a guide to sorting these issues out.

Hope its of interest to some
Mitch
 

Attachments

  • figarti1.JPG
    figarti1.JPG
    212.2 KB · Views: 515
  • figarti2.JPG
    figarti2.JPG
    231.4 KB · Views: 533
  • figarti3.JPG
    figarti3.JPG
    267.2 KB · Views: 530
  • figarti4.JPG
    figarti4.JPG
    268.5 KB · Views: 549
A few people have contacted me about the sets that have paint issues and damage either because they have not had the issues as bad as I have mentioned or, want to see them and how they can be sorted.So, I will start with some of the figures from the V2 series

Well, I have just received a number of sets today and thought its time to do a thread. These are the figures which the paint is flaking from and, there is also the V2 launch pad which, will come later but, is in similar state. What this shows is that these issues happen and are at first look appalling but, that they can be sorted and look as good as new. Probably down to insufficient primer or, non at all from looking at them and scraping the paint which actually just comes away.

This is not a bang Figarti (the title is a little attempt at humour!!) but, just to show what happens to a lot of these sets and, still does happen. I know from my own sets that I had issues of paint flaking on a number of sets up to and including the Nashorn. so, this is a guide to sorting these issues out.

Hope its of interest to some
Mitch

That's worse than I thought. Are you going to take all the paint off and do a complete repaint or just touch up. Is there any point to getting someone to do a touchup as it will still be expensive and more could flake. And a complete repaint defeats the point of getting the Figarti models for their realisitc finish in the first place. The cost of a complete repaint of an AFV could be $200+ and the cost of 2 way shipping. I have quite a few Figarti AFVs and certainly can't afford to get them repainted. A few of the models have already lost paint and several more are fine but are models that other people reported flaking on. Oh well, not much I can do about it now.

Terry
 
Terry...

These are actually quite good to some I have been sent.

Often I have found that Figarti have issues where some areas flake heavily whilst some do not so, it depends on what the piece is when I start work on it as to what comes off. These figures are in better condition than some I have been sent. I did a Churchill which required a full strip and repaint and a Long tom the same. some have a panel or two like the Nashorn that require repainting and nothing more.

If the area in question is sanded and primed correctly and then painted even a small area should not be a problem. What happens to other areas over further time is the issue. I have not had one complaint about issues after I have worked on them.

My own flak half track required the whole cab repainted but, the back was fine.

I am not sure where you are getting your repaints done but, even for a full repaint that is expensive. Shame you live in Canada!!
Mitch

I'm not getting repaints done. I haven't found anyone locally and adding the cost of 2 way shipping is prohibative. It would be nice to have a good painter in Toronto where the item could be dropped off and picked up. I think Wayne has it very good being so close to Obee and is able to get complete repaints cheaply because it requires only one coat of grey over everything. {sm3}{sm4}
 
Unless I missed something, there should be absolutely no excuse for paint pealing, period. I too have suffered from this. My e-boat is peeling. Someone tell me how to remedy this?
I came up with the ultimate solution to Figarti's problem, I STOPPED buying from them over 2 years ago.
I would sell every Figarti piece I still own but then we run into Figarti problem two, packaging.
That,s another horror show all it,s own!
Gary
 
Do be fair think it a problem with Figarti older stuff
 
They obviously didn't close their eyes when the Ark of the Covenant was opened
 
I've obsereved exactly the same paint flaking with those figures form Figarti.

These have been passed onto me for repair work, whic also includes loose arms, so I'd question the glue thats used!

It looks to me that there is no undercoat sprayed onto the bare metal, so the paint has nothing to adhere to.

I always use a primer or undercaot on the casting, and I have nothing flake.

This is poor workmanship and if I had bouth them I would contact Figarti and get some solution, seeing you hav epaind a lot of $$$$ for them.

John
 
Mitch,

When I saw those pictures I thought it was my own sets of V-2 figures being shown! {eek3} I have the exactly same problem with 2 sets of those. At first I felt some relief, after all it`s not only bad luck with me, but bottom line is that I fully agree with those who say: these things simply should not happen!
Being the product old or new, expecting durable quality from a first tier TS manufacturer is not a favor, a plus; it`s a basic feature that should be inherent to every item!
Since I live halfway around the globe, I had to "fix" the problem myself, without talent like yours easily available and no access to a wide selection of paints and brands...:redface2:
 
That's what happens when you don't use primer. They never use primer on any of thier products. This issue has been going on forever with this company. They should place a warning on the box, "After opening never touch figures again". The only Figarti figures I still own are the ACW Marco Polo sets, which I have been keeping an eye on. I hope they were painted in another factory.
 
Last edited:
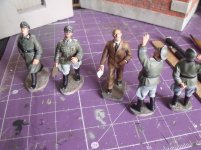
Interesting comments. Anyway, back to the figs and sets. A picture now showing the work done to the figures after they were sanded down and primed. They still have some work to do blending and colouring to get the figarti shading and facial tones on their figures. The officer in the trenchcoat is the one needing most facial repaint and only has a couple of coats of flesh on as his face had fallen off.

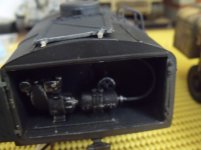
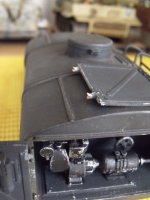
I have also put in a couple of pics of the Fuel trucks grey and Camo versions. The grey had opening rear doors and the hinges on one had snapped so, I have had to remake new hinges which can be seen and will then wrap these around the pins in place and glue them. Bit of primer and german grey and Bob is your mothers cousin!!! I have also removed the cab roof and will replace the plastic glass as it was a right state. Pictures of this repair to follow later.

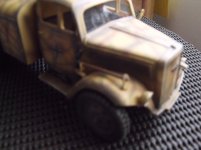
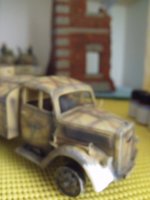
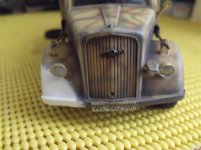
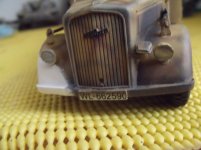
The camo version had lost its front fender and was in a right state. The pics show what it came like and, after three hours work. I drilled small holes into the structure and placed small metal rods adhered with glue. These act as an attachment for the milliput (rather like the way concrete bunkers were made metal and then concrete) I have built up the shape of the fender from scratch and at this stage its allowed to harden. I have to add the bumper and some other parts so, they all blend. Once that is done I will water down some milliput and blend the line where it was broken with the milliput so, its a seamless blend.

Once dry I will sand down parts necessary and then undercoat/prime and then repaint with dunkelgelb and camo colours.

It was interesting to see the differences in manufacturing between these two releases. The camo had no opening doors and a number of parts were differently made. It had rolling wheels whereas the grey version had static and, the camo version as can be seen by the pics had removable rubber tyres which, made the milliput work an awful lot easier.

Hope its of interest
Mitch
 

Attachments

  • figfigs.JPG
    figfigs.JPG
    232.2 KB · Views: 328
  • greyhinge.JPG
    greyhinge.JPG
    157.2 KB · Views: 299
  • hing2.JPG
    hing2.JPG
    281.1 KB · Views: 301
  • figblitz.JPG
    figblitz.JPG
    165.2 KB · Views: 322
  • repair2.JPG
    repair2.JPG
    251.9 KB · Views: 309
Interesting comments. Anyway, back to the figs and sets. A picture now showing the work done to the figures after they were sanded down and primed. They still have some work to do blending and colouring to get the figarti shading and facial tones on their figures. The officer in the trenchcoat is the one needing most facial repaint and only has a couple of coats of flesh on as his face had fallen off.

I have also put in a couple of pics of the Fuel trucks grey and Camo versions. The grey had opening rear doors and the hinges on one had snapped so, I have had to remake new hinges which can be seen and will then wrap these around the pins in place and glue them. Bit of primer and german grey and Bob is your mothers cousin!!! I have also removed the cab roof and will replace the plastic glass as it was a right state. Pictures of this repair to follow later.

The camo version had lost its front fender and was in a right state. The pics show what it came like and, after three hours work. I drilled small holes into the structure and placed small metal rods adhered with glue. These act as an attachment for the milliput (rather like the way concrete bunkers were made metal and then concrete) I have built up the shape of the fender from scratch and at this stage its allowed to harden. I have to add the bumper and some other parts so, they all blend. Once that is done I will water down some milliput and blend the line where it was broken with the milliput so, its a seamless blend.

Once dry I will sand down parts necessary and then undercoat/prime and then repaint with dunkelgelb and camo colours.

It was interesting to see the differences in manufacturing between these two releases. The camo had no opening doors and a number of parts were differently made. It had rolling wheels whereas the grey version had static and, the camo version as can be seen by the pics had removable rubber tyres which, made the milliput work an awful lot easier.

Hope its of interest
Mitch

Apart altogether from the serious nature of the problem being discussed I want to commend Mitch for what is probably the wittiest title ever for a TF thread. I still laugh every time I read it! C
 
Really good work mate and building in the background look good to
 
Cheers Neil. Building is scratch built from foam covered in cork bricks cut to size. I find this easier to work with and am not keen on kits of buildings I have a pile but, just can't get round to doing them
Mitch

Really good work mate and building in the background look good to
 
Anyone experienced or heard of any of their warbirds losing paint?
 
I have not heard any or, had any issues with the two aircraft I have the Owl and the ME110 winter. I would say that this is probably down to the medium used as they are for all purposes plastic and, paint adheres to these surfaces better than metal with or without primer (in general)

So, apart from the parts that are metal not sure how many there are in each set there should be no problems like we regularly see with the metal releases
Mitch
Cheers. Comforting, because I have one in my sights.
 
Building is scratch built from foam covered in cork bricks cut to size.

Mitch, I would be interested to learn more about this cork brick technique. Perhaps in an extras thread or PM.

Thanks,
Oliver
 
got a little more done to the broken camo fuel truck added the bumper and padded out the underneath etc to make it similar to the other side. Need to mix some filler and blend the join line and then sand down and undercoat.
Mitch
 

Attachments

  • blitz2.JPG
    blitz2.JPG
    198.4 KB · Views: 154
  • blitzbumper.JPG
    blitzbumper.JPG
    201.1 KB · Views: 146

Users who are viewing this thread

Back
Top