Working With Water Confidently and Easily (3 Viewers)

I'm thinking that the water material was "teased out", that is, it was allowed to cure partly, and was pulled out into descending streams with a brush or a toothpick.

For a water fountain, for example, the congealing strands of the water material were drawn from the spouts on the fountain to the surface of the water in the basin.

This looks like a good water medium, I'll have to get some and experiment with it.

Prost!
Brad

I agree...and my understanding is that is the traditional practice.
 
I think to depict streams of water from a fountain fishing line or fibre optic strands are used.
 
I'm thinking that the water material was "teased out", that is, it was allowed to cure partly, and was pulled out into descending streams with a brush or a toothpick.

For a water fountain, for example, the congealing strands of the water material were drawn from the spouts on the fountain to the surface of the water in the basin.

This looks like a good water medium, I'll have to get some and experiment with it.

Prost!
Brad

here is a technique that Hirst Arts teaches...

http://www.hirstarts.com/tips15/tips15.html#pools

http://www.hirstarts.com/tips17/tips17.html#swab

I found this when I built my castle...

hope it helps...


here is a link to all his tips...not all of them are about bricks...look through them...some are pretty unique...pages and pages of tips...

http://www.hirstarts.com/tipsmain/tipsmain.html
 
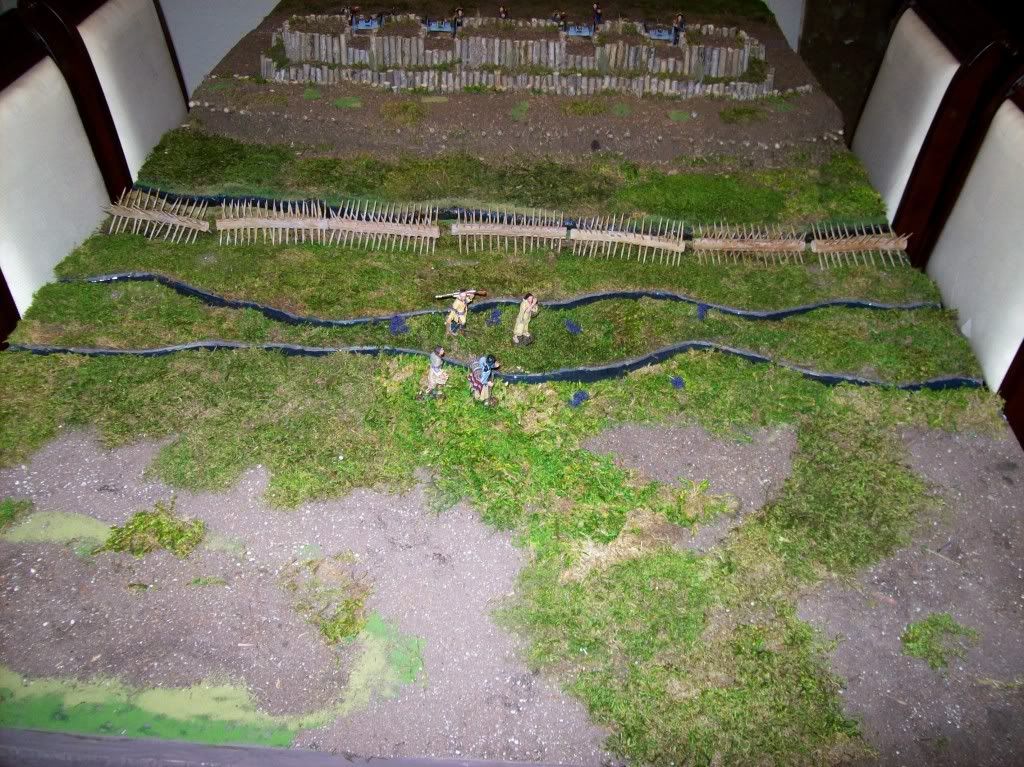
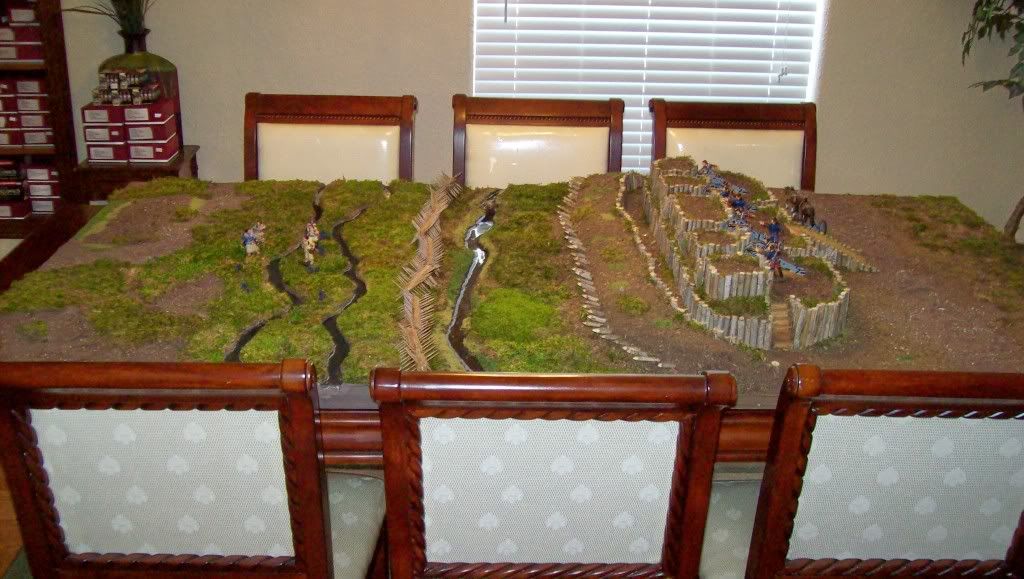
I finally got around to doing the ground work and taking a few pictures of this project...

this unfinished project has been looking at me for a couple of days while I played with grass mats...

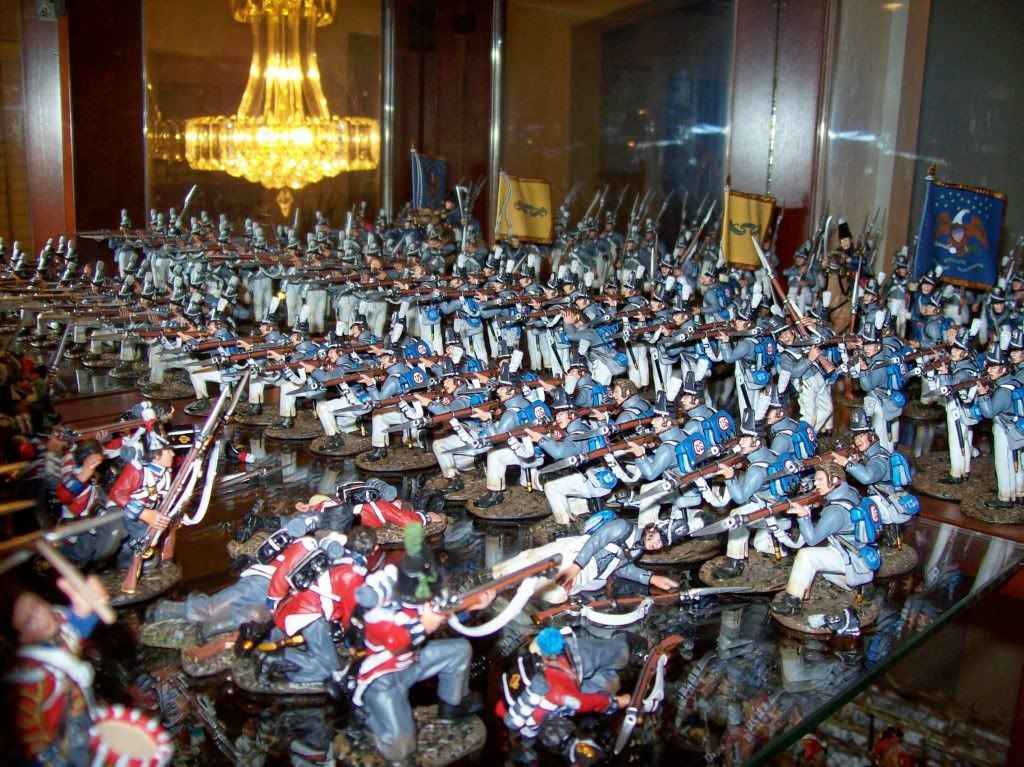
No close-ups yet...hahahaha...

100_7877.jpg


100_7876.jpg


100_7874.jpg


the detailing is by no means finished...

the river banks need a lot of touching up...:eek:

the grass needs some trimming...

and I might add a few props...

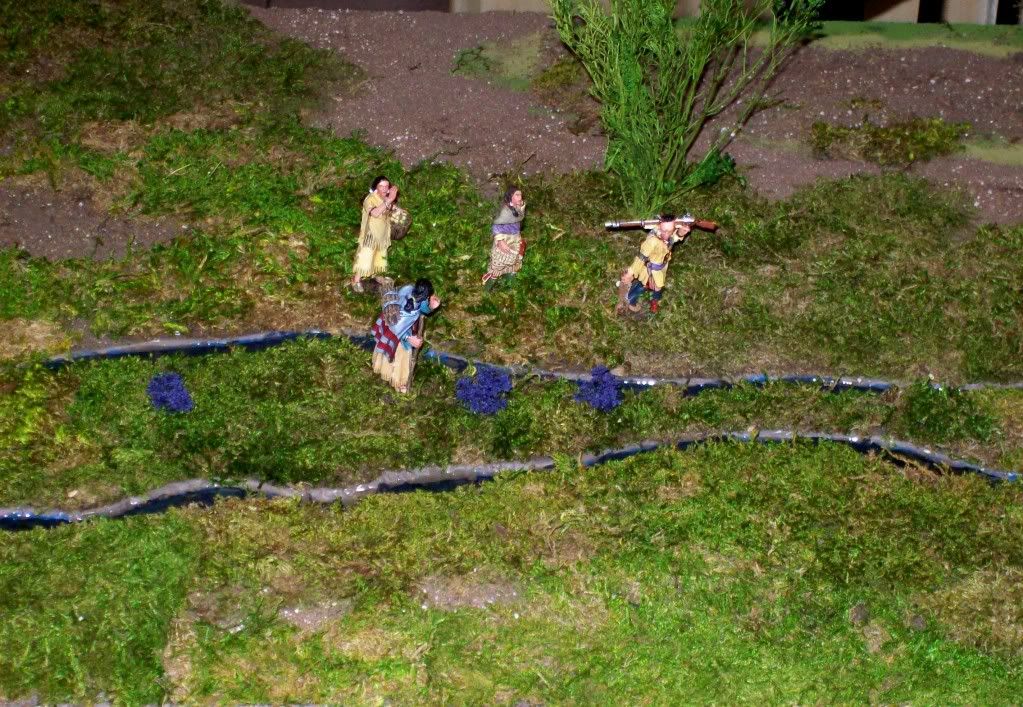
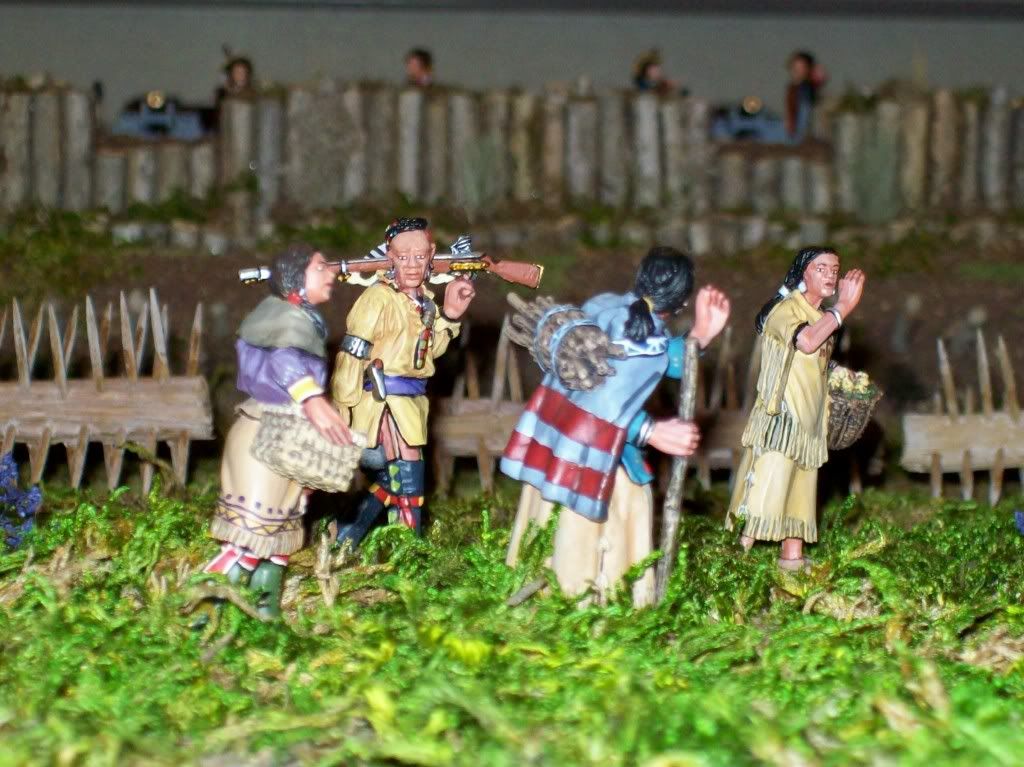
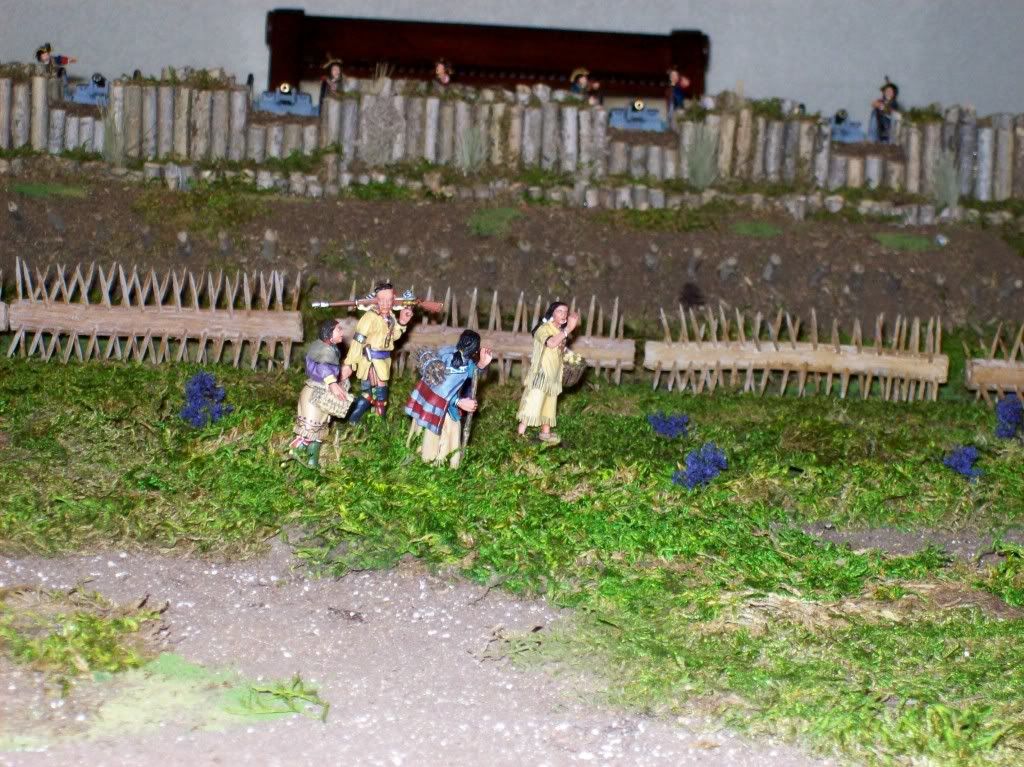
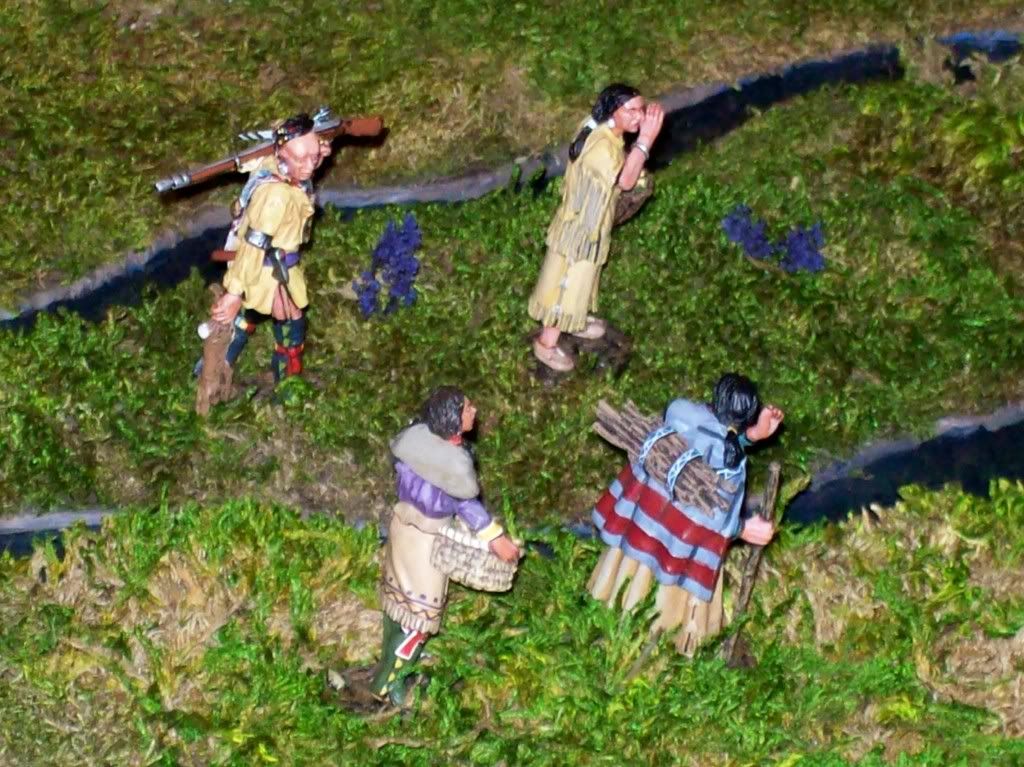
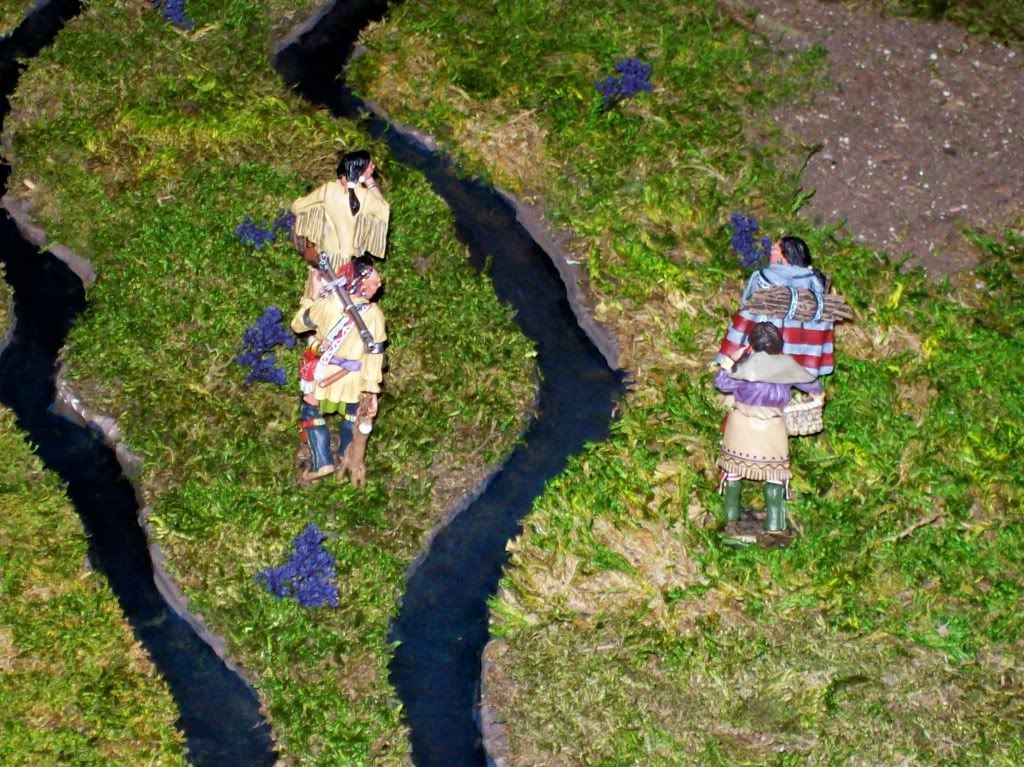
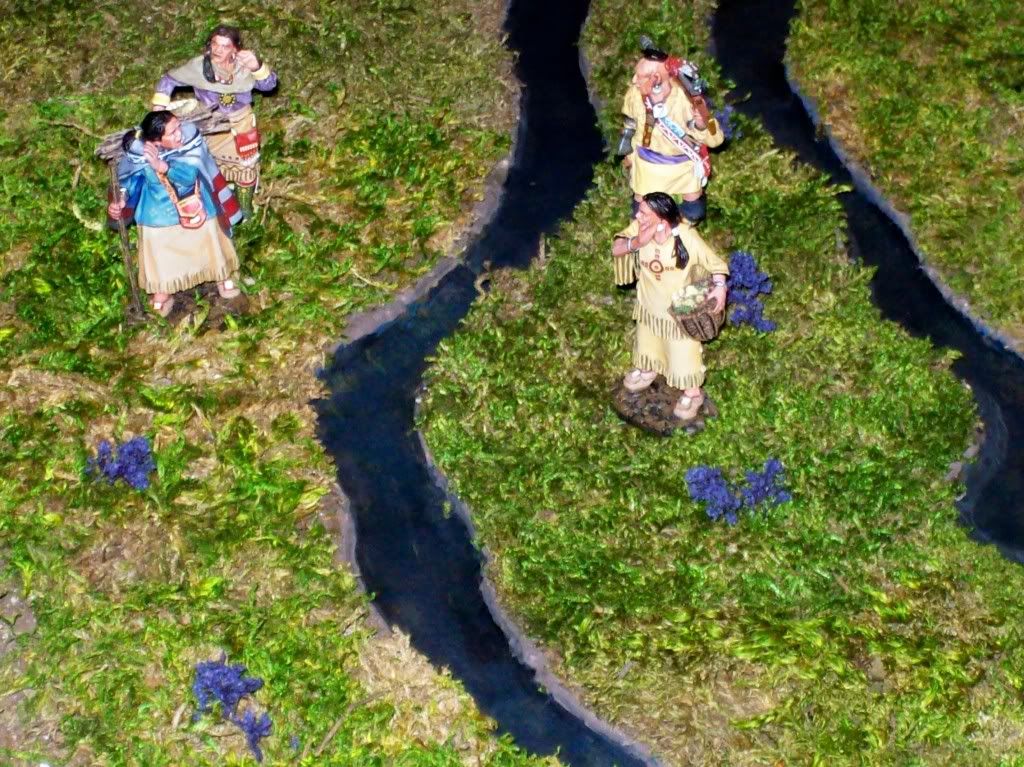
I used some Jenkin's figures...

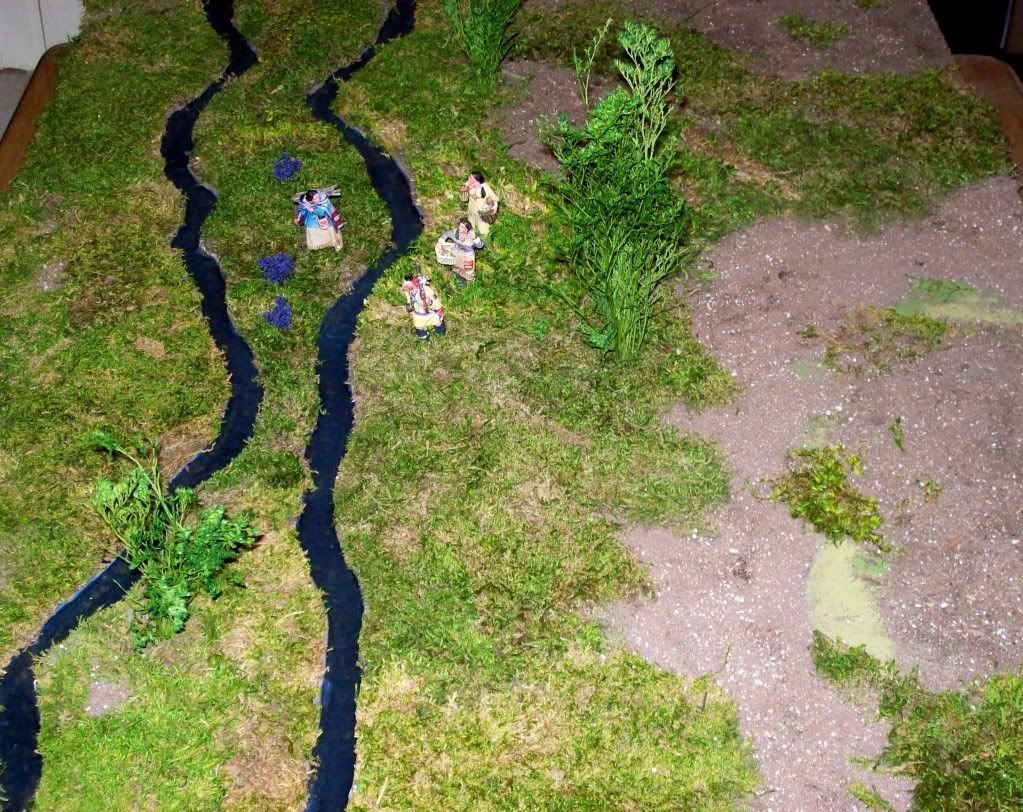
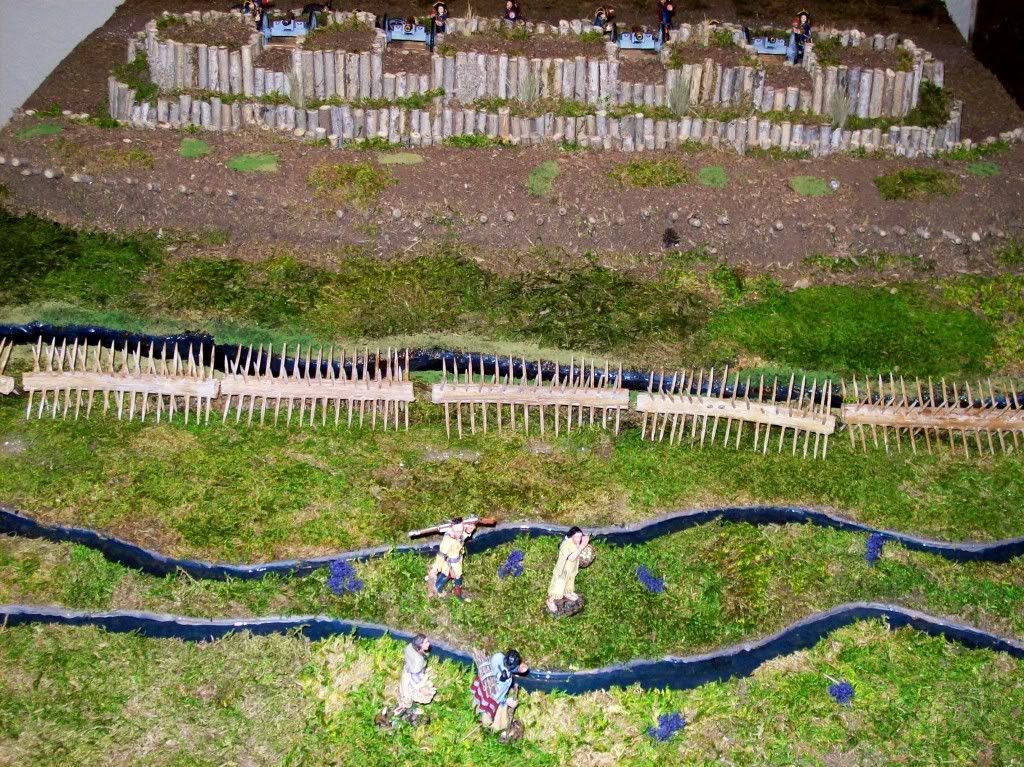
added a couple of trees and found some nice delicate tiny purple flowers to put in between the creeks...

I wanted to show a few pictures of the Magic Water finished so nobody would think I just abandoned this thread....

I will take some close-ups tomorrow...but the river bank really needs some attention...the close-ups of the camera show all the mistakes magnified...and I want to touch up some of the blue on the river banks before I got any detailed photos...

I just wanted to show everybody how nice the product is and how it looks with the terrain added...

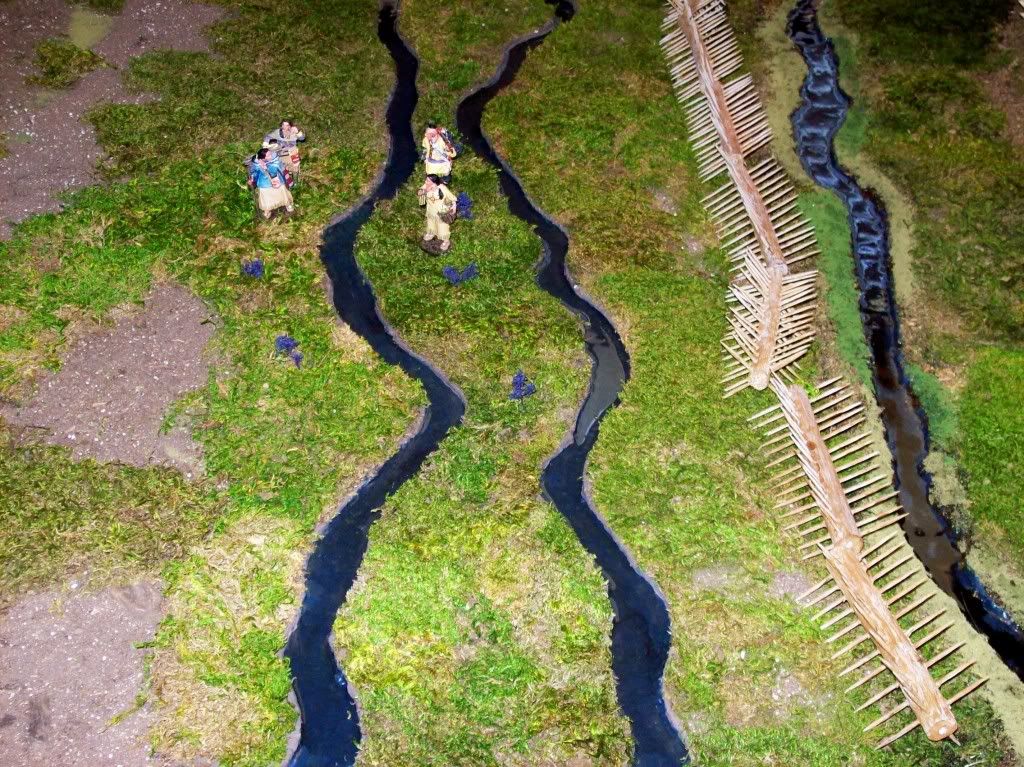
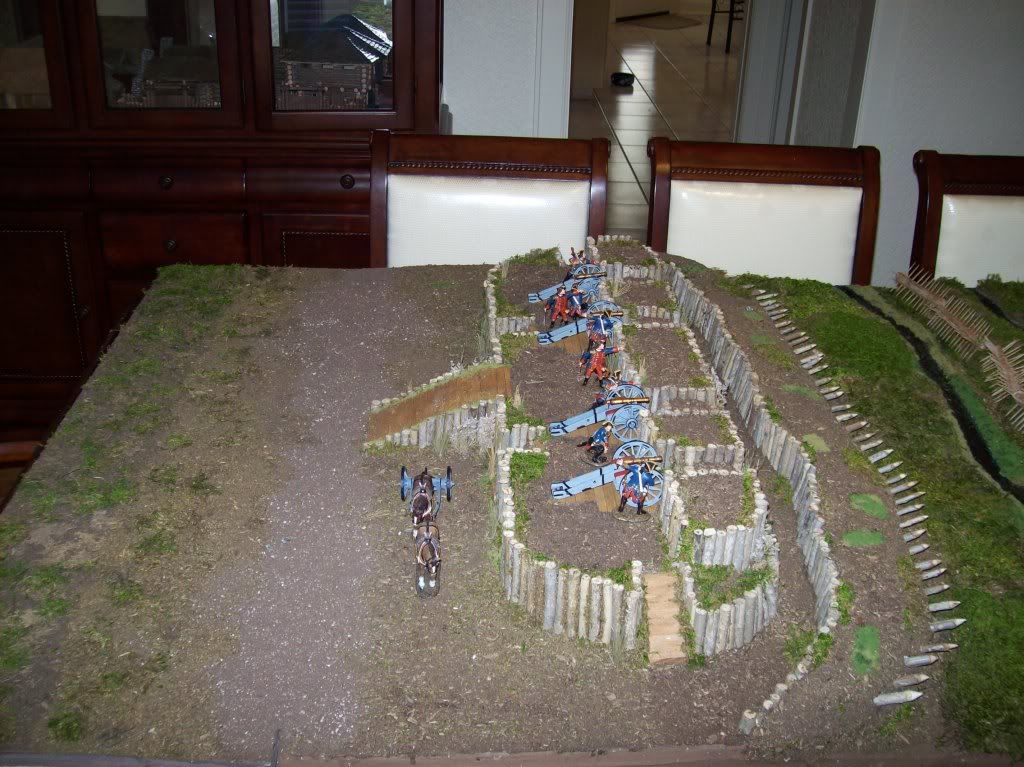
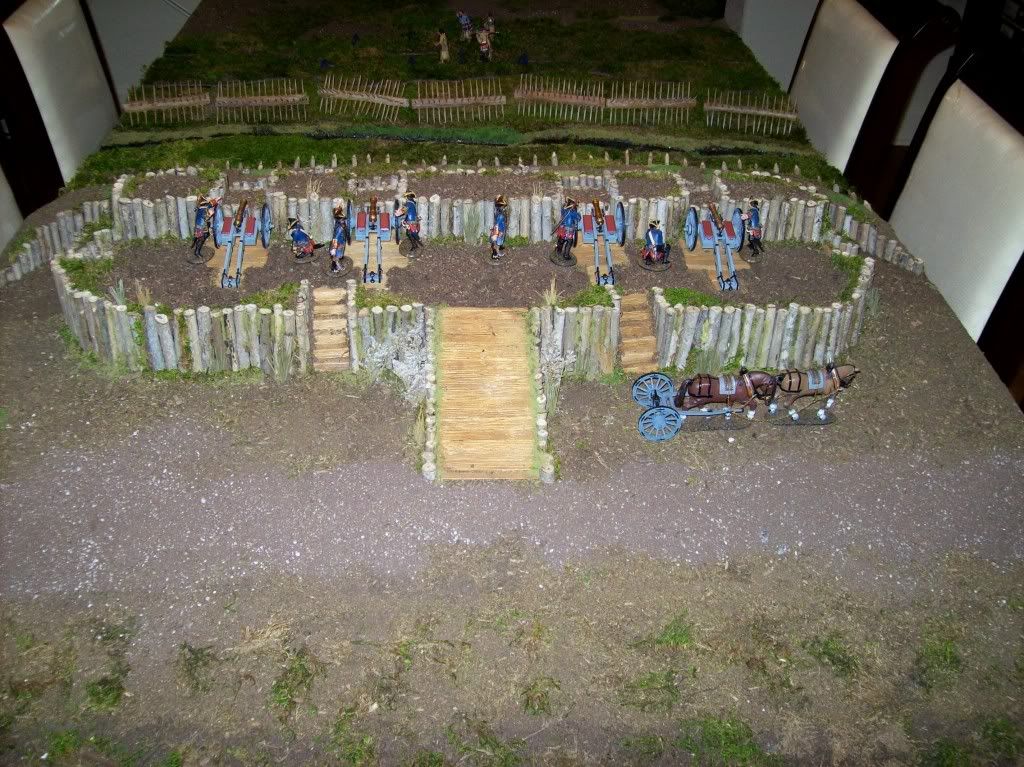
this piece is a supplement to my large artillery diorama...

I needed more room for the attacking army to stand...

this piece will butt up to it so all three creeks run parrallel to each other...

I already made another piece to go behind the artillery battery...

100_7265.jpg


100_7293.jpg


100_7292.jpg


once again...

Treefrog sells Magic Water...

if you followed this thread from the beginning you should have a pretty good idea how to use it and understand how simple it is...

Treefrog sells it in both small and large quantities...

I only used 1/2 a cup for both of these creeks...each is 41 inches long...so this stuff goes a long way...

don't shy away from this product...

Magic Water is simple and very affordable...

I will post some detailed pictures in the next day or so...
 
.... :eek: Increhíble anything seen here!. Congratulations.
On one occasion, got my hands on a figure of an Indian with a fishing rod. We called the good Indian. What brand was it? ... :)
 
Okay...

I cleaned up my riverbeds and took a few close-ups...

it turned out pretty good...

I added the new piece with the Magic Water creeks to the front of the artillery battery...

so the attacking army would have a place to stand...

I also added a smaller piece behind the artillery battery...

for wagons and an encampment...

anyway...it's pretty much finished and I'm pleased with the overall results...

I'm waiting to the 1812 US Army artillery crews that John promised to occupy the battery...

I got a lot of soldiers for this battle...but I need the artillery crews...

for right now...I have some British cannon crews from Battle of Monongahela still on there...

it sure turned out big...but at least it's in 3 sections so I can store it in the garage for now...

hopefully soon...

here's a few pictures of the entire set-up...

100_7901.jpg


100_7902.jpg


100_7904.jpg


100_7908.jpg


100_7909.jpg


100_7910.jpg


100_7913.jpg
 
WOWSERS Mike !!!!!

This is fantastic. Thanks very much for the step by step it has been very informative.

Once I get things in place for my new room I plan to use some of your techniques for a Zulu dio.

Can I ask the size of each of the sections in this dio?
 
Thanks Scott...

the dio is 42 inches wide...

the three pieces from left to right are...

100_7898.jpg


33 inches
36 inches
18 inches

the piece on the left I can use for some seperate dios...
 
Your dio is awesome Michael!
Do you have a spot to display it year-round in your house? It definitely should have a place of honor. I'm assuming the dining room table is not its permanent home. ;)

Michael to guest:
"Glad you could come over for dinner. Uh uh uh! Don't sit down! Pick up that plate and slowly back away from the table. You stand over there by the wall and eat--I don't want anyone slopping gumbo on my new creekbed!" :p

I have a kitchen island and a breakfast table for eating on...and they are usually full with diorama projects too...hahahaha...

that table is used once a year...when I host Thanksgiving...

not permanent...

I'm guessing I have 15-20 diaramas in the garage stacked against the wall...

they multiply like rabbits...:rolleyes:
 
Beautiful work Mike.You should go into business with Ken Osen.:D:D
Mark
 
Mark...

If I knew 1/20th of what Ken knew...

I still wouldn't...

too labor intensive...

I can certainly understand why diorama and diorama created pieces cost so much...

an incredible amount of time is spent on creating them...

but thanks and I'm flattered you like it...
 

Users who are viewing this thread

Back
Top