Hirst Arts Castle and diorama done in 60mm. (2 Viewers)

Outstanding, Mike! Way to stick with it, too! The results are fantastic.

I have a question, and I may have missed this: What kind of glue are you using to attach the plaster pieces together?

Also, for the joints on the pieces you rejected, do you think it would be possible to putty those seams with something like Elmer's wood putty, or maybe even a slurry of your casting plaster? Or does your batch make so many pieces, that it's not worth it to try to use up the rejects, too?

After seeing how beautifully your stones turn out, I'm ashamed to think that after your first post, about the materials you tried, I was going to post and ask if you tried spackle on wood, like luan plywood :D That's an old technique for making textured walls, too, but I don't know that it would wear as well, in this application. You really need something robust, that can take dismantling, setting up, and moving.

Really, really outstanding work, thanks for sharing it!
Prost!
Brad
 
Rocks

All the rocks were made by Woodland Scenic’s molds. They were all made with plaster of paris.

I can’t endorse the mold or the plaster.

Woodland Scenic’s molds are flimsy and overpriced. The molds are of a very thin plastic/rubber and it’s impossible to get one to sit level while the plaster hardens.

I read a forum about one guy that had the same problem and he said he corrected it by placing the mold in a bucket of sand and settling it.

Don’t know if you’ve ever worked with plaster of paris, but it’s messy, I wouldn’t want to work it in a bucket of sand.

Woodland Scenic’s could have made a better mold that would sit level until the plaster hardens.

As far as the plaster of paris, it chips, the ends tend to break off easily. I would recommend Hydrostone or anything but PoP.

All the stones were painted in a chocolate brown like the castle with 2 extra washes for detail.

The first wash was ½ brown and ½ beige.

The second wash was all beige.

They are fragile, but it doesn’t matter, my diorama has long outgrown so many things I’ve made or bought. I will use some of the small rocks around the bridge, catapult and river.

000_0001_01.jpg


000_0003_01.jpg


100_0581.jpg
 
Mike,

This is a superb thread, incredibly informative. I appreciate the time you're taking posting this. The castle and your other structures look the dog's danglies. Got me seriously thinking about getting some of this stuff now.

Simon

T
"The dog's danglies", lol, I think that's a compliment, so thank you.

"The dog's danglies", that's funny.
 
Outstanding, Mike! Way to stick with it, too! The results are fantastic.

I have a question, and I may have missed this: What kind of glue are you using to attach the plaster pieces together?

Also, for the joints on the pieces you rejected, do you think it would be possible to putty those seams with something like Elmer's wood putty, or maybe even a slurry of your casting plaster? Or does your batch make so many pieces, that it's not worth it to try to use up the rejects, too?

After seeing how beautifully your stones turn out, I'm ashamed to think that after your first post, about the materials you tried, I was going to post and ask if you tried spackle on wood, like luan plywood :D That's an old technique for making textured walls, too, but I don't know that it would wear as well, in this application. You really need something robust, that can take dismantling, setting up, and moving.

Really, really outstanding work, thanks for sharing it!
Prost!
Brad

Thanks for the praise Brad,

Aleene's or Elmers, I see no difference. I've used about 5 large tubes, but lots of mistakes in there. I was going through it so quick, I thought preschoolers were sneaking in my house in the middle of the night and eating it. I wish they made an industrial size bucket.

100_0582.jpg


The pieces are precious to me, I've never had enough, so no, the molds don't make too many. I'll build some extra farm buildings with the scraps.

I did try to get some mixed hydrostone in the joints, but it was a tedious process trying not to blemish, cover or distort the surrounding textured bricks. Also the wall sections don't match up flush very well on corners, they seem to overextend just a fraction. I hate to give up on anything I've spent time on, so I tried a lot of things.

You're making me laugh, I thought about spackle too.
 
Your on a roll Michael and like all looking forward to seeing your next stage.....The Lt.
 
Mike you may want to use a lintel for over the windows. These really are wonderful. Also amazing is the level of interest in the castle thread. Very well done Mike. I look forward to see the end result. Also one other point is butresses are usually higher. But well done for including them. Most people would not even add them. BTW My sir name in German refers to the ring of stones at the base of a castle. It is called a stone skirt or skirting. You have put a great deal of architectual detail.:)
 
Help me KV,

I didn't know what a "lintel" was so I looked it up.

Wikipedia definition: A lintel is defined as a horizontal block that spans the space between two supports in classical western architecture.

Is this supposed to be a decorative piece?

I really like the idea, if I undersand the definition, but where can I use it?

Do you mean over the interior castle windows?

Can you show me a photo or a link of what you mean?

I also looked up buttresses to find a photo.

Wikipedia definition: A buttress is an architectural structure built against (a counterfort) or projecting from a wall which serves to support or reinforce the wall.

I stole my idea from a photo I saw on line, but would like it to be accurate realistically.

You said they are usually higher, can you please send me a photo or a link on this too, I may want to correct them.

It's never too late to replace them if you can help me with a photo.

Thanks, Michael

Interesting, I just ran into the same question over on the IMdB, on a question I posted on the message board for "The Office". There is something printed on the lintel of the door out of the office. Some guy responded to ask if I were speaking French. I followed up by saying I understand that most folks may not know the term, if they're not builders or regular watchers of This Old House :D

Seriously, though, and to go more specifically beyond the Wikipedia article, the horizontal cap rail on a doorway is also referred to as the lintel. A doorway consists of the veritcal posts, and the horizontal lintel (top) and sill (bottom). Same goes for a window frame. That's just referring to the framing, which may be hidden by the wall finish (like drywall and trim). Then, as an architectural detail, you can have a piece of stone or some other material set over such an opening as a decorative piece, visible to the outside, which would also be a lintel.

And the butresses would be stonework built against a wall, at 90 degress, to provide vertical support for the wall. That is, a buttress is intended to keep the wall from bowing out or leaning to the side that the buttress is on.

Late medieval and Renaissance builders refined this into the flying buttress seen on buildings like Notre Dame cathedral. There, the base of the buttress doesn't touch the wall the buttress supports, but rather, supports a post of stone that rises to a height along the wall, and the post supports a beam of stonework that provides the actual support for the wall. That allows a builder to design a main wall with more window space, because the flying buttress doesn't block the light like the regular one does.

I don't have any pics, but hopefully that helps describe it a little more.

Prost!
Brad
 
Brad,

That is concise and to the point, it doesn't read like French to me.

I understand exactly what it is. Thank you.

I think KV is telling me I should dress up my interior wooden windows with a decorative lintel mounted horizontally over the wooden slats. Kind of like the bricks I put over the castle door and portcullis. I'm not sure where else he meant cause those are the only windows I've shown so far.

The buttress, I found a link that shows a great photo (posted below). It looks like I would have to cast quite a few more stones and go back to work to build one like that surrounding the castle walls and towers.

Brad, thanks for the detailed explanation of the lintel and the buttress.

Michael

PS...I love "This Old House" and "The New Yankee Worksop" too.
 
Norm rules! I'd love to have a shop big enough for a table saw island like he has.

Prost!
Brad
 
Brad, yea, Norm can build anything and makes it look so easy. I once looked at the printed plans of an armoire he built, can't remember the material, but I quikly realized my chop saw and circular saw just wouldn't get the job done at all. He was speaking in "French" to me, to quote you. He is a master.

I can't remember the name of the show, maybe you can, but the guy worked with almost medieval tools only, the drills were hand operaterd, more like bores, the saws were antiquated, almost prehistoric. It really made me appreciate antique furniture after I watched it a few times. Can't remember the name of the show, but it was always on early Sunday mornings.
 
I’m getting close.

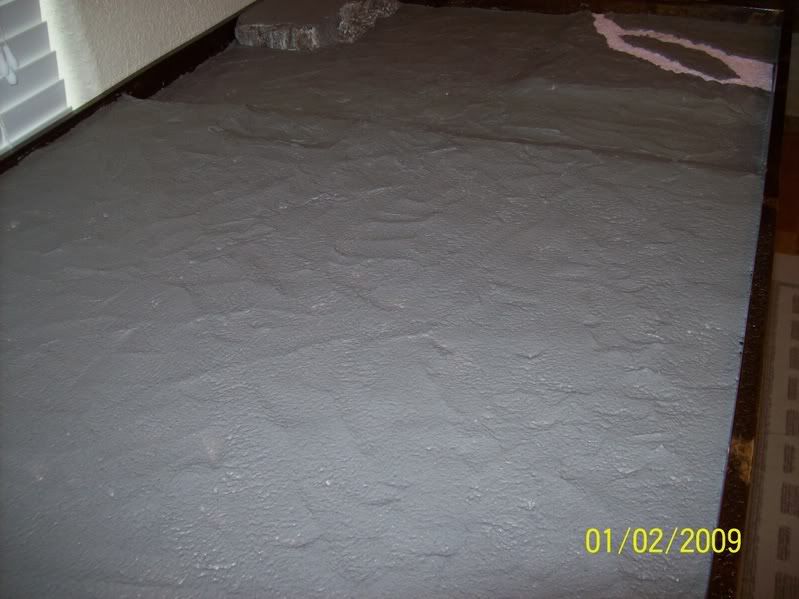
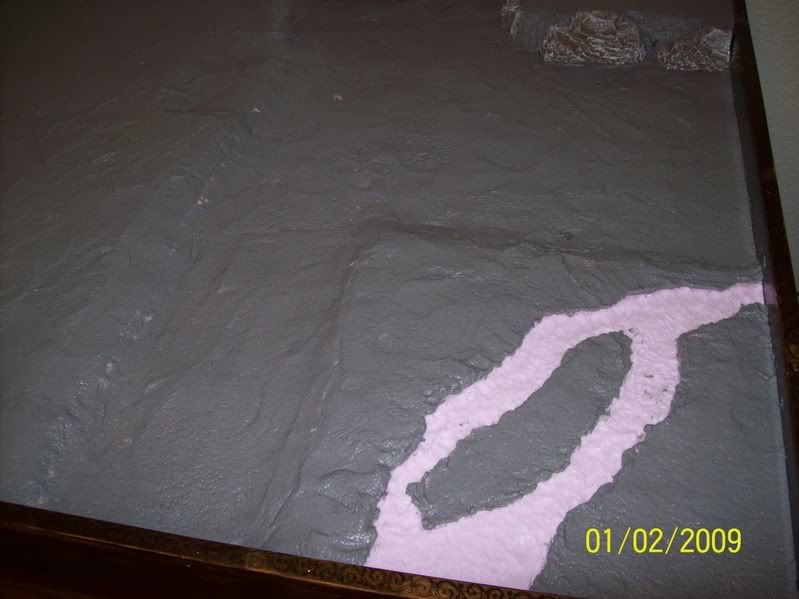
I’m ready to set up my diorama and show some castle photos, but I’m waiting for a small section of Celleclay to dry and then paint and texture the terrain.

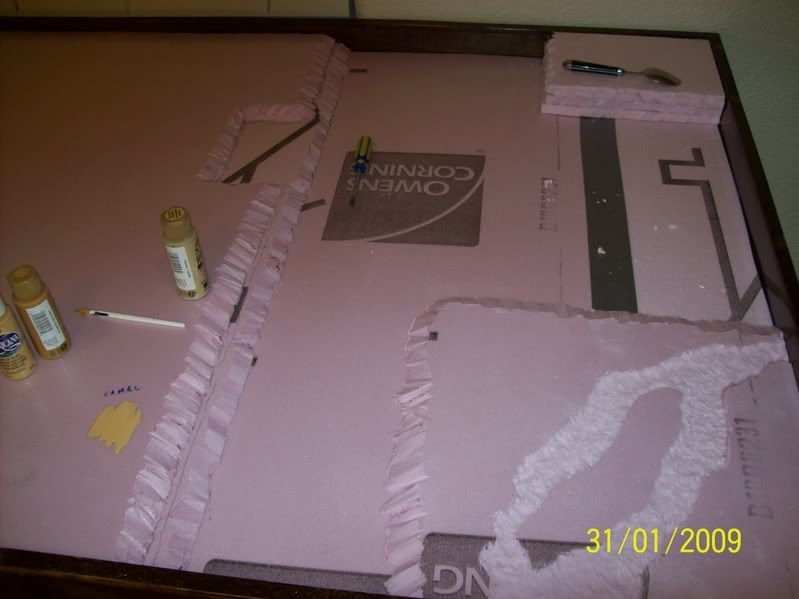
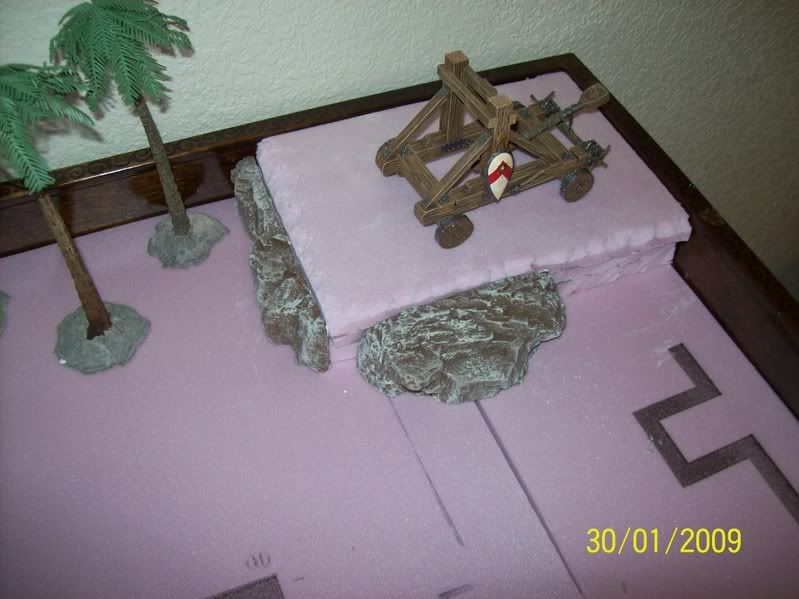
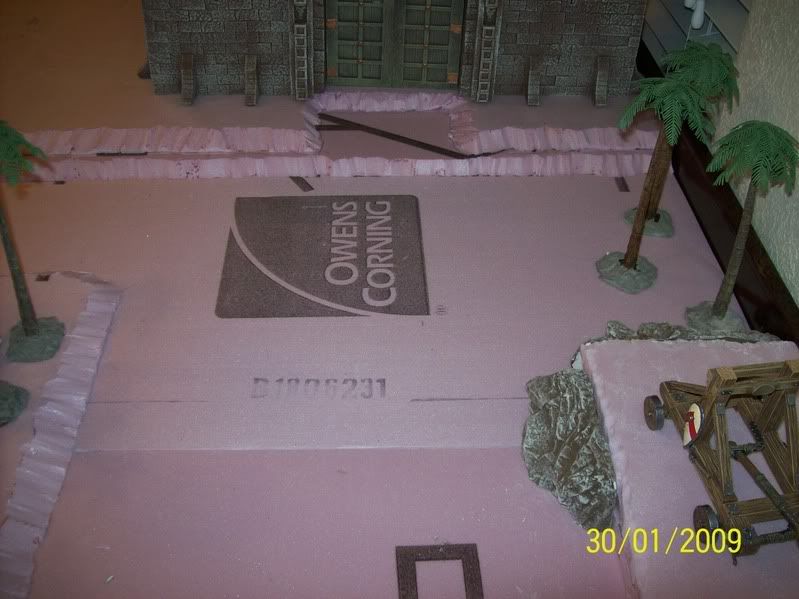
I made my base with styroprene, glued together with white glue. Be sure and peel the plastic off first, so the glue will adhere better.

100_0437.jpg


100_0436.jpg


100_0430.jpg


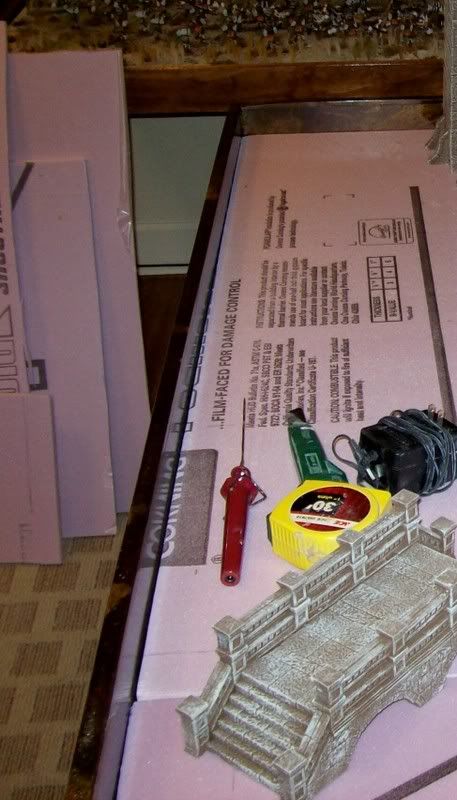
The river carvings were done with a kitchen spoon, that I just carefully gouged out. The sloped terrain was done with a “hot knife”, shown in this photo.

000_0008_00.jpg


It’s the little red thing with a long tip that gets hot enough to cut plastic. Around $8 at Hobby Lobby, but a rasp or knife will do just as well.

The celluclay is a great product, when it dries it dries really hard. It is expensive ($22.00), but even for my table, I only used a ¼ of the bag.

000_0009.jpg


000_0009.jpg


000_0005-2.jpg


I got the idea from Mike’s (Mestell) post on “The Fall of Acre”, to use Celluclay for a terrain.

I didn’t know the stuff would take so long to dry. If you want more information on it, read his post. He gave a such a great tutorial on it. I did not mix the paint with mine like Mestell did.
 
Brad, yea, Norm can build anything and makes it look so easy. I once looked at the printed plans of an armoire he built, can't remember the material, but I quikly realized my chop saw and circular saw just wouldn't get the job done at all. He was speaking in "French" to me, to quote you. He is a master.

I can't remember the name of the show, maybe you can, but the guy worked with almost medieval tools only, the drills were hand operaterd, more like bores, the saws were antiquated, almost prehistoric. It really made me appreciate antique furniture after I watched it a few times. Can't remember the name of the show, but it was always on early Sunday mornings.

I don't know about medieval tools, but there's a show on PBS called "The Woodwright's Shop", starring Roy Underhill, but he used tools from the 18th century (like bending a growing sapling in the yard, to provide the spring force to turn a piece of lumber while he shaped it). He was the director of the work at Colonial Williamsburg at one time, and I think has a degree in archeology. He used no power beyond human muscle, or the sapling method, although he included segments in his show with tours of water-powered mills from the 18th century. I think he demostrated how to mix finishes as they did back then (real shellac, from the beetles, for example).

I haven't seen that one in a while, though.
 
There is a tool (red), just beside the bridge, what is that for? Cut the FOAM?

Cheers
 
There is a tool (red), just beside the bridge, what is that for? Cut the FOAM?

Cheers

Mike, that's the hot knife, isn't it? That's the same as the old pyrogravure tool that Airfix and Historex used to recommend to kit builders, I think.
 
Yes Debrito,

There is a 6" thin metal rod, that protrudes from the red handle, that gets very hot. It is electric and plugs into any 110. It will cut styroprene or foam. While you don't really need one, a rasp or a knife will do, it cuts cleanly and doesn't leave all the styrofoam particles all over the floor. When you rasp or cut styrofoam, all these clingy particles shed off all over the place. They are impossible to clean up. For $8, buy one, it's really handy, neat and worth it.
 
There is a tool (red), just beside the bridge, what is that for? Cut the FOAM?

Cheers

I don't know about medieval tools, but there's a show on PBS called "The Woodwright's Shop", starring Roy Underhill, but he used tools from the 18th century (like bending a growing sapling in the yard, to provide the spring force to turn a piece of lumber while he shaped it). He was the director of the work at Colonial Williamsburg at one time, and I think has a degree in archeology. He used no power beyond human muscle, or the sapling method, although he included segments in his show with tours of water-powered mills from the 18th century. I think he demostrated how to mix finishes as they did back then (real shellac, from the beetles, for example).

I haven't seen that one in a while, though.

That doesn't sound like the one I'm talking about. This was mostly tools from the 18th century, I was embellishing a little when I said "prehistoric and medieval". But yes, "human muscle and patience" was the theme.
 

Users who are viewing this thread

Back
Top