mikemiller1955
Lieutenant General
- Joined
- Aug 3, 2008
- Messages
- 17,868
Tim,
You have a really keen eye. I bet you were hard to trick as a kid too.
You didn’t set traps for the Tooth Fairy did you?
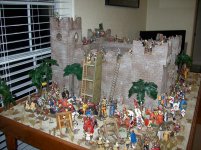
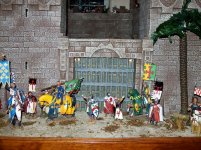
You are right, the roof has too much overhang on both sides.
It was an error that I made, an error I saw and an error I never corrected.
If you look at it close you will see 2 rows of 5 ½ panels.
I really only needed 5.
It was originally measured and designed with an exterior chimney on the right side that would have balanced the overhang. I wasn’t happy with the chimney after it was finished, I didn’t like it, but was too lazy to shorten the roof.
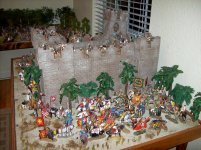
I cast the silicone rubber mold myself from a $2.00 sample order of his stone roofing and produce my own shingles cheaply.
Also, if you look close enough you will see the 2 sets of 5 ½ panels on each side of the roof lining up too evenly. They should have been staggered to avoid the lines being too obvious. No excuses for lazy work.
I’m still learning, but I don’t have the heart to throw it away, lol.
But you’re guess was right, it was pre made roofing (made by me) that was never corrected for the absence of the chimney.
The windows I do have an excuse for.
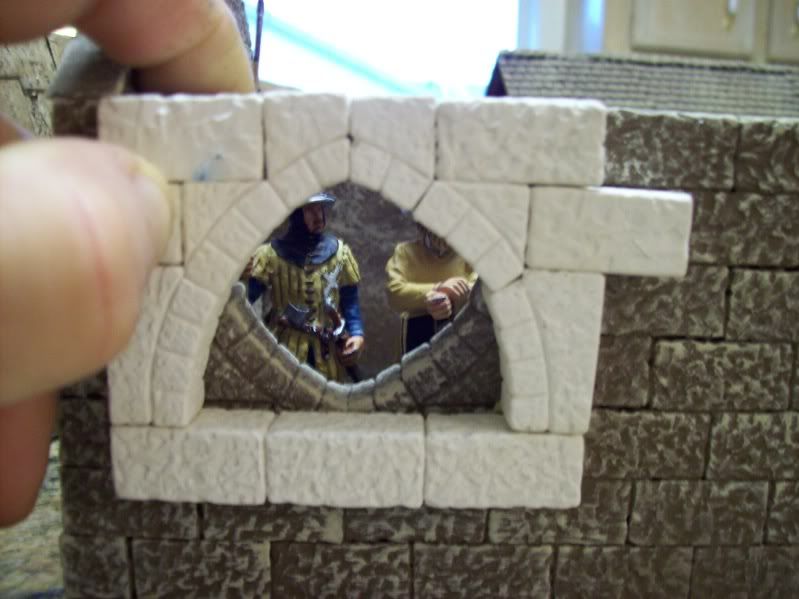
If the buildings were taller, say 4 inches (maybe ½” more taller, which is only one brick), the arch at the top would have looked better, but at 3 ½”s tall, the portal of the window wouldn’t show the figures faces as well if the arch was at the top.
When I was making them, I used two figures side by side for a proof. I liked the look.

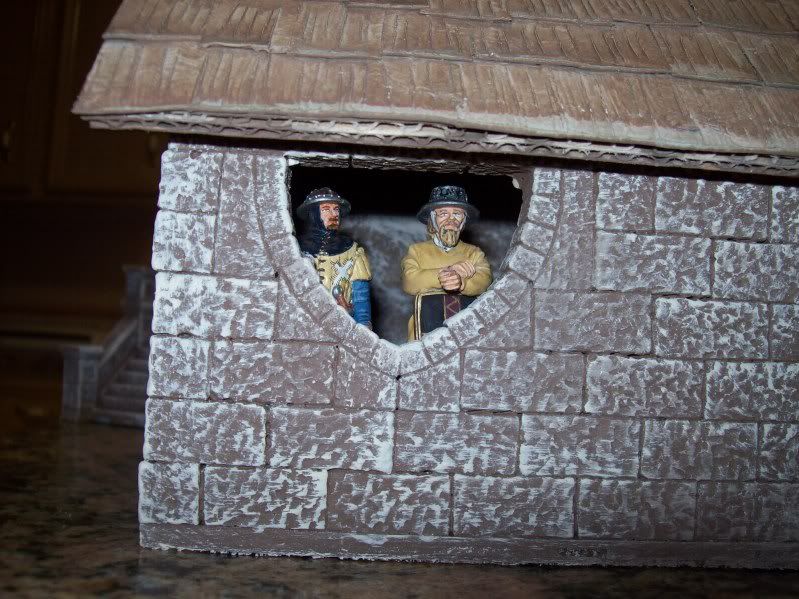
The bricks design didn’t mandate I choose either style. The look was up to me. Just a personal preference I guess.
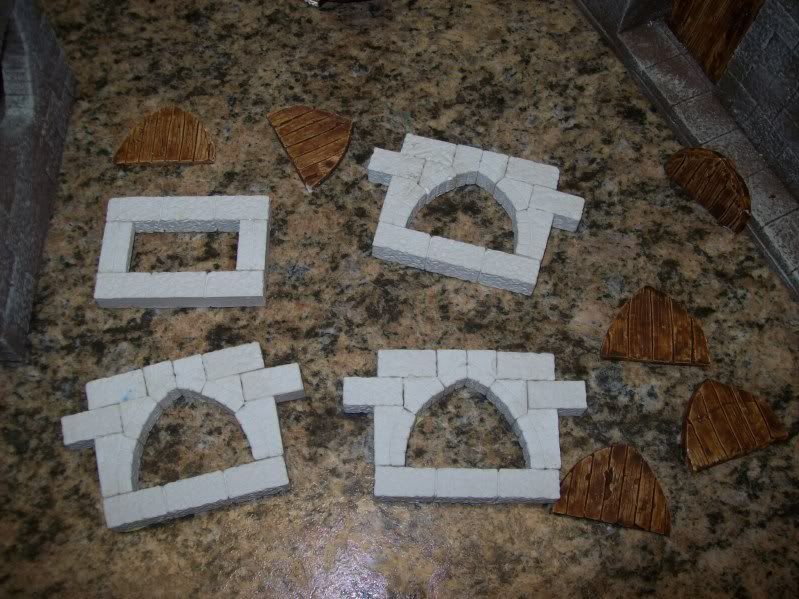
To be perfectly honest, it didn’t even dawn on me as being upside down until you mentioned it.
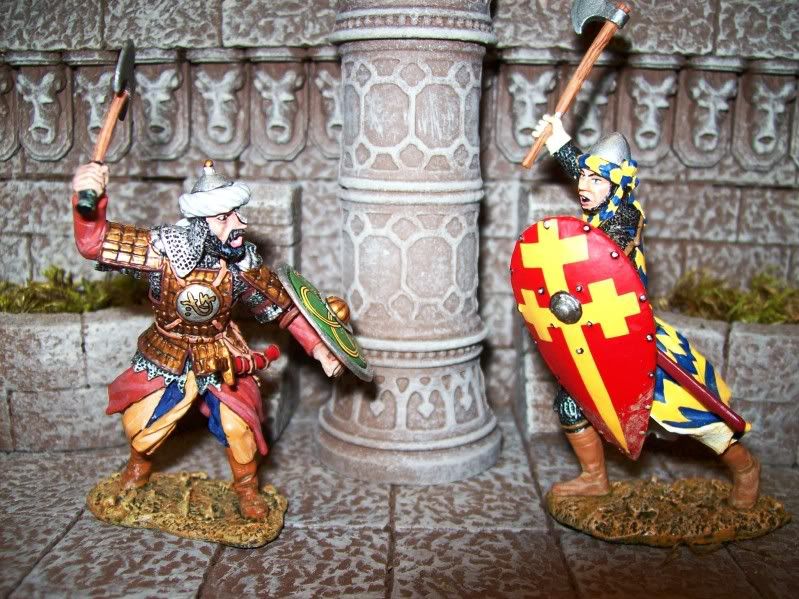
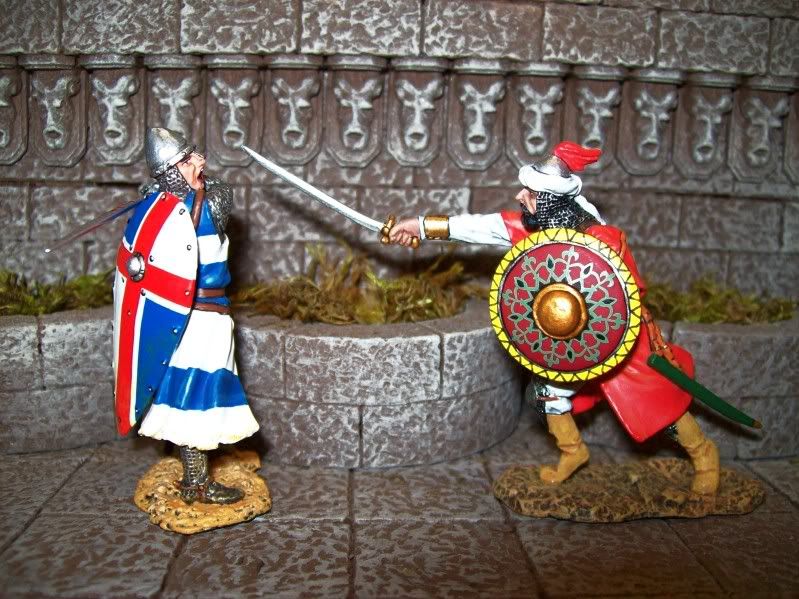
These were done on purpose upside down, so the little ornate ram figure head could be glued to the top.

The medieval contractor of these buildings had been hit in the head with a spear in his youth and was a little dyslexic.
Thanks for the compliment on the paint job. First coat chocolate brown, then 1 dry brushes with same brown toned down with beige, and then the final dry brush with the beige only.
You ought to get some and play with it, get the basic brick mold $34 and a 50 pound bag of hydrostone for $16. You can make at least 20 buildings like these out of it, for less than $50.
I don’t think you want or need that Hydrostone in your laundry room. The “wet water method” (Jet dry water conditioner), in the link I sent should solve air bubble problem. Bruce show how to build a vibrating table, but I never did and never got any air bubbles in my bricks.
Michael
You have a really keen eye. I bet you were hard to trick as a kid too.
You didn’t set traps for the Tooth Fairy did you?
You are right, the roof has too much overhang on both sides.
It was an error that I made, an error I saw and an error I never corrected.
If you look at it close you will see 2 rows of 5 ½ panels.
I really only needed 5.
It was originally measured and designed with an exterior chimney on the right side that would have balanced the overhang. I wasn’t happy with the chimney after it was finished, I didn’t like it, but was too lazy to shorten the roof.
I cast the silicone rubber mold myself from a $2.00 sample order of his stone roofing and produce my own shingles cheaply.
Also, if you look close enough you will see the 2 sets of 5 ½ panels on each side of the roof lining up too evenly. They should have been staggered to avoid the lines being too obvious. No excuses for lazy work.
I’m still learning, but I don’t have the heart to throw it away, lol.
But you’re guess was right, it was pre made roofing (made by me) that was never corrected for the absence of the chimney.
The windows I do have an excuse for.
If the buildings were taller, say 4 inches (maybe ½” more taller, which is only one brick), the arch at the top would have looked better, but at 3 ½”s tall, the portal of the window wouldn’t show the figures faces as well if the arch was at the top.
When I was making them, I used two figures side by side for a proof. I liked the look.
The bricks design didn’t mandate I choose either style. The look was up to me. Just a personal preference I guess.
To be perfectly honest, it didn’t even dawn on me as being upside down until you mentioned it.
These were done on purpose upside down, so the little ornate ram figure head could be glued to the top.
The medieval contractor of these buildings had been hit in the head with a spear in his youth and was a little dyslexic.
Thanks for the compliment on the paint job. First coat chocolate brown, then 1 dry brushes with same brown toned down with beige, and then the final dry brush with the beige only.
You ought to get some and play with it, get the basic brick mold $34 and a 50 pound bag of hydrostone for $16. You can make at least 20 buildings like these out of it, for less than $50.
I don’t think you want or need that Hydrostone in your laundry room. The “wet water method” (Jet dry water conditioner), in the link I sent should solve air bubble problem. Bruce show how to build a vibrating table, but I never did and never got any air bubbles in my bricks.
Michael