Hirst Arts Castle and diorama done in 60mm. (1 Viewer)

I thought the first two buildings were ok but then when you put that mud stuff it looked a little scary.:) This Hirst Arts is really cool and you used it well. I've seen their website before but never tried it because of the scale issue but you've solved that problem.
 
Mold Sizes

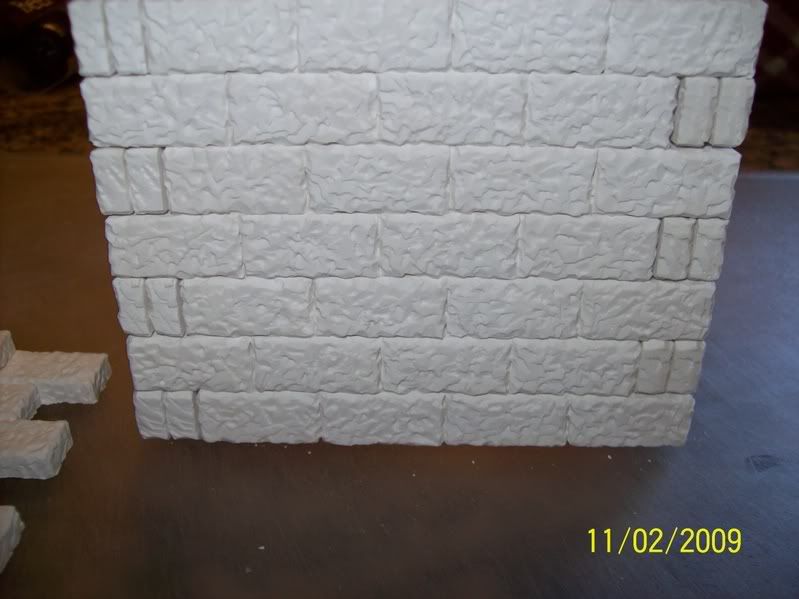
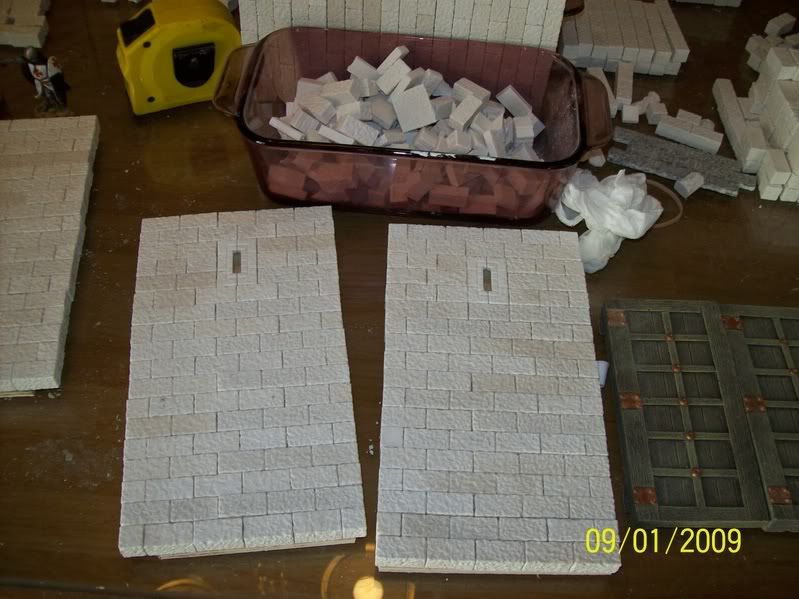
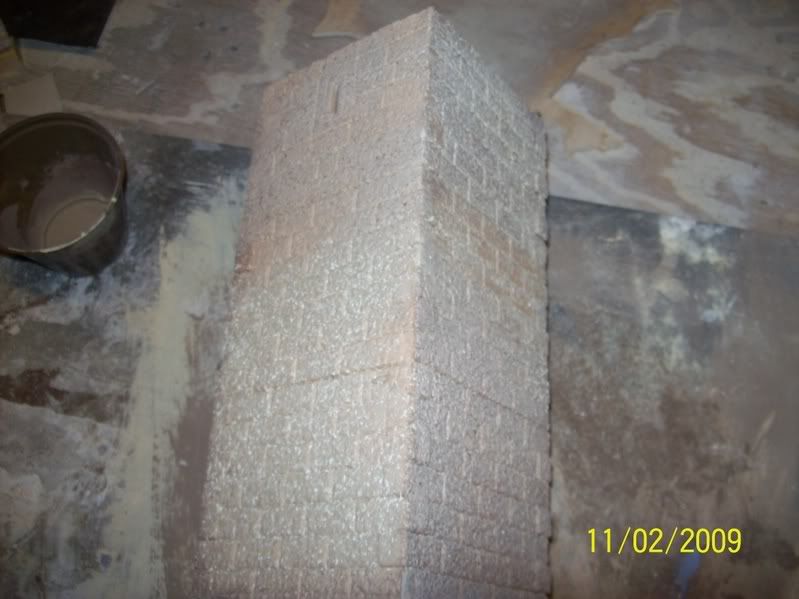
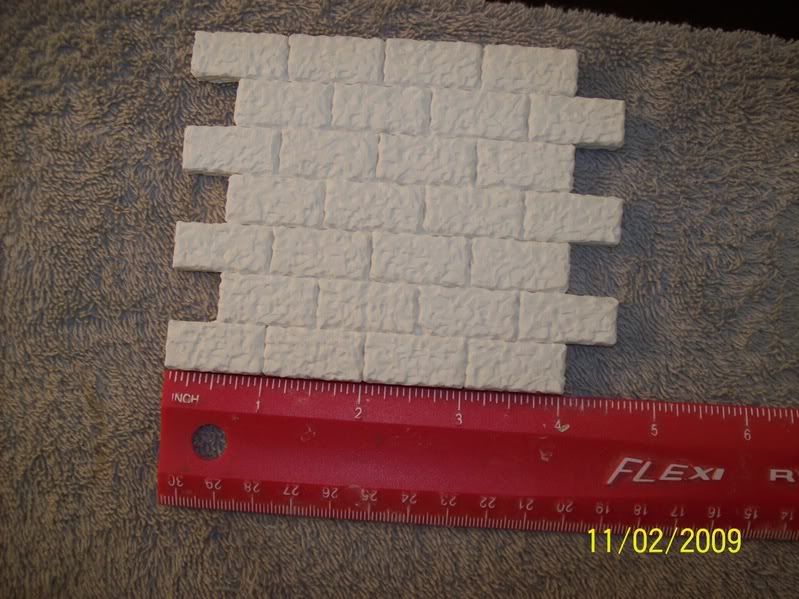
Scott, the basic block, mold #40, from Hirst arts is $34.

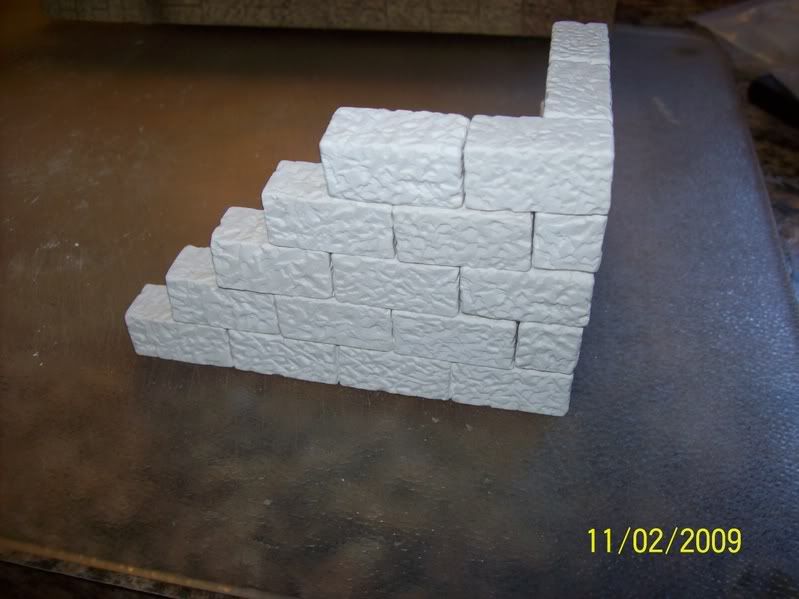
I have a picture of it here. It’s the blue mold. It produces 20 bricks per cast.

100_0547.jpg


100_0549.jpg


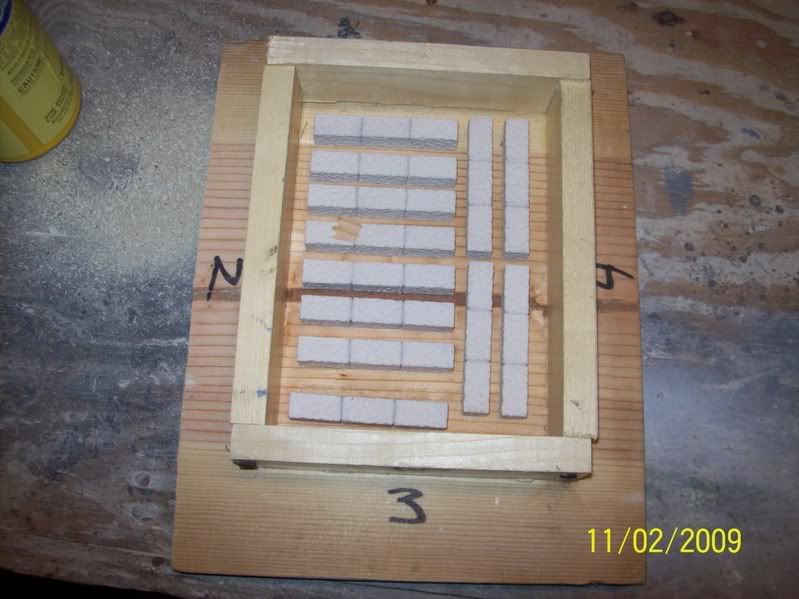
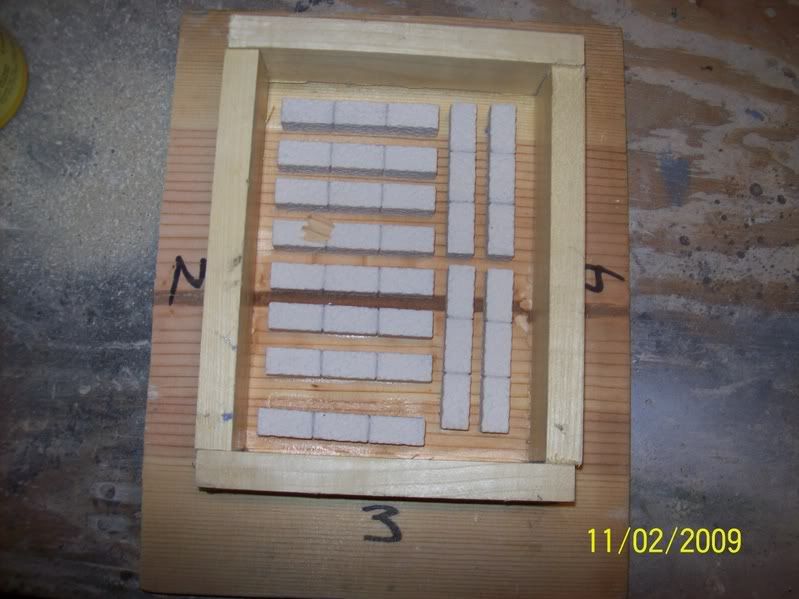
It produces 5-½” long blocks
2-¾” long blocks
10-1” long blocks
1-2” long block
2-3” long blocks

All the blocks are ½” wide and ½“ deep.

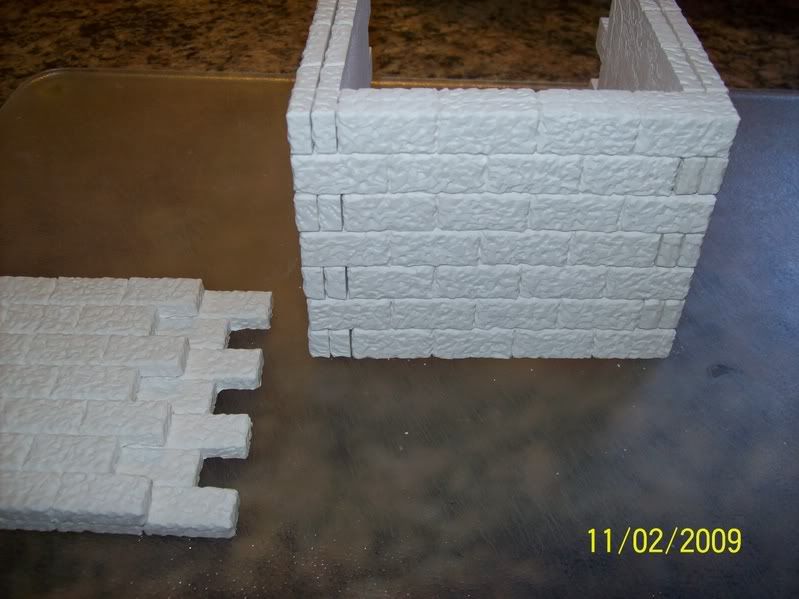
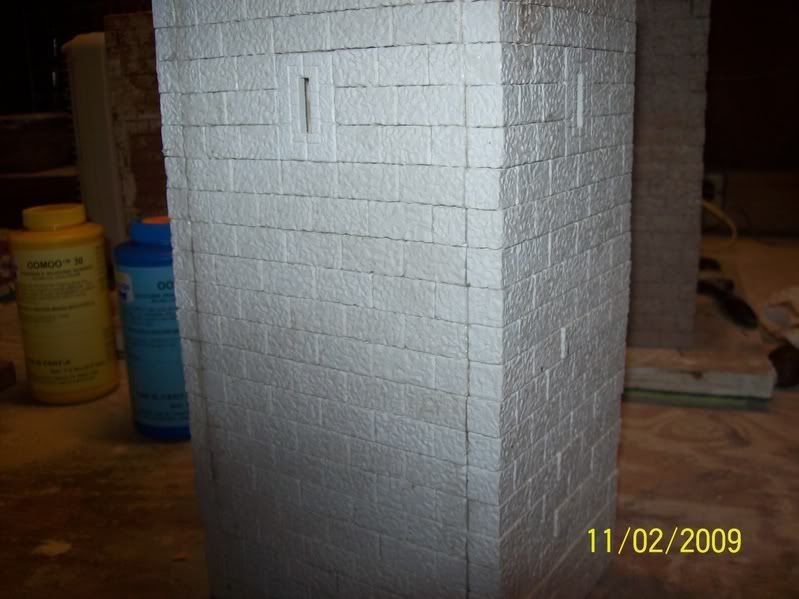
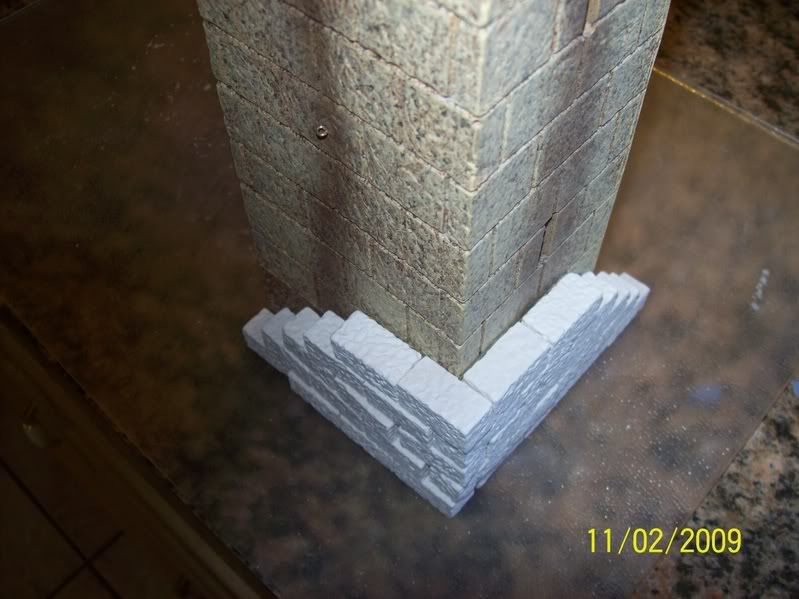
One of my 4 towers (the tallest) is 19”’s tall and 7”s deep x 7”’s wide.

In comparison the,

JG Ancient City Gates towers are 10 ½”s tall and 3 ½”s deep x 3”s wide.

My towers dwarf the JG towers. They are over twice as big.

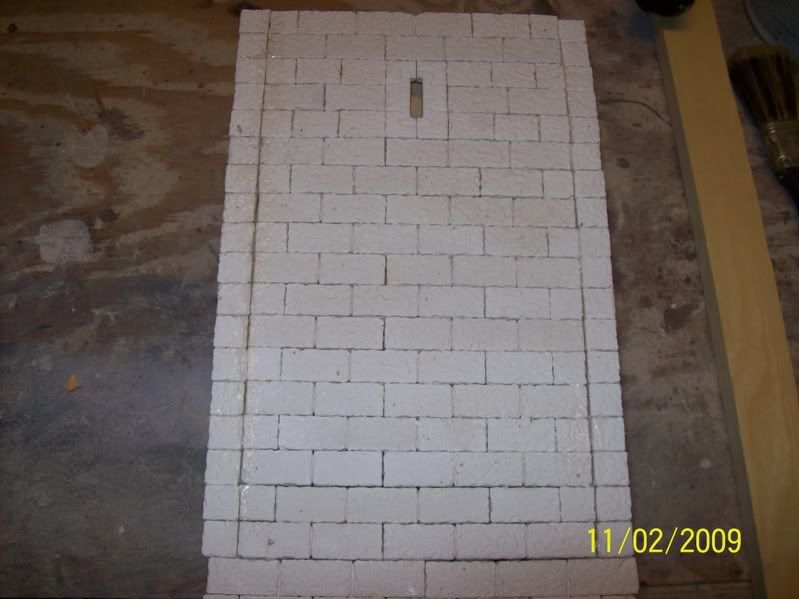
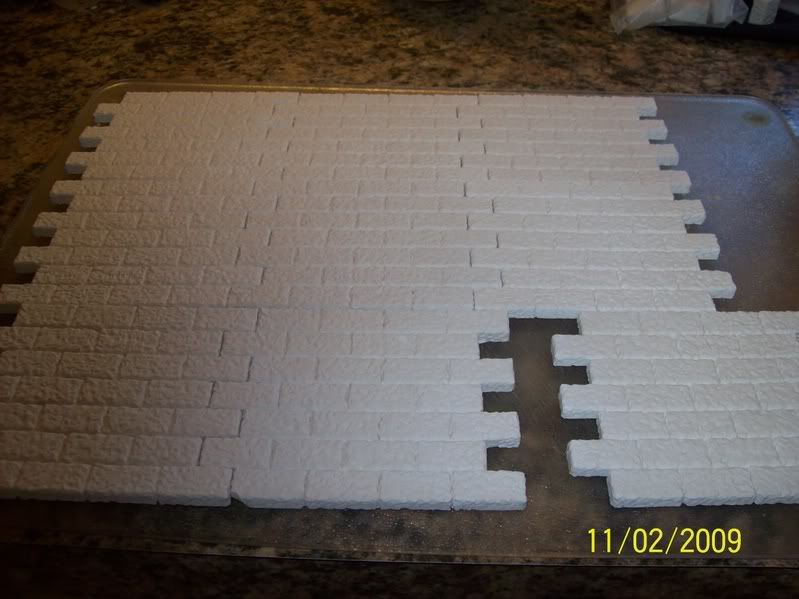
To build my tallest tower, takes 1,064-1” blocks (if my math is right), so you can see, I was molding like a mad man.

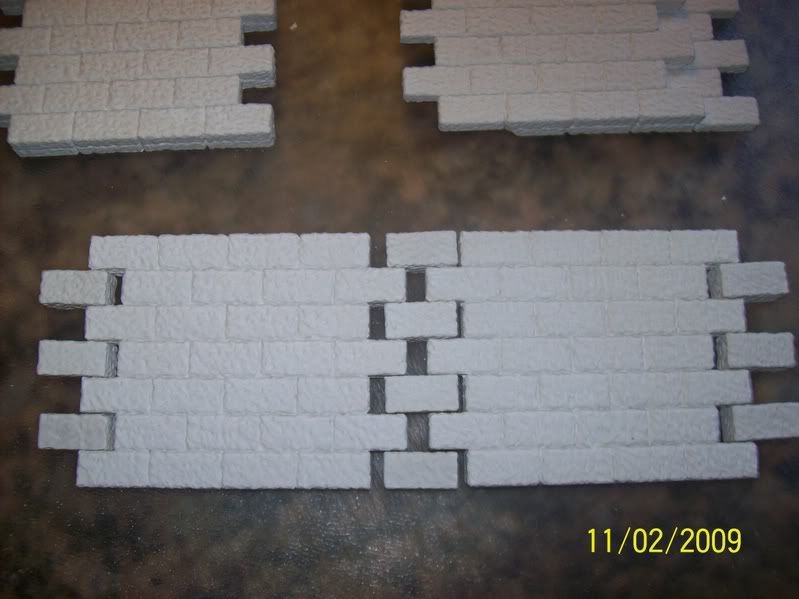
Each tower layer has 7-1” blocks wide and 7-1” blocks deep = 28 blocks per square.

Multiply that by 38 square rows high and you get 1,064 blocks to make that tower (if my math is right).

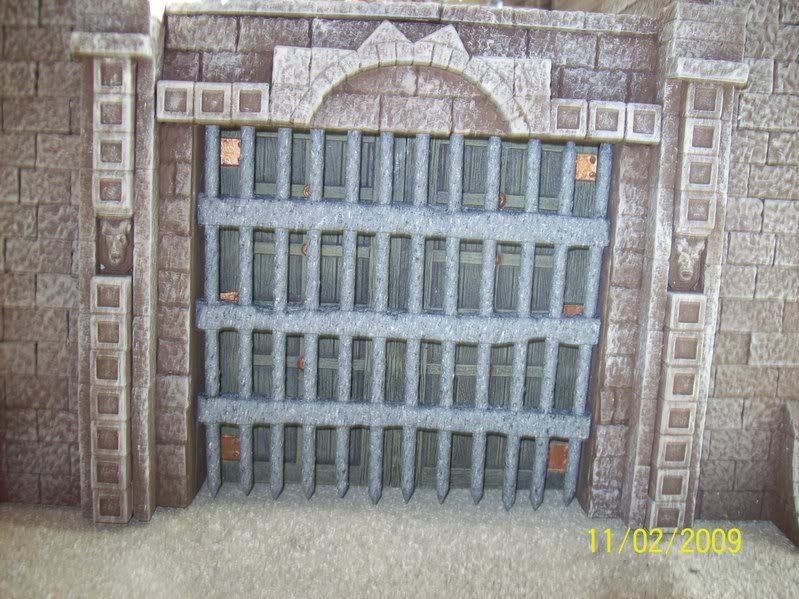
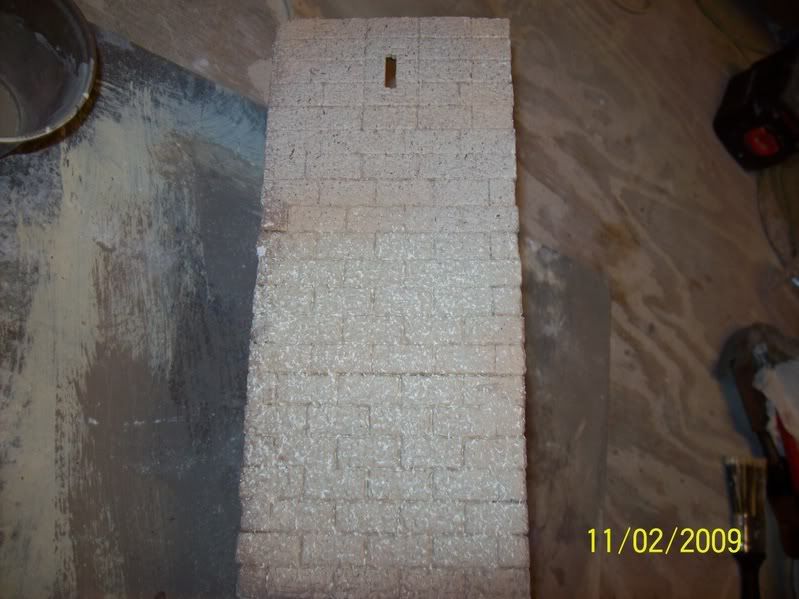
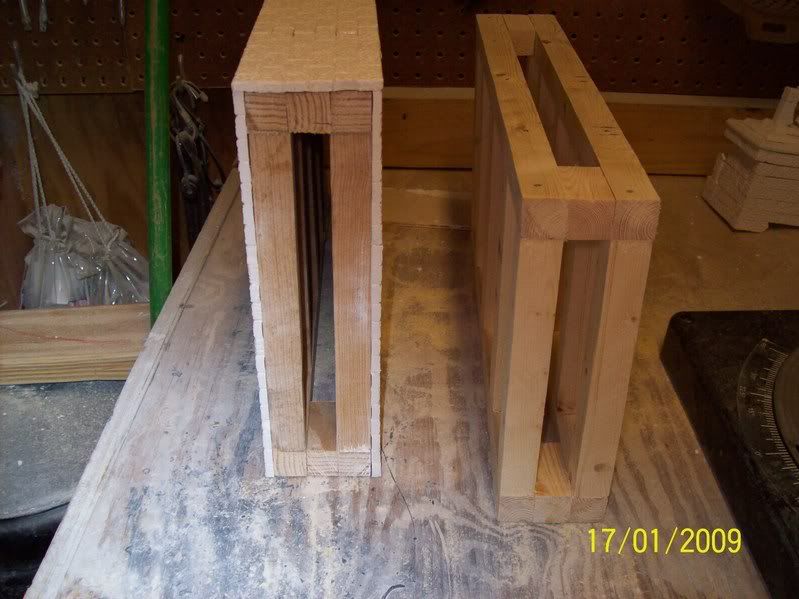
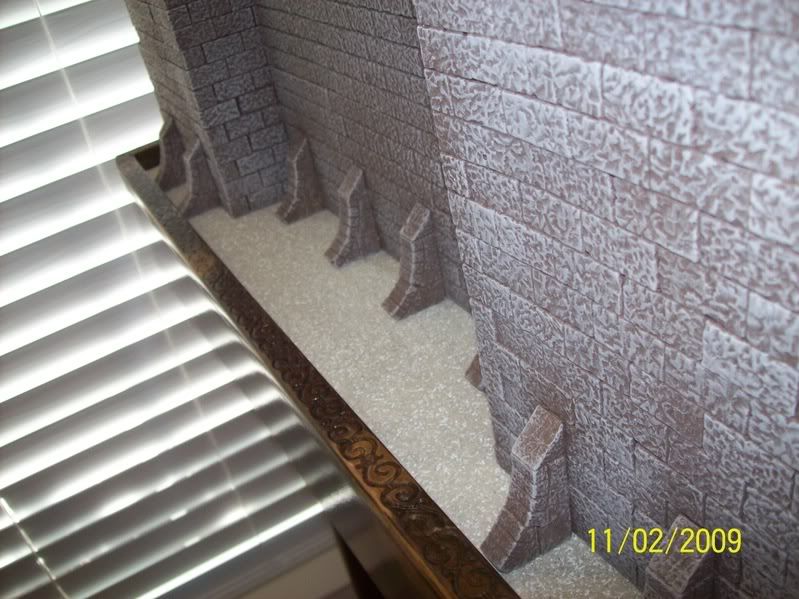
Excluding a few blocks for arrow slits, crenels (the open spaces between the merlons of a wall or tower battlement), merlons (the solid part of the wall or tower battlement), windows, doors etc…

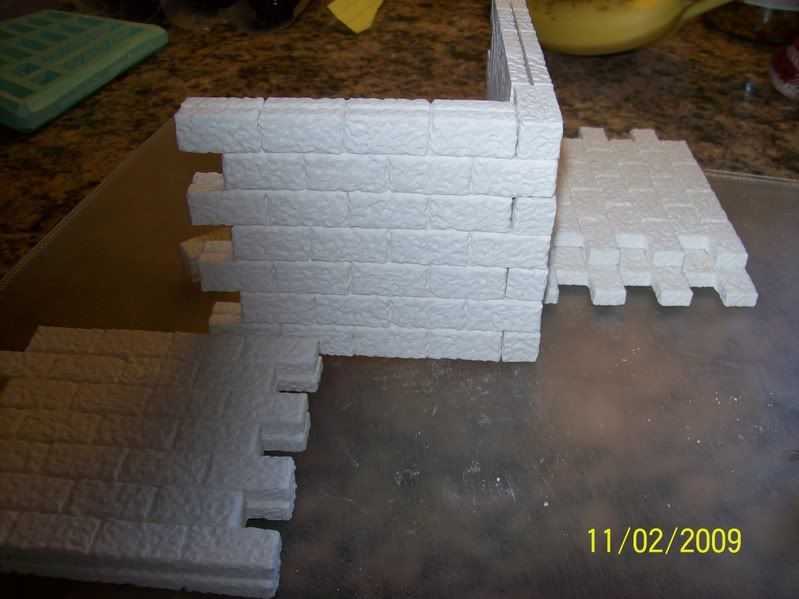
It seems insurmountable to make 1,064 blocks per tower when I add it up, but the blocks seem to multiply geometrically and are really fun to make.

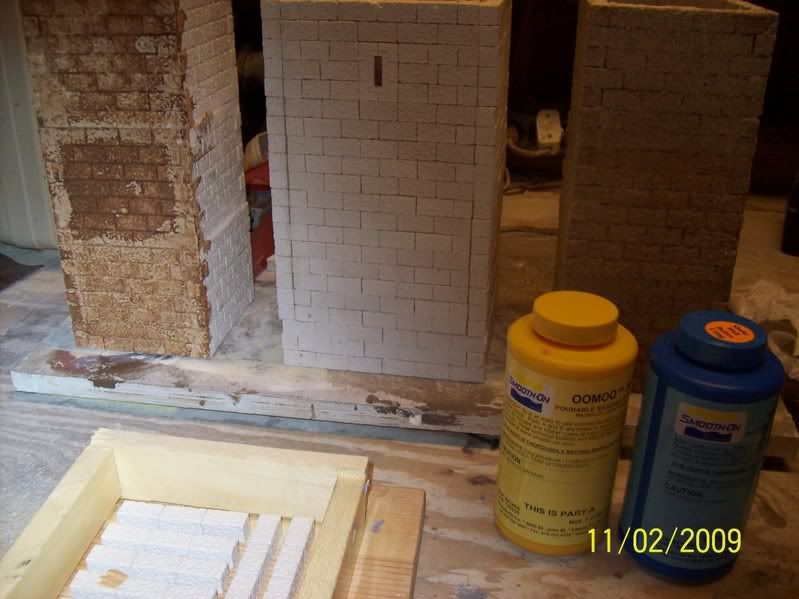
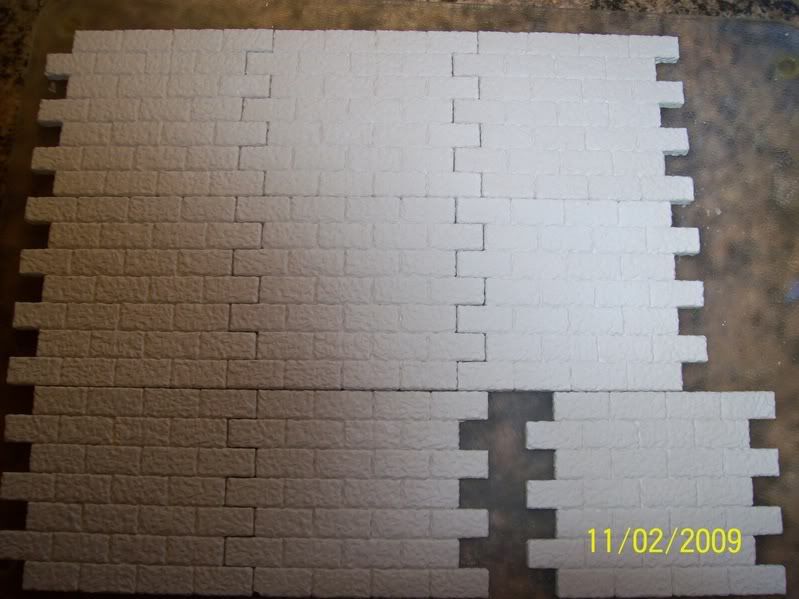
I made my own rubber silicone mold that produces 12-3” bricks to speed up the process (the one in purple). I began mass producing them. It was simple and works great. It really helped produce bricks like an assembly line.

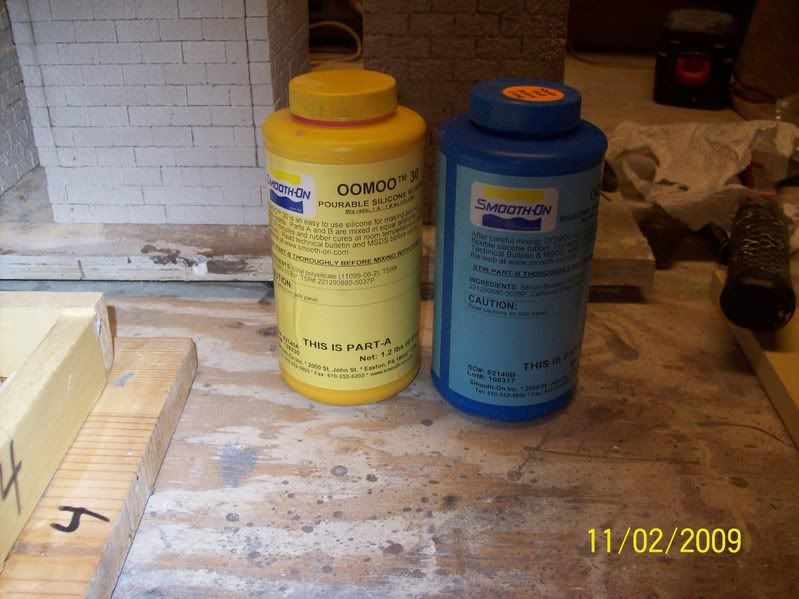
My purple mold was made with a product called OOMOO 25 silicone rubber. It was very easy to make and I’ll show you later how to do it. You can cast almost anything you want in Hydrostone TB from the rubber molds you make. You can make molds of almost anything you want.
 
Thanks for the info Mike. These look great and sure seems like fun and adds another dimension to the hobby.
 
"Yonda lies da castle of ma fadder" Tony Curtis line in The Black Shield of Falworth.

Mike
That is some fortress you've built there brick by brick-very impressive and a super how-to and how- not to thread. But have to agree with the guys the others you built didn't look that bad to me.
Hell of a lot better than my attempt at Alamo walls:D:D

Very well done!

Reb
 
OOMOO 25 or OOMOO 30 SILICONE RUBBER

OOMOO 25-30 are easy to use silicone rubber compounds that feature a convenient 1 to 1 ratio to mix. You simply measure the same amount from each bottle into a mixing glass and pour over the piece you want to cast. The piece you want to cast must be set in a framed area to hold the rubber until it hardens.

It can be bought online, I got mine from shipped Dallas, Texas.

I previously said I had used OOMOO 25, my bad, I used OOMOO 30. The only difference is that the OOMOO 25 hardens up in 75 minutes as opposed to 6 hours for OOMOO 30. It also allows you more to “pot time” (will not harden in mixing glass prior to pouring), so it was recommended to me by their technical team because I was a novice.

100_0554.jpg


100_0553.jpg


Once my pieces were glued in the casting frame (which was made of smooth sanded wood, so the rubber wouldn’t pick up the impression of the wood), I poured my 1 to 1 ratio mix of both bottles and left it alone until the next morning.

The wood casting frame that holds the liquid rubber must be glued to the base board and leak proof. I added screws in each corner along with white glue to ensure an airtight seal.

100_0551.jpg


100_0550.jpg


This is a simple process to do, easy to work with and produces almost any original in the world that you might want to replicate in a very hard brick Hydrostone, plaster or other resins.

The cost of both bottles was $22.26 plus shipping.

If you ever want to replicate a piece, this is the way to go.

I would be more than happy to walk anyone through it if you decide to try it.

The 3 towers in the background were failures that I learned from and eventually used for test painting samples. I’ll explain why they were failures in my next post.
 
"Yonda lies da castle of ma fadder" Tony Curtis line in The Black Shield of Falworth.

Mike
That is some fortress you've built there brick by brick-very impressive and a super how-to and how- not to thread. But have to agree with the guys the others you built didn't look that bad to me.
Hell of a lot better than my attempt at Alamo walls:D:D

Very well done!

Reb

Reb,

Your Alamo is awesome.

I would pay admission to see that up close.

It's always been one of my favorites on here.

Michael
 
Why my first attempts at Hirst were failures.

Learn by my mistakes.

In the previous photos of OMMOO 25-30 mold you see 3 towers that I scrapped.

The reason I didn’t use these towers was because my first attempt was done incorrectly in my opinion. I’m telling you this so hopefully you won’t make the same mistakes that I did if you decide to use building blocks.

I discovered 3 errors I made on my first attempts.

First, I built the towers in wall (mold 200) sheet sections instead of individual bricks.

The problem with this is that the corneredges of the towers don’t look realistic. Look at the photos. You can see thin vertical edges exposed on the corner left by two walls glued face to face, instead on one single solid brick.

100_0557.jpg


100_0556.jpg


I double stacked the wall sections, which looked fine from the front view , but from a corner view, when the corners wove and interlocked, you could see the back wall section was two ½’s instead of one solid brick.

I tried to mend the gap with Hydrostone, dabbing it in like caulk, but was never happy with it, so I scrapped it.

This can be remedied easily allowing you to use wall sections on corner butts if you add single blocks into the weave at the end.

Look at these photos. Notice the seam is now gone.

100_0559.jpg


100_0560.jpg


100_0561.jpg

By adding single solid bricks at the end of the wall section, it alleviates the thin vertical gap made by the two wall sections glued together. It gives a much more realistic look.

The bricks are still staggered on top of each other but the vertical seam is gone.

You can cetainly use wall sections on your towers instead of individual bricks, you just need to make this adjustment on the corners.

I scrapped this one.
 
My second tower failure,


More failures.

Secondly, I built tower wall sections individually and glued them together. I didn’t realize how bad it would look until I finished the tower.

I fortified the walls with a thin wood backboard and let all 4 walls dry.

When I glued them together, it left a vertical gap on the corners, with no staggered bricks on the edges.

000_0002-3.jpg


100_0562.jpg


100_0563.jpg


Very unrealistic looking, no real castle tower would have been built like this. It bothered me, so I scrapped it too.

I may look like an idiot to you, when every post ends in, “I scrapped it”, but hopefully you will learn from my mistakes if you ever try these products.

To solve this problem, I realized every corner would have to have staggered brick overlapping into the next corner wall.

Look at these photos, this is what a corner should look like. Each brick is staggered on top of each other. This is just a loose unglued example, the bricks can be glued together tighter to conceal any gaps and with a base coat of paint, no gaps between bricks should show, ideally.

100_0566.jpg


100_0565.jpg


100_0566-1.jpg


So, to sum up this tower, I scrapped it.
 
Mike I have a few points to make.

1st Great thread! informative and helpful.
2nd Your structures that you built first would have benefited from a paint product called fleckstone. They were well built items I am sorry they were trashed.
3rd I like how you have continued to perservere. I saw thr JG miniatures sections and thought they were great until I saw the price. 5 pieces to make a wall with a gate would be over $600.00!
4th I have been wanting to do something like this for the knights I have rebuilt and repainted. When I get ready I would like to talk to you about this some more.
 
Mike you are very patient person.

Excellent job BTW.

Rod.
 
Mike,

Thanks so much for sharing what you're learning from trial and error with the rest of us. Very interesting. I give you credit for your patience, persistance and ingenuity. I'm sure we will all be following your progress and waiting to see your final result. I'm, sure it will be worth waiting for.

George
 
Even more failures.

Thirdly, I learned that you needed a really straight 90 degree edge on your corners.

The edges should be “plum” just like the edge of a house. They should stand tall and very straight. The higher you go, the more difficult it is to keep it straight. The more you get off course, the more it really shows up on a 60mm scale.

I corrected this by fabricating a tall 90 degree wooden structure to align the corners with, both inside and out. I don’t think you need to really build anything to line you up, just find something around the house that is very square and “plum”.

100_0567.jpg


100_0568.jpg


Pressing the bricks against the straight corners of the wooden structure gave me true straight lines.

I’m using a JG Miniature tower to illustrate how to align the inside of the corners.

100_0572.jpg


One of my towers is 19”’s tall, so it was imperative to end up with a Leaning Tower of Pisa.

Building the corners by eyeball with nothing to line up with is going to give you a crooked tower, or at least it did for me. It took me awhile, but I finally figured it out.

All this sounds pretty simple and I’m showing you just so you don’t make the same mistakes as me.

These bricks are fun to make, fun to play with and your imagination will let you create anything you want. They are not only for castles, you can build all types of structures out of them.
 
Thank you for showing us with photos and the "how To" of your project. You are doing nice work and very informative in your descriptions of your progress. Leadmen
 
This is great info, these products and techniques have great possibilites. Perhaps norman house for d-day among others. Keep pluggin along mike thanks
 
Mike I have a few points to make.

1st Great thread! informative and helpful.
2nd Your structures that you built first would have benefited from a paint product called fleckstone. They were well built items I am sorry they were trashed.
3rd I like how you have continued to perservere. I saw thr JG miniatures sections and thought they were great until I saw the price. 5 pieces to make a wall with a gate would be over $600.00!
4th I have been wanting to do something like this for the knights I have rebuilt and repainted. When I get ready I would like to talk to you about this some more.

KV, thanks a lot, I would say great minds think alike, but I would be pushing it on my end.

Not familiar with fleckstone, but......

I tried a product called American Accent Stone (7990 bleached stone), by Rustoleum and a comporable product by Krylon on my trash towers. Here's a photo of both samples on the trash tower (top half one, bottom half the other).

It's a great procuct, $7-$9 a can, very expensive and takes forever to dry. I love this "stone effect", but it hid the mortar in the walls too much for me.

Wal-Mart has a brand for about $7 a can.

And you're right about the JG's, great product but soooooo expensive. It would have cost well over a $1,000 to do one my size. I had bought the Ancient Gate section for $125 and have taken the doors off to use on my castle. I also built a portcullis out of Sculpey Clay and kabob sticks the door. I did use the "stone effects" paint on it.

100_0576.jpg


100_0462-1.jpg


100_0447-1.jpg


Look at the photos, it seemed to diminish the details.

100_0574.jpg


100_0575.jpg
 
Mike,
These walls are amazing:D:D:D:D!!!!! I need to make one of these for Normandy.....

Great Job!!!!
Vick:D:D:D
 
Mike, thought your first two castles looked pretty good, then saw the samples of your third and wow!!! Unbelievable job. Looks like the real thing!! You are a very patient, meticulous and talented man!!:cool::cool:
 
Making Wall Sections

This was all trial and error with me.

Everything Hirst Arts makes is for 25-28mm. All his plans, which are fantastically laid out on his website didn’t work for me because they would have been too small.

Everything had to be increased in size for 60mm.

I got lucky here, thank God no errors on this part, his parts were perfect for my castle..

I built the wall sections just like I would build a house. Earlier in my post when I said my castle was so sturdy that I could stand on it. I wasn’t kidding. I actually have stood on it.

I built a frame out of 1 x 2’s, 9 ½”s tall.

I even put studs in it every couple of inches, so I had something solid and something to glue the wall sections too.

000_0001-3.jpg


000_0002-4.jpg


000_0003-1.jpg


000_0004-2.jpg


The height of the wall worked out perfect when allowing for my siege tower ramp to match up with the merlons and crenels so the attacking knights would be at the right height to enter the catwalk. Hirst’s mold 200 (wall section) comes out at 3 ½”s tall. So stacked 3 high, it was a perfect 9 ½“s.

It made it 3 ½“s wide for the catwalk.

I used wall section for the catwalks too, a perfect 3 ½”s.

The walls are designed in 3 ½” height sections, but they can be scored with an exacto knife and easily broken off to make smaller. They fit together so well, after painting the seams are invisible.

100_0577.jpg


100_0578.jpg


100_0579.jpg


I put buttress’s on all the walls and all the towers, just leftover pieces that I tought would make it more ornate.

100_0580.jpg
 
All these compliments, I got to tell you, I'm almost blushing.

You guys are so supportive and so encouraging.

I promise, I'll have this up in two or three days at most.

Thank you all.

Michael :)
 
Mike,

This is a superb thread, incredibly informative. I appreciate the time you're taking posting this. The castle and your other structures look the dog's danglies. Got me seriously thinking about getting some of this stuff now.

Simon
 

Users who are viewing this thread

Back
Top