Hirst Arts Castle and diorama done in 60mm. (1 Viewer)

Yes Debrito,

There is a 6" thin metal rod, that protrudes from the red handle, that gets very hot. It is electric and plugs into any 110. It will cut styroprene or foam. While you don't really need one, a rasp or a knife will do, it cuts cleanly and doesn't leave all the styrofoam particles all over the floor. When you rasp or cut styrofoam, all these clingy particles shed off all over the place. They are impossible to clean up. For $8, buy one, it's really handy, neat and worth it.

Thanks for the info. Post more photos please.

Rod.
 
49 cent Ballista

I know everybody is waiting to see how the 25-28mm Hirst Arts bricks worked out in 60mm scale castle.

My table (Celluclay) is almost dry and I will finish texturing it tonight and hopefully show it the next day

In the meantime, I made a ballista I can show you.

100_0614.jpg

100_0616.jpg

100_0620.jpg


It's nowhere as near as nice as Conte's "Sting of the Valkrie" ($65), but it only cost me a mere 49 cents for a strip of wood from the hobby store and a couple of hours work.

I had the glue, paint, string, ka-bob sticks, nail and Sculpey already.

The ka-bob sticks have a piece of Sculpey on the tip, baked at 275 degrees for 15 minutes, the same as the portcullis on the front gate.

100_0456-1.jpg

100_0455-1.jpg


I’m not that proud of it, or the battering ram I made.

100_0617.jpg


100_0618.jpg


I may not even use them, but they won’t go on the scrap pile.

I stole the idea of one I saw on a website for 25-28mm.

I even positioned the nail handle on the crank of the ballista so it would line up with my K&C catapult firing figure.

They aren’t the greatest pieces, I mostly just wanted to see if I could do them.

Please no comments like, “They look like they cost 49 cents.”
 
Is there no end to your talents Mike? Don't put yourself down about the ballista or the ram. I wouldn't be surprised if you get pm's from forum members asking you to make one for them. The don't look like they cost you 49cents to make or even $4.90 for that matter. This thread is just great and we haven't even really seen the castle yet!!!!!!!!!!
 
Leftover Bricks made free buildings.

I made some simple buildings out of leftover bricks. I will use them as village or farm buildings somewhere down the line.

100_0623.jpg

100_0624.jpg

100_0625.jpg

100_0626.jpg


I imagine they could be used in any diorama as a rural structure. They would fit into almost any era medieval to WWII or even current date.

All these pieces were made from the 3 molds I purchased.

Any design, any shape, any size….the bricks will follow your imagination into anything you want to create.

I put stone floors in mine, different styles in each one, painted in the same style as the castle.

The window shutters were made from Sculpey clay. They were scribed and painted after they came out of the oven.

100_0459-2.jpg


The roof was made from a cereal box, aluminum foil, white glue and a paint wash. It is uncharacteristically strong because I reinforced it with a strip of wood.

100_0522.jpg


After putting the flat cereal box roof together in place on the building top, I took another different cereal box top and put a thick layer of glue on top of it.

I placed a sheet of aluminum foil onto the glue and while it was still wet, I took a comb and made grooves in it.

After drying overnight, I cut the shingles out of the dried cereal box with the aluminum foil attached to it and glued the to the flat roof. I then put a light wash on it and sealed it with a matte finish spray.

One roof is still unfinished, I still need more shutters for the windows, and doors for the portals, but I'll get on that after I finish my diorama.

If you have time, watch the videos and read the "Tips and Tricks" section on bruce@hirstarts.com website. These are the best tutorials I have ever seen. They will explain the roof procedure better than I did along with a hundred other tips for modeling.

100_0523.jpg

100_0523.jpg


Nothing spectacular, just showing you all the applications available with the bricks
 
Last edited:
Wow! Now that's really outstanding, Mike! Great scratchbuilding!

That gets two Prosts, oans, zwoa, g'suffa!
Brad
 
This continues to be a great thread Michael, one which I have enjoyed thoroughly each day since you started it. Great work.

Mike
 
The roof looks great. I have been browsing through the tips section ever since you mentioned the site. There is some really great stuff in there that can be used even if you are not using their moulds.

Thanks again !!
 
The roof looks great. I have been browsing through the tips section ever since you mentioned the site. There is some really great stuff in there that can be used even if you are not using their moulds.

Thanks again !!

The more you look, the more you will find.

He has painting techniques, texturing tips everything.

He shows you how to make everything from doors to graveyards, rock molding to palm trees, gates to rivers.

If you ever want to start casting molds, watch his videos. He had dozens of videos on there that take you step by step.

Also check out the rubber/silicone rubber molding, you can reproduce anything.

It's a must read as far as I'm concerned.
 
I was giving some thought as to why your mixture of CelluCaly was taking so long to dry compared to my experience using it. It just dawned on me - its the incredible humidity of Galveston Island. I can remember vsiting my son when he was stationed there. He could not afford air conditoning in his apartment - anything made from textiles felt damp (carpeting, chair fabric, etc). Anyway, when it dries you will really like it.

Mike
 
You might be right Mike.

I do have an air condtioned house, but I have not turned it on in a week at least.

I live about 2 blocks from the Gulf of Mexico beach.

In fact I had the windows open today.

I believe it's dry now, it just had some of those dark grey spots where it was holding water.

I only have a small corner left to paint and I'm finished. I think I will paint it now before I go to bed.
 
I've used Celluclay, but made some mistakes with it. One was not adding white glue, and the other was to force-dry it in the oven. I only had it on warm, then turned it off and put the piece in, but the edges I had made were thin, and they retracted a little. Lesson learned!

I saw a tip for preparing Celluclay over on FineScale's forum, from Hans von Hammer. He bought an old blender at a garage sale, to use for mixing his Celluclay. He noted that he got a much more consistent mix using the blender, and by buying a second-hand one specifically for the task, he preserved his domestic bliss by not using his wife's good blender in the kitchen :) I'm thinking of trying that, too, for mixing.

Can't wait to see your final product, Mike, it's shaping up to a beautiful display!

Prost!
Brad
 
Devastated last night.

I have been waiting for a corner of my diorama to dry so I could finish painting the terrain.

I had applied a coat of Celluclay, water and white glue on top of the styroprene to use as terrain. I just had a small corner to finish and it seemed to have been working fine.

It has been drying for several days.

In thread #55 (see photos), I have a small raised area, in the corner of the table, with some rocks surrounding it. I had used Celluclay in that spot, just like on the rest of my table.

It had trouble drying, I assumed, because it was much thicker there between the rocks than on the flat terrain.

Lat night, after it had all turned a dull grey (indicating it had dried completely), I went to paint it and noticed it had warped up and become unglued from the styroprene.

It’s like it had shrunk and pulled away from the styroprene.

The sheet of Celluclay just peeled up and pulled away from the styroprene.

I wish I had taken a picture to show you, but in my angry state, I just ripped out the rocks and cut away the Celluclay floor before documenting it.

I mixed it the same as all the rest, I think, but for some reason when it dried it constricted or shrunk.

The interior corner of Celluclay shrunk so bad that it warped upwards off the styroprene in a flat dried sheet of Celluclay.

I was devastated.

Disgusted, I cut all the Celluclay out from that corner area and removed the rocks.

I’m going to go ahead and finish that area, I will not use Celluclay on that spot and will just texture the terrain, hopefully it will match, but I’m really distraught about it.

Live and learn I guess, live and learn.
 
Hey Brad,

After I posted this, I just saw your post on having trouble with the Celluclay.

You jinxed me man.

Nah, just kidding.

I don't know what happened here, I'm so bummed out.

I'm going to call Mistell and ask him about it.
 
Hey Brad,

After I posted this, I just saw your post on having trouble with the Celluclay.

You jinxed me man.

Nah, just kidding.

I don't know what happened here, I'm so bummed out.

I'm going to call Mistell and ask him about it.

Sorry, Mike! Though, it is Friday the 13th :D

Seriously, that's the same thing that happened to me, it pulled up from the base. I have to experiment more with the mix, and with mixing it. I didn't use any white glue, and I think that if you can mix it more thoroughly, you can cut back on the moisture content. I want to try the blender idea for mixing.
 
Thoroughly enjoyed our telephone conversation this afternoon. Keep the pics of your project coming our way. We all enjoy seeing them.

Mike
 
Brad,

I just spoke to Mike (Mestell), he uses a lot of Celluclay, and he thinks the reason I had some trouble with mine is because I used it on styroprene.

He uses green floral styrfoam, with is an open porous material as opposed to a flat non penetrable material like styroprene.

In other words the Celluclay has nothing to seep into and adhere.

I'm going to re-do my terrain very soon, cause I hate mine, except for the river, but tonight I'm going to live with it and take some castle photos to post.

Hope that helps,

Michael
 
Thoroughly enjoyed our telephone conversation this afternoon. Keep the pics of your project coming our way. We all enjoy seeing them.

Mike

Mike,

It was my pleasure, we went from Andersonville to Elmira and from The History Channel to St. Petersburg, in about an hour.

I thought I had the bug, but you're as hooked as me, lol.

As you say, "Never be too old to enjoy your youth".

Thanks for your tutelage,

Anytime,

Michael
 
Inside the Castle Walls-A 60mm Castle done in Hirstart bricks.

Okay,

I’m just going to start bombing you with pictures of the inside of the castle walls.

That will give me some time to let my repaired terrain dry.

They are in no particular order. There is no story to be told here. This is not a diodrama. Forgive me if i repeat some photos.

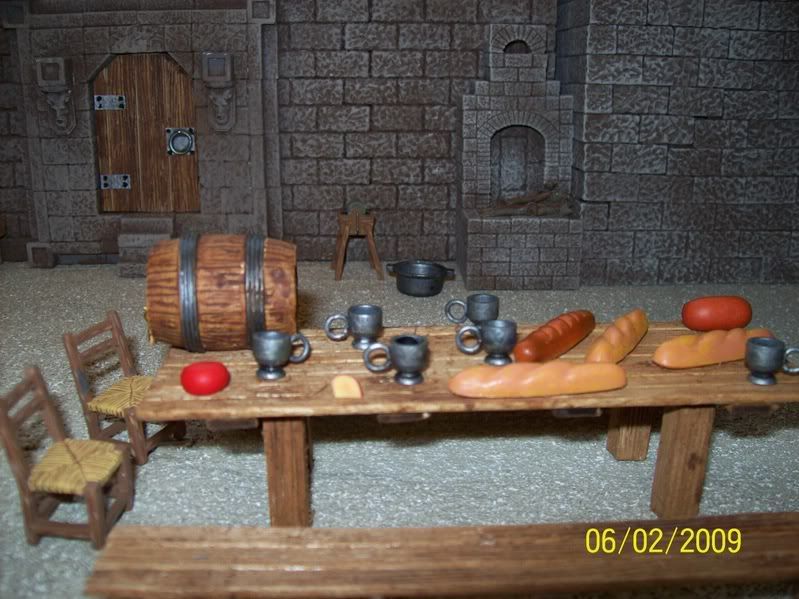
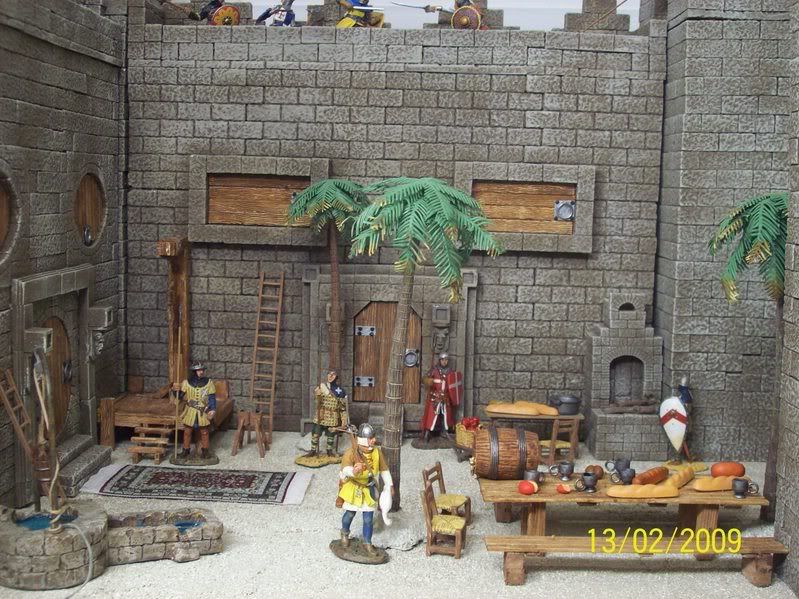
In my head, this is just a trip back to my youth. A massive strong well manned castle with an gigantic battle. Good guys against bad guys.

Photobucket does get a little overwhelming at times and is kind of slow at downloading too sometimes, so bare with me.

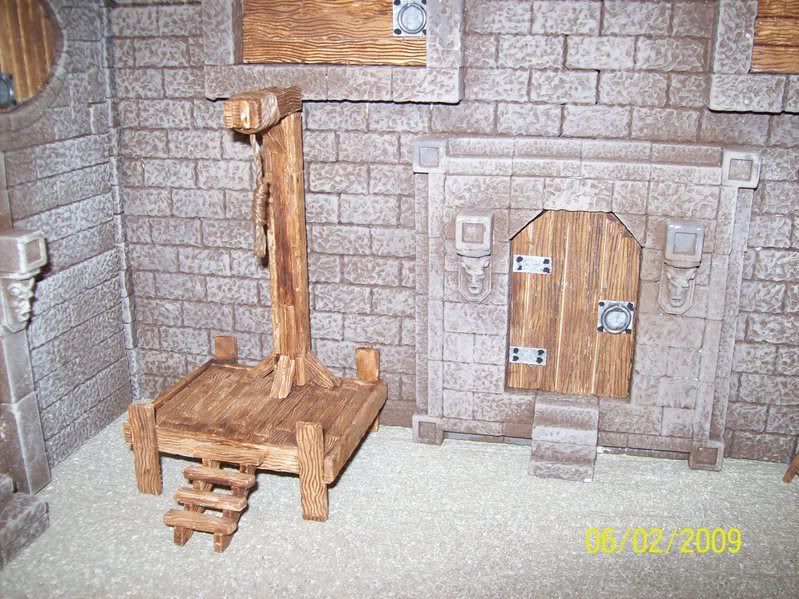
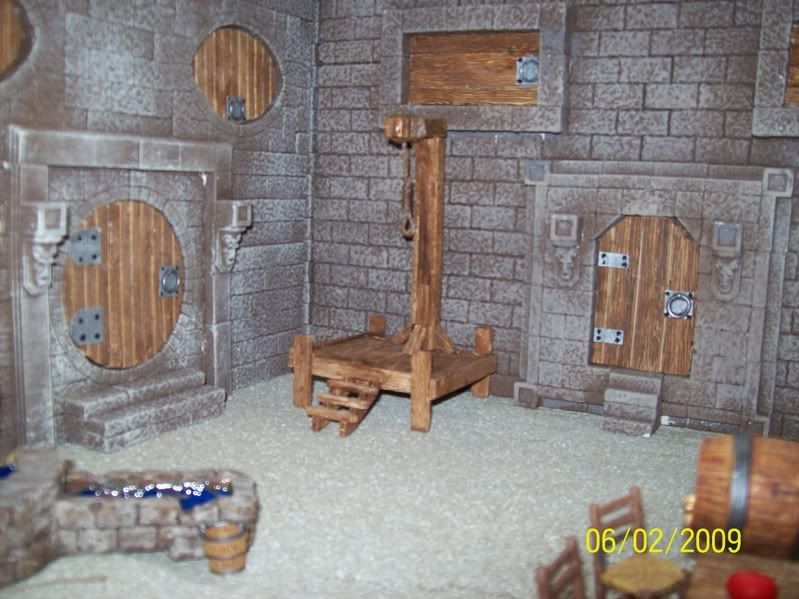
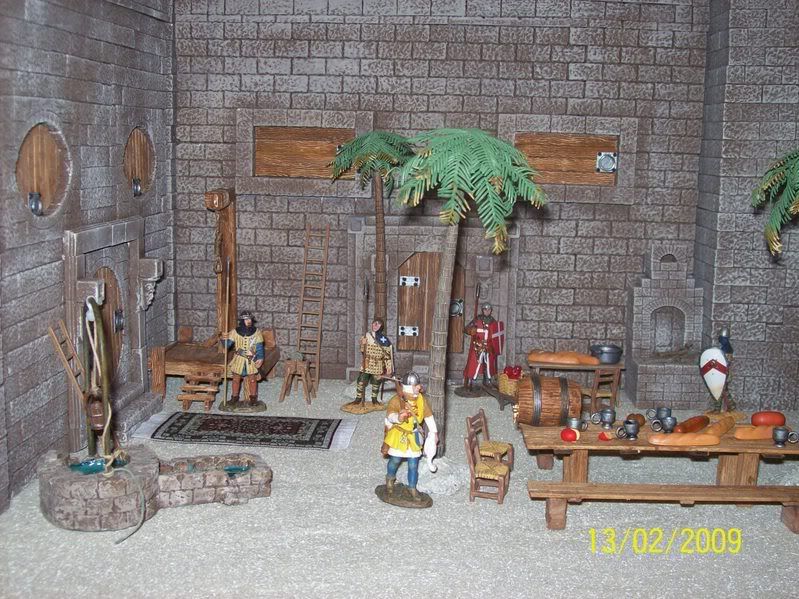
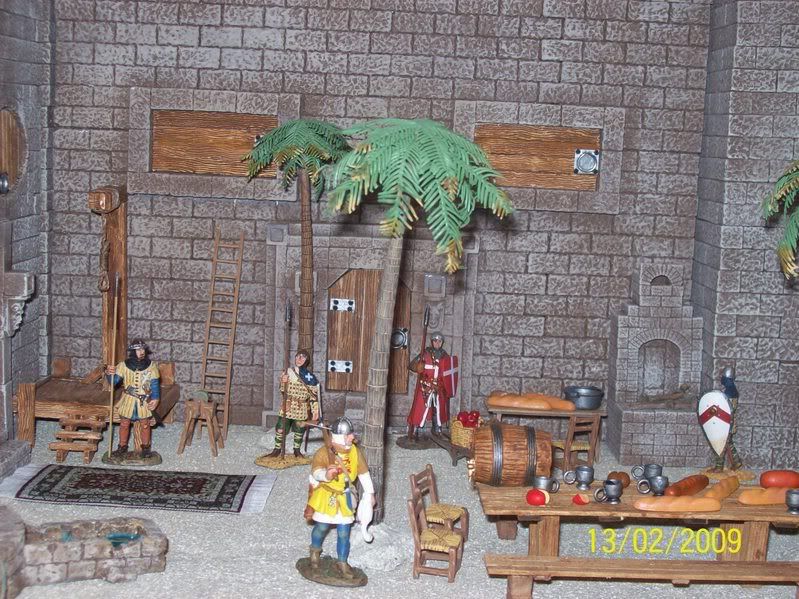
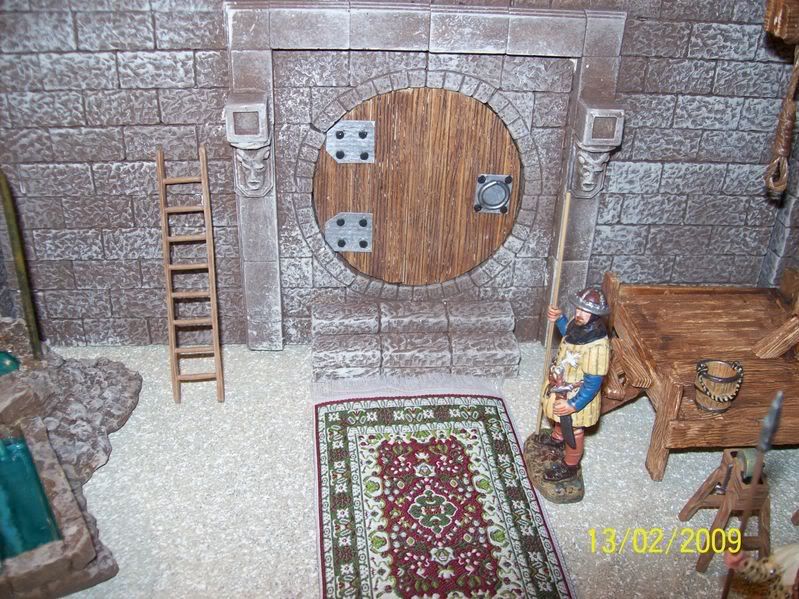
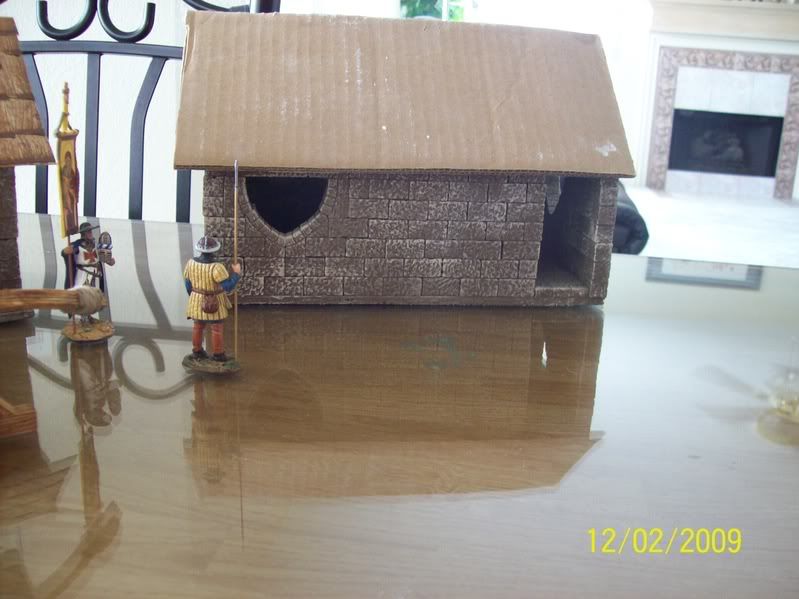
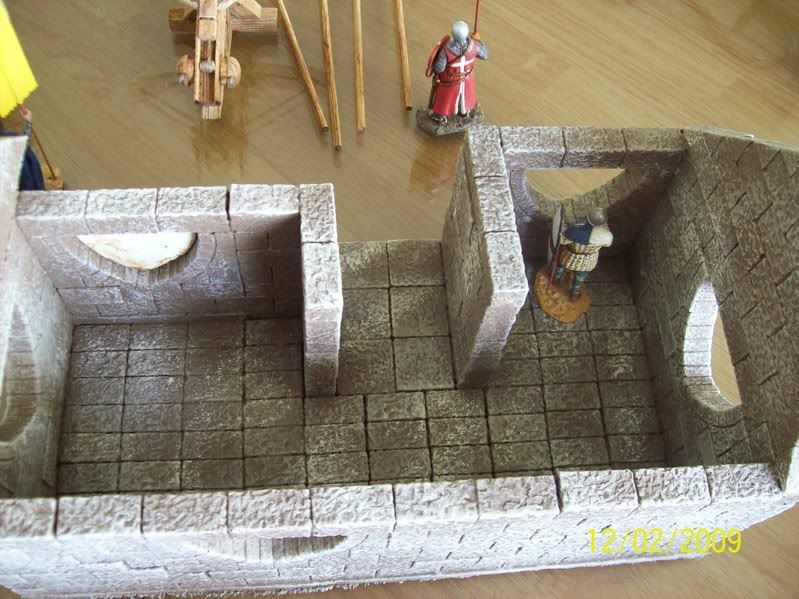
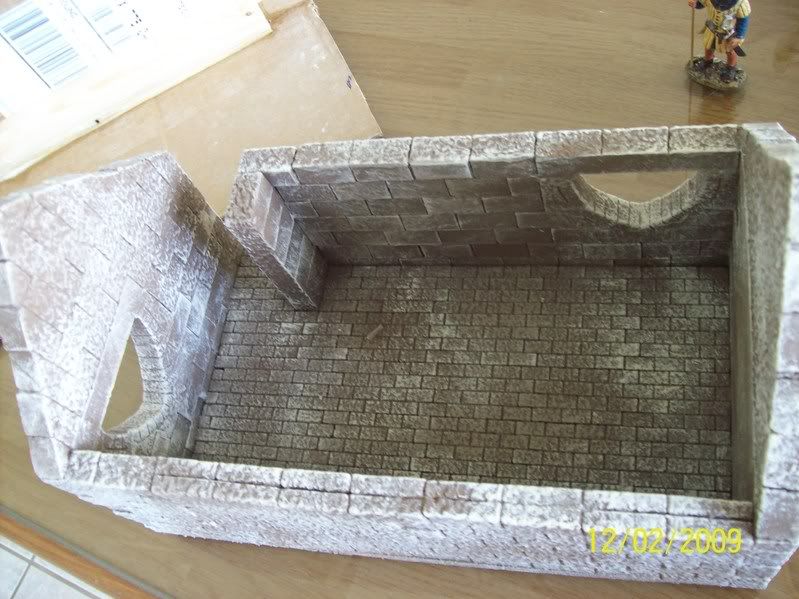
I wanted to make a scratch castle, so here it is. A one of a kind. Brick by brick, I made a one of a kind, unique, well scaled castle.

There were lots of failures, but I have something I’m pretty proud of and want to share with you. I’ve felt pain, despair, pleasure and pride building it.

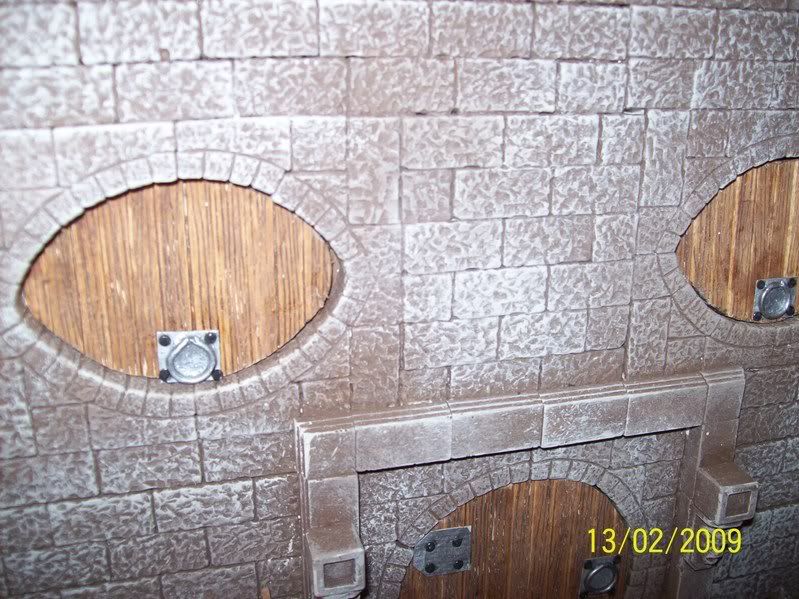
You will be able to see that the Hirstart brick molds will work with 60mm. There are no set plans for 60mm, as I said before, all his plans are for 25-28mm. If I can be creative enough to modify them, I’m sure you can too.

This was my first attempt, you will see many flaws. I know if I did this again, I would do a much better job the second time.

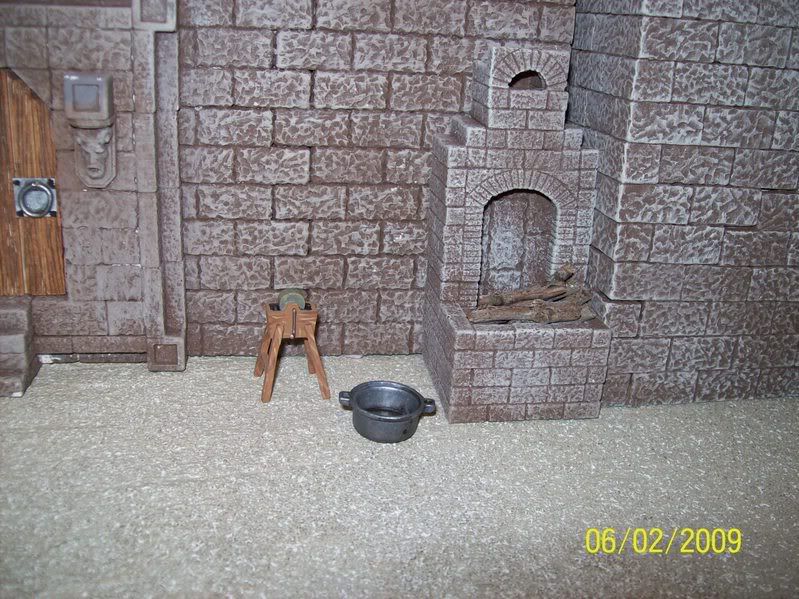
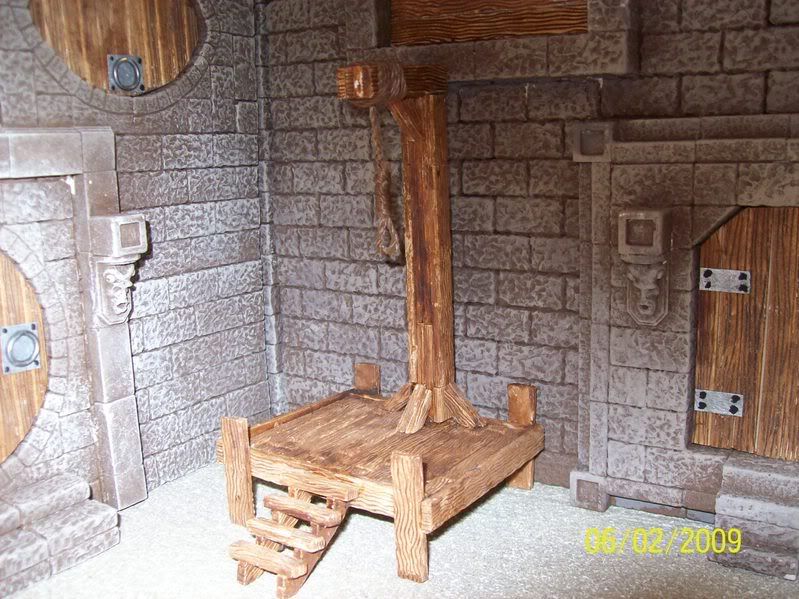
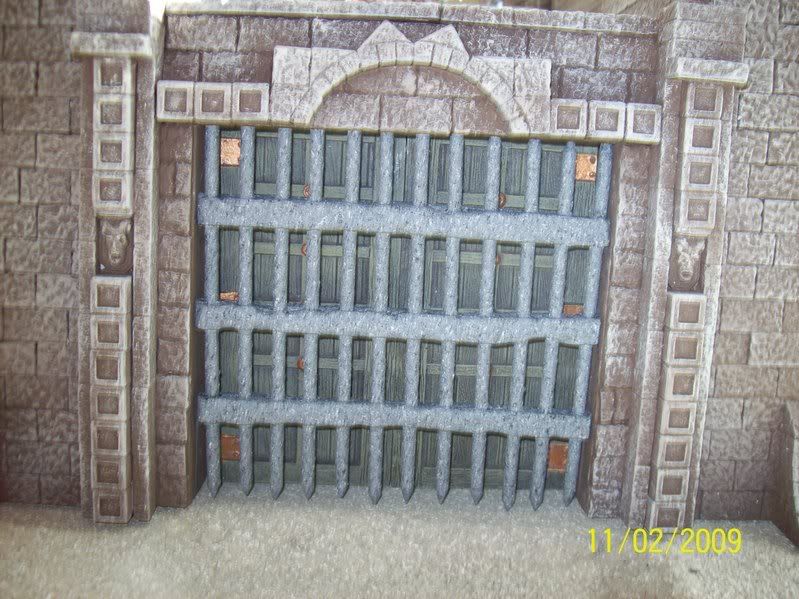
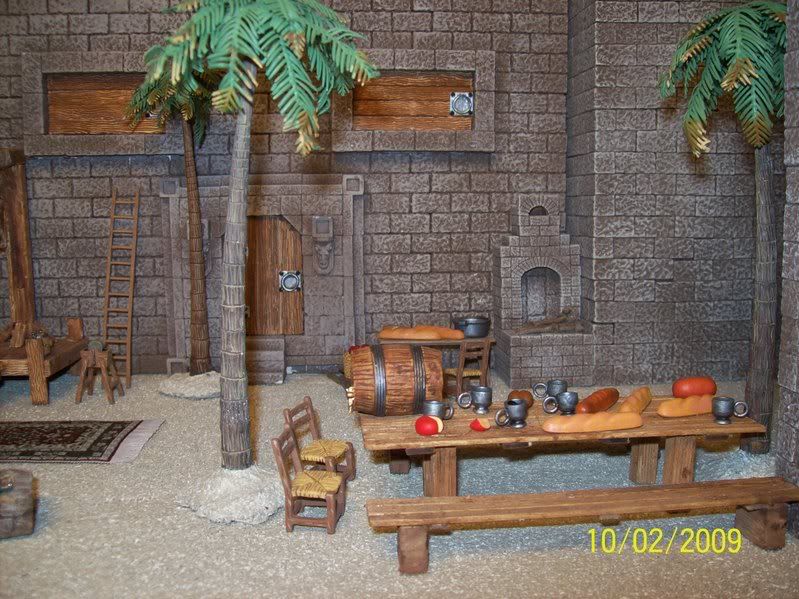
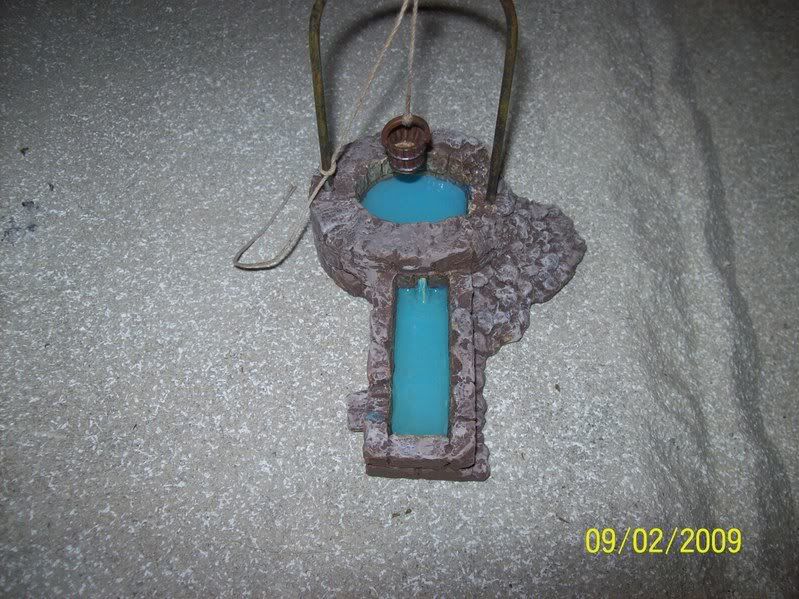
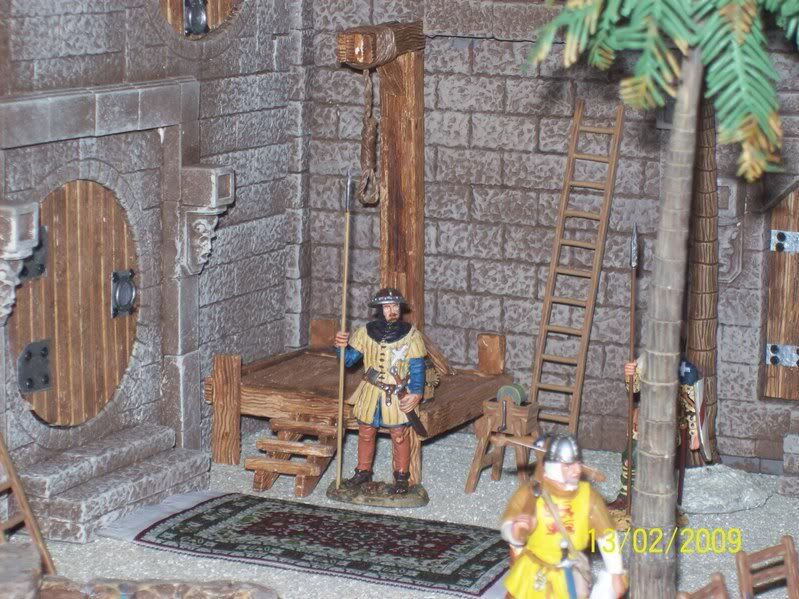
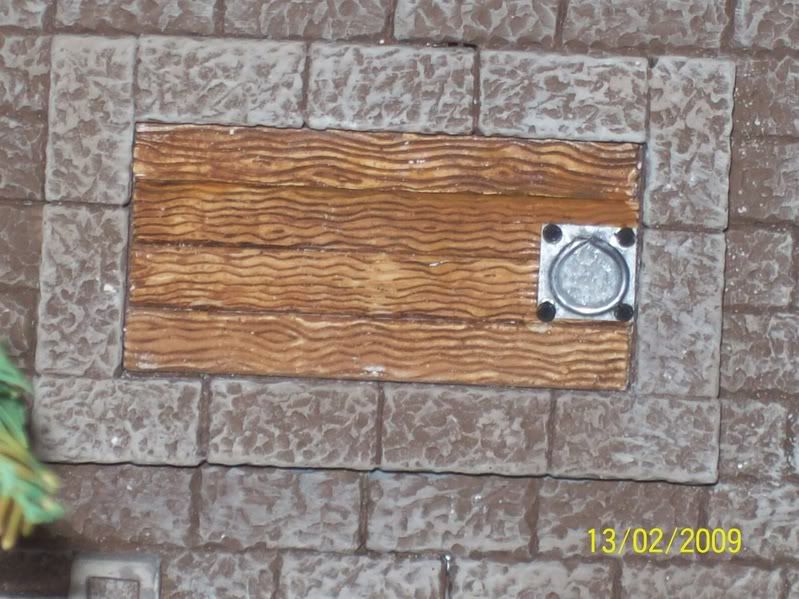
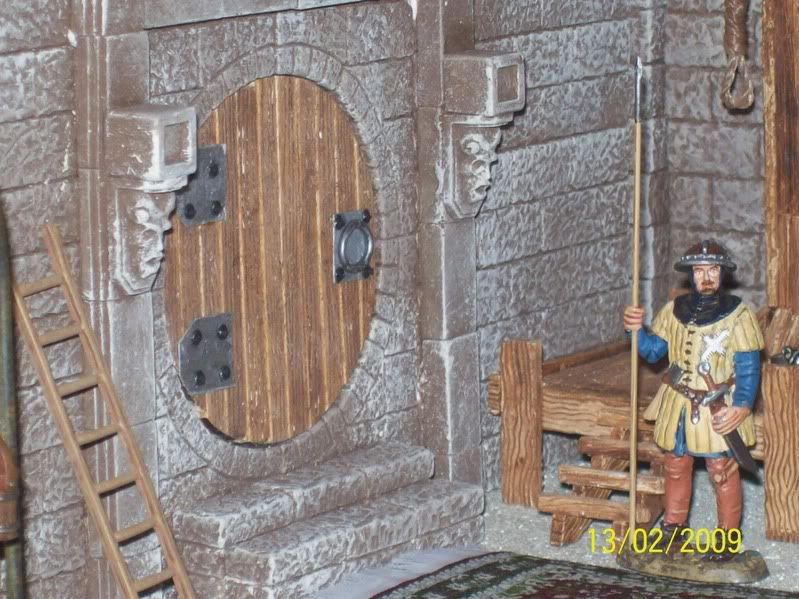
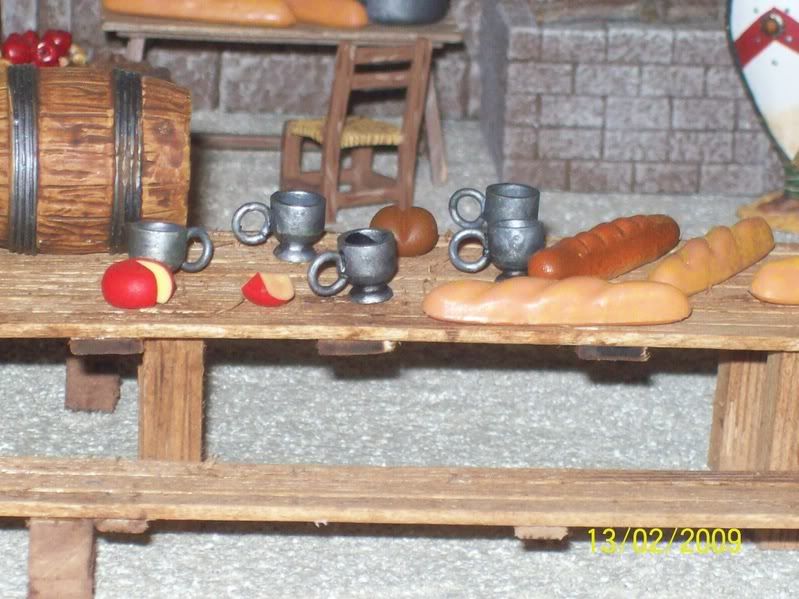
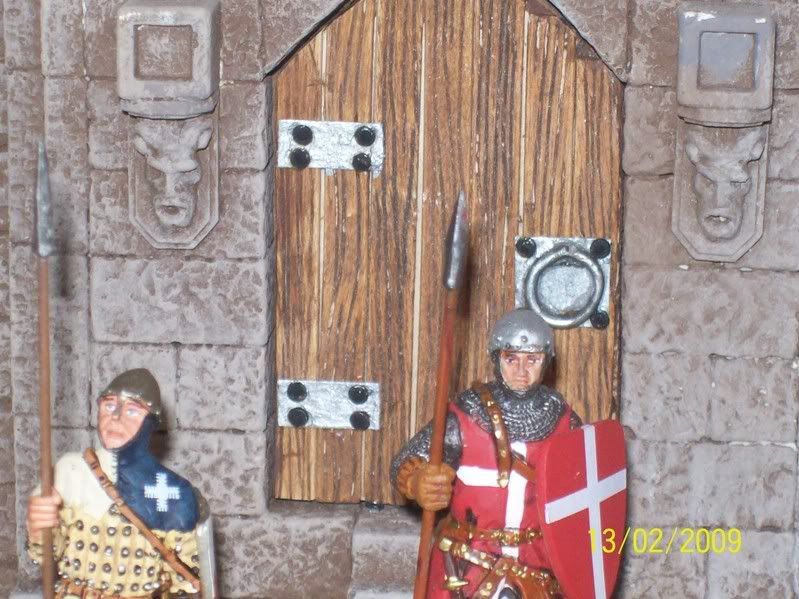
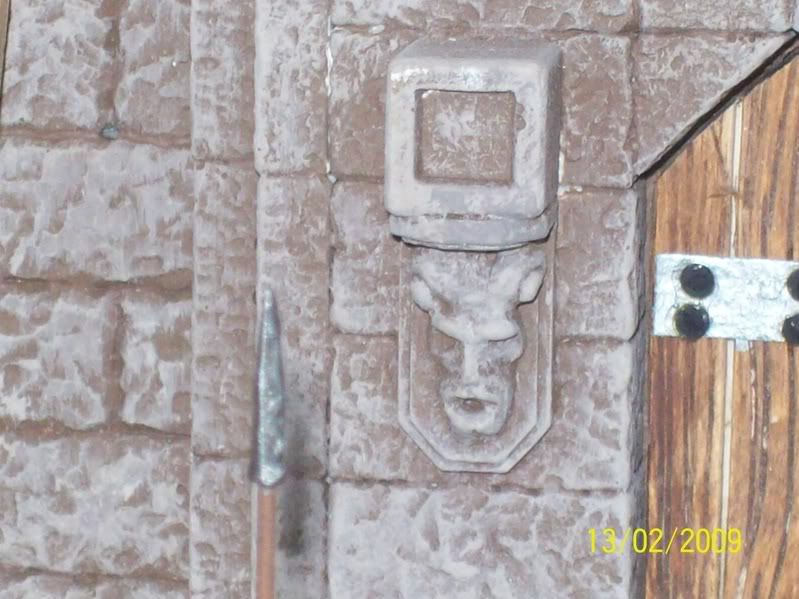
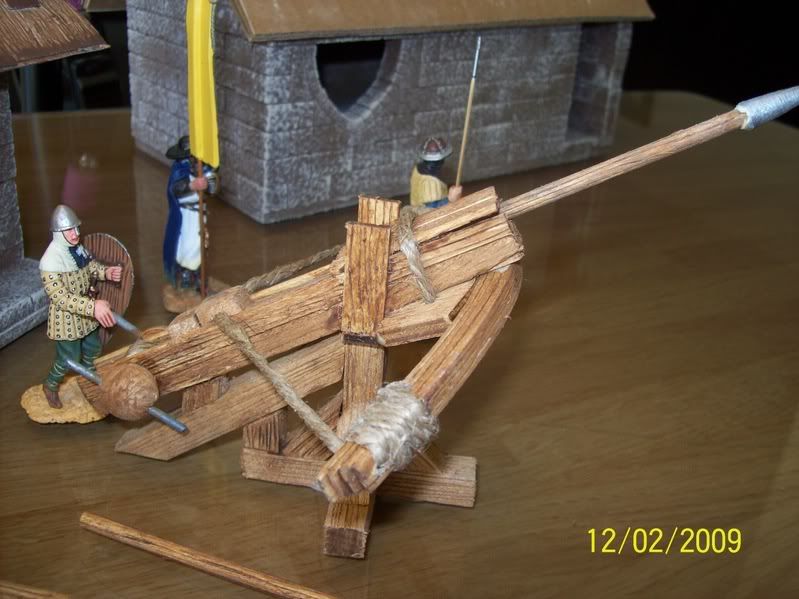
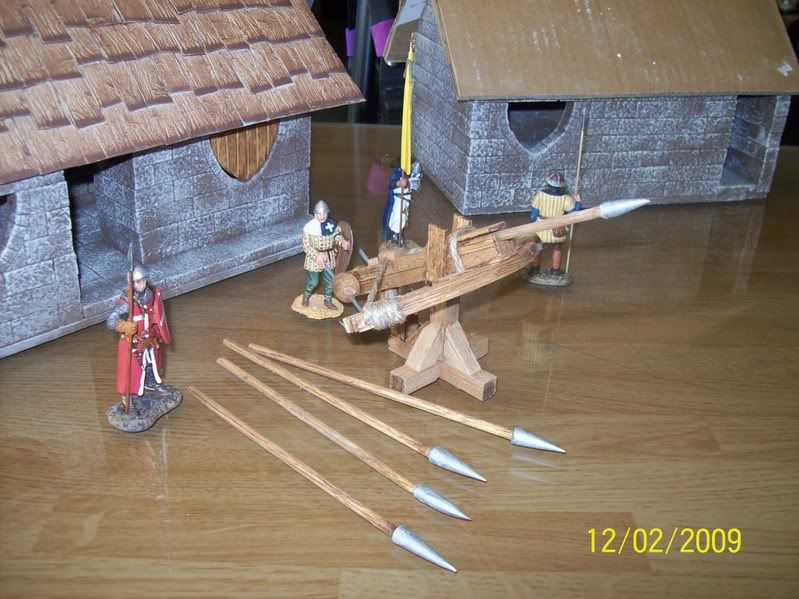
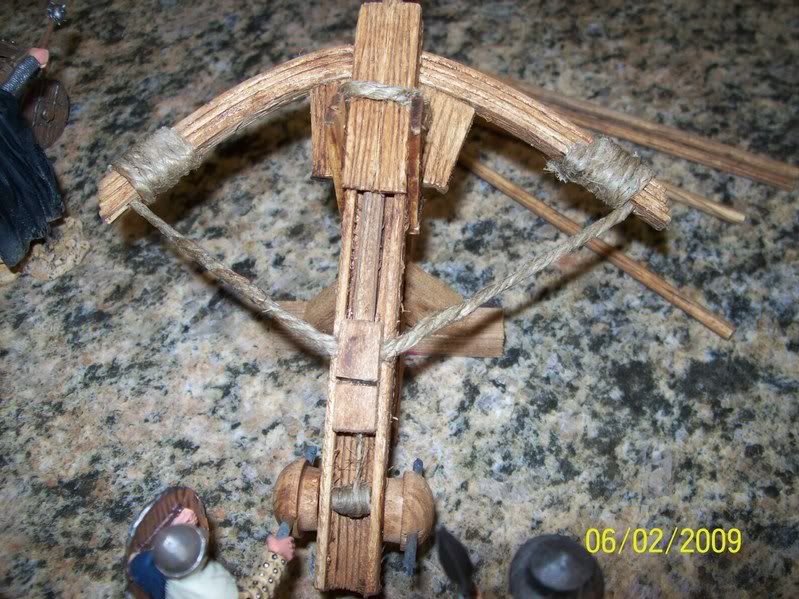
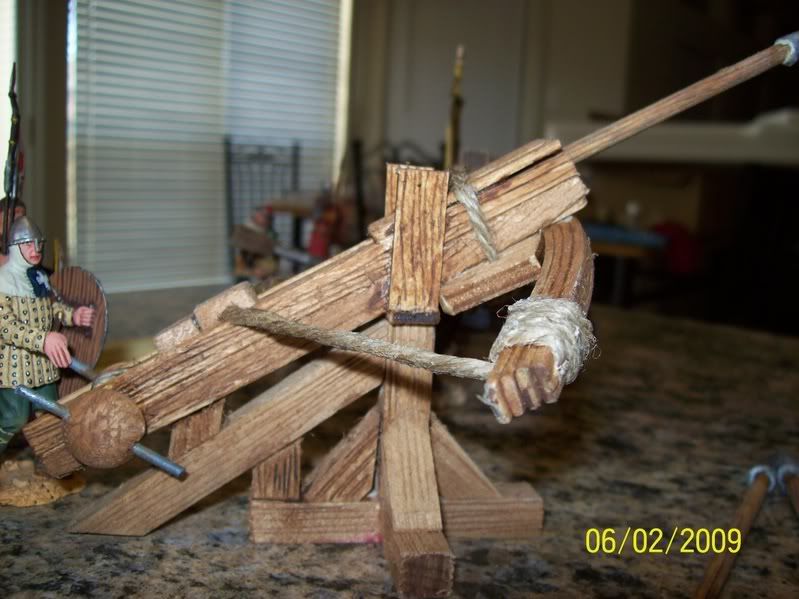
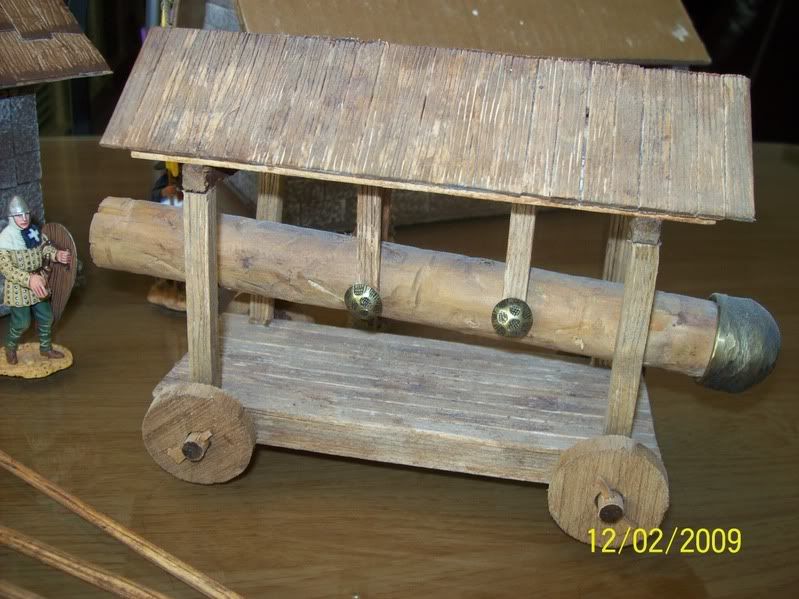
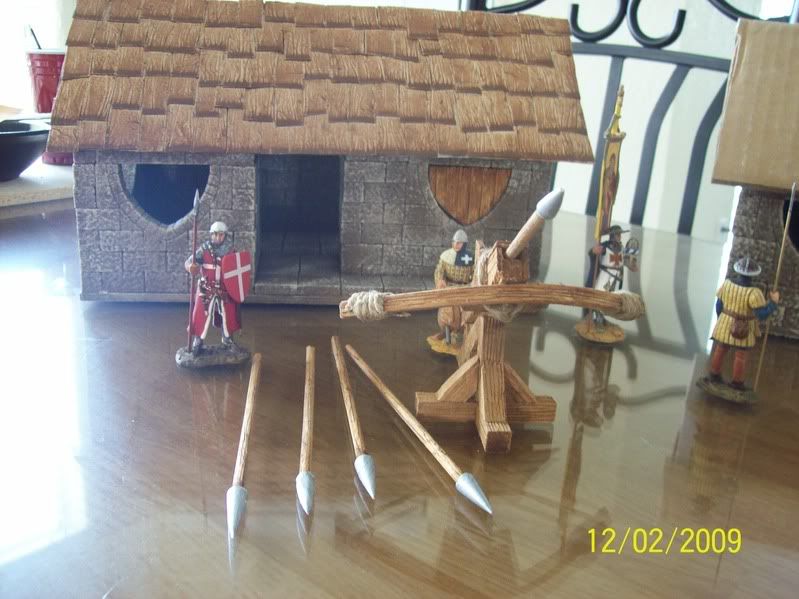
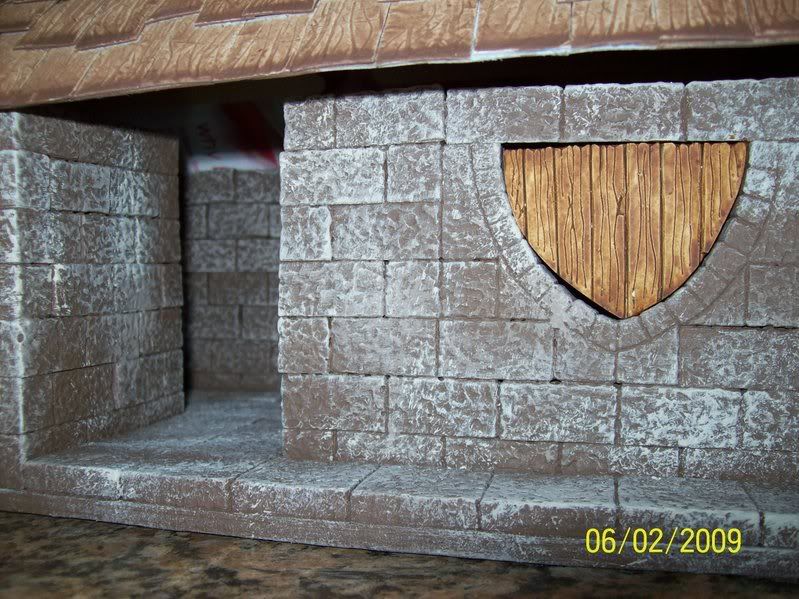
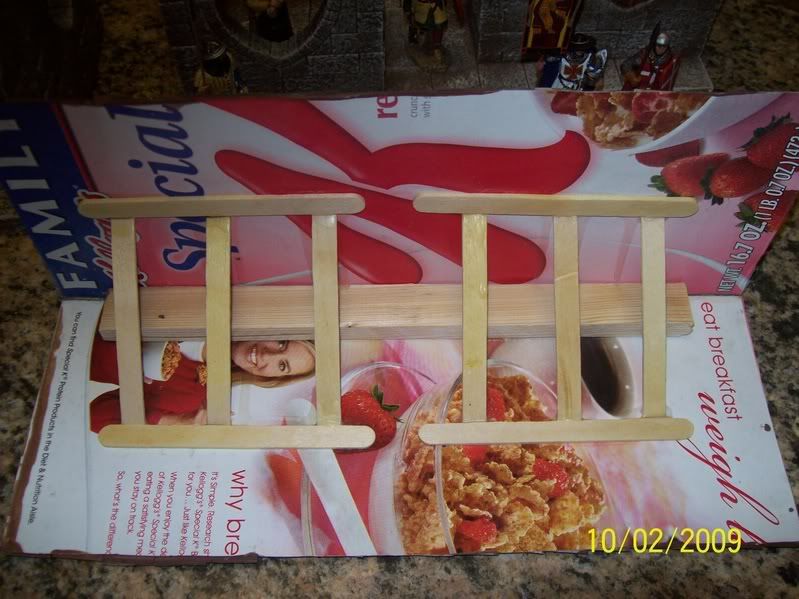
With a little playing around, I have made windows, doors, gallows, walls, steps, ovens, bridges, towers, gates, arrow slits, merlons, crenels, catwalks, portcullis’s, etc……..

I strongly encourage this product, it reminds me of Leggos and Lincoln Logs when I was a kid. It’s fun, it’s creatively encouraging…….it’s just flat addictive. The more blocks you make, the more you want to create. The more you create, the more blocks you want to make.

All you guys are just like me, you played with Leggos and Lincoln Logs as kids, you still might.

You had little soldiers as kids, a plastic Alamo, a plastic Fort Apache, a plastic King Arthur’s Castle, you had something. Whether it was World War II or Custer’s Last Stand, you all had something.

Remember when it was all set up perfect. Each soldier engaged in combat or each soldier having a purpose for where he was standing. If somebody moved one, you would notice it immediately and put him back where he belonged.

We all shared a passion for little toy soldiers, we all still do.

Everybody wanted something bigger and better.

Well, the only difference now is that we are a little older and can afford to indulge our hobbies a little better.

Everybody is looking for new ideas, have a look.

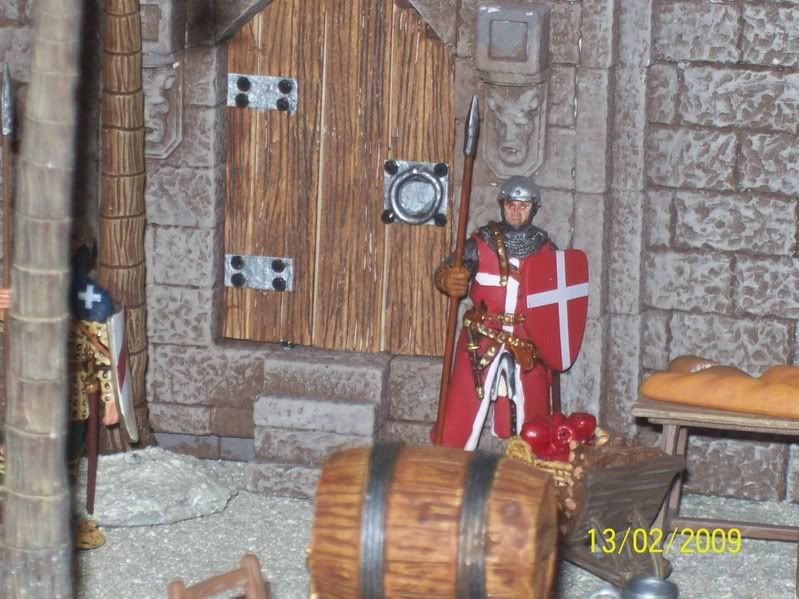
These are Hirstarts products. Built from scratch.

Enjoy……………..I’m going to post a ton of pictures.

100_0443-1.jpg

100_0442-1.jpg

100_0441-1.jpg

100_0464-1.jpg

100_0463-1.jpg

100_0628.jpg

100_0576-1.jpg
 
Even More Inside Castle Walls.

If you like looking at pictures, you’re in the right spot.

100_0641.jpg

100_0640.jpg

100_0639.jpg

100_0657.jpg

100_0656.jpg

100_0649.jpg

100_0646.jpg
 

Users who are viewing this thread

Back
Top