German City Urban Area (2 Viewers)

7th OVI

Sergeant
Joined
Jan 1, 2009
Messages
634
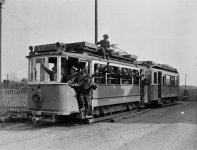
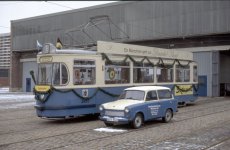
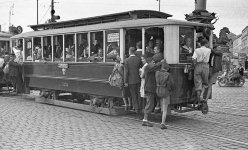
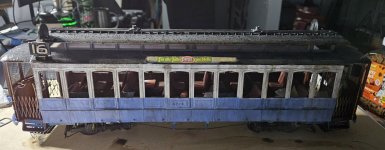
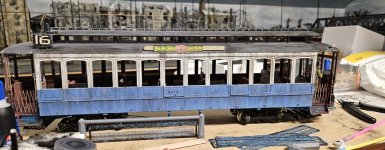
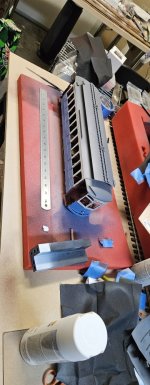
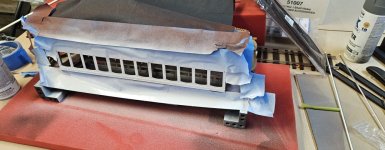
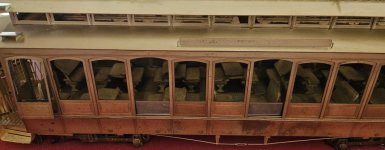
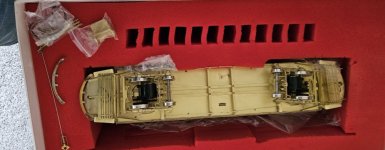
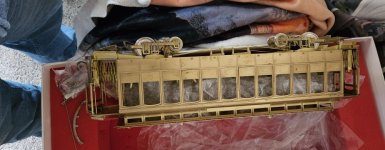
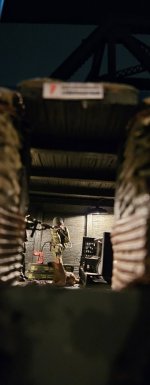
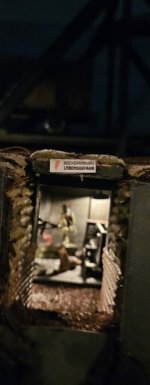
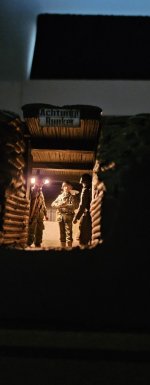
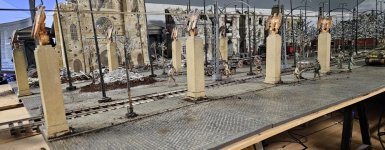
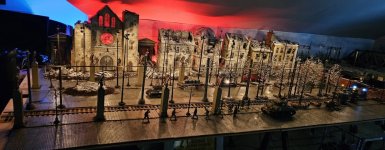
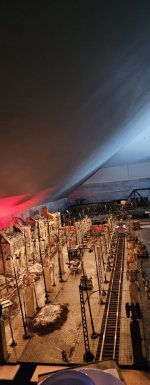
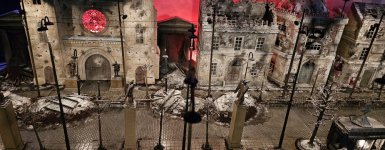
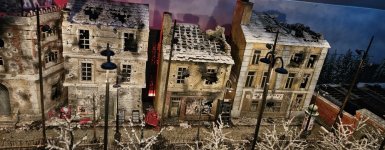
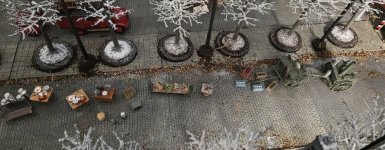
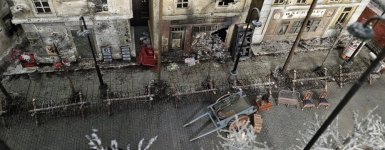
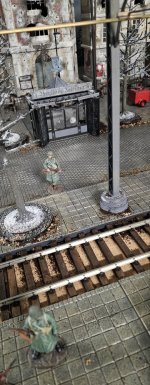
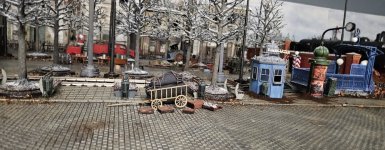
Break time again so wanted to show the Urban Area that was created based on recognizable portions of German Cities. Used approximately 750 different images of German cities that dated from 1938 to late 1945 as design inputs and references for the diorama. There are a number of suppliers in this area, King and Country, RT Diorama, Style Design, War Park, Locomotive Joe, GHB, KM1, LCB, Toy Soldiers of Scandinavia and of course Britains. Some of the challenges in this area was synchronizing a first snow look on everything (things would be a mixture of water and snow) as well as including all aspects of a particular subject matter. The major technical challenge was the installation of just under 100 LED lights in this area along with power to operate the streetcar with controls to make the streetcar go, stop and reverse. As you can see in the images, also decided to do something a bit different and have only American vehicles and figures in this section. The first 5 images are in normal light of the city, included an image of the operational all metal streetcar currently in process and then the last 4 images are with the "nighttime look". A lot of detail in this section just like the others. Will post some from/to images on how some of this was done in the future.

In the next few weeks, I will be taking an extended break from this diorama to wait on a few final pieces and to prevent burn out. I will use the time to work on some Britains ACW scenes that I have been designing and wanting to set up.

Appreciate all the kind comments, especially the one on the movie the "The Train" with Burt Lancaster which is one of my favorites. Let me know what you think. Thx Chris
 

Attachments

  • 20250616_163515.jpg
    20250616_163515.jpg
    148.7 KB · Views: 63
  • 20250615_044723.jpg
    20250615_044723.jpg
    120.9 KB · Views: 63
  • 20250615_044751.jpg
    20250615_044751.jpg
    79.4 KB · Views: 61
  • 20250615_044817.jpg
    20250615_044817.jpg
    159.5 KB · Views: 61
  • 20250615_044836.jpg
    20250615_044836.jpg
    151.5 KB · Views: 59
  • 20250615_045414.jpg
    20250615_045414.jpg
    122.1 KB · Views: 58
  • 20250616_163718.jpg
    20250616_163718.jpg
    163.8 KB · Views: 59
  • 20250616_163701.jpg
    20250616_163701.jpg
    145.6 KB · Views: 62
  • 20250616_163615.jpg
    20250616_163615.jpg
    146 KB · Views: 63
  • 20250616_163549.jpg
    20250616_163549.jpg
    145.2 KB · Views: 62
This is a head spinner Chris. Enormous project with loads of design features. The space this layout requires, is beyond anything I have previously imagined. Need to ponder over these photos for quite some time to take it all in. What dream project. Robin.
 
Absolutely Fantastic Chris, you really have excelled yourself with so much detail evident in this part of your diorama, and my favourite so far.

Yes, you certainly deserve a break having already accomplished so much.

If you don't mind me asking what made you feel compelled to build this huge multi part diorama, as it is such a break from your previous Civil War labours of love ?
 
This is an amazing under taking Chris and the execution of it has been expertly achieved. Although I am in awe of the entire diorama, i believe I like this city urban section the best. Thank you very much for taking the time to share your progress in such detail, not only in words but also in the photos.
Mike
 
Absolutely spectacular work Chris, a true masterpiece you've created.

That is museum quality work right there, incredible.

Would love to see it populated with tanks and figures, Russians and German fighting it out.

Thanks for sharing.
 
Appreciate all of your kind comments, here are the answer to a couple of the questions.

First question, "Why did I switch to doing this WW2 diorama from the ACW dioramas that I had been doing for a number of years?" Great question, I have always had an interest in the US Army during WW2 and with the availability of the new figures and vehicles from WB and now War Park just made the possibility of a diorama a possibility. I also loved model trains and wanted to do a layout when I retired. I was also doing some research on our family history and surprisingly found out how much the war impacted my family both from the US side but also from the German side. All of this pushed me over the edge to build this WW2 diorama and train layout. Since I started the WW2 diorama, I have begun drawing up plans for a large ACW permanent diorama as well.

The second question, "who made the streetcar/tram/trolley? It was made by GHB Limited in the 1980's and was one of about 100 made to function on the G Gauge, 1/32 scale track. It is solid brass with twin motored 12-volt trucks and wired head lamps. I bought this one and recently found a second on eBay that will be included in the layout. I painted it to match the Munich streetcar colors along with the Munich style subway entrance and ticket stand. I have attached images of the streetcar in original condition and then how it was transformed into what it looks like today. Both of the cars are working. The catenary system is modeled off a system used in Berlin and was a new approach. The system is made by LGB that I modified to match the Berlin system. Both of the companies are still in business today but focus their products on the more popular HO and O gauge trains.

I also decided to make it as big as possible and a permanent display so that I could incorporate as many ideas as possible and to not be limited by the portability of the diorama. The urban section has taken the longest to research and design. I started almost 18 months ago designing and continue to work on it. You will see elements from Berlin, Nuremberg, Munich, Kiel, and Frankfurt in the design. For example, the bear on the newsstand weathervane, street names and road sign topper are indicative of Berlin. There are a lot of details in this layout, and I continue to add them as materials become available such as the 3D printed air raid sirens in the urban section and the rail yard. I will high light the diorama details in future postings.

As far as adding figures and vehicles, started to do that and will have some of those images before I take a break next week. Here are the images of the streetcar. The first are of the streetcar as it arrived. There were a few repairs that had to be glued and soldered. Next are of the base painting and then weathering and then the last one is of it with water affects and how it will sit on the diorama. The last images are of Munich streetcars that some of the images that were used in the research for the paint scheme. Let me know if you have any other questions or comments. Thx Chris
 

Attachments

  • R.jpg
    R.jpg
    123 KB · Views: 8
  • ab40e496e5fcad92b987e644742f7cf9.jpg
    ab40e496e5fcad92b987e644742f7cf9.jpg
    155.5 KB · Views: 8
  • 20250622_154647.jpg
    20250622_154647.jpg
    92.3 KB · Views: 9
  • 20250615_045414.jpg
    20250615_045414.jpg
    122.1 KB · Views: 10
  • 20250327_111425.jpg
    20250327_111425.jpg
    107.7 KB · Views: 9
  • 20250326_122659.jpg
    20250326_122659.jpg
    114.9 KB · Views: 8
  • 20250312_141622(0).jpg
    20250312_141622(0).jpg
    85.3 KB · Views: 8
  • 20250312_135802.jpg
    20250312_135802.jpg
    79.3 KB · Views: 8
  • 20250312_135839.jpg
    20250312_135839.jpg
    95.7 KB · Views: 6
  • 172619844965.jpg
    172619844965.jpg
    139.5 KB · Views: 7
Thanks Chris for the explanations.
With moving trams and the lighting effects, you're taking the hobby, of the when finished, display into a new level.
Totally awesome and something that is going to give you great pleasure and no doubt will have you tinkering with it yor years as add bits as they come to mind and availability, and 3D printing does certainly open the door to the possibility of such ideas.
Great stuff Chris, and thanks for sharing yhe photos too. 👍🏻
 
Still can’t comprehend how you have had the patience to bring this enormous project together. It’s just amazing. Your attention to detail is to be commended. Robin.
 

Users who are viewing this thread

Back
Top