You are using an out of date browser. It may not display this or other websites correctly.
You should upgrade or use an alternative browser.
You should upgrade or use an alternative browser.
Battle for Arnhem.... (1 Viewer)
- Thread starter panda1gen
- Start date
panda1gen
Colonel
- Joined
- Jul 29, 2005
- Messages
- 8,297
Louis Badolato
Lieutenant General
- Joined
- Apr 25, 2005
- Messages
- 18,483
Kevin,
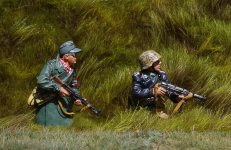
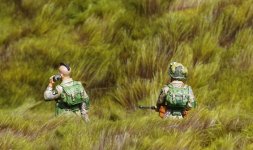
B Sqdn 15/19 Hussars were however, still busy
View attachment 261786
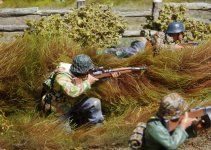
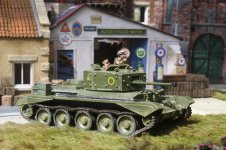
and cleared with fire a variety of enemy guns,
View attachment 261787
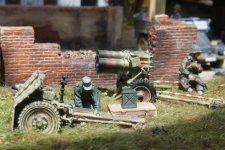
including a German artillery battery across the canal.
View attachment 261788
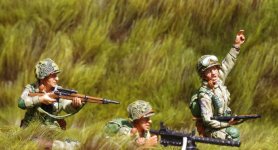
2/327 had numerous short range encounters in the woods and took casualties
View attachment 261789
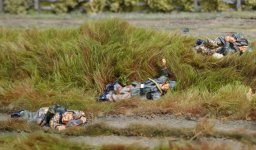
, but cleared the Son forest by late afternoon on the 19[SUP]th[/SUP].
View attachment 261790
Some of your best work!:salute::
panda1gen
Colonel
- Joined
- Jul 29, 2005
- Messages
- 8,297
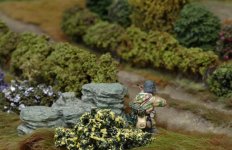
To the north, 3/327 GIR’s lead unit was Company G,
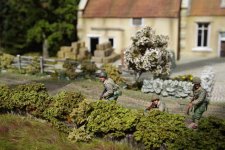
supported by C Sqdn 15/19 Hussars.
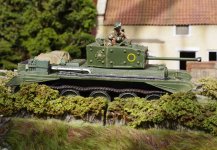
Enemy mortar fire was very accurate, so it was suspected it was observed from Best church steeple.
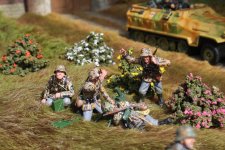
3/327 GIR took position for all round defence around the road into Best which was ominously quiet.
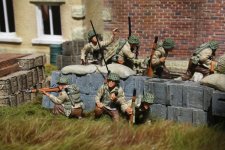
Snipers joined the mortars in making life unpleasant.
panda1gen
Colonel
- Joined
- Jul 29, 2005
- Messages
- 8,297
An excerpt from the 502 PIR after action report read:
‘The area covered by the Regiment on the 17[SUP]th[/SUP], 18[SUP]th[/SUP] and 19[SUP]th[/SUP] September had contained 2,500 enemy troops. Of these, 1042 were captured and an estimated 800 killed. This figure was reported by a British unit, which later occupied the area and buried the dead.
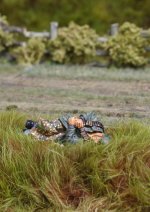
Reinforcing his normal compliment of machine guns and mortars, the enemy had eight 88mm guns, two 75mm anti-tank guns and five 20mm anti-aircraft guns.
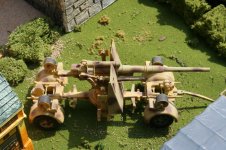 extremely rare, early K&C resin 88mm
Casualties in the Regiment were particularly heavy ... 29 officers and 420 enlisted men’.
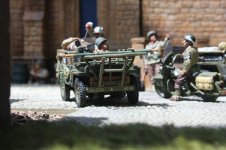
In the meantime, 327 GIR took over the defence of the Best sector from 502 PIR, who would be taken into reserve.
They were only able to extract themselves after a concentrated shoot by 377 Artillery Battalion, which silenced them long enough for 502 PIR to withdraw and 327 GIR to take their place. After three days of fighting, 502 needed rest.
They were to take up new positions in the St Oedenrode area. (There were however, some disquieting indications of a growing build up of the Germans in that area, see later).
panda1gen
Colonel
- Joined
- Jul 29, 2005
- Messages
- 8,297
At post #1459 I started the tale of 2[SUP]nd[/SUP] platoon of 3/502 PIR as they approached the Best Bridge area. I now return to their story. They only managed to rejoin the rest of 3/502 PIR on the 19[SUP]th[/SUP]. They were feared to be lost for two days by their HQ. When they did rejoin they spoke of events in the forest.
Earlier that day Lt Wierzbowski’s platoon was still isolated in the woods near the bridge. German infantry reached grenade range of them, in the morning mist.
‘Sergeant Betras threw a grenade, then several others threw. But the Germans had beaten them to the throw and grenades were already on their way to the foxholes. Two hit the top of the embankment.’
They were thrown back, but another exploded on Engineer Private Laino’s machine gun.
‘It blew his eye out, blinded the other eye and made a pulp of his face .... another grenade came over ....... hit Laino on the knee and bounced off into his foxhole. Laino, still blinded, reached down groping for it, found it and tossed it from his foxhole just a split second before it exploded.’
Private Laino earned the Silver Star for his coolness in this action.
panda1gen
Colonel
- Joined
- Jul 29, 2005
- Messages
- 8,297
The final grenade again fell in the large trench containing six wounded paratroopers, that included Private First Class Mann. His wounded arms were bound up. He felt the grenade land behind him and yelled ‘grenade’.
‘Fully conscious of what he was doing he lay back and took the explosion with his own back.’
He whispered to Lt Wierzbowski that his back had gone. Without a further sound he died a few minutes later. He was described as the bravest man his comrades had ever known.
Surrounded and outnumbered, the Americans surrendered, but were released later that afternoon.
PFC Joe Mann of 2/502 PIR was awarded a posthumous Congressional Medal of Honor.
His citation reads:
He distinguished himself by conspicuous gallantry above and beyond the call of duty. On 18 September 1944, in the vicinity of Best, Holland, his platoon, attempting to seize the bridge across the Wilhelmina Canal, was surrounded and isolated by an enemy force greatly superior in personnel and firepower. Acting as lead scout, Pfc. Mann boldly crept to within rocket-launcher range of an enemy artillery position and, in the face of heavy enemy fire, destroyed an 88mm. gun and an ammunition dump. Completely disregarding the great danger involved, he remained in his exposed position, and, with his M-1 rifle, killed the enemy one by one until he was wounded 4 times.
Taken to a covered position, he insisted on returning to a forward position to stand guard during the night. On the following morning the enemy launched a concerted attack and advanced to within a few yards of the position, throwing hand grenades as they approached. One of these landed within a few feet of Pfc. Mann. Unable to raise his arms, which were bandaged to his body, he yelled "grenade" and threw his body over the grenade, and as it exploded, died.
His outstanding gallantry above and beyond the call of duty and his magnificent conduct were an everlasting inspiration to his comrades for whom he gave his life.
Louis Badolato
Lieutenant General
- Joined
- Apr 25, 2005
- Messages
- 18,483
Kevin,
Thank you for passing along the stories of these amazing men. To paraphrase a discription of the marines at Iwo Jima, among these paratroopers uncommon valor was a common virtue.
I also love your photographs. That show of my old K&C resin 88 brings back some great memories of your visits!:salute::
Thank you for passing along the stories of these amazing men. To paraphrase a discription of the marines at Iwo Jima, among these paratroopers uncommon valor was a common virtue.
I also love your photographs. That show of my old K&C resin 88 brings back some great memories of your visits!:salute::
panda1gen
Colonel
- Joined
- Jul 29, 2005
- Messages
- 8,297
panda1gen
Colonel
- Joined
- Jul 29, 2005
- Messages
- 8,297
Neunen, 20[SUP]th[/SUP] September 1944
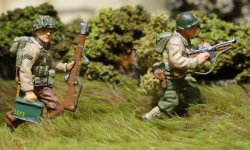
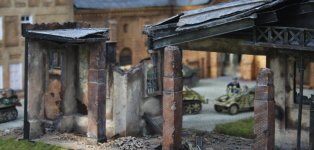
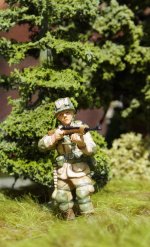
With tanks now rolling through Eindhoven and Son, the paratroopers of the 506[SUP]th[/SUP] PIR were able to patrol the area and widen the corridor. The 2nd Battalion 506[SUP]th[/SUP] in Eindhoven received its orders and was sent to Helmond, Mierlo and Nuenen, to the east of Eindhoven,
in order to widen the corridor for British 2[SUP]nd[/SUP] Army to advance through and to reduce pressure on the main road. The paras were working with the 15[SUP]th[/SUP]/19[SUP]th[/SUP] King’s Royal Hussars, see later. They were the Reconnaissance Regiment of the 11[SUP]th[/SUP] Armoured Division, but at this time they were attached to support XXX Corps and had come under the command of the 101[SUP]st[/SUP] Airborne.
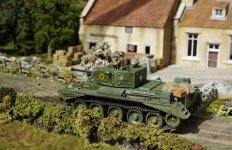 A Cromwell approaches Neunen
The 11[SUP]th[/SUP] Armoured Division (divisional sign - Black Bull on yellow background) remained part of VIII Corps, which had begun to advance on the right flank of XXX Corps on the 18[SUP]th[/SUP] in two columns.
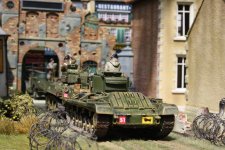 An 11th Armoured Division Valentine tank
The 3[SUP]rd[/SUP] Infantry Division followed on to hold the ground taken. Given the supply situation at the time, the Corps was relatively starved of supplies for the benefit of XXX Corps, so they were not at full efficiency.
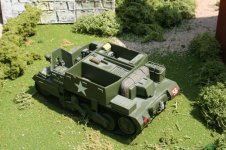 A 3rd Infantry Division early (extremely rare) K&C resin bren carrier
The paratroops of 2/506 PIR and Cromwell tanks of 15/19 KRH ran into troops of the 107th Panzer Brigade on the 20[SUP]th[/SUP] September and were quickly overwhelmed, so retreated back towards Eindhoven.
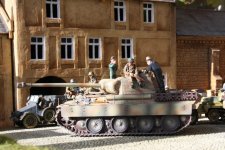 A 107 PB Panther prepares
The British lost two tanks, and four American and three British soldiers were killed. The Germans suffered two fatalities. Although a relatively light skirmish, the fight is ‘dramatised’ in episode 4 "Replacements" of the television series Band of Brothers, which made the action very famous, although several larger and more bloody battles occurred around this time.
Ref: mainly different sections of wikipedia
Louis Badolato
Lieutenant General
- Joined
- Apr 25, 2005
- Messages
- 18,483
Kevin,
The photo over the caption "An 11th Armoured Division Valentine tank" is truly one of your best! :salute:: The diorama set up looks real! ^&cool^&cool^&cool^&cool^&cool
The photo over the caption "An 11th Armoured Division Valentine tank" is truly one of your best! :salute:: The diorama set up looks real! ^&cool^&cool^&cool^&cool^&cool
panda1gen
Colonel
- Joined
- Jul 29, 2005
- Messages
- 8,297
Hitler had made the defence of Holland the number one priority and reinforcements poured in from Germany and from units trapped in Holland to interdict the XXX Corps corridor or prevent its extension.
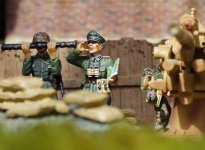
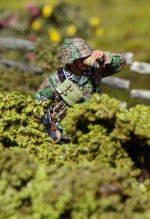
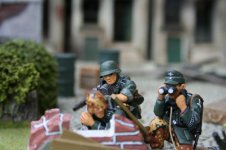
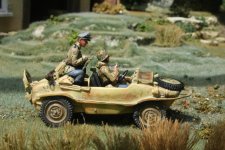 A reconnaissance unit searches for XXX Corps
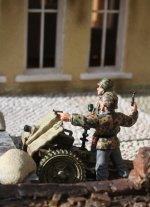
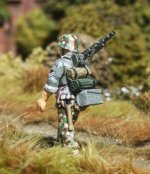 Most German infantry still had to march
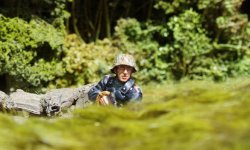
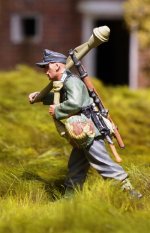 Panzerfaust armed infantry was an increasing threat to armour as more were mass produced in 1944
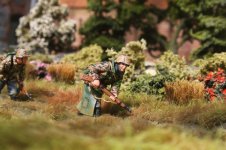
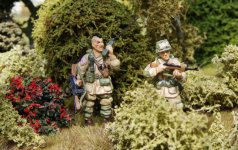
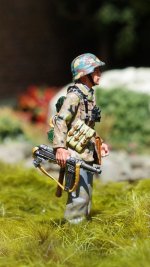 An NCO leads his squad
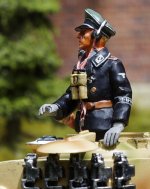 Heavy armour was also mobilised
panda1gen
Colonel
- Joined
- Jul 29, 2005
- Messages
- 8,297
ref - amended from Wikipedia
David Samuel Anthony Lord VC DFC
David Lord was an Irish aviator, born on 18 October 1913 in Cork and died on 19 September 1944.
Early life
David Lord was one of three sons of Samuel (a Warrant Officer in the Royal Welsh Fusiliers) and Mary Lord (née Miller). One of Lord's brothers died in infancy. After the First World War the family were posted to British India and Lord attended Lucknow Convent School. On his father's retirement from the Army the family moved to Wrexham and then David was a pupil at St Mary's College, Aberystwyth, and then the University of Wales.
Later, he attended the English Ecclesiastical College, Valladolid, Spain to study for the priesthood. Deciding that it was not the career for him, he returned to Wrexham, before moving to London in the mid-1930s to work as a freelance writer.
Second World War
Lord enlisted in the Royal Air Force in 1936 and after reaching the rank of corporal in 1938 undertook pilot training, gaining his wings as a sergeant pilot in April 1939. He was posted to No. 31 Squadron RAF, based in Lahore, India. In 1941, No. 31 Squadron was the first unit to receive the Douglas DC-2 which was followed by both the Douglas DC-3 and Dakota transports. That year he was promoted to flight sergeant, then warrant officer.
He flew in North Africa, supporting troops in Libya and Egypt for four months, before being posted back to India. Commissioned as a pilot officer in 1942, he flew supply missions over Burma and was mentioned in despatches.
Lord was awarded the Distinguished Flying Cross in July 1943.
By January 1944, he had joined No. 271 Squadron (based at RAF Down Ampney, Gloucestershire). On D-Day Lord carried paratroopers into France and his aircraft was hit by flak, returning to base without flaps.
In September 1944 Lord was 30 years old and a flight lieutenant, still serving with No. 271 Squadron. On 19 September 1944, during the Battle of Arnhem in the Netherlands, Lord was on a re-supply mission for the British 1st Airborne Division. Lord's Douglas Dakota III "KG374" encountered intense enemy anti-aircraft fire and was twice hit, with one engine burning. Lord managed to drop his supplies, but at the end of the run found that there were two containers remaining. Although he knew that one of his wings might collapse at any moment, he nevertheless made a second run to drop the last supplies, then ordered his crew to bail out. A few seconds later, the Dakota crashed in flames with its pilot and six crew members.
Only the navigator, Flying Officer Harold King, survived, becoming a prisoner of war. It was only on his release in mid-1945, as well as the release of several paratroops from the 10th Parachute Battalion, that the story of Lord's action became known. Lord was awarded a posthumous Victoria Cross.
Victoria Cross Citation
The full citation for Lord's VC appeared in a supplement to the London Gazette on 9 November 1945, reading: Air Ministry, 13 November 1945.
"The KING has been graciously pleased to confer the VICTORIA CROSS on the undermentioned officer in recognition of most conspicuous bravery:—
Flight Lieutenant David Samuel Anthony LORD, D.F.C. (49149), R.A.F., 271 Sqn. (deceased).
Flight Lieutenant Lord was pilot and captain of a Dakota aircraft detailed to drop supplies at Arnhem on the afternoon of 19 September 1944. Our airborne troops had been surrounded and were being pressed into a small area defended by a large number of anti-aircraft guns. Air crews were warned that intense opposition would be met over the dropping zone. To ensure accuracy they were ordered to fly at 900 feet when dropping their containers.
While flying at 1,500 feet near Arnhem the starboard wing of Flight Lieutenant Lord's aircraft was twice hit by anti-aircraft fire. The starboard engine was set on fire. He would have been justified in leaving the main stream of supply aircraft and continuing at the same height or even abandoning his aircraft. But on learning that his crew were uninjured and that the dropping zone would be reached in three minutes he said he would complete his mission, as the troops were in dire need of supplies.
By now the starboard engine was burning furiously. Flight Lieutenant Lord came down to 900 feet, where he was singled out for the concentrated fire of all the anti-aircraft guns. On reaching the dropping zone he kept the aircraft on a straight, and level course while supplies were dropped. At the end of the run, he was told that two containers remained. Although he must have known that the collapse of the starboard wing could not be long delayed, Flight Lieutenant Lord circled, rejoined the stream of aircraft and made a second run to drop the remaining supplies. These manoeuvres took eight minutes in all, the aircraft being continuously under heavy anti-aircraft fire.
His task completed, Flight Lieutenant Lord ordered his crew to abandon the Dakota, making no attempt himself to leave the aircraft, which was down to 500 feet. A few seconds later, the starboard wing collapsed and the aircraft fell in flames. There was only one survivor, who was flung out while assisting other members of the crew to put on their parachutes.
By continuing his mission in a damaged and burning aircraft, descending to drop the supplies accurately, returning to the dropping zone a second time and, finally, remaining at the controls to give his crew a chance of escape, Flight Lieutenant Lord displayed supreme valour and self-sacrifice".
Louis Badolato
Lieutenant General
- Joined
- Apr 25, 2005
- Messages
- 18,483
Kevin,ref - amended from Wikipedia
David Samuel Anthony Lord VC DFC
David Lord was an Irish aviator, born on 18 October 1913 in Cork and died on 19 September 1944.
Early life
David Lord was one of three sons of Samuel (a Warrant Officer in the Royal Welsh Fusiliers) and Mary Lord (née Miller). One of Lord's brothers died in infancy. After the First World War the family were posted to British India and Lord attended Lucknow Convent School. On his father's retirement from the Army the family moved to Wrexham and then David was a pupil at St Mary's College, Aberystwyth, and then the University of Wales.
Later, he attended the English Ecclesiastical College, Valladolid, Spain to study for the priesthood. Deciding that it was not the career for him, he returned to Wrexham, before moving to London in the mid-1930s to work as a freelance writer.
Second World War
Lord enlisted in the Royal Air Force in 1936 and after reaching the rank of corporal in 1938 undertook pilot training, gaining his wings as a sergeant pilot in April 1939. He was posted to No. 31 Squadron RAF, based in Lahore, India. In 1941, No. 31 Squadron was the first unit to receive the Douglas DC-2 which was followed by both the Douglas DC-3 and Dakota transports. That year he was promoted to flight sergeant, then warrant officer.
He flew in North Africa, supporting troops in Libya and Egypt for four months, before being posted back to India. Commissioned as a pilot officer in 1942, he flew supply missions over Burma and was mentioned in despatches.
Lord was awarded the Distinguished Flying Cross in July 1943.
By January 1944, he had joined No. 271 Squadron (based at RAF Down Ampney, Gloucestershire). On D-Day Lord carried paratroopers into France and his aircraft was hit by flak, returning to base without flaps.
In September 1944 Lord was 30 years old and a flight lieutenant, still serving with No. 271 Squadron. On 19 September 1944, during the Battle of Arnhem in the Netherlands, Lord was on a re-supply mission for the British 1st Airborne Division. Lord's Douglas Dakota III "KG374" encountered intense enemy anti-aircraft fire and was twice hit, with one engine burning. Lord managed to drop his supplies, but at the end of the run found that there were two containers remaining. Although he knew that one of his wings might collapse at any moment, he nevertheless made a second run to drop the last supplies, then ordered his crew to bail out. A few seconds later, the Dakota crashed in flames with its pilot and six crew members.
Only the navigator, Flying Officer Harold King, survived, becoming a prisoner of war. It was only on his release in mid-1945, as well as the release of several paratroops from the 10th Parachute Battalion, that the story of Lord's action became known. Lord was awarded a posthumous Victoria Cross.
Victoria Cross Citation
The full citation for Lord's VC appeared in a supplement to the London Gazette on 9 November 1945, reading: Air Ministry, 13 November 1945.
"The KING has been graciously pleased to confer the VICTORIA CROSS on the undermentioned officer in recognition of most conspicuous bravery:—
Flight Lieutenant David Samuel Anthony LORD, D.F.C. (49149), R.A.F., 271 Sqn. (deceased).
Flight Lieutenant Lord was pilot and captain of a Dakota aircraft detailed to drop supplies at Arnhem on the afternoon of 19 September 1944. Our airborne troops had been surrounded and were being pressed into a small area defended by a large number of anti-aircraft guns. Air crews were warned that intense opposition would be met over the dropping zone. To ensure accuracy they were ordered to fly at 900 feet when dropping their containers.
While flying at 1,500 feet near Arnhem the starboard wing of Flight Lieutenant Lord's aircraft was twice hit by anti-aircraft fire. The starboard engine was set on fire. He would have been justified in leaving the main stream of supply aircraft and continuing at the same height or even abandoning his aircraft. But on learning that his crew were uninjured and that the dropping zone would be reached in three minutes he said he would complete his mission, as the troops were in dire need of supplies.
By now the starboard engine was burning furiously. Flight Lieutenant Lord came down to 900 feet, where he was singled out for the concentrated fire of all the anti-aircraft guns. On reaching the dropping zone he kept the aircraft on a straight, and level course while supplies were dropped. At the end of the run, he was told that two containers remained. Although he must have known that the collapse of the starboard wing could not be long delayed, Flight Lieutenant Lord circled, rejoined the stream of aircraft and made a second run to drop the remaining supplies. These manoeuvres took eight minutes in all, the aircraft being continuously under heavy anti-aircraft fire.
His task completed, Flight Lieutenant Lord ordered his crew to abandon the Dakota, making no attempt himself to leave the aircraft, which was down to 500 feet. A few seconds later, the starboard wing collapsed and the aircraft fell in flames. There was only one survivor, who was flung out while assisting other members of the crew to put on their parachutes.
By continuing his mission in a damaged and burning aircraft, descending to drop the supplies accurately, returning to the dropping zone a second time and, finally, remaining at the controls to give his crew a chance of escape, Flight Lieutenant Lord displayed supreme valour and self-sacrifice".
Thank you for educating me about David Lord, he is a man who should be remembered.
panda1gen
Colonel
- Joined
- Jul 29, 2005
- Messages
- 8,297
Having discussed the role they played around Best with the 101st Airborne, I enclose some further information about the ........
15[SUP]th[/SUP]/19[SUP]th[/SUP] King’s Royal Hussars
Battle of France 1940
In 1939, the Royal Hussars (15/19 KHR) set sail for France. Once on the continent, the Hussars settled in to positions around Bethune. There they trained until 10 May 1940, when the Germans crossed the Belgian and Dutch frontier. The Hussars rushed to forward defensive positions in and around Louvain. As the Allied front collapsed, the Hussars were ordered to take up new positions west of Brussels and hold Assche at any cost so that the 4th Division could establish a new line of defence 15 miles (24km) to the west. Just as 15/19 KHR arrived at the town on 18 May, all three of its squadrons were simultaneously attacked by German combined arms.
Heavy fighting ensued and the Hussars were encircled, but they valiantly struggled on, buying time for the retreating 4[SUP]th[/SUP] Division. For the remainder of the month, 15/19 KHR used their dwindling armoured vehicles to cover the withdrawal to Dunkirk and eventually were forced to march as infantry until their own evacuation on 30 May.
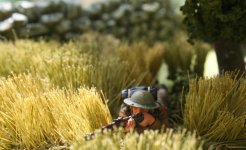 A British Tommy fights back
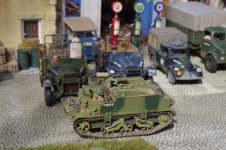 A dwindling number of KHR's BEF vehicles
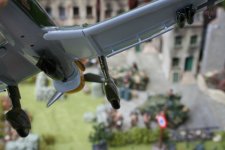 An Anglo-French force under Stuka attack
Back to the Fight
On August 13, 1944, 15/19 KHR was ordered to embark for France as quickly as possible to replace the shattered 2nd Northamptonshire Yeomanry. Upon landing in France they drew Cromwells and Challengers from the 2nd Armoured Reinforcement Group, then dashed forward to replace their fellow tankers during the night of 17 August. They spent the next week fighting light skirmishes around Flers and Argentan as the 11th Armoured Division completed its operations in the Falaise Pocket.
The division then fell back and took some much needed rest, but the 15/19 KHR, one of the few fresh British armoured regiments in the area, continued in support of 43rd Wessex Division’s assault across the Seine at Veron.
On the far side of the river the German 49th Infantry Division occupied the heights and an ancient Roman fortress. As the Wessex infantry boarded assault boats, the Hussars took up positions along the bank. From there they let loose a barrage of fire, pinning down the defending Germans, and allowing the Wessex to row across in relative safety.
Once the Wessex secured the far bank, one troop of C Squadron sailed across the river on hastily constructed rafts, then scaled the heights to dominate the valley below. Seizing this position allowed the engineers to complete their bridge work without enemy harassment and in turn the whole of 30 Corps to cross the Seine.
Upon rejoining 11th Armoured Division, the Hussars took up rear and flank guard positions for the dash to Antwerp. As the 29 Armoured Brigade led the charge, 15/19 KHR engaged pockets of German resistance, and thus were the last members of the division to reach the city. By the time they arrived, the 159 Infantry Brigade had already secured the almost entirely intact docks.
For the next two weeks the regiment continued operations between Antwerp and Brussels, passing through Assche on 4 September, the site of their epic battle four years earlier. As the Allies prepared for the coming attack into Holland, the 15/19 KHR was detached to support the 32 Guards Infantry Brigade at the de Groot bridge, allowing the 5 Guards Armoured Brigade to fall back to prepare for their famous charge up Hell’s Highway.
For the next several days the Germans made many attempts to push the force back across the Meuse-Escaut Canal. With little room to manoeuvre, the Hussars broke in to small troop sized battle groups to help the Guards repel the Germans until they were relieved by 50th Division.
Valkenswaard
On 17 September, the 15/19 KHR began their Market Garden operations by pushing through the dense woods astride the main road north to Eindhoven in support of 50th Division, covering Guards Armoured Division’s flanks.
Extensive minefields, determined German opposition, and the heavy traffic along the road slowed the Allied advance, but the Hussars managed to reach Hoek by last light and Valkenswaard the following day.
Eindhoven
On 19 September, the 15/19 KHR pushed further up the road to Eindhoven. There A Squadron joined members of the Royals under the command of Colonel Sink’s 506th Parachute Infantry Regiment of the US 101st Airborne Division. A company of paratroopers and the squadron, deployed west of Heike to protect his flank. From there the squadron broke in to smaller forces (see previous).
A troop of tanks and a scout car, under command of Captain Weatherby was ordered northwest to the Wilhelmina Canal bridge. ‘Weatherbyforce’ dashed up the road capturing ten Germans and forcing another forty to swim the canal into B Squadron’s line on the north bank where they were captured.
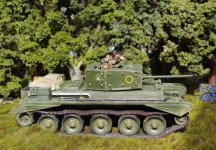 'Weatherbyforce' tank and scout car
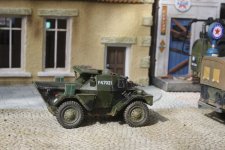
15[SUP]th[/SUP]/19[SUP]th[/SUP] King’s Royal Hussars
Battle of France 1940
In 1939, the Royal Hussars (15/19 KHR) set sail for France. Once on the continent, the Hussars settled in to positions around Bethune. There they trained until 10 May 1940, when the Germans crossed the Belgian and Dutch frontier. The Hussars rushed to forward defensive positions in and around Louvain. As the Allied front collapsed, the Hussars were ordered to take up new positions west of Brussels and hold Assche at any cost so that the 4th Division could establish a new line of defence 15 miles (24km) to the west. Just as 15/19 KHR arrived at the town on 18 May, all three of its squadrons were simultaneously attacked by German combined arms.
Heavy fighting ensued and the Hussars were encircled, but they valiantly struggled on, buying time for the retreating 4[SUP]th[/SUP] Division. For the remainder of the month, 15/19 KHR used their dwindling armoured vehicles to cover the withdrawal to Dunkirk and eventually were forced to march as infantry until their own evacuation on 30 May.
 A British Tommy fights back
 A dwindling number of KHR's BEF vehicles
 An Anglo-French force under Stuka attack
Back to the Fight
On August 13, 1944, 15/19 KHR was ordered to embark for France as quickly as possible to replace the shattered 2nd Northamptonshire Yeomanry. Upon landing in France they drew Cromwells and Challengers from the 2nd Armoured Reinforcement Group, then dashed forward to replace their fellow tankers during the night of 17 August. They spent the next week fighting light skirmishes around Flers and Argentan as the 11th Armoured Division completed its operations in the Falaise Pocket.
The division then fell back and took some much needed rest, but the 15/19 KHR, one of the few fresh British armoured regiments in the area, continued in support of 43rd Wessex Division’s assault across the Seine at Veron.
On the far side of the river the German 49th Infantry Division occupied the heights and an ancient Roman fortress. As the Wessex infantry boarded assault boats, the Hussars took up positions along the bank. From there they let loose a barrage of fire, pinning down the defending Germans, and allowing the Wessex to row across in relative safety.
Once the Wessex secured the far bank, one troop of C Squadron sailed across the river on hastily constructed rafts, then scaled the heights to dominate the valley below. Seizing this position allowed the engineers to complete their bridge work without enemy harassment and in turn the whole of 30 Corps to cross the Seine.
Upon rejoining 11th Armoured Division, the Hussars took up rear and flank guard positions for the dash to Antwerp. As the 29 Armoured Brigade led the charge, 15/19 KHR engaged pockets of German resistance, and thus were the last members of the division to reach the city. By the time they arrived, the 159 Infantry Brigade had already secured the almost entirely intact docks.
For the next two weeks the regiment continued operations between Antwerp and Brussels, passing through Assche on 4 September, the site of their epic battle four years earlier. As the Allies prepared for the coming attack into Holland, the 15/19 KHR was detached to support the 32 Guards Infantry Brigade at the de Groot bridge, allowing the 5 Guards Armoured Brigade to fall back to prepare for their famous charge up Hell’s Highway.
For the next several days the Germans made many attempts to push the force back across the Meuse-Escaut Canal. With little room to manoeuvre, the Hussars broke in to small troop sized battle groups to help the Guards repel the Germans until they were relieved by 50th Division.
Valkenswaard
On 17 September, the 15/19 KHR began their Market Garden operations by pushing through the dense woods astride the main road north to Eindhoven in support of 50th Division, covering Guards Armoured Division’s flanks.
Extensive minefields, determined German opposition, and the heavy traffic along the road slowed the Allied advance, but the Hussars managed to reach Hoek by last light and Valkenswaard the following day.
Eindhoven
On 19 September, the 15/19 KHR pushed further up the road to Eindhoven. There A Squadron joined members of the Royals under the command of Colonel Sink’s 506th Parachute Infantry Regiment of the US 101st Airborne Division. A company of paratroopers and the squadron, deployed west of Heike to protect his flank. From there the squadron broke in to smaller forces (see previous).
A troop of tanks and a scout car, under command of Captain Weatherby was ordered northwest to the Wilhelmina Canal bridge. ‘Weatherbyforce’ dashed up the road capturing ten Germans and forcing another forty to swim the canal into B Squadron’s line on the north bank where they were captured.
 'Weatherbyforce' tank and scout car
panda1gen
Colonel
- Joined
- Jul 29, 2005
- Messages
- 8,297
The next day, the 20[SUP]th[/SUP], the force moved to Nederwetten, where Panthers, sent from the Rhineland to reinforce the front, were spotted moving through the forest. Firing from town, the Hussars destroyed two tanks and forced the others to withdraw.
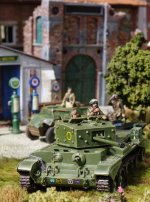
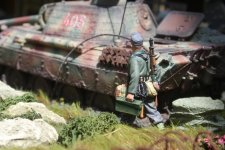
Meanwhile, Captain Pearson was sent east to Geldrop with two troops and a scout car in support of the Royals. From there they moved to Neunen in support of the Americans, but were forced back by an intense German counterattack and regrouped once again in Eindhoven.
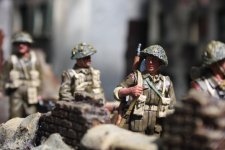
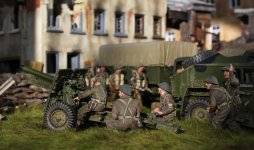
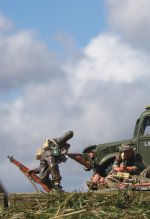
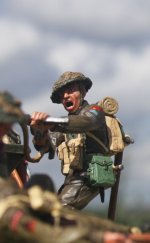
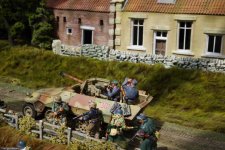 A cautious advance on a raised road
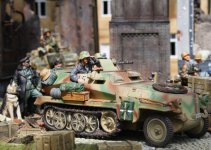 Panzer Grenadiers in support
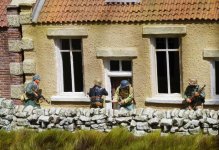 'We have infantry all over us!'
villagehorse
Lieutenant General
- Joined
- Feb 5, 2010
- Messages
- 17,018
Starting to see the tide turn as the Germans gain the upper hand. You have done a fabulous job unfolding this story Kevin. Robin.
panda1gen
Colonel
- Joined
- Jul 29, 2005
- Messages
- 8,297
Starting to see the tide turn as the Germans gain the upper hand. You have done a fabulous job unfolding this story Kevin. Robin.
Thank you Robin for the kind words and encouragement.
panda1gen
Colonel
- Joined
- Jul 29, 2005
- Messages
- 8,297
The remainder of A Squadron was held at Eindhoven under Captain Lutrell’s command to protect the 506th’s headquarters.
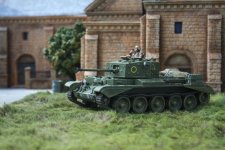
As night fell on 19 September, an intense German air raid struck the city, shattering A Squadron’s supply echelon.
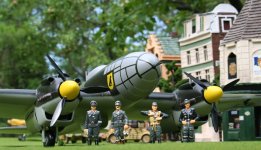 Rare early K&C glossy Luftwaffe bomber crew and extremely rare early K&C mahogany He 111 prepare for take off
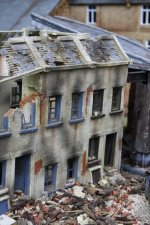 Eindhoven was badly damaged
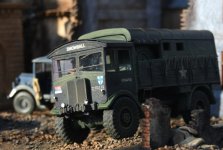 Trucks try to escape the moonscape of rubble
Through heroic effort, the force managed to move several lorries, filled with ammunition and petrol, to safety before they caught ablaze (see earlier).
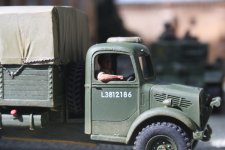 brave K&C Bedford 3t truck driver carrying inflammable cargo
Users who are viewing this thread
Total: 2 (members: 0, guests: 2)


