Battle for Arnhem.... (1 Viewer)

ref: https://www.sagerssoldiers.com/mg001-reece-jeep-by-king-and-country-retired/

Product Description


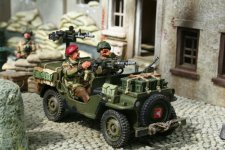
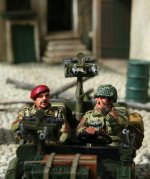
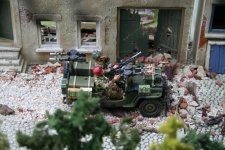
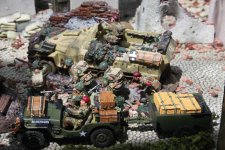
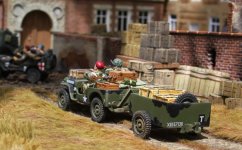
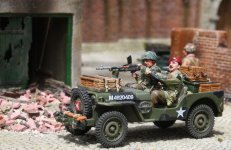
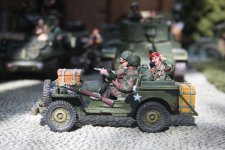
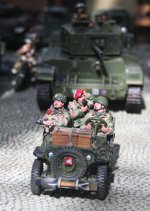
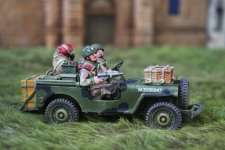
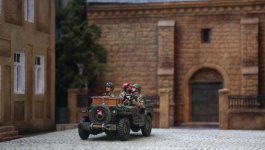
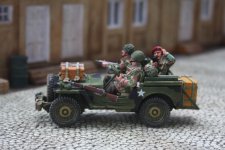
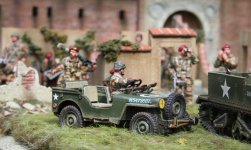
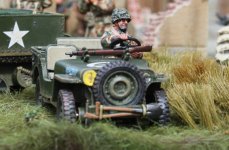
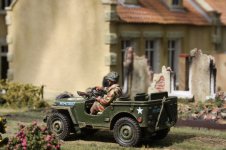
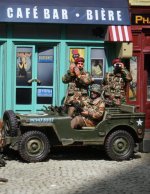
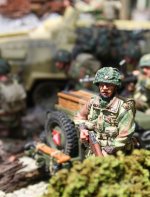
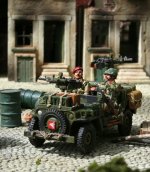
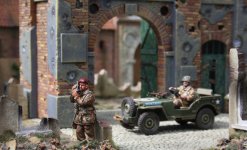
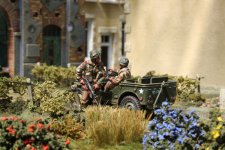
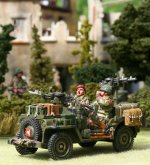
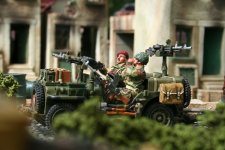
MG001 “The Recce Jeep”

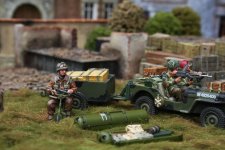
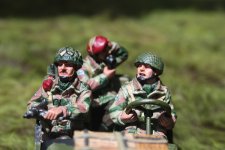
A two-man set sitting in a very well-armed jeep… a pair of twin Lewis guns plus a Bren gun and a whole host of fuel, ammo and supplies make this particular jeep set a “must-have”. An additional feature of all of these new “ARNHEM” sets is that each paratrooper is actually “named”. Manning this recce jeep are… (driver) Lance Corporal Tony Neville and (gunner) Sergeant Jack Edwards.


“OPERATION MARKET GARDEN”

At last, the much-anticipated new British Paras are about to “descend from the heavens” and land into the hell that was the little Dutch town called… ARNHEM… in September 1944.

Immortalized in the book and then the movie, “A Bridge Too Far”, K&C proudly and defiantly returns and improves on our first big World War Two Success — “ARNHEM’44”.
That series was the very first major toy soldier range to introduce, what has now become, the “industry standard” — the Matt-painted toy soldier accompanied by a wide variety of scale model fighting vehicles.


Other Details

Release Date:November 2007


Retired Date:December 2009


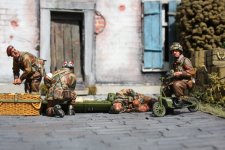
I covered the history of the reconnaissance squadron earlier, and how they were mainly blocked from reaching Arnhem Bridge. I also covered Maj Gough's story. I have enjoyed taking pictures of these MG series jeeps. More to come before I get back to the history.
img_0133csr.jpg

img_0184sr.jpg

jeepsr.jpg

img_0233sr.jpg

img_0538sr.jpg
 
ref https://www.sagerssoldiers.com/mg002-airborne-jeep-trailer-by-king-and-country-retired/

Product Description


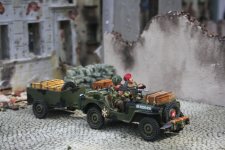
MG002 “Airborne Jeep & Trailer”

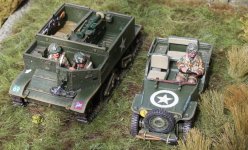
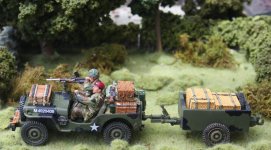
Jeeps played an important transport role during the battle… apart from a few Gun Carriers, jeeps were ubiquitous during the battle — recce jeeps… ambulance jeeps… radio jeeps… and, of course, hauling trailers full of ammunition and supplies.

That’s what K&C has produced… an Airborne Jeep & Trailer complete with 2 Paras… one manning a Bren gun and the other driving. Inside the trailer are two large basket containers of supplies.


Other Details

Release Date: December 2007

166csr.JPG

IMG_2611csr.JPG

IMG_2687csr.JPG

002srx.JPG

IMG_2797sr.JPG
 
MG029 Radio Jeep by King and Country (RETIRED)

Price $139.00


Product Description

MG029 “Radio Jeep”

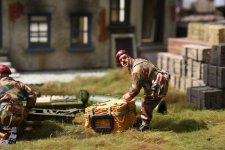
Jeeps were essential to these airborne soldiers and so were radios… Fortunately the jeeps worked… unfortunately the radios did not! However, it’s all part of the “ARNHEM” story. Here an officer (with Sten gun ready) and his driver ferry their radio operator around the drop zone trying to get a better signal!

Other Details

Release Date: April 2010

Retired Date: January 2014


084srk.JPG

094csrk.JPG

485sr.JPG

469csr.JPG

554sr.JPG
 

MG053 "Airborne Jeep" by K&C

Price:$129.00

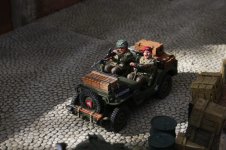
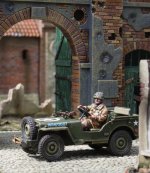
When it comes to the Paras you can never have “too many jeeps”. Since all our earlier Para Jeeps are retired we’ve had many requests for another...and here it is. A simple, straight forward, regular “Airborne Jeep”complete with Para driver.

Other Details

Release Date: October 2014

Retired Date:August 2016

IMG_5359csr.JPG

IMG_5365csr.JPG

IMG_5744csr.JPG

IMG_7815csr.JPG

IMG_66333csr.JPG
 
MG046 Arnhem Universal Carrier by King and Country

Price:$165.00

Product Description

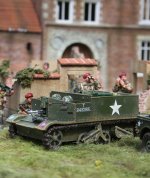
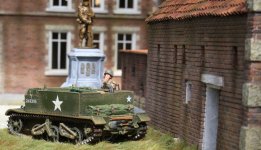
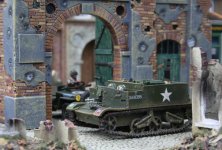
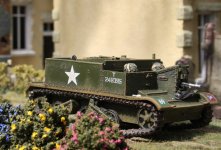
MG046 “Arnhem Universal Carrier”

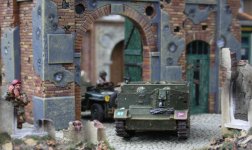
Over the years K&C has produced many models of the different kinds of jeeps that took part in “Operation Market Garden”…but relatively few Bren Gun carriers…Well, that’s changing with the release of our best and most accurate carrier yet!

Just 16 of these little tracked vehicles landed with the British 1[SUP]st[/SUP] Airborne Division…all came with the Air Landing Brigades and belonged to the Royal Army Service Corps. They were used to transport ammunition and haul the Brigades howitzers and anti tank guns.

Thanks to the help of our good friend “Arnhemjim”, a leading expert on the battle our model represents one of those carriers featured in many photographs taken during the battle.

As you can see two R.A.S.C. men “crew” the vehicle.

Other Details

Release Date: November 2013

Retired Date:

IMG_5362csr.JPG

IMG_5395csr.JPG

IMG_5759csr.JPG

IMG_7803csr.JPG

IMG_5371csr.JPG
 
MG046 Arnhem Universal Carrier by King and Country

Price:$165.00

Product Description

MG046 “Arnhem Universal Carrier”

Over the years K&C has produced many models of the different kinds of jeeps that took part in “Operation Market Garden”…but relatively few Bren Gun carriers…Well, that’s changing with the release of our best and most accurate carrier yet!

Just 16 of these little tracked vehicles landed with the British 1[SUP]st[/SUP] Airborne Division…all came with the Air Landing Brigades and belonged to the Royal Army Service Corps. They were used to transport ammunition and haul the Brigades howitzers and anti tank guns.

Thanks to the help of our good friend “Arnhemjim”, a leading expert on the battle our model represents one of those carriers featured in many photographs taken during the battle.

As you can see two R.A.S.C. men “crew” the vehicle.

Other Details

Release Date: November 2013

Retired Date:

View attachment 264537

View attachment 264538

View attachment 264539

View attachment 264540

View attachment 264541

Hello panda1gen and members of the forum,
Andy did a great job on the Universal Carrier, taking only slight artistic license on the rear in order to integrate a pintle providing means to tow trailers and guns. Suffices even the vintage W. Britains Ltd., took similar liberties on occasion. For those who might be interested in the research that went into the vehicle you might want to glance at; http://arnhemjim.blogspot.com/2012/10/the-universal-carriers-of-british.html
Particularly note the ordnance "T" number and tactical markings.
Arnhem Jim
Arizona Territory
 
Last edited:
Thank you for your contribution Arnhem Jim, the 'Bren Carrier' is a good model. It is also a good link to the next bit, the history, of the rarely mentioned backwater that was the RASC.


Ref: Arnhem 1944 The Airborne Battle by Martin Middlebrook ISBN 0-14-014342-4


The RASC at Arnhem

RAF transport squadrons would fly in the paratroopers and tow their gliders.

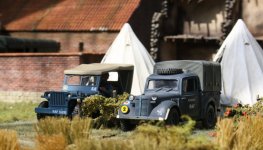
IMG_1744csr.JPG RAF transport and tents

Royal Army Service Corps
(RASC) units saw to it that their supplies initially went with them and that they were resupplied.
The 223[SUP]rd[/SUP], 799[SUP]th[/SUP] and 800[SUP]th[/SUP] Air Dispatch Companies were based on or near the relevant RAF airfields and were responsible for packing and loading the aircraft and gliders as well as pushing out the baskets of supplies from aircraft on resupply missions.

IMG_73321csr.JPG Preparing to load RASC vehicles

These men received no parachute training and were not volunteers like RAF aircrew. They did receive flight pay however and some were unofficially allowed to wear red berets on leave. These regular air-despatch units would be supplemented by men drawn from other RASC companies in the 1st and 6th Airborne Divisions, although not from the airborne platoons.

Because of the more prolonged duration of the Arnhem operation than planned, there would be more air supply flights. A much greater and riskier RASC effort than originally planned would be needed. The casualty rate would be higher as a result.

As discussed in earlier posts regarding preparation for Market Garden, a large contingent of 1[SUP]st[/SUP] Airborne were sent to Europe by sea, before the operation began. Therefore, it was planned that most of the division's RASC transport would reach Arnhem by land.

IMG_8753csr.JPG Busy road

167sr.JPG 40mm Bofors AAA covers a vulnerable transport hub


Many hours of hard work were put in by RAF and WAAF ground staff at the various airfields. Also, thousands of parachutes were packed at a central unit at Credenhill, near Hereford.

IMG_2189sr.JPG RAF ground staff take a break

For the second lift, gliders were carefully loaded once again, with the usual attention being devoted to weight distribution, whether carrying supplies, vehicles or guns. If the glider pilot could pull down on the tail and lift up the nose wheel, a Horsa was deemed to be perfectly loaded. Examples of loads for a Horsa would be a rifle platoon (smaller than line infantry to fit the glider) or a jeep, trailer and six men, or a jeep and two trailers of supplies.

Each load was almost exactly three tons, and each soldier and his equipment was assumed to weigh 210 pounds (15 stones). Various items of equipment were issued to every man e.g. a life jacket, two 24-hour ration packs, two hexamine heating blocks, twenty cigarettes, sweets, one candle and a box of matches.

The RASC also packed reserve ammunition in containers, then took them to the American airfields to be loaded on to the Dakotas.

Eighty-two RAF messenger pigeons were also taken to Arnhem.

In addition, three platoons of 250 (Airborne) Light Composite Company RASC took part in the initial airborne landing. Their main duty was to collect supplies dropped by parachute and distribute the contents to appropriate 1[SUP]st[/SUP] Airborne Division's units.

IMG_2547sr.JPG Jeep with supply trailer

It was also planned that a light transport platoon with jeeps and trailers, carrying a large reserve of ammunition, would arrive on the second lift.

IMG_2564sr.JPG A pannier of ammo for the light howitzer

Although they had their primary roles, all the men in these units were also trained to fight as infantry.

IMGP39582csr.JPG
 

After the landing on the 17[SUP]th[/SUP], those 1[SUP]st[/SUP] Airborne units with journeys to make to Arnhem prepared to set out. Most did so in good order, although there were some changes in the minor units attached to the parachute battalions.

101srz.JPG Bren gunner warily sets off to Arnhem


For example, each battalion was supposed to have one troop of four 6-pounders from the anti-tank battery that had landed, but in the rush to get off, an extra gun team attached itself to the 2nd Battalion column.

027csr.JPG An extra 6 pounder would come in useful at the bridge


Two RASC platoons had arrived, one mainly by parachute to accompany 1st Parachute Brigade Headquarters, which was about to move off towards Arnhem.

IMG_6519zsr.JPG A Brigade HQ jeep sets off for Arnhem


The other came by glider and was due to remain with the Airlanding Brigade at the landing area. However, the parachute RASC platoon was slow in assembling, and its commander asked the other platoon commander to exchange roles.

IMG_73282rcsr.JPG


It was by such chance and decisions, that the extra gun team and the glider borne RASC platoon found themselves with Lt Col Frost and 2 Para at the Arnhem Bridge. The survivors would all become prisoners of war, whereas if the respective RASC units had adhered to their original roles, they might have had a chance of evacuation at the end of the battle.

IMG_7557rcsr.JPG


As discussed earlier, the ‘sea tail’ of 1[SUP]st[/SUP] Airborne traveled by sea
. The division's ‘B Echelon’, consisted mostly of RASC, REME (Royal Electrical and Mechanical Engineers) and other units' heavy transport. They embarked on American Liberty ships in London on the 14[SUP]th[/SUP] August, when 1,100 vehicles and 2,264 men left in preparation for one of the cancelled operations. They landed on Gold Beach in Normandy three days later, as there were still no other ports available. The vehicles were filled with second-line ammunition and two days' rations for the whole division. They also carried much of the division's personal kit.

The plan was for them to travel behind XXX Corps’ ground forces, before joining up with the airborne elements. Their supplies should then enable the division to continue in action after the airborne landing. The 'sea tails' of the Polish brigade and the 52nd (Lowland) Division were also sent to Europe by sea. They were held at a transit camp in Normandy for over two weeks. During that time efforts to requisition its transport, to help in the NW Europe ground forces' supply crisis (see earlier posts regarding the planning of Market-Garden), had to be resisted. The large convoy only moved forward by stages, first for Operation 'Linnet', then for Operation 'Comet'. The penultimate park was in the Louvain/Brussels area.

Gunner Harold Lee described their progress across France and Belgium as 'a leisurely and euphoric journey', but was concerned about security when he heard Arnhem mentioned in cafes at Louvain. On the 15[SUP]th[/SUP] of September, after some last-minute arrivals joined from England, they moved to fall in as ordered, fourteen miles behind the tip of the huge XXX Corps column of vehicles, which would form the ‘Garden’ assault. Gunner Lee reported, 'a carnival atmosphere', in anticipation of the advance.

IMG_1556sr1.JPG Transit camp

936csr.JPG 14 miles behind the tip

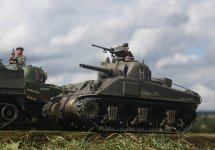
1017csr.JPG Irish Guards Sherman ready to go

IMGP9890ccsr.JPG Lt Col Vandaleur, Irish Guards Group at the tip of the XXX Corps spear


Meanwhile, back at the Arnhem landing grounds, the Airlanding Brigade units, 1[SUP]st[/SUP] Airborne Divisional Headquarters and part of the Light Regiment did not depart on landing on the 17[SUP]th[/SUP]. They were due to remain close by the landing area until the second lift arrived. The landing and dropping zones quickly became almost deserted, apart from the last few men still trying to release trapped glider pilots in the few overturned Hamilcar gliders or to free jeeps in crashed Horsas. Some RASC jeeps and trailers were also still being used to collect ammunition from the containers dropped by the Dakotas.

The force about to be sent to Arnhem was the 1[SUP]st[/SUP] Parachute Brigade Group, a force calculated to be capable of independent action. It formed four columns, those of the three battalions and Brigade HQ. Besides Lathbury's Brigade Headquarters and the three parachute battalions under his command, the Group included, 1[SUP]st[/SUP] Parachute Squadron and part of the 9th Field Company of the Royal Engineers, most of the 1st Airlanding Anti-Tank Battery, 16 Parachute Field Ambulance, No. 3 Platoon of 250 RASC Company and at least two forward artillery observation officers with each battalion and at Brigade HQ, together with some glider pilots and various other personnel.

Brigade Headquarters was to follow the 2[SUP]nd[/SUP] Battalion route to the north end of the road bridge. In or following this column would be most of the 1[SUP]st[/SUP] Parachute Squadron, the RASC platoon, the headquarters of 1[SUP]st[/SUP] Airlanding Anti-Tank Battery and a Military Police field security section. It was planned that 16 Parachute Field Ambulance would drop off at St Elizabeth Hospital in Arnhem.

IMG_5326csr.JPG HQ group

IMG_7743csr.JPG Get moving

085csrz.JPG March on

IMG_66332csr.JPG Medics
 

The 1st Parachute Brigade HQ, under the command of the Brigade Major, Tony Hibbert, followed 2 Para closely, as did the Brigade Defence Platoon. A large part of Major Douglas Murray's 1[SUP]st[/SUP] Parachute Squadron, RE, also went to the bridge.

045csr.JPG


The Brigade Headquarters group arrived at the bridge about forty minutes after the 2[SUP]nd[/SUP] Battalion men but they suffered some casualties on the way.

IMG_3012q1sr.JPG


This force was joined by an RASC platoon lead by Captain Bill Gell. The unit was mostly on foot, but it also had two jeeps and four trailers loaded with invaluable ammunition. As discussed earlier, it was not this platoon's original role to go to the bridge. Captain Gell had accepted it at the landing area, when the originally allocated RASC platoon had failed to assemble on time, after a relatively scattered parachute landing.

024srx.JPG


Three more jeeps turned up at the bridge later. Major Freddie Gough and his Reconnaissance Squadron men (who had given up looking for the divisional commander) had two jeeps.

img_0180csr.jpg


Another carried Major Dennis Munford, commander of the Light Regiment battery due to support the 1st Parachute Brigade, with his driver and two signallers. His post was nominally based at Brigade Headquarters.

IMG_6540sr.JPG
 

The only other arrival at the bridge during the night was most of No. 2 Platoon, 9th Field Company, RE, adding another thirty or so men to the force at the bridge.

The composition of the force at the bridge did not change at all after most of the 2nd Battalion's B Company, and the other men who had been trying to make a crossing at the pontoon area, came into the perimeter.

The exact number of men who formed the bridge garrison will probably never be known, but what follows is quoted from: Arnhem 1944 The Airborne Battle by Martin Middlebrook ISBN 0-14-014342-4
·
2nd Parachute Battalion: Battalion HQ, HQ Support Company, A Company and B Company (less most of No. 4 Platoon) - 340 men.

1st Parachute Brigade HQ, including Defence Platoon and Signals Section - 110 men.

1st Parachute Squadron, Royal Engineers (RE): HQ, A Troop and most of B Troop – 75 men.·

3rd Parachute Battalion: C Company HQ, most of No. 9 Platoon and part of No. 8 Platoon - 45 men.·

1st Airlanding Anti-Tank Battery, Royal Artillery (RA): HQ, B Troop plus one gun team of C Troop - 40 men.

250 Light Composite Company, RASC: No. 3 Platoon - 40 men, plus Major David Clark from Divisional HQ RASC.·

9th Field Company, RE - part of No. 2 Platoon - 30 men.


In addition there were an estimated 59 men from other units:

Glider pilots - 17, all or nearly all from B Squadron arriving with the antitank guns;

Reconnaissance Squadron -
8 men under Major Gough

Royal Artillery -
12 men from forward observation officer parties;

RAOC (Royal Army Ordinance Corps) -
6 men

REME -
5 men

Intelligence Corps - 5 men

Military Police - 2 or 3

'Jedburgh' team -
2 men (US and Dutch officers, minus a missing US NCO)

War correspondent – 1

The total force at the bridge thus numbered an estimated 740 men, equivalent to less than one and a half parachute battalions. Although many of those men were not trained to the standards of a parachute battalion, nearly all had valuable combat potential. Less than half of the force was from the 2nd Battalion.

Amongst the 740 total were sixty or so officers. Lieutenant-Colonel John Frost was of course the ranking officer in command, but given the specialist and HQ units that had congregated at the bridge, he had a remarkable thirteen majors with him.

There was a good cross-section of units available, but one element not present would be sadly missed: there was no part of 16 Parachute Field Ambulance there. It had been anticipated that there would be easy evacuation of seriously wounded cases to that unit's location at St Elizabeth Hospital, but that did not happen. Captains J. W. Logan and D. Wright, the medical officers of the 2nd Battalion and Brigade HQ, and their orderlies, would have to treat all the wounded without any assistance from surgical teams.

IMG_3077q1csr.JPG Troops approach the bridge area

IMG_7690csr.JPG Lt Col Frost was the ranking officer

IMG_5369csra.JPG Checking positions

IMG_5760csr.JPG The Bren carrier was used for towing guns and transport

IMG_3012q1csr.JPG Due to over optimistic assessment of enemy strength, the bridge force would be surrounded and separated from surgical support


Along the southernmost route to the bridge, the Germans were covering a square near the pontoon bridge area, firing across it from a distance. Men were split up into small groups to dash across, but several were hit.

IMG_3085q1csr.JPG get ready to dash lads

The driver of one of the RASC jeeps was also wounded, but Corporal Doug Beardmore went back, under fire, and drove the jeep clear with its two trailers loaded with ammunition.

There was a story that gained widespread belief that a captured German lorry, commandeered by the RASC, was loaded with ammunition and driven through enemy forces to the bridge that night. It is now believed to be incorrect. The lorry did reach the outskirts of Arnhem, but no further.


The ammunition taken to the bridge by the RASC was in the four jeep trailers brought in earlier by Captain Gell's platoon. Without it the Bridge force could not have held on as long.

IMG_2692csr.JPG

IMG_5745csr.JPG jeep in Arnhem after unloading supplies
 
IMG_73282rcsr.JPG

Great thread mate I have enjoyed it so much over the years and the occasional laugh this time his lunger hanging out of his gob.......................^&grin^&grin
 
View attachment 265364

Great thread mate I have enjoyed it so much over the years and the occasional laugh this time his lunger hanging out of his gob.......................^&grin^&grin

Thanks for the kind words and glad you like it, I wonder what inspiration Andy had for the 'lunger'............


RASC and the 2[SUP]nd[/SUP] Lift

Three Hamilcars heavily loaded with trailers full of ammunition had been despatched as an experiment; two were unloaded, but the Germans captured the third before it could be emptied. Horsa gliders had brought in fifteen jeeps, each with two trailers full of ammunition for the airlanding battalions.

An RASC light transport platoon of eighteen jeeps and trailers had also been sent; so each brigade could have a reserve ammunition column.
Five Polish anti-tank guns were landed safely and driven to Divisional HQ. The Poles looked forward to joining up with the rest of their brigade, which was due to drop on the following morning.

The actual glider landing, even under fire at one place, appears to have cost the lives of only eight men: four glider pilots, two artillerymen, one REME jeep driver and a 10[SUP]th[/SUP] Battalion man travelling with one of his unit's jeeps.
There were no serious unloading problems for most of the gliders, and all but one was safely emptied by 5.30 p.m.

The resupply operation by glider had mostly been successful.
As well as the gliders, a further element of the air operation was a parachute resupply. Thirty-three Stirlings launched from Harwell, their loads comprised 803 panniers or containers loaded with eighty-six tons of supplies. This was mostly gun and mortar ammunition, with some petrol. No food was sent at this point.

The drop would be on an open space in the woods north-west of Oosterbeek, designated LZ-L.


One Stirling turned back and one was shot down earlier in the flight. The remaining thirty-one flew in, just after the glider landing. They released their supplies and RASC jeeps and trailers went out to collect them.
This supply drop was another element planned under the assumption that there would be little opposition. In reality, the area chosen was not yet fully under British control.

As a result,
only twelve tonsof the eighty-six tons of supplies were gathered in.
 

The collection of supplies from a dropping zone was mainly the duty of the RASC. When the first major drop took place, on Tuesday, Captain Desmond Kavanagh led four jeeps and trailers carrying about twenty-four men of his platoon out towards the dropping zone, even though this was a mile away in German-held territory. It was a hopeless venture.
The platoon had only just crossed the railway bridge at Oosterbeek Hoog when it was fired upon by a German tank hidden in trees alongside the Dreijenseweg.

IMGP8275csr.JPG


The leading jeep was hit, and the ones following, all traveling at speed, crashed concertina-wise into its trailer.

IMG_7719sr.JPG
Captain Kavanagh's jeep before he set out on his re-supply mission


Captain Kavanagh died covering the retreat of his men with a Bren gun, and several other men were killed.

IMGP8247csr.JPG


Driver Ken Clarke, who took part in this action, says:

'Seeing our captain and others in our small party killed in this manner has always stuck in my mind as one of the most vivid and dreadful memories of the campaign.'
 

The Parachute Supply Drops


The six Stirling squadrons of No. 38 Group and six Dakota squadrons of No. 46 Group were designated for this duty. Supplies were carried either in metal containers, which were stowed in the Stirling's bomb-bay or wing-root positions, or in large panniers (like laundry baskets) pushed out of the fuselages of each aircraft by the Royal Army Service Corps dispatchers carried for this purpose.

The Stirling could carry 2.64 tons of supplies, the Dakota 1.97 tons, neither payload included the weight of containers or panniers.
The aircraft allocated for the next few days could therefore carry 390 tons of supplies.

This was equivalent to 130 of the RASC's standard 3-ton Bedford trucks rolling into the divisional area each day, if all the aircraft arrived, if all the supplies fell in the correct place and if they could all be collected.


The pre-packed containers and panniers had been brought in from the supply dumps in RASC vehicles, one lorry-load for each aircraft. They were then fitted with parachutes and loaded into or on to the aircraft by the 454 dispatchers, who would also embark on the flight.

106srk.JPG RASC trucks were busy bringing supplies to be packed

IMG_8433sr.JPG RAF vehicles in hectic to and fro as preparation got under way

The novelty of the first large-scale resupply flights and the whole Arnhem operation was so great that several people, including some staff officers, had such interest aroused that they asked to fly as passengers. For example, Bob Francis was a Canadian war correspondent who had twice taken off for Arnhem in aircraft which had been forced to turn back. He would get a place and with it he would get his story this time.

Arnhem quickly started to become costly for the air units. Despite their increasingly heroic actions in flying over the area, the difficulties of collection of supplies on the ground would help to seal the fate of 1[SUP]st[/SUP] Airborne.

An operation planned to last three days at most would last into a second week and the first major effort to maintain a force fighting on the ground in Europe by air supply would fail, though not because of any lack of determination by the aircrews concerned.

007zzcsr.JPG RAF aircrew prior to embarkation


A total of 629 flights would be made:
· 371 by Stirlings · 258 by Dakotas

These would result in the loss of 66 aircraft: · 43 Stirlings (11.6% of those despatched) · 23 Dakotas (8.9%) · an overall loss rate of 10.5 per cent.

The lost aircraft contained 540 men: 360 regular aircrew and a few passengers, plus 180 RASC despatchers.


Of those, 222 - 144 aircrew and 79 despatchers - would be killed or would die of wounds.


In addition, 123 became prisoners of war.


The other 195 were fortunate enough to parachute safely, crash-land in the airborne corridor in Holland or in Belgium, or to evade capture with the help of Dutch people and return to England.

 
Ref M. Middlebrook


RASC units at Arnhem/Oosterbeek
250 (Airborne) Light Composite Company, RASC Based at Longhills Hall, Branston, and at Lincoln.

Three parachute platoons, with jeeps sections attached, together with a light transport section of jeeps, were provided by the company for the airborne operation, most of the heavy transport coming up with the 'sea tail'.

They flew in 4 C-47s from Barkston Heath and Saltby and 34 Horsas and 3 Hamilcars from Keevil, Harwell and Tarrant Rushton.

In total, 226 men (including 10 from 93 Company attached) went in.
Casualties were: - killed 29 - evacuated 75 - missing 122.


RASC Air Despatch Units


48 Air Despatch Group had their HQ at Poulton, near Cirencester.

The group's air-despatch companies were 223, 799 and 800, all based on or near the Dakota squadron airfields of RAF 46 Group.

Most of these units' despatchers flew with those squadrons, but some also flew in RAF 38 Group using Stirlings in later stages of the Arnhem resupply operation.


49 Air Despatch Group
had their HQ at Down Ampney.

This was probably a looser organization which used as despatchers men drawn from 253 and 63 Light Composite Companies, which were 1st and 6th Airborne Divisional companies.

Most or all of these despatchers flew in 38 Group Stirlings on the Arnhem operation.


The RASC dispatcher fatal casualties in shot-down aircraft are believed to be:


1.
253 Company: 27

2. 223 Company: 18

3. 63 Company: 17

4. 799 Company: 8

5.
800 Company: 6

6. Unknown units: 3.


One hundred yards north of the car park in front of the Arnhem Oosterbeek War Cemetery is a roadside memorial to the men of the RASC Air Despatch units lost on the re-supply flights.
 

Users who are viewing this thread

Back
Top