Battle for Arnhem.... (2 Viewers)

XXX Corps were trying meanwhile, to reach Valkenswaard .....

IMG_9481csr.JPG

IMG_1470sr.JPG

Urged on by Lt Col Vandeleur ....

IMGP77711rcsrz.JPG
 
to continue from #1560

The plan contd........

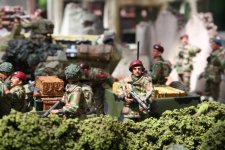
The 2nd Parachute Battalion, with a troop of 6-pounder antitank guns and some Royal Engineers, would take the southern, minor road along the north bank of the Rhine (code-named 'Lion' route). They were to capture the Arnhem road bridge and the railway bridge over the Rhine near Oosterbeek. They were then to establish one company in a defensive position south of the river in the road-bridge area.

020csr11.JPG


The 3rd Parachute Battalion, augmented as the 2nd Battalion but with fewer Royal Engineers, were to take the main Heelsum-Arnhem road (code-named 'Tiger' route) into Arnhem and assist the 2[SUP]nd[/SUP] Battalion in capturing and holding the road bridge.

154sr.JPG


The 1st Parachute Battalion, augmented as the 3rd Battalion, were to be held back until released by the brigade commander. They would then follow the Reconnaissance Squadron on the northern route. Later, they were to turn off and secure some high ground north of Arnhem.

090srk.JPG


However it has been said that 'no plan survives contact with the enemy' ........

IMG_72391csrz.JPG

IMG_7737csr.JPG
 
Kevin,

Another tremendous set of photographs!:salute::
Thanks Louis, glad you like them.


I covered this in relation to 2 Para and the forces that reached the bridge at # 1531, but in discussing the wider Airlanding Brigade, recap briefly here .....

Brigade Headquarters would follow the 2nd Battalion to a position in Arnhem close to the north end of the road bridge. As previously described, other elements in or following this column would be most of the 1[SUP]st[/SUP] Parachute Squadron, the RASC platoon, the headquarters of 1[SUP]st[/SUP] Airlanding Anti-Tank Battery, a Military Police field security section and 16 Parachute Field Ambulance, which was to drop off at St Elizabeth Hospital in Arnhem.

The most important part of the ‘Market’ story at Arnhem concerns how much progress Brigadier Lathbury and these units would make in the remaining hours of daylight on that Sunday.
M Middlebrook states that,

‘Nothing less than the ultimate success of Operation 'Market Garden' rested on the ability of the Reconnaissance Squadron and the 1st Parachute Brigade Group to capture and hold the Arnhem road bridge’.


IMG_7715csr.JPG Elements of Airlanding Brigade HQ


Advance elements in contact with Krafft's Battalion

IMG_5320srz.JPG

IMGP2349csr.JPG

054srx.JPG

IMG_3970csrz.JPG


Ref: M Middlebrook

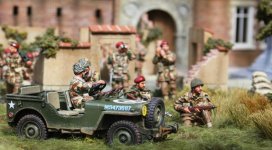
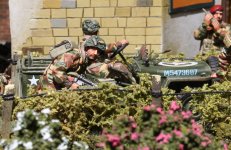
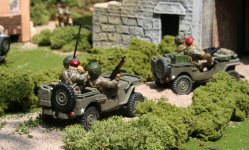
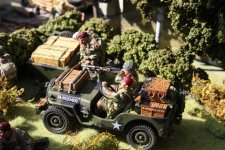
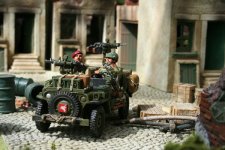
The armed jeeps of Major Freddie Gough's Reconnaissance Squadron were sent directly to the Arnhem road bridge, as the squadron was under Lathbury's command. This was not what they had trained for. Gough had three troops of eight jeeps and wanted them to scout ahead of the three parachute battalions in the unit's normal role. Lathbury had been denied an attack on the bridge in a coup-de-main by the airforce commanders above him, so decided to use the squadron instead, Gough was in turn overruled.

They were to be accompanied by four jeeps of 9th Field Company Royal Engineers who would disarm any demolition charges on the bridge. They had a glider crash in England, so this, the necessary reorganisation and slow unloading of gliders on landing, meant they did not show up in time.

IMG_73332csr.JPG re-organising after landing

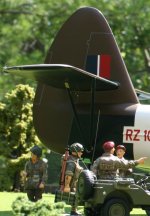
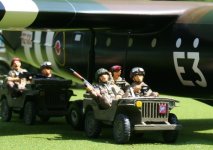
Reconnaissance Squadron jeeps and drivers came by glider, most of the men landed by parachute. One glider cast off over England and two others crashed on landing, but they still formed up quickly. A Troop was most affected, but it was to remain behind in divisional reserve anyway. They landed about eight miles from the bridge, which should be less than half an hour's drive.

Eight men in two jeeps of Lieutenant Peter Bucknall's section from C Troop were to lead, but the move did not go according to plan.

IMG_73602csr.JPG
Lieutenant Peter Bucknall was in the lead jeep
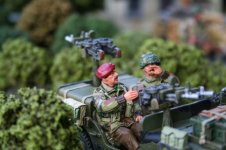

Trooper Arthur Barlow recalled that he was normally the wireless operator in Lieutenant Bucknall's jeep:

“We had landed by parachute and were at the RV waiting for the jeeps. Lieutenant Bucknall was very impatient; he knew we should be first off. The second jeep arrived first, but not Bucknall's. Most of the others were ready, and Bucknall was very impatient; his language would not be printable; he was furious. So, he took the second jeep, turning the driver out and taking the wheel himself, and telling me to stay behind and wait for No. 1 jeep, which had the wireless.

We were at least half an hour late. Bucknall set off, bumping along the track towards Wolfheze, and went out of sight. It was four or five minutes later before the other jeep turned up and we followed, with Lance-Sergeant McGregor in charge.
The other sections followed us; they had all assembled properly and they moved off at the proper intervals, within hand-signalling distance of each other, but Lieutenant Bucknall's jeep was five minutes ahead of us and out of sight.

We met no military along the way to Wolfheze, just civilians waving to us from windows or gardens; we didn't stop to speak to anyone. We weren't worried about encountering any resistance; we had been told there would be little opposition. We were hoping that it would be quiet like that all the way through to the bridge. We went over the railway crossing at Wolfheze and turned right, down a track alongside the railway.

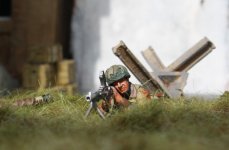
Then two things happened almost at once. We heard heavy firing from in front, where we assumed the first jeep was, and, at the same time, we were fired on from the top of the railway embankment up the road on the right. Reg Hasler was driving and immediately stopped the jeep, which had taken a direct burst of machine-gun fire across the radiator.

Jimmy Pierce, Tom McGregor and myself ran to the road verge on the right-hand side of the jeep. Dicky Minns, Hasler and 'Taffy' Thomas were to the left of the jeep and partly beneath it. Heavy machine-gun fire continued. Minns, being more exposed, had his hip shattered and other wounds, and lay in the road bleeding profusely, calling for help. Thomas was hit in the foot, while Hasler was hit in both legs and unable to move.

On our side of the road, McGregor was to my left, about four or five feet away. He raised himself up on his hands to have a look around and died immediately, falling flat on his face without making a sound, killed by a burst of machine-gun fire in the face and chest."

img_0330sr.jpg
attack jeep

602csrz.JPG
pinned down

IMG_5278srz.JPG
return fire
 
Another set of terrific photos, Kevin!:salute:: The jeeps are very photogenic!
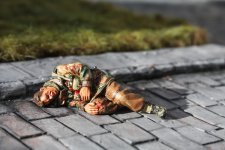
Thanks Louis

Arthur Barlow had one shot hit the cocking handle of his Sten gun and another hit him in the thigh, as he and the other survivors continued to exchange fire with the Germans. However, about half an hour later, someone waved a white flag and they became prisoners. Speaking in perfect English, a German NCO promised that the wounded Minns would be looked after.

IMG_6000srz.JPG wounded para

IMG_5906srz.JPG returning fire

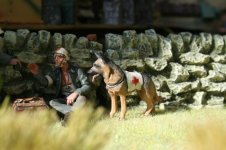
img_2533sr.jpg German wounded and four legged medic assistant
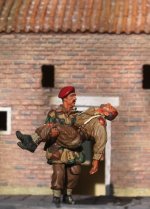
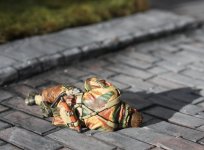

Whether by accident or design, the Germans did not go back for the badly wounded Trooper Minns, as promised. He was hit by a bullet in the stomach which exited through his hip and a second which entered his side and came out through his leg. He lay there for the rest of the day and all night. He tried to crawl to Wolfheze but only managed a few yards before becoming unconscious.

IMG_6010ccsrz.JPG

He was found next morning by his own unit, but was wounded again during the siege at Oosterbeek. He was hospitalised for two years after the war and remained crippled for thirty-five years until the Parachute Regiment Association arranged admittance to the Military Hospital at Woolwich for a replacement hip:


'I jokingly asked the surgeon if he could add two and a half inches to my leg, and he did so. It was marvellous; I threw away my built-up boot and caliper.'
 

Lt Bucknall and his three paratroopers in the leading jeep were all killed. The jeep was found the next day in a track by a wooded rise. They had been hit in the back by bullets and scorched in the front by a flame-thrower.

IMG_6002csrz.JPG


Maybe the jeep was traveling so fast that it went past the Germans before they could fire? Or maybe the Germans initially held their fire, perhaps hoping for a second jeep, before they
exposed their positions? It was not discovered when the flame-thrower was used.

(Because of the switching of the lead jeep, the flame-thrower-burned body of Trooper Ted Gorringe was wrongly identified. It was not until 1987 that the Commonwealth War Graves Commission accepted that it was Trooper Gorringe's grave).

The rest of C Troop only saw what had happened to the second jeep, described above. Their C.O. was Captain John Hay. Hay ordered the next section to dismount .......

IMG_5370csr.JPG

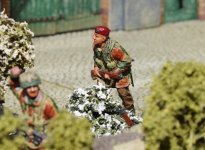
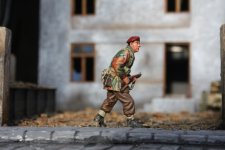
..... and advance tactically, on foot.

023srzx1z.JPG


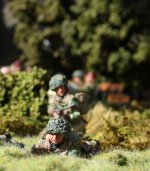
However, the Germans proved too strong for their small force, so they were forced to retreat with two men fatally wounded.

IMG_0754sr.JPG

IMGP2201csrc.JPG


Last edited:

Lt Bucknall and his three paratroopers in the leading jeep were all killed. The jeep was found the next day in a track by a wooded rise. They had been hit in the back by bullets and scorched in the front by a flame-thrower.

View attachment 267964


Maybe the jeep was traveling so fast that it went past the Germans before they could fire? Or maybe the Germans initially held their fire, perhaps hoping for a second jeep, before they
exposed their positions? It was not discovered when the flame-thrower was used.

(Because of the switching of the lead jeep, the flame-thrower-burned body of Trooper Ted Gorringe was wrongly identified. It was not until 1987 that the Commonwealth War Graves Commission accepted that it was Trooper Gorringe's grave).

The rest of C Troop only saw what had happened to the second jeep, described above. Their C.O. was Captain John Hay. Hay ordered the next section to dismount .......

View attachment 267965

..... and advance tactically, on foot.

View attachment 267966


However, the Germans proved too strong for their small force, so they were forced to retreat with two men fatally wounded.

View attachment 267967

View attachment 267968


Kevin,

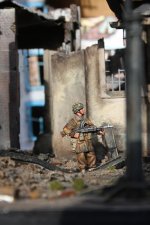
Your collection of European buildings useful for a WW2 western front scene is beyond impressive. I noticed you slipped in a Hudson & Allen destroyed Stalingrad Factory, but it works seamlessly. The photos, and the narrative, are excellent!:salute::
 
Kevin,

Your collection of European buildings useful for a WW2 western front scene is beyond impressive. I noticed you slipped in a Hudson & Allen destroyed Stalingrad Factory, but it works seamlessly. The photos, and the narrative, are excellent!:salute::

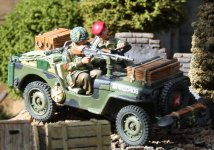
Thanks Louis, but it is a TM Terrain ruined factory - I have not yet managed to find any H&A buildings in the UK yet and same with TM.

IMG_6068srz.JPG
 

The Reconnaissance Squadron had suffered seven men dead or dying, plus four men captured.

IMG_2779csrcz.JPG

IMG_5082rcsr.JPG


It was halted less than half a mile after it left Wolfheze. If the jeeps had managed to set off on time, they might have been clear before Krafft’s block was in place, or alternatively, had they used a more northerly route from Wolfheze, they might have outflanked it. As it was, it hit the northern end of the Battalion Krafft blocking line just after it was established.

IMG_0385csr.JPG


The unit was unlucky perhaps, but the plan had not lead them to expect such opposition outside of Arnhem.

IMG_2542sr.JPG


The squadron was not allowed to scout ahead of the parachute battalions, but failed in its imposed assault task. With it, the first attempt to reach Arnhem bridge also failed.

IMGP82341csr.JPG
 

A short, but exaggerated, entry in Battalion Krafft's war diary read:
'The enemy has reconnoitered on No. 4 Company front and is attacking with two-company strength. Our advance defences beat him off and took prisoners.'

Surprisingly or not, no further attempt was made to send either of the Reconnaissance Squadron's other two troops (with thirteen operational jeeps), to the bridge.

img_0232sr.jpg

IMG_25952ccsrz.JPG


Given Battalion Krafft’s actual dispositions, unless they were fortunate enough to select 2 Para’s route, driving up to hidden troops in waiting, whilst riding exposed on a few jeeps, may not have been advisable anyway.

IMGP23142ccsr.JPG
 

As it was, Brigadier Lathbury's three parachute battalions were all on the move even before the Reconnaissance Squadron’s action. Lathbury ordered the 2nd and 3rd Battalions to move off by 3pm along their respective routes (see map at #1552).
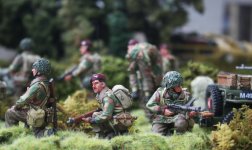
Their leading companies moved tactically.

IMG_6040csrz.JPG

The marching men of the other companies, the jeeps of the battalion and the various attached units, formed a long column behind.

IMGP8166rcsr.JPG

IMG_7275csr.JPG

024ssr.JPG

023srz.JPG


It is worth noting some relevant command confusion at the same time. The liaison officer from the Reconnaissance Squadron failed to appear at Brigade HQ. In his absence a message was received by Lathbury’s HQ, via wireless, that the squadron 'had lost most of its transport'.

This was probably not a report on the skirmish with Krafft, although Lathbury should have heard that had the squadron had started its move to the bridge. It may have been presumed this was due to lost or crashed gliders. In truth, twenty eight of the squadron's thirty one jeeps survived, slow assembly was the cause of their delayed start. In ‘Arnhem - 1944: The Airborne Battle’, M Middlebrook notes that,

't
he story of the Reconnaissance Squadron’s loss of most of its transport found its way into official reports. It persisted in post-war books until 1978, when a well researched account of the Reconnaissance Squadron at Arnhem, John Fairley's ‘Remember Arnhem’, Peaton Press, Bearsden, Glasgow, was published'.

It was perhaps also referred to in the film, ‘A Bridge Too Far’?
 

Lathbury now urged his battalions to advance even faster. This included the 1st Battalion, which was earmarked as a possible reserve. It was ordered to move off as quickly as possible along the northern route.

IMGP8168rcsr.JPG 1st Battalion sets off


Meanwhile, Lathbury sent signals to the 2nd and 3rd Battalions, to suggest that they each mount a company on all available jeeps and rush them through to the bridge, as the Reconnaissance Squadron had been intercepted.

IMG_5322csr.JPG He wants us to do what?


Both battalion commanders ignored this advice.

IMG_9599csrf.JPG Frost considers the CO's suggestion.


Accompanied by his Intelligence Officer, Captain Willie Taylor, Lathbury then set off by jeep, to visit his battalions in person. He first caught up with the 2nd Battalion. Having told Frost to move even faster, he headed to the 3rd Battalion.

498sr.JPG


As discussed earlier, the Brigade HQ column, commanded by Major Tony Hibbert, followed closely behind the 2nd Battalion.

IMG_5798srz.JPG


From ‘Arnhem - 1944: The Airborne Battle’, the approximate timetable of this sequence of events was thus:

2.10 p.m. Parachute drop complete

2.45 p.m. All parachute battalions at RVs and on brigade wireless net

3.00 p.m. 2nd and 3rd Battalions set off

3.00 p.m. Reconnaissance Squadron fails to set off

3.20 p.m. Reconnaissance Squadron 'has lost its transport' report circulates

3.30 p.m. 1st Battalion ordered to move; Brigadier Lathbury leaves his HQ

3.35 p.m. Reconnaissance Squadron finally leaves its RV

3.45 p.m. 1st Parachute Brigade HQ and other units set off

3.45 p.m. Reconnaissance Squadron halted by German opposition


Brigadier Lathbury was not the only commander to chivvy his units along, due to the Reconnaissance Squadron's misfortune. Major-General Urquhart, the divisional commander, heard news of a set-back, whilst visiting the Airlanding Brigade HQ.

IMG_95951srz.JPG K&C figure of Major-General Urquhart


It was probably news of the action taking place on the other side of Wolfheze, rather than the false report about the loss of the Reconnaissance Squadron's jeeps.

img_0712csrz.jpg


However, it meant that Urquhart wanted to ask Major Gough, the Reconnaissance Squadron commander, to arrange a fresh attempt to reach the bridge using the squadron's jeeps.

IMG_5410src.JPG K&C figure of Major Gough on the right
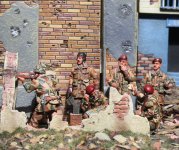

An attempt to contact Gough via his jeep’s wireless set failed.

IMG_6541sr.JPG


The Reconnaissance Squadron had been put under the command of the 1[SUP]st[/SUP] Parachute Brigade. Its headquarters wireless set was on the brigade net, not the divisional one. Even though he was only three-quarters of a mile away on the other side of Wolfheze, Gough could not be reached.
 

Urquhart left orders at both his own headquarters and the Airlanding Brigade HQ, to find Gough and ask him to come to Urquhart. However, Urquhart then made a significant error, albeit an understandable one in the circumstances.

IMG_6205csr.JPG a view of Divisional HQ

This was his first divisional battle in command. He well understood the need for speed. He did not wish to play a static role for nearly twenty-four hours, until the second lift arrived, stuck in his Divisional Headquarters.

Urquhart therefore went to look for Brigadier Lathbury in his jeep, to urge more speed in the advance. By now it was about 5 p.m. Lieutenant-Colonel Robert Loder-Symonds, the divisional artillery commander went with him, as well as his driver and wireless operator.

IMG_7701csr.JPG
Urquhart before the journey by jeep


This journey was potentially risky, given that he traveled without an escort and it entailed a drive into insecure territory. Urquhart was lucky however and encountered no danger. He followed the southern route, where he met Lathbury's Brigade HQ column and the rear of the 2nd Battalion. He missed Lathbury, who had by now moved on to the 3rd Battalion.

IMG_72402csrz.JPG
Urquhart reaches Lathbury's Brigade HQ column
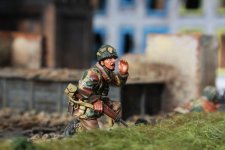

Tony Hibbert, the Brigade Major, remembered Urquhart shouting to him as he raced away: 'Hibbert, for God's sake get your brigade moving or the bloody Germans will get to the bridge before us.'

IMG_5909srz.JPG 'you heard the brass, get a move on'

IMG_6669srz.JPG


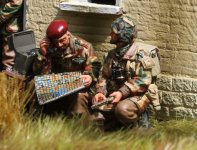
Loder-Symonds became separated at some point, but was able to make his way back to his headquarters. Urquhart, his driver and his wireless operator continued on their journey to the 3rd Battalion, hoping to catch Lathbury. Eventually, both arrived safely.
 

Major Gough meanwhile received Urquhart's order to meet him in the middle of the Reconnaissance Squadron's fight by the railway line. So he now set out to find Urquhart, traveling in two jeeps loaded with men of his unit. Gough also tried to contact Lathbury by wireless but could not reach him. This may have been the first important example of how the sandy soil and wooded nature of this area limited the range of the division's wireless sets. I covered the communication problems earlier, at post #1395.

IMG_9482csr.JPG


Gough visited the Airlanding Brigade and Divisional HQs in turn, looking for his divisional commander.

IMG_72421csrz.JPG


He then drove along the southern route, where Urquhart’s position was last reported. He failed to find Urquhart, but decided to continue further on the southern route, towards his unit's original objective, the Arnhem bridge. This decision would effectively remove him from his unit for the rest of the battle. More detailed accounts of the history and background of the Reconnaissance Sqdn start at #1401 and Major Gough’s history begins at #1405.

569sr.JPG


This detailed description has been given as these events on the first afternoon were to prove important to the ultimate outcome of the battle. Although it was only a minor clash between the Reconnaissance Sqdn and Krafft’s Battalion, its impact should be considered together with the subsequent communications (or lack of) and the effect on the movements of these senior officers.

The result was that the only attempt made to reach the Arnhem bridge swiftly by vehicle, was stopped in its tracks, far from the bridge. The Reconnaissance Squadron's commander was then sent on a wild goose chase, whilst the bulk of his unit returned to the divisional area. They were not employed again that day in any useful role. To compound the unit’s problems, they also lost their commander for the remainder of the battle.

img_0181sr.jpg


Both the divisional commander and the 1[SUP]st[/SUP] Parachute Brigade's commander had also left their headquarters. Urquhart was, 'charging around like a wet hen', as one officer (perhaps a little unkindly) described it. Set against this leadership void, all units of the 1st Parachute Brigade were on their way to Arnhem and had not yet met much opposition.

IMG_6152srz.JPG
 

Users who are viewing this thread

Back
Top