Battle for Arnhem.... (2 Viewers)

The second lift was delayed by more than four hours ...

IMG_73442rcsr.JPG


.... a source of much frustration to the units that had to maintain their positions around the landing areas.

IMG_5908srz.JPG

IMGP7958 - src 0.JPG


They did this in the face of increasing German pressure as the day wore on with still no sign of the lift's approach.

IMG_0550 - cs 0.JPG

IMG_0365sr.JPG
 
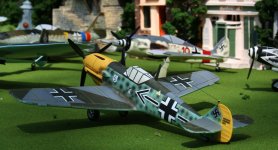
An added danger was the appearance during the morning of between twenty and thirty Messerschmitt 109s which made strafing runs on the landing areas used the previous day.

IMG_75141rxs.JPG


They particularly attacked the areas on which there were gliders to be seen.

IMG_7324 = rs 0.JPG


Several gliders were set on fire. That, and a few men wounded, was the only effect of ten minutes or so of noisy and violent action. The fighters flew off and would be back at their bases in Germany, unprepared for action, when the second lift approached.

IMG_7513 - rsc 0.JPG

IMG_7527xrrs.JPG


There may have been only one British fatal casualty from this strafing. Out on the Airborne Corps HQ glider landing zone near Nijmegen was a solitary RAF officer. He was Wing Commander John Brown, who was in charge of two RAF radar parties due to come in by glider, with the second lift, to Arnhem.

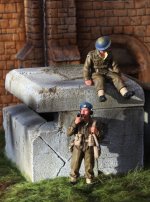
Two radar party members wait, prior to embarkation on the glider ....

002 = rsc 0.JPG
 
Ref: Arnhem - 1944: The Airborne Battle by M. Middlebrook


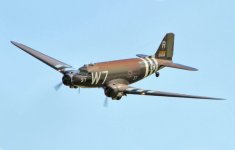
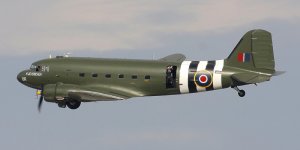
The plan for the second lift, as far as Arnhem was concerned, was that the balance of the 1st British Airborne Division, mainly the 4th Parachute Brigade Group, would be flown in as early in the day as possible. Take-offs were planned for soon after 7.0 a.m. Unlike the first lift, the American parachute aircraft would fly in first — 123 C-47s and three C-53s. These would be provided by the 314th and 315th Troop Carrier Groups based at Saltby and Spanhoe respectively.

C47_Skytrain.jpg


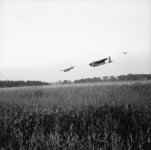
Most of the RAF's 38 and 46 Groups would be dispatched once again; 296 aircraft would tow 281 Horsas and 15 Hamilcars (see below) ......

Hamilcar glider.jpg


...... containing the balance of the division's guns, vehicles and infantry, including twenty-five glider loads from the first lift that had force-landed in England the previous day.

IMG_73531sr.JPG


Also from the glider lift were ten Horsas from Manston carrying the first element of the Polish brigade to fly to Arnhem - mainly an anti-tank troop - and four Horsas from Harwell with the two RAF radar warning teams aboard.

Thirty-three further aircraft, Stirlings of 295 and 570 Squadrons from Harwell, would carry out the first of the daily parachute resupply drop for the units already landed at Arnhem.

It would be another day of massive air operations, with nearly 2,500 aircraft involved in Operation 'Market' flights. It is an interesting point that, while the Polish brigade was still waiting to fly to Arnhem, 110 B-17 Flying Fortresses of the 8th US Air Force were flying that day from England in a last attempt to drop supplies to the dying Warsaw Uprising, in support of which the Polish brigade had originally been raised.

IMG_7443srrx.jpg
 
Good job Louis, as I resized a lot more ....

Ref: Arnhem - 1944: The Airborne Battle by M. Middlebrook

The second-lift units and aircraft were all ready by the Sunday evening, but during the night mist was forecast for many of the English airfield areas. Lieutenant-General Brereton's staff decided that the take-offs would have to be delayed until this hazard cleared
IMG_7427 = rscr 0.JPG


U unfortunately, communications were so poor that there was no way of informing the commanders at Arnhem of the delay.
IMGP43291crcsrz.JPG


The second-lift aircraft had to wait four hours before the weather cleared. Take-offs eventually commenced at 11.20 a.m.

However, a further change of plan had been made during that waiting period. The original plan was to use the southern approach route, entailing a longer flight but making more use of Allied-held territory. Weather reports from Belgium now showed that this route was affected by thick raincloud, so it was decided that the northern route should again be used.

Navigators and map readers had to be rebriefed and new flight plans made.
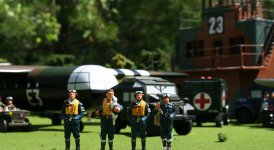
IMG_7357 = scr 0.JPG


Two stand-by Dakota crews at Broadwell, brought in at the last moment to tow gliders which had aborted on the first lift, were not informed of the change. There were no serious accidents; one glider crashed when its tug's engines failed, but there were no casualties. There were showers and cloud in some places, but only seven Horsas and one Hamilcar from the Arnhem force came down early over England.

One of the Horsas, being towed by a 299 Squadron Stirling, landed safely at Martlesham Heath airfield. The Stirling pilot, Flight Lieutenant B. H. Berridge, also landed there, had the glider reattached to the tow line and took off again; but the Stirling was later damaged by flak over Holland and had to cast off its glider there.

The only mishap to any of the American parachute aircraft was when a 314th Troop Carrier Group aircraft nearly crashed after a badly fitted parachute on one of the supply containers under a wing opened prematurely. The container was jettisoned, but the parachute then wrapped itself around the tail wheel, with the container hanging below. The pilot (name unknown) landed carefully at an airfield in East Anglia, all aboard hoping that the contents of the container were not sensitive explosives. In the event, all was well; the parachute and container were cut away, and the C-47 took off again. It was not able to catch up with its own formation and so flew to Holland among the tugs and gliders.

The weather improved over the North Sea. Morale among the airborne troops was high. Many were reading newspapers containing reports of the previous day's successful landings.
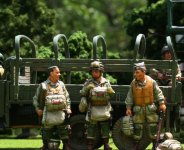
IMG_7428 = rsc 0.JPG


Flight Officer George Hoffman was an American co-pilot.
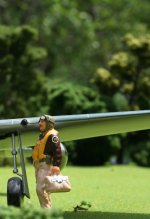
IMG_7415 = rsc 0.JPG


Hoffman later went to talk to the troops in the back of his C-47, probably 10th Battalion men:

'The troopers were joyously talking about the success of the mission and that it would mean the end of the war by Christmas.'

Two gliders had to ditch in the sea. One was a large Hamilcar carrying a 17-pounder anti-tank gun and its towing vehicle. The Hamilcar broke up on hitting the water, and Lieutenant Robert McLaren, the artillery officer, was drowned when the gun broke loose and trapped him. He was the only casualty of the ditchings.
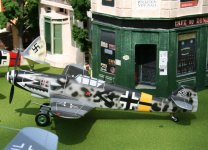
 
Ref: Arnhem - 1944: The Airborne Battle by M. Middlebrook

The stream was met by flak on crossing the Dutch coast.

365 (2)sr.JPG


The fighter escort and flak-suppression aircraft were present ...

IMG_0161 - rrcs 02.JPG

IMG_7386 - rsc 0.JPG


... but the Germans were more prepared than on the previous day, and there was a steady succession of casualties. On the main part of the route across Holland, these occurred not among the American parachute aircraft at the front of the stream - these were almost completely immune at this stage - but mostly among the tugs and gliders. Perhaps the German gunners lay low until the first sweep of fighters had passed over and then emerged to open fire. Several gliders came down over Holland as a result of flak, usually the tow ropes being cut, as well as through the usual problems of tug aircraft engines overheating, forcing gliders to be released.

Staff Sergeant Ron Watkinson was the pilot of a Horsa whose controls were damaged by flak; the load was a 75-millimetre gun and its crew:

We carried on for about another twenty minutes, but then the tow rope broke with the strain of the jerking movements. I managed to get it down close to a farm. The Albemarle circled low over us and saw us get out safely, before flying home. A host of Dutch men and women came out to greet us; but none spoke English. After embracing us, they helped us to unload the glider. We hoped we were not too far from Arnhem and might even be able to get the gun there. We had a lot of problems unloading, because of the flak damage, but we eventually achieved it, mainly through Dutch brawn. We found that the hitches on the jeep, gun and trailer had been damaged by the flak.

We took the jeep and trailer to near a barn, ready to go on the road.....

IMG_7314 = rsc 0.JPG


.... but we were fired on by German troops.

IMGP1604 - srcs 01.JPG

We put up a fight, firing back in the general direction from which the German fire was coming. My second pilot, Arthur Jones, was hit in the shoulder, and one of the gunners took a bullet through his face. We realized we were surrounded; one of the gunners waved a white handkerchief, and we became prisoners. I found out after the war that Arthur Jones died four days later.
 
Ref: Arnhem - 1944: The Airborne Battle by M. Middlebrook

The two Dakotas from Broadwell, whose navigators had not been informed of the change of route had left the stream as it passed over the turning-point at Hatfield, wondering why the aircraft ahead were flying north-eastwards while they turned to the southeast. But they continued on their way, being forced steadily lower by the thickening cloud on that southern route. When they reached Belgium they were flying at only 500 feet.

Dak-H = s 0.jpg


This route was only just inside the Allied front line, and one Dakota must have strayed slightly to the left of the route, for it was suddenly hit in the port side of the cockpit by a shell burst.

128 (2) - rs 0.JPG


This was a 437 Squadron crew but operating on loan in a 575 Squadron aircraft.

The Canadian pilot, Flying Officer Ed Henry, was killed at once; he was the only qualified pilot aboard; the man in the co-pilot's seat, Warrant Officer Bert Smith, was only the map reader. He took the controls in front of him and just managed to keep the Dakota in the air; the glider pilot realized the tug was almost out of control and cast off the tow.

The navigator, Flying Officer Harry McKinley, an American from Brooklyn who had joined the RCAF, was injured but took over the left-hand seat when the pilot's body had been removed:

My map was smeared with blood, as my left index finger had been severed and was hanging as if it didn't belong to my hand. My left arm and side had also been hit, but in the excitement pain was not a factor. We didn't even notice the wind blowing through the large hole in the side of the fuselage. Here we were, a navigator, a map reader and a wireless operator, in a sick plane, and none of us had landed one before - and we were lost. We had a problem!

There followed a gallant flight by two men who had never received any formal pilot training. After two hours and ten minutes of the most rudimentary navigation, the Dakota reached an airfield on the English coast which turned out to be Martlesham Heath.

McKinley, as the senior officer, said he would land the plane, and the other two could either bale out or ride down with him. They both stayed, and the subsequent landing became a team effort. The Dakota bounced its way along the runway, ran off the end on to grass and, by luck alone, through a gap in a row of parked P-47 fighters before coming to a stop.

The Dakota crew were treated as heroes both at the American base and back at Broadwell when they returned there. McKinley then went to the RAF hospital at Wroughton, where he was the first patient in a ward waiting for Arnhem casualties.

IMG_8920 = src 01.JPG


Meanwhile, the cast-off glider had made a forced landing west of Bourg Leopold, just inside the Allied lines in Belgium. The occupants were the commanding officer of the 1st Border, Lieutenant-Colonel Tommy Haddon, and part of his headquarters.

This was their second abortive attempt to reach Arnhem, having been forced to land in England on the previous day. So Lieutenant-Colonel Haddon, his Intelligence Officer Lieutenant Ronald Hope-Jones, their batmen and several other Border soldiers found themselves seventy-five miles from Arnhem. They soon met friendly troops and set out once again to reach their units, this time by land up the airborne corridor.

5322csrcz.JPG

IMGP0312csr.JPG
 
The Germans knew the rule of airborne operations. Unless the initial landing force could be quickly reached by friendly ground forces - as was obviously not going to be the case at Arnhem – that force would need to be reinforced by subsequent lifts.

Such flights to Arnhem could only come from the south or west, and it was on those approaches that the Germans had built up their anti-aircraft defences, through which the approaching Allied aircraft now had to fly.

Coming in first were the two American troop-carrier groups, flying low and at a slow and steady speed preparatory to the parachute drop. Captain Leonard Ottaway's aircraft, flying near the front of the American formations, went down first, about twelve miles before the dropping zone. His C-47 had been the starboard aircraft of a 'vie' of three on take-off; but after the leader had been forced to land in England to clear the container parachute from its tail wheel, Captain Ottaway had moved across to fill in the centre position, and it was here that his aircraft was hit.

Major John Waddy of 156 Battalion was in the aircraft on its left, standing in the door ready to jump:

We were so near the ground that, on occasions, we could actually see the white faces of the flak gunners turned up towards us. The aircraft to the starboard of mine received a direct hit and exploded in a great ball of flame. I watched it pass underneath my aircraft and hit the ground with its port wing; it then rolled over in a great ball of fire.


This is merely a short extract. With respect, I recommend a fuller visit to the following website:


COLONEL JOHN WADDY, who died on Sunday, 27th September 2020 aged 100 years, was a company commander in the 156 Parachute Battalion at the Battle of Arnhem where he was badly wounded in September 1944. 31 years later he was senior military adviser to the film A Bridge Too Far.

Hired for six months to ensure that the action, uniforms and weapons looked as authentic as possible, he was so appalled by the unmilitary way the 50 young actors with minor parts moved as a group he gave them a course of special training. Their language deteriorated though the drill improved.
Waddy could make few changes to the script, which placed far too much emphasis on the Americans in the battle. Richard Attenborough, the director, explained that the project was American financed for an American audience, which was still bruised by the defeat in Vietnam and would be little enthused by a movie about another defeat.

It was also unpopular with some British veterans. One British medical officer, whose gallant part in the negotiation over the removal of the wounded was transferred to a Dutch doctor played by Laurence Olivier, suggested that the film should be renamed A Star Too Many.

Joseph Levine, the producer, simply declared that he made films for money, not history.

Nevertheless, Attenborough showed his appreciation by giving the name Waddy to the driver of General Horrocks (Edward Fox) at the beginning of the film and placing him as an extra in a later scene with General Urquhart (Sean Connery).
 
The plane had been carrying half of 156 Battalion's Machine-Gun Platoon. Dutch civilians later said that one man was thrown clear, but he died of his injuries in a farmhouse that night.

The total death toll was twenty-four: Captain Ottaway, the other five aircrew and eighteen paratroopers.

Three more C-47s from the 314th Troop Carrier Group, all carrying men of the 11th Battalion, were shot down in the next few minutes. But there were no more violent explosions, and there were at least some survivors from each of the lost aircraft.

It is clear that the American aircrews attempted to remain at their posts until as many as possible of the paratroopers could jump.

When Captain Warren Egbert's plane's port engine caught fire, he pulled up alongside his element leader to have the fire checked and then held on until all of the soldiers and two of his own crew were able to jump, although Private John Barton's parachute probably did not open properly, because his body was later found on the ground.

Captain Egbert and his co-pilot and navigator all died. The other two aircraft of this group to go down were captained by Captain George Merz and First Lieutenant Fredrick Hale; both pilots and more than half of the men in these aircraft survived.

The stick commander in Captain Merz's C-47 was Captain Frank King of the 11th Battalion:

I didn't know that we had been hit at first. We were all checking each other's kit, getting ready to jump; the crew chief should have been helping but he seemed to be asleep. I was angry and shouted at him and was going to kick him, but then I saw the pool of blood under his seat and realized he was dead.

When I looked out of the door we appeared to be flying straight and level, but we were well below the rest of the formation and I was horrified to see how low we were – no more than 250 feet. I then put my head out, into the slipstream, and saw that the whole of the port wing was on fire.

I shouted to Sergeant-Major Gatland, who was near the tail end of the stick, and told him to open the little door into the pilot's compartment, which he did, and we saw a mass of smoke and flame. The light was still red. It is a very serious offence to jump with a red light, but I had to make a decision and I said, 'We jump', which we did with great rapidity and we got nearly all of them out.

We had been told at Ringway that the X-type parachute opened fully at ninety-eight feet of drop and we couldn't have been much higher than that, because I seemed to hit the ground straight away. When I landed I turned and counted the other chaps coming down; we were three short. I was told afterwards that one man fell in the doorway and the man behind him jumped over him, but his parachute didn't open. Probably the last men in the stick decided they were too low and stayed in the plane. One of them was badly burned.


The second American formation was the 315th Troop Carrier Group, carrying the 10th Battalion and other units of the 4th Parachute Brigade. Two more C-47s were shot down. Second Lieutenant Jim Spurrier's aircraft caught fire; all the paratroopers and the crew chief were able to jump, but from so low a height that one paratrooper died and another and the crew chief both broke legs. The pilot then attempted to force-land the burning aircraft, but the aircraft hit an electricity pylon, skidded round and was engulfed in flames; only the co-pilot, Second Lieutenant Ed Fulmar, survived, severely burned.
The last plane to go down suffered no fatal casualties. Major Pat Anson, a company commander in the 10th Battalion, and his stick of men all dropped safely, and Lieutenant Tucker then crash-landed his plane.
 
The total casualties in the shot-down planes were thirty-one soldiers and seventeen aircrew killed; eleven aircrew and approximately seventy-three soldiers survived.

One of the men who jumped was Sergeant Tony Bolland of the 10th Battalion, who was not included in the main operation because of an injured foot but was allowed to fly as an unofficial despatcher; he was later seen with only gym shoes and without helmet or equipment, steadily grumbling,

'I'm not f—ing-well supposed to be here.'

Another man forced to jump was Flight Sergeant Carter, one of a number of RAF parachute instructors who had trained the airborne men and been allowed to fly as despatchers.

Thanks to the help of brave Dutch civilians, nearly all of the survivors evaded capture.

Most of the soldiers managed to make their way northwards and rejoin their units in the Arnhem fighting ....

IMG_9921 = csr 02.JPG

IMG_9928 = rcs 0.JPG


The Americans went south to meet up with their forces ....

IMG_1045 src.JPG


The American formations flew steadily on through the flak right up to the dropping zone. In response, the flak crews loaded as fast as they could ....

IMG_2359-1rrcs.JPG


Brigadier Hackett had promised his pilot a bottle of champagne if his brigade was delivered to the correct place. Although his plane was being hit, he watched the pilot,

'with his coon-skin hat, smoking a large cigar. I could tell he was quite calm when the flak started to come up by the lengthening ash on the cigar; his hand was quite steady.'

The promised champagne was not actually handed over until Hackett met the co-pilot in 1989.
 
Ref: Arnhem - 1944: The Airborne Battle by M. Middlebrook

The vulnerable and unwieldy tug-and-glider combinations were flying much higher than the parachute aircraft and escaped the worst of the flak, but some were still damaged. These are descriptions from various men.

Flight Lieutenant Jimmy Stark was a 298 Squadron Halifax pilot:

"The air in a glider train can be exceedingly disturbed unless you are in the leading aircraft, and if you hit the slipstream of the aircraft ahead, your wing stalls and you sweat like a pig pulling it up again. To avoid that, the dodge was to move out slightly to one side of the train and thereby fly in clear air.

As we approached the front line, a friend of mine called Ensor was just ahead of me, well out to the left of the train. All of a sudden, his aircraft was surrounded by black puffs of bursting flak. I am afraid that I started laughing and shouting,

'Get into line, you silly clot.'

Then my own aircraft was hit. It was a most unusual sensation and a most unusual noise. It sounded like someone running an iron bar along a corrugated iron fence. I immediately tried all the controls, and they worked perfectly. However, the glider pilot in the Horsa saw the whole incident and started calling me up on the intercom.

'Are you all right?'

I replied,

'Yes, I am all right; are you all right?'

We kept this up for a few minutes; we were like a couple of old 'dolls' at a Women's Missionary Association. Our conversation was brought to a halt by my tail gunner, a laconic Canadian, who said,

'There is a f—ing great hole in your tail.'

Part of the starboard fin had been blown away, but we got to Arnhem safely".


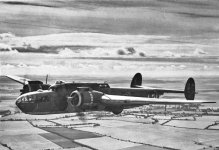
ALBEMARLE tug.jpg

The Albemarle was succeeded by superior British bombers, but was a useful tug.


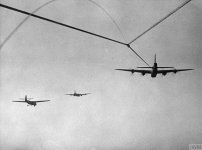
Stirlings_tow_Horsas = s 0.jpg

The text mentions Halifax aircraft as tugs, this photo is of another four engine bomber, the Stirling.
 
Ref: Arnhem - 1944: The Airborne Battle by M. Middlebrook

Gunner Bob Christie of the 1st Airlanding Light Regiment .....

IMG_2489src.JPG


.... was in another Horsa:

IMG_7336 - crs 0.JPG

“The three of us at the rear of the glider heard a series of sudden tearing noises further forward, under the jeep and the trailer. Our immediate thought was that the lashings were working loose. If they were, and the jeep and the trailer started to move, things would progressively get worse, and the glider would get out of control.

I crawled up the floor, between the wheels in their troughs and the skin-and-frame members of the Horsa. Again the noises and sudden shafts of sunlight appeared through jagged holes. It was flak. Relieved, we returned to our seats and, as one, removed our steel helmets and sat on them to protect our vital assets”.


Gunner George Hurdman of the 2nd Airlanding Anti-Tank Battery ......

017csr.JPG


...... was also in a Horsa:

IMG_7305_11sr.jpg

“We heard gunfire, and the glider started to buffet around. The violent movement blew out the glider's back door. The three of us had a tot of rum - a good swig, good for the nerves - and stood up to see outside better. On the spur of the moment, we stood with our backs to the hole, with our arms linked around one another, holding on to the door frame to help cut down the gale of wind coming in and prevent the glider from breaking up. We stayed that way until we landed”.

 
One glider was hit by a heavy flak shell, and onlookers watched it fold into a 'V' shape, with men tumbling out, and then crash.

286 (2)csrz.JPG


This was one of the Horsas containing the RAF radar warning teams. Six RAF men and the two glider pilots were killed. Two of the tug aircraft were shot down.

The Horsa being towed by one, a 512 Squadron Dakota, was able to cast off safely before the Dakota was crash-landed by the wounded co-pilot, Flight Lieutenant Saunders.

But the second tug, a Stirling of 570 Squadron, fell violently out of control and was seen to cartwheel into the ground and explode. The Australian pilot, Pilot Officer George Bell and all his crew were killed instantly, among them an RAF ground-staff corporal who had asked to come on the flight.

The glider pilot successfully cast off the tow and landed the Horsa near the south bank of the Rhine. This was the second RAF radar warning unit glider to be lost. The glider party was later taken across the river by the Driel-Heveadorp ferryman, Pieter Hensen, with many other men from gliders or parachute aircraft who came down south of the Rhine.

IMGP1913rsxc.JPG


However, the glider pilot, Staff Sergeant Bernard Cummins, and two of the RAF men later died in the fighting at Oosterbeek.

IMG_7534 = srrc 0.JPG


That was the end of the incident-packed outward flight of the second lift. The crew of one Stirling tug heard a glider pilot say, just before casting off:

'Thank you, Jesus; we can look after ourselves now.'
 

Users who are viewing this thread

Back
Top