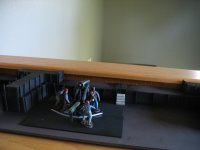
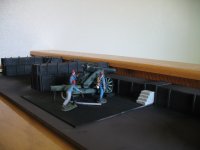
Embrace an Angry Wind, Western American Soldiers from 1778 to 1865 (2 Viewers)

Thank you fro the excellent pictures and the answers.... I would also love to see step-by-step photographs of future dioramas.
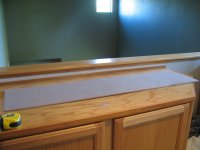
 
Chris, wonderful in all regards. From the pine trees, to the sunken skiff, battery wagon (where did you get that?) to the interior shots of the mortar barges, and the forge, all outstanding. I remember seeing a shot of a WB prototype mortar boat a yr or so ago. Maybe Ken will release soon. Would a "Best In Show" in any competition. Chris
 
Wow, thanks everyone for the positive comments. I am glad you liked it. Especially when it comes from people who have the same interest and have had impressive dioramas themselves. I am in the process of "breaking down" this scenario to make room for the next one that will start right after the 4th of July holiday. Will post the "work bench" pictures then. Hopefully it will not disappoint.

Ken, thanks for the kind comments and I appreciate any new "elements" you and your team at WB can give me. Any hints on the new "elements"? Will we see something in the fall catalog? Do you think WB will make a mortar barge? The mortar set is excellent and it would go well with it.

Well back to work.

Thanks again, Chris
 
This is a brilliant piece of work.Your attention to detail is amazing.I am particularly impressed with your water work-where the river meets the bank.Well done that man.
 
Farmertony, appreciate the compliment, the details definitely helps the diorama. The launch especially had a number of details added to the boiler, gear box and plumbing to add to the realism. The water took some time. The base was painted to match the gradual coloration from the river to the bank. The wateris 3 layers Woodland Scenic's Realistic Water in 1/16 inch thick coats that build to a little over 3/16 inches thick to provide a clear base that reached from the center of the river to the bank. I added various materials to mimic fresh water algae and river debris including the log as wells as the boats with temporary dock in between the layers of the clear water. I then added a base of Woodland Scenic's Water Effects with a brush to provide a base current to the river section being careful to extend it to the Mississippi green water section only. After this was dry, I added a final coat of Water Effects applied with a mixing stick to add the more dramatic current. It did blend nicely from the river to the bank as well as in between the boats and temporary dock. The space is almost 2 feet by 4 feet covered in acrylic. Again I appreciate the comment. Chris
 
Chris
Just caught up with your latest master class of modelmaking which is a pure knockout. A really interesting subject that unfortunately tends to be ignored by most ACW history books let alone dioramas. I'm hooked for the next episode.
Bob
 
Bob, as always, I appreciate your kind remarks and appreciation of the dioramas that I build. I am looking forward to your next installment of the ACW Diaries. Chris
 
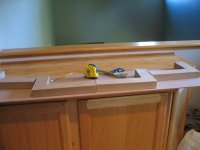
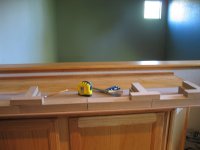
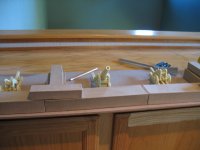
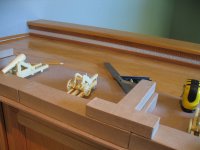
From the Workbench, this weekend I started on Scenario Number 2 which also involves Vicksburg. This time it is from the Confederate point of view and focused on one of the many river batteries that defended the city. All of my diorama's start off basically the same way with a lot of research up front and drafting of a basic story line or concept. I actually did the research on both Scenario 1 and 2 at the same time. I usually maintain a base board size of either 2 feet by 4 feet or 1 foot by 4 feet to maintain a modular approach that can allow utilization of other modular sections that were previously completed for other dioramas. For this scenario we will use a 1 foot by 4 feet section based on the concept. The next step is the feasibility stage where I look for various components we need to complete the concept within the size of the base board. I create a list and then finalize a "buy", "assemble" or "make from scratch" decision. Once all of the decisions have been made, we need to procure the components for the scenario. The procurement of the components usually involves shopping, a lot of shopping in craft stores, building supply stores, model train shops, hobby shops, on line shopping and so on. Then comes the hard part, measuring, a lot of measuring and mockups for framing, blocking and scenario development as well as the constant "hide the bases" with the components we acquired. For example, to create the battery, I am going to use preformed Paper Mache letters "L" and "T" in 2 sizes to form the battery's defenses and balsa wood to create the guns barbettes. I will also utilize 4 Verlinden kits for the Columbia and the 32 pound guns in this battery. The gun crew members will be WB figures from previous Confederate battery sets. I will assemble the kits into subassemblies for base coating and final painting. Once nearly finished with painting , the subassemblies will be put together to finish the guns. This diorama is not as challenging as the last one but there are still some challenges that will need to be over come. I have included pictures of the first early stages. Hope this was helpful. Chris

Begin.jpgfirst entrenchment.jpgsecond entrenchment.jpgfirst battery.jpg
 
From the Workbench, this weekend I started on Scenario Number 2 which also involves Vicksburg. This time it is from the Confederate point of view and focused on one of the many river batteries that defended the city. All of my diorama's start off basically the same way with a lot of research up front and drafting of a basic story line or concept. I actually did the research on both Scenario 1 and 2 at the same time. I usually maintain a base board size of either 2 feet by 4 feet or 1 foot by 4 feet to maintain a modular approach that can allow utilization of other modular sections that were previously completed for other dioramas. For this scenario we will use a 1 foot by 4 feet section based on the concept. The next step is the feasibility stage where I look for various components we need to complete the concept within the size of the base board. I create a list and then finalize a "buy", "assemble" or "make from scratch" decision. Once all of the decisions have been made, we need to procure the components for the scenario. The procurement of the components usually involves shopping, a lot of shopping in craft stores, building supply stores, model train shops, hobby shops, on line shopping and so on. Then comes the hard part, measuring, a lot of measuring and mockups for framing, blocking and scenario development as well as the constant "hide the bases" with the components we acquired. For example, to create the battery, I am going to use preformed Paper Mache letters "L" and "T" in 2 sizes to form the battery's defenses and balsa wood to create the guns barbettes. I will also utilize 4 Verlinden kits for the Columbia and the 32 pound guns in this battery. The gun crew members will be WB figures from previous Confederate battery sets. I will assemble the kits into subassemblies for base coating and final painting. Once nearly finished with painting , the subassemblies will be put together to finish the guns. This diorama is not as challenging as the last one but there are still some challenges that will need to be over come. I have included pictures of the first early stages. Hope this was helpful. Chris

View attachment 175526View attachment 175527View attachment 175529View attachment 175528
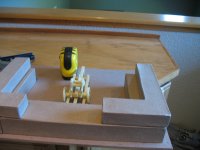
Do you need one of these for support? Michael
 

Attachments

  • uss osage.jpg
    uss osage.jpg
    30 KB · Views: 230
Michael, appreciate the offer but the Federals have enough fire pore for now. Chris
 
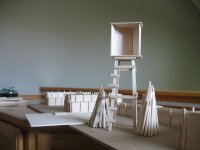
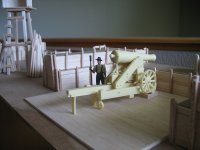
From the workbench, for the last 2 weeks, we have continued to add details to the river batteries with adding braces for the walls that were hand cut out and fitted from balsa wood. We also started some blocking with figures to calibrate the scaling of the custom built material with the actual figures we are going to use in the diorama. Finished the guns and placed them to make sure we did not have any tolerance stack up issues with the models, figures and custom pieces. We also built a couple of extra structures to fit the story. The first one was a beacon light used by the Confederates to light up the Mississippi at night. It was modeled (period image and dimensions) off of a Federal version used in a fort outside of Charleston. We also built 2 bonfire stacks of wood used by the Confederates to light up the batteries and the river. The Confederates would also use abandoned houses and barrels filled with pitch to light up the river when federals tried to "run the batteries":

vicka.jpgvickb.jpgvickc.jpgvickd.jpg
 
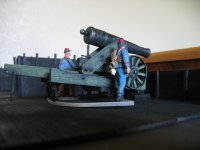
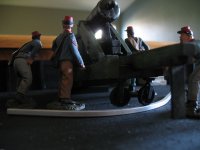
From the workbench continued, I base painted the emplacements and started to do our second round of calibration and tolerance stack up checks. Also got my shipment of resin sandbags to line the upper part of the works and been working on creating the rails for the guns on the barbettes. I also got one of the 32 pounder guns nearly finished. I still need to touch up the gun and add weathering to the gun. I wanted to stage it to look at the color pallets and see what will be needed from alighting perspective to make sure the scene can be seen and the key points are enhanced. In the picture you can see the aluminum rails that I will use to cover up the bases in the pictures. That is all for this week. Let me know what you think. Chris

vick1.jpgvick2.jpgvick3.jpgvick4.jpg
 
Amazing project and release {bravo}}{bravo}}{bravo}}{bravo}}{bravo}}
 
Chris...

such an entertaining group of dioramas...

your attention to detail really makes them pop...

great combination and use of WB figures with your store bought props and home made props...

this is nice...

great job!!!
 
Riverine warfare in the ACW is really interesting.Just caught up with this thread and Chris you have done a great job.Your attention to details is amazing.I will be keeping my eye on this thread from now on.
Mark
 

Users who are viewing this thread

Back
Top