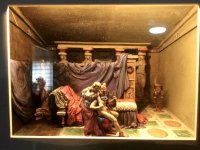
Paris and Helen (2 Viewers)

As is obvious by now, I am really into this piece.

The drapery and cord hangings on the bed spread have been completed. The cord hangings were sculpted on a flexible piece of plastic and when hardened, these were prised off and glued into place in the scene.
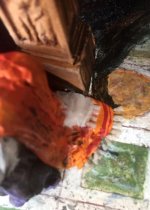
az3.jpg

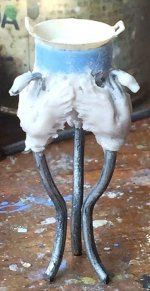
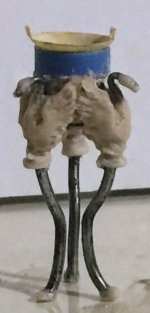
The brazier has been further sculpted. I made the swan necks from smaller bent wire for strength and superglued these into position. Then more putty was added to sculpt the swans.
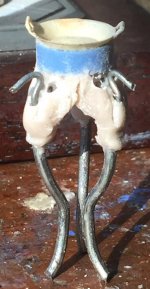
az.jpgaz2.jpg
 
Hello Steve and Mikemiller,

Very nice of you two to say so. I must admit that I am enjoying finishing the last part of this piece now.
Normally, for such a complex diorama, I would have carefully planned for it. However for this piece, I am improvising here and there. This is because I am rescuing this earlier abandoned project from obscurity.

Anyway, most of the brazier has been sculpted, only awaiting final shaping and filing. Surprisingly, this most complex of accessory was quite easy to make, after I luckily managed to bend all the legs into the correct shape.

aw.jpg
 
You've been doing incredible work on the whole project. Hats off to you mate :salute::

Steve
 
Hello Steve,

Thank you for your very kind remarks. I think I got lucky with this piece, winging it here and there so far. I definitely will plan my future diorama projects more carefully.

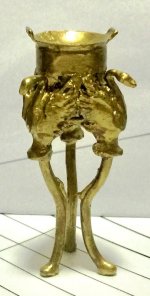
Here's the finished brazier. Ta-dah. A bit of gilt paint does wonders. Surprisingly not that difficult to sculpt as the wip pics has shown.

Now on to the final painitng stages.

Rgds Victor

aq.jpg
 
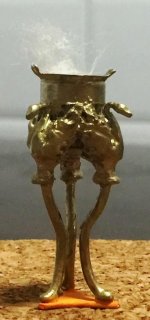
I added a base to the brazier. and some wispy cotton smoke. The auguries are saying that I can finish this diorama soon....:)

as.jpg
 
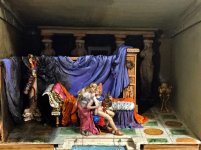
I placed all the elements in place in the diorama and carefully painted in the final details. This is the scene before I I cover it with the glass frame.

a.jpg
 
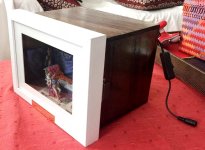
The diorama was placed inside the shadow box with the frame fitted into place. At the back can be seen the LED cable and plug.

a2.jpga3.jpg
 
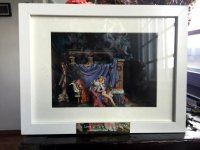
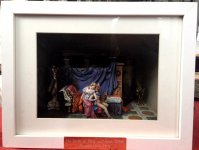
The completed diorama, daytime and with LED lights on at night.

That's it for this piece. Thanks for watching and for all you nice inputs.

I've enjoyed working on the last phase of this piece and the valuable lessons learned here will be used for my next few shadow box projects.

a4.jpga5.jpg
 
Job very well done. Looks absolutely amazing. :salute:::salute:::salute::

Steve
 
Hello Steve,

Thanks for your kind comments. I'm glad that I finished this piece as I really learned quite a bit from its execution. The completion was helped in no small measure by the innovation of convenient LED light strips which I am now happily incorporating into my shadow boxes.

Rgds

Victor
 
Hi Mike,

Thanks for your kind comment. I have to reiterate that I was lucky with this piece. It was started more than 2 decades ago and abandoned.

I remember that the initial concept was a simple scene in a square box room, separated by a screen. No perspectives and the depth would have to be about twice as deep. Hence I sculpted the larger carytids in the background with 1/24 scale and the figures of Paris and Helen in 1/32 scale, allowing for the true depth to create come into play.

In retrospect, I should have sculpted the carytids in 1/32 scale and the foreground figures in 1/24 scale, thus heightening the perspectives and then being able to add more detail to the foreground items.

As it turned out, I used minor perspectives but stayed with the same foreground elements as I didn't want to redo most of the items. Thus the shadow box depth was reduced.

This use of heightened perspective is what I am using in my redux of the Gros Nap at Jaffa diorama which I hope you'll like as well when finished.

Rgds Victor
 
Hi Victor,

Congratulations on your completion of this outstanding piece of work.

Well Done.

All the Best, Raymond.
 
Hello Raymond,

Great to hear from you. Thanks for your nice compliment and I hope to carry on in the same vein.

Rgds

Victor
 

Users who are viewing this thread

Back
Top