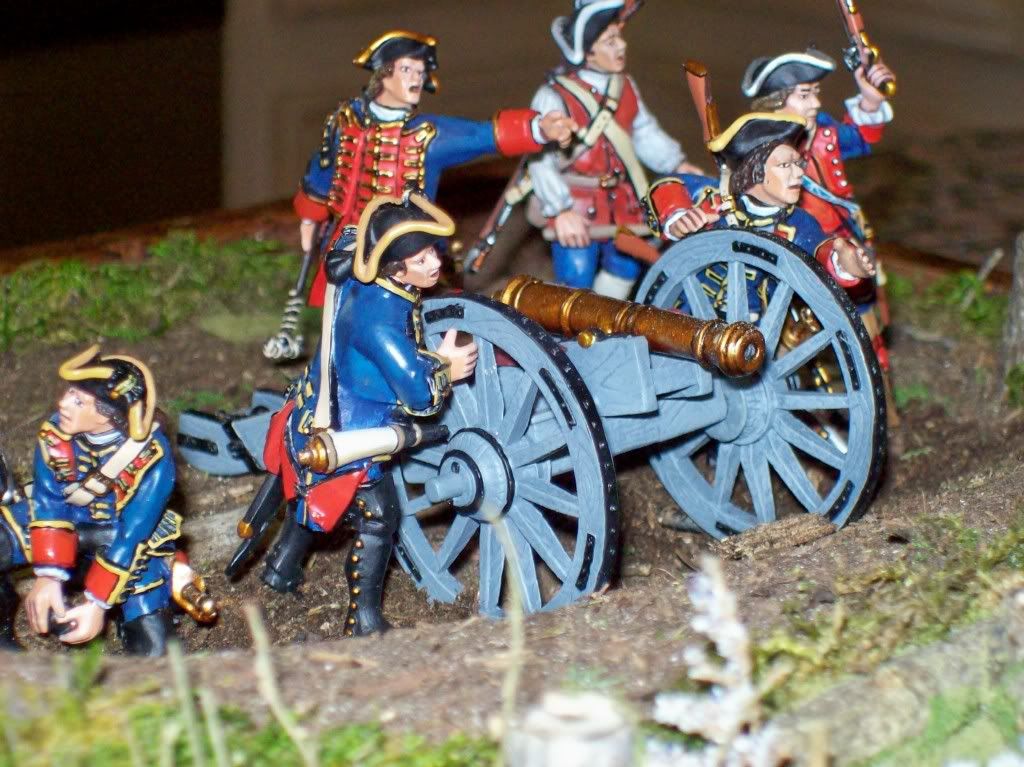
Artillery Battery (2 Viewers)

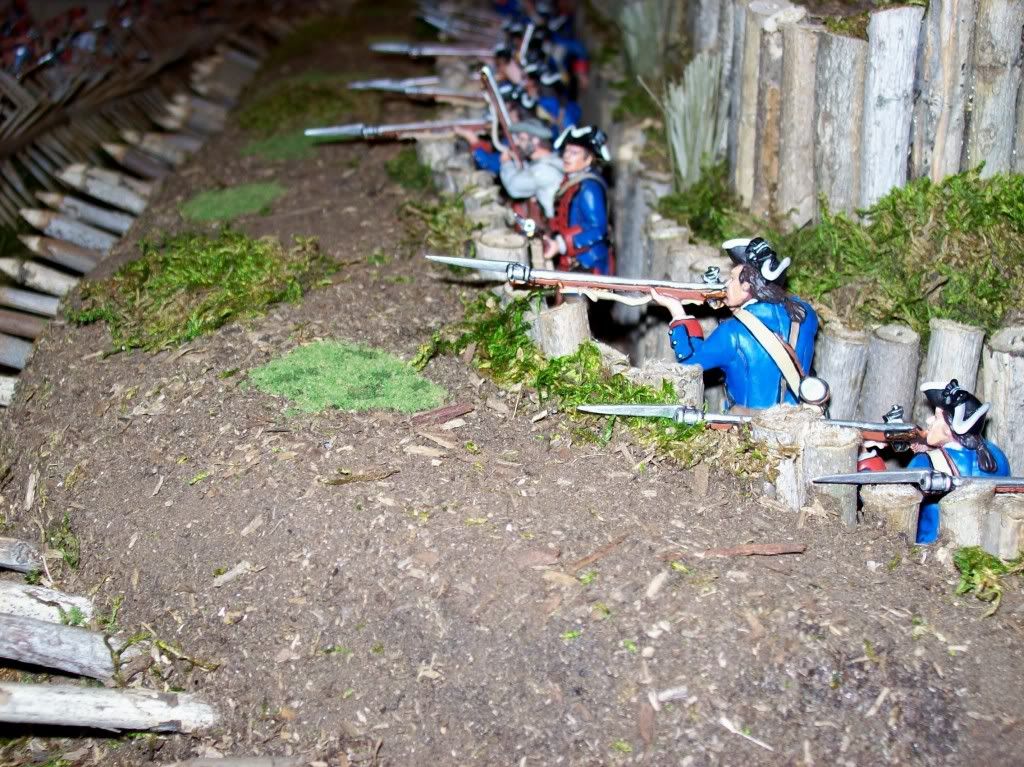
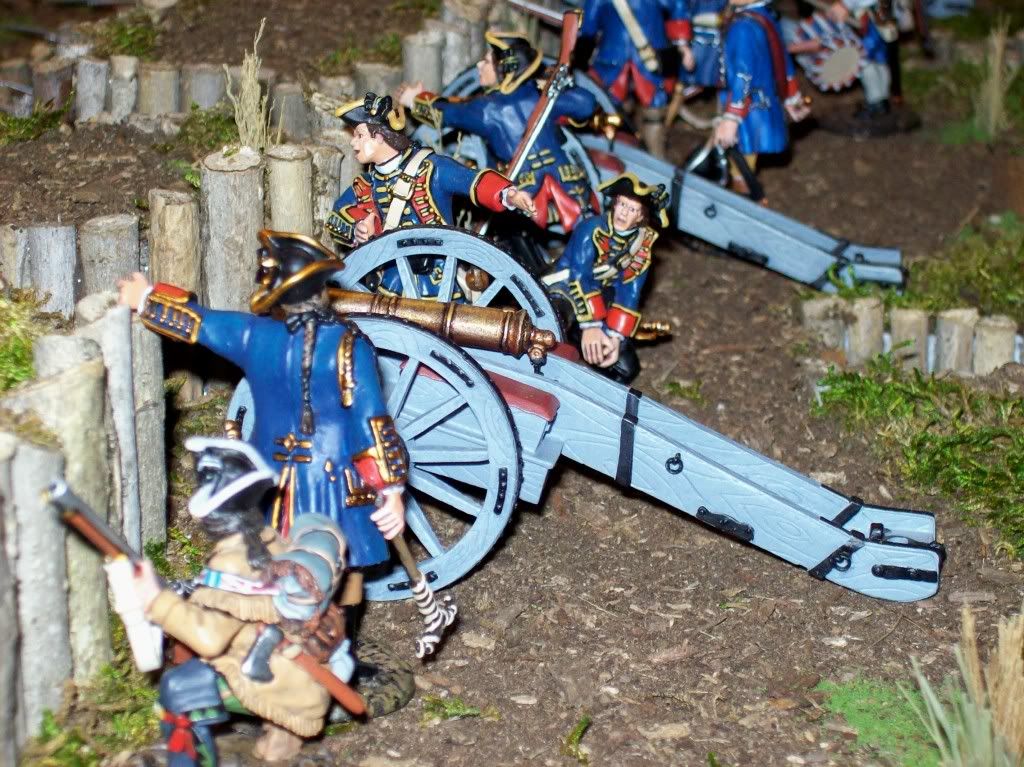
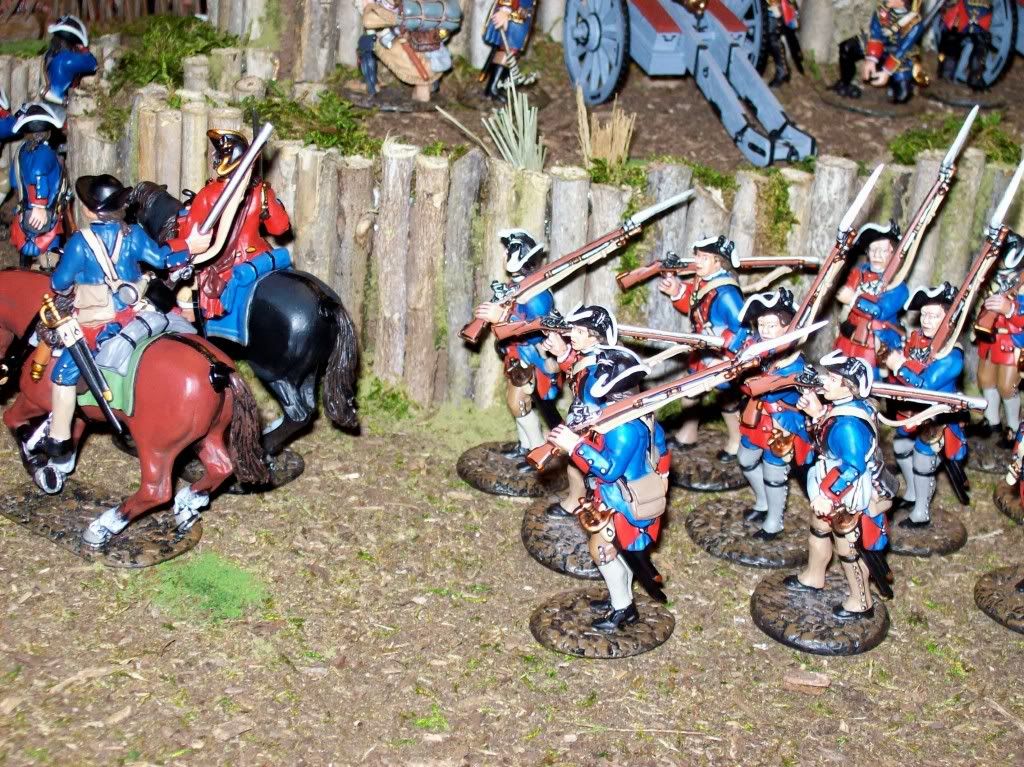
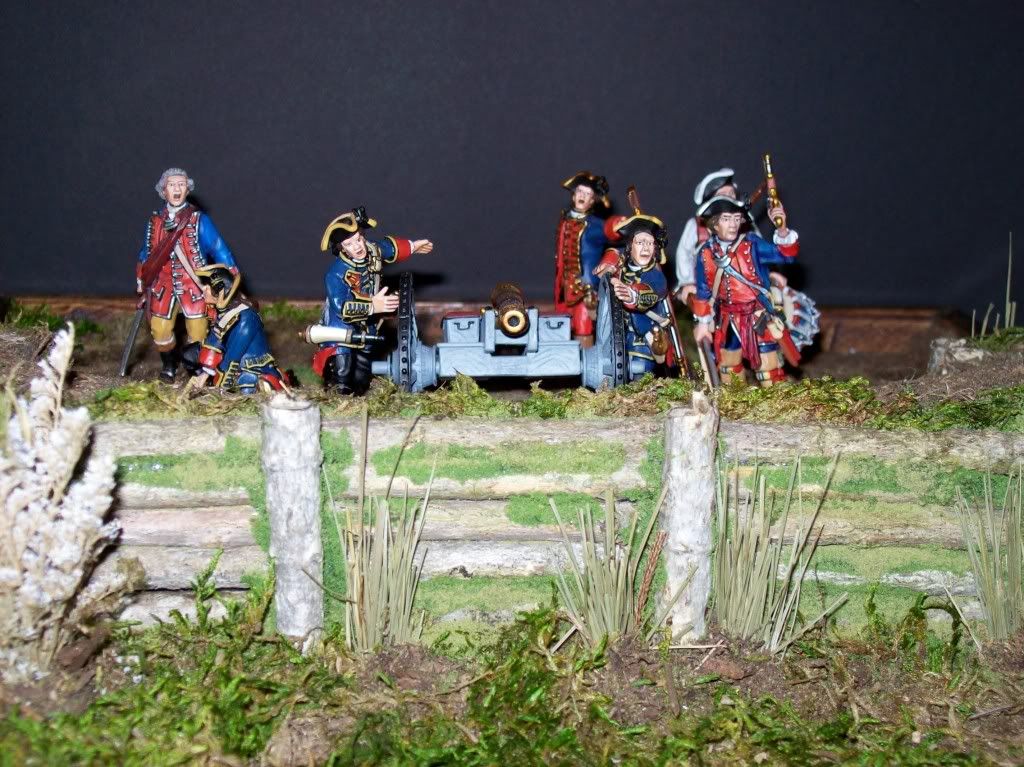
I'm pretty much finished with this artillery battery...

I like the way it turned out...and learned a lot from my mistakes...

I used some Jenkins Virginia Provincial Battle of Monongahela and Jenkins Indians to stage a conflict...

I want to thank Tim...aka...Fishhead for the inspiration to do it and the advice on how to do some of it...

I was almost finished...but had some knee surgery last Monday and have been kind of laid up some...but it was an easy and fun project...

I wish I had a more versatile posed artillery crew to man the guns instead of duplicate crew members...but...it looks okay for now...

I don't own any other artillery crews in the series I collect...but I think John might be making some for Battle of Chippewa in the near future and I would like to set it up with the US Army defending and Royal Scots attacking...

I think it would be perfect for the battle of New Orleans...

I usually hide the bases of the figures I pose with terrain for pictures...but I didn't on this one...just too lazy...hahahaha...

I will when I set up the next one...

I want to do a few more things with it still...

I want make another piece the same size as this piece (36x40) for the attacking armies...it will be just flat grassed terrain...and will be real easy to to make...no more than a days work I'm sure...on this new piece I want to make another stream that "forks" off in two directions...

I also want a smaller piece to put behind the battery (the encampment)...

about half as big as this piece...but at least big enough to hold a line of trees three deep for a backdrop...

I want to make a small "officer's headquarters"...made of of the same wood as the battery...just something simple like a timber hutch with a door...not real big...it should be pretty easy to do...

the wood used in the battery is just branch stems that I picked up from a neighbors debris pile of clippings on his curb...but since they are real...they required no painting...

I want to put a "worn" wooden platform under the guns and wheels...as suggested by Ken...aka...Fraxinus...so the guns wouldn't slide or sink in the dirt and mud...more authentic and realistic...made from popsickle sticks and painted...then sunk into the terrain...

I want to put a few rocks in the terrain...just had not done it before I took the photos...

The dark "dirtish" terrain is just mulch I took out of the flower bed and ran through my coffee grinder til it got the right size...I like the dark look it gives...kind of like sodded earth...

For the grass...I tried a new product I found...it's called "Super Moss", that I bought at Hobby Lobby...I really liked the look...but especially the price...

I used 3 sheets of the Super Moss on this diorama...it's about $4 a sheet for about 1 sq. foot and stretches out a little extra...on top of that...they often have it on sale for 50% of and almost always have a coupon available for 40%off too...

I really like it...pretty cheap and pretty grassy looking...I just glued it down with Aleens...

I added a small stream...nothing real big...I just wanted a little water to break up the grass some...

It's mostly styroprene and a little styrofoam...about $14 a sheet...I used almost the whole sheet of styroprene...

I put a piece of 1/4" birch under it for a base and glued it on for strength and durability when moving it around...

The Cheval de frise...the "spikey logs"...I made from branch pieces and toothpicks...pretty cheap...

I used an enormous amount of glue making this thing...probably two large bottles of Aleen's and probably 6 glue sticks...maybe 8...maybe 10...hahahaha...a lot of glue...

the Aleens was used for the terrain and the glue gun for the sticks...

I can't tell you how cool the glue gun is...it's so fast...it literally dries in place in 5 seconds...dried completely so you can move really fast...

about as fast as you can pick up the next log...the last one is already dried...

The main gun ramp is made from the long skinny popsickle sticks from Wal Mart and the steps are made from 4 sided dowel sticks and cut to size...

The tents, wagons, horses, and cannons are Jenkins...

The water trough for the horses I made from popsickle sticks...

All the water is "Magic Water"...

unrealdetails.com

I love this product...mix and pour...too easy...it dries so hard in 24 hours...

anyway...no more text for now...I took a ton of pictures to show some detail...

I particularly like the way the terrain and shrubs turned out...

thanks again Tim for the help...

100_7255.jpg


100_7254.jpg


100_7253.jpg


100_7252.jpg


100_7251.jpg


100_7250.jpg


100_7249.jpg


100_7247.jpg

Great job! Simply outstanding work and improvisation.

Carlos
 
Re: Artillery Battery........and another thing.

Your "engineers" had SAWS to finish off the logs rather than the usual ax "pointy" ends. Less labor and wasted material.
 
MIKE.....GREAT..GREAT...Job you are becoming a master in your field
and you give us great pleasure at looking at your dioramas and good
ideas for future projects i am working on. Thanks again old buddy.
 
Many thanks again...

Tim...appreciate your help and ideas...you made it easy to do...
Carlos...
Alex...
Louis...Peter Griffin slays me...but Stewie is my favorite..."Infernal Woman" :D
Mike...Christmas Vacation...one of my favorites...Randy Quaid is so funny...
Aurele...

Scott...the "pointed" timbers...they were supposed to resemble an Abatis...

The engineers cut the rest of the fortress timbers with an early model Black and Decker gas chain saw...

Abatis, abattis, or abbattis (a French word meaning a heap of material thrown) is a term in field fortification for an obstacle formed of the branches of trees laid in a row, with the sharpened tops directed outwards, towards the enemy. The trees are usually interlaced or tied with wire. Abatis are used alone or in combination with wire entanglements and other obstacles

n., pl., -tis (-tēz'), or -tis·es (-tĭ-sĭz).
A defensive obstacle made by laying felled trees on top of each other with branches, sometimes sharpened, facing the enemy.

Abatis were trees cut to point in the direction of the enemy, with the tips of the trees sharpened into spikes. One or more lines of closely packed abatis could make a tricky and treacherous obstacle. The abatis in front of the fortifications surrounding Petersburg in 1864 represented an intimidating sight for soldiers before they attacked.

17838.jpg


untitled-1.jpg


Photo23564.jpg


Photo23563.jpg


2474707685_4ec655c4e8.jpg


This last one is really a Cheval de frise...

590px-Cheval_de_frise_petersburg_ci.jpg
 
Just found this thread Michael. AWESOME! I saw your initial pictures of this on the Jenkins section. The finished project turned out just marvelous.
Mike
 
"Scott...the "pointed" timbers...they were supposed to resemble an Abatis..."

Thanks! I've helped build some full size abati and chevaux de fris. I meant the main logs used to shore up the earth works. I like that you had them look like they were cut with a saw, much like the section of Britains Ltd. earthworks you posted. Period saper/pioneer/engineers had axes and saws. Sorry I wasn't clearer about my comment.
 
Last edited:
Great diorama and pictures. Your fortifications look great. Well planed out and the scene tells a story of a battle on the frontier. Thanks for the pictures and the tips on making the diorama. John
 
WOW! Mike that is some artillery redoubt you've built yourself there-and whoever you get to attack that has absolutely no chance-it'll be a complete wipeout!:D

NB Your explosion tutorial will be forwarded by e-mail within the next couple of days-it's been a bit tougher explaining it without pictures than I thought.

Bob
 
Many thanks...

Mike...
John...
Bob...

I'm making a small piece that I will post a photo of today once it dries...

my version of Frontline's SW.2...

it's just going to be a little shelf diorama...
 
Amazing artillery redoubt and encampment. Tempting me to start collecting Naps so I can build a redoubt.

One question is the placement of the cannon. I would not want to be a rifleman in the front trench of the redoubt with a cannon firing directly behind me. How did the riflemen handle the concussion and blast from the muzzle?

Terry

Thanks Terry...to your question...

I have no idea...perhaps these guys were all deaf in the first few minutes of the encounter.
 
I made this small single artillery structure last night...

it's modeled after Frontlines SW.2.

I used Jenkins Virginia Provincial for the crew and a few other Jenkins figures...

I made a little wooden frame for it...
put a sheet of 1/4 birch underneath for sturdiness...
stained and polyurethaned it...
it's only 14x16...
the ground work is "coffee grinder" ground mulch from the flower bed...
the grass is and Super Moss...

it will go on a office shelf and be a permanent display...

a fun little project...

I like working with the tree clippings and ground mulch...there's not much of a cost factor...except a little styrofoam and glue...

100_7380.jpg


100_7392.jpg


100_7395.jpg


100_7357.jpg


100_7348.jpg


100_7344.jpg


100_7343.jpg


100_7341.jpg
 
Terry...

thank you...

and no "singed" lower level soldiers...:D

however all 6 of these guys probably went deaf too...;)
 
I made this small single artillery structure last night...

it's modeled after Frontlines SW.2.

I used Jenkins Virginia Provincial for the crew and a few other Jenkins figures...

I made a little wooden frame for it...
put a sheet of 1/4 birch underneath for sturdiness...
stained and polyurethaned it...
it's only 14x16...
the ground work is "coffee grinder" ground mulch from the flower bed...
the grass is and Super Moss...

it will go on a office shelf and be a permanent display...

a fun little project...

I like working with the tree clippings and ground mulch...there's not much of a cost factor...except a little styrofoam and glue...

100_7380.jpg


100_7392.jpg


100_7395.jpg


100_7357.jpg


100_7348.jpg


100_7344.jpg


100_7343.jpg


100_7341.jpg

Very, very nice:cool:

Cheers

Martyn:)
 
Wow, your diorama is absolutely fantastic! Great use of the wood and other foliage and thanks for your thorough explanations of materials and techniques used in making everything. I thoroughly enjoyed looking at all of your photographs and reading the accompanying information. Very,very nice.

George
 

Users who are viewing this thread

Back
Top